Crochet Hats De-Mystified

It is interesting that you completely forget how you felt about something before it became common place. Okay, that sentence could apply to many things in today’s day and age, however I was personally thinking of my crochet. A conversation I had with a student juggled a little something free in my mind about hats.

I find crocheting hats a pretty relaxing past time at this point in my life, enough so that the yarn I post about on Fridays … that swatch usually becomes a hat…but I didn’t always feel that way. Hats were intimidating to me, probably because the only crochet hats I had seen as a kid growing up were usually worked vertically with short rows. I had never really seen a top down, or even bottom up worked crochet hat, until probably college.

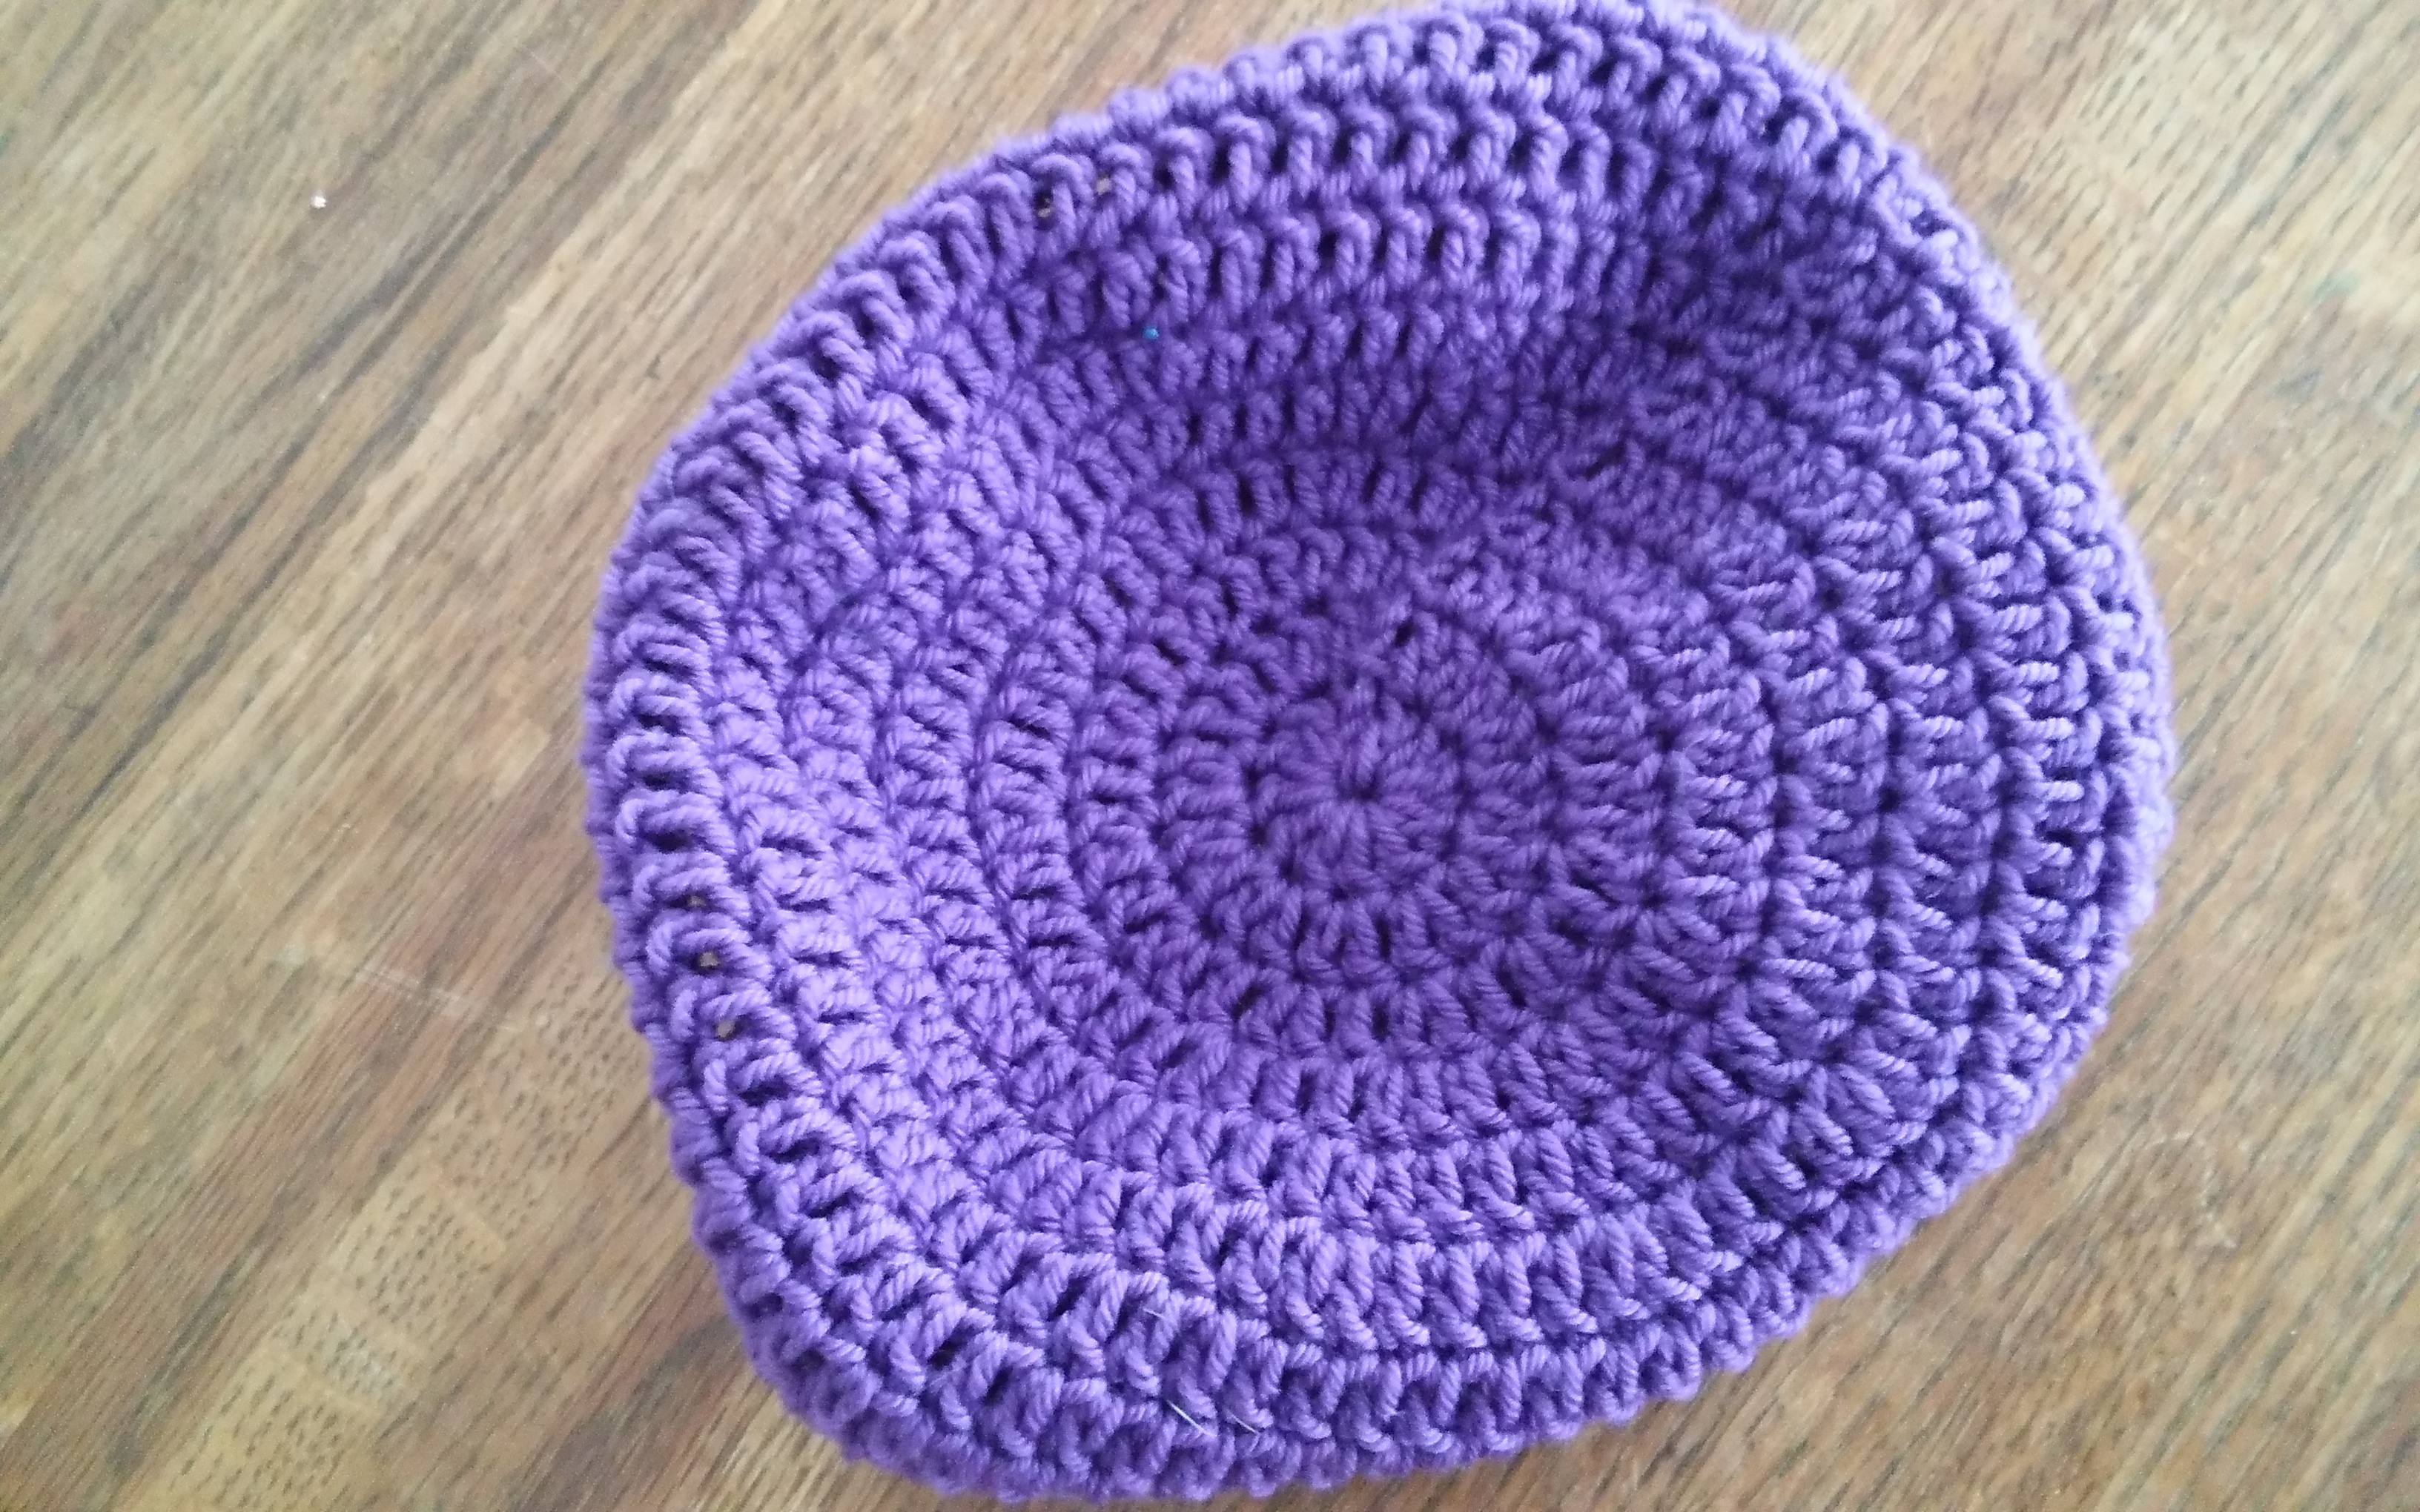
Top down hats start as a flat circle

That does make my crochet life sound a bit sheltered, maybe it was. I did teach myself after all and I primarily crocheted with “hand-me-down” yarn form other people’s stashes. I made doll clothes and scarves, but if it was something to be adorned or admired, I made afghans …hundreds of them.

Anyway, when I would contemplate working a hat, I was always befuddled by the dome shape, and having it actually fit. Little did I realize how easy it was to make, so easy that since I learned it I have never looked back. Essentially a top down crochet hat begins with a flat circle. Yes, a flat circle. This seems a little counterintuitive, but it works. Creating a flat circle simply requires adding the number of stitches worked in round 1 to be added evenly throughout all other rounds. Meaning if I begin the first round with 12 double crochets, then I add 12 double crochets evenly in each following round, so round 2 would have 24 double crochets, and round 3 would have 36 double crochets.

After the circle is worked to a point where the outer edge, the circumference, measures the circumference of the head (usually somewhere between 20” and 22” (51-56 cm) for a typical adult), then you quit working any increasing stitches and continue working even (a single stitch in every stitch around), until you have the hat the desired length.

Here is a really basic pattern for a hat, nothing fancy…

Using any yarn and a corresponding hook,

Rnd 1: Ch 4, 11 dc in 4th ch from hook, sl st to top of beg ch. (12 dc)

Rnd 2: Ch 3, dc in same st, 2 dc in each st around, sl st to join. (24 dc)

Rnd 3: Ch 3, dc in same st, dc in next st, [2 dc in next st, dc in next st] around, sl st to join. (36 dc)

Note: Depending on your yarn and hook only continue working Rnds until circumference of hat is met with circumference of the circle, then work Body of Hat.

Rnd 4: Ch 3, dc in same st, dc in next 2 sts, [2 dc in next st, dc in next 2 sts] around, sl st to join. (48 dc)

Rnd 5: Ch 3, dc in same st, dc in next 3 sts, [2 dc in next st, dc in next 3 sts] around, sl st to join. (60 dc)

Rnd 6: Ch 3, dc in same st, dc in next 4 sts, [2 dc in next st, dc in next 4 sts] around, sl st to join. (72 dc)

Rnd 7: Ch 3, dc in same st, dc in next 5 sts, [2 dc in next st, dc in next 5 sts] around, sl st to join. (84 dc)

Body of Hat

Ch 3, dc in each st around, sl st to join. Repeat this Rnd until hat is desired length.

Fasten off and weave in ends.

Make a few hats, and considering helping your local community by donating a few to your local homeless shelter.

A Perfect Flair for Summer- Dare to Flair Toddlers Dress

I really enjoy when I have a design that looks fashionable and creative, and more difficult than it actually is to construct. The Dare to Flair Toddlers Dress fits this description. It can be found in the June 2017 issue of I Like Crochet Magazine, and dependent upon the size you make, uses no more than 2 skeins of Lisa Souza Dyeworks Hardtwist yarn.

This girls dress worked in Tunisian Simple stitch is comprised of strips, so you make only rectangles and triangles, these are put together with Reverse Single Crochet, to add an almost rope like edging between all the panels and the edging. I love how this dress allows even a relative beginner complete a project that shines like an advanced piece.

Dare to Flair Toddler Dress www.lindadeancrochet.com

Dare to Flair Toddler Dress Photo courtesy Prime Pulishing

The pattern is sized for a 2T through a girl size 8, and can easily be customized. Add length by making the rectangles longer, add width by making rectangles wider. You may need to make some adjustments on the triangles, but this will depend upon where you want the flair to begin, at the waist, at the thigh, maybe at the hip.

I enjoy the versatility that this dress has, and how it really allows variegated yarn to color pool in a way more like knitting. This design would also be fun worked in color blocks, meaning working different panels different colors and joined together.

www.lindadeancrochet.com

Photo courtesy Prime Publishing

Whenever I design clothes for kids, I always try to make it something that they can be successful getting dressed in themselves. So the piece has not really front of back, hence no way to put it on backwards. If it gets turned inside out, the fabric on the inside is just as pretty as the outside. Pair it with legging, or length it for a full dress effect. Ever little girl will want to wear this dress.

Titter Tat a Stitch that Breaks the Rules

There are times when you can come across a crochet stitch that breaks all the rules, for me the stitch I refer to as Titter Tat does just that. This stitch creates an open stretchy pattern whose stitches appear to be sideways, and you do not chain at the beginning of a row, you simply begin working your stitches.

I have used this stitch in the Wine Country Throw that is found in the October 2016 issue of Crochet World, it does have a bit of stretch, which can be deceiving when attempting to get a desired size, but I really love the affect.

Titter Tat Stitch www.lindareancrochet.com

Titter Tat Stitch

Begin with a chain that is a multiple of 4, then add 2 more chains. Single crochet in the second chain from the hook, [chain 4, skip 3 chains, single crochet in next chain] repeat everything in the brackets across, then turn. Do not chain anything, and simply work (2 double crochet, chain 3, single crochet) in all chain 4 loops across, and then turn your work. This can be a little awkward with the first stitch as it seems a bit distorted as it is pulled over, this is the correct approach as it will set the first stitches up the match the rest. All subsequent rows are worked the same, no beginning chain, working (2 double crochet, chain 3, single crochet) in all chain 3 spaces across. You work this until you have the desired length. This stitch can really benefit from blocking, but the type of yarn can influence how well this works.

The more formal written pattern looks like this:

Ch a multiple of 4 +2

Row 1: Sc in 2nd ch from hook, [ch 4, sk 3, sc in next ch] across, turn.

Row 2: [(2dc, ch 3, sc) in ch-4 sp] across, turn.

Row 3-desired length: [(2dc, ch 3, sc in each ch-3 sp] across, turn.

You may want to add a solid border to the stitch to limit the stretch, but that is a personal choice. If you are seeking to practice this stitch and create a throw for charity you may want to consider your local foster youth programs. Often foster kids in any community have limited personal belongings, and upon during 18 are now legal adults with in many cases nothing to begin their own households. Foster youth programs try an ease this transition.

How To Impress the Judge & Get the Blue Ribbon

I have recently been asked to consider being a judge for fiber arts at a county fair in a community nearby. This would entail giving all entries within divisions and categories placement of at least first through third, and highlighting the best in shows. I am not sure how this offer might play out and if I will actually participate or not, but it did get me thinking. It is nearing the season of fairs and country competitions, and there are a couple of things that help a piece really stand out and become the grand prize.

The biggest thing that sets one knit or crocheted item apart for the rest is the finish work. Each piece obviously has had hours of work placed in creating the stitches and putting the colors together; so the pieces that demonstrate the extra time worked in weaving in ends, in blocking, in finishing and edge creating take the edge.

A judge should leave personal opinions aside, the colors you choose or the pattern you decide upon should not be a determining factor. The judging should be comprised of the skill and execution of your work itself. That is why these final touches makes such a difference.

Another factor that curries favor in judging is taking the skill to another level. This could be adding bead work to your shawl, or adding buttons to your wrap. Taking a little extra to ensure that all your fine craft work does not just blend in, but stands out. Sometimes this is created in the yarn selection for your project. In just a simple shawl yarn choice can make a great difference, such as in the drape. A yarn with a lot of spring or bounce, such as a merino, will drape differently than a yarn that has no memory, like a silk or an alpaca. This can create a shawl that has a stand out personality, and possibly make it a winner.

Ultimately, I advise anyone and everyone to enter some type of competition if you ultimately want to improve your work. The best judges often provide feedback on your work, constructive criticism. If your competition allows for judging that is open to the public, attend. This is a tremendous opportunity to gain extra insight in your work and learn how you can take your work to the next level. Even hearing commentary on the work of others will help in the growth of knowledge of your own work.

A Subtle Pattern Hit, the Subtle Diamonds Throw

There are times that I undertake a project and later wonder what I was thinking. Sometimes this is because I have bitten off more than I can chew, maybe I hadn’t thought my plan through enough, or maybe my timetable really will not allow for what I think it would. Yet with some perseverance it all comes out in the end. So when I took on the challenge of the Subtle Diamonds Throw I should have already been aware of my own pitfalls, but I jumped in anyway.

The challenge of Subtle Diamonds was really of my own creating, as it was designed as a challenge, could I create an afghan from a few skeins of hand dyed yarns. Some may think this really isn’t a challenge, yarn is yarn, and you are making a blanket…that seems pretty straight forward. However using hand dyed yarns can create a bit more thought in the designing.

Subtle Diamonds Throw Photo courtesy Ancient Arts Yarn

Some may not realize it but one of the thoughts that goes into a design for a pattern is if it would be cost prohibitive. By this I mean, if I designed a pattern that took 25 skeins of a $10 per skein yarn, would anyone realistically spend $250 in materials to make it? Probably not, especially if it was something pretty basic. This thought comes into play not only with the designer but with publishers and yarn manufactures. So working with hand dyed keeps this price pointing in your mind to find the most cost effective way to create.

So with Subtle Diamonds I was limited on the amount of yarn, using only 2 skeins of each color this throw can easily be made into a 48”x48” (122x122cm) throw, adding 1 more skein of 2 colors and it can become a 54”x48” (137x122cm). Then I wanted to ensure that the fabric was appropriate and would keep you warm, as well as the stitch pattern being interesting. Utilizing post stitches a staggered diamond pattern is created while helping the colors visually blend and harmonize together. This design as a result took a bit more planning and I am pretty happy with the way it finally came out.

Subtle Diamonds Throw Photo courtesy Ancient Arts Yarn

I teamed up with Ancient Arts Yarn to bring this design to you, they loved the idea of the challenge and added a bit of a twist to the process by requesting that the design have a modern, contemporary feel. I will in no way claim to be an expert in meeting, understanding, or designing to specific “type” or “style”, but apparently I came close since they liked it.

This challenge did help me grow as a designer, as all challenges do in general. It sharpens your senses and helps you to focus.