Crocheting the Mark

The other day I was going through an old box and I stumbled across some “early to me” crochet. I recall, about the time I was learning to crochet at age 10, at school I received a crocheted bookmark. My teacher had a friend who crocheted and she had created a bookmark with a “curly q”. My teacher gave them as prizes to students that had met her reading goal, I cannot recall exactly what the goal was but I remember the prize.

Curly Q bookmark in use

I remember being in awe of how it was made. Being a new crocheter I had no idea how the twists were created. I used that bookmark for years, and several years later, after becoming more proficient in crochet, figuring out how it was made. I have since recreated this bookmark for teachers of my children. They have used them in much the same way as my teacher years ago, meeting a goal and getting a reward.

I am sharing this stitch pattern for this bookmark in the hopes that you might make a few and share them with teachers or your local library, helping sharing the gift of reading. I know that many think that all books are going digital, but there is something about holding a book and moving your bookmark through the pages that has a gratification that can’t be completely explained.

More of the Curly Q bookmark in use

This is a really loose pattern, I don’t know if I should even all it a pattern, I am basically sharing how I create mine, and none of the stitch counts are really important. The gauge does not matter, it doesn’t matter what yarn or hook your use. To begin you chain anywhere between 6 and 8, slip stitching to the first chain to create a ring. I then chain 1 and place about 12 single crochets in the ring, slip stitch to the beginning single crochet. Now create a chain of about 18” to 24”, then double crochet in the 4th chain from the hook, add 2 more double crochets to the same stitch as the last, work 3 double crochets in each of the next several chains, working until you feel the “curl” you are making is long enough. Finish off, and weave in all ends.

That is all there is to it. The chain section lays in between the pages while the “curly q” can slip through the ring to secure around the book binding. This is a simple scrap project, and one I find fun and fast.

Hourglass Waves- A Stunning Stitch

I really enjoy putting some classic stitches together in ways that you may not have considered. My latest design does just that. The Hourglass Waves Baby Afghan uses the Catherine Wheel Stitch to create a ripple and an hourglass appearance.

It is really the color work that makes this design come to life, and believe it or not, the color really do have an order to their repeating pattern. However the various stitches can through off this simple pattern creating a great visual interest. It is obvious that this is not your everyday baby throw.

Hourglass Waves Baby Afghan by Linda Dean www.lindadeancrochet.com

Hourglass Waves Baby Afghan Photo courtesy Crochet Now Magazine

Featured as a design in the latest issue of Crochet Now Magazine, issue 13, this blanket is one that does not just mark itself as something for a baby, it can easily grow for a toddler, a child, and created larger a great design for a teen or adult. The next opportunity I get I think I may make enlarge my own and make a version for my son. I really think he would love it in primary colors.

Sometimes people can hear the stitch pattern Catherine’s Wheel and instantly get a bit fearful, but this stitch pattern is not as difficult as you may think. Essentially it is a row of large shells, or fans, basically a large number of double crochets (treble crochets if you happen to be in the UK), worked min the same location. This is worked across a row and the following row is essentially a large decrease, worked in between the shells, pulling up loops in each of these stitches, making the fabric edge straight again. This blanket utilizes this very technique, but then highlights the shapes it can create with rows of single crochet (double crochet in the UK).

Hourglass Waves Baby Afghan by Linda Dean www.lindadeancrochet.com

Hourglass Waves Baby Afghan Photo courtesy Crochet Now Magazine

I love how the pattern is not something that you see every day, it has dimension and character.  I hope you find this design inspiring too.

Celebrate a Month of Crochet! The Spokes Tam

Welcome to my post for the annual National Crochet Month Blog Tour hosted by Crochetville.com! I am honored to have been participated in the last 5 years of this tour event, and this year theme is “Glamping”…or Glamorous Camping, every day in the month of March Crochetville.com has visited designers, yarn stores, and had various giveaways…don’t miss a stop of the tour.

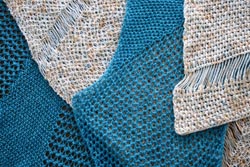
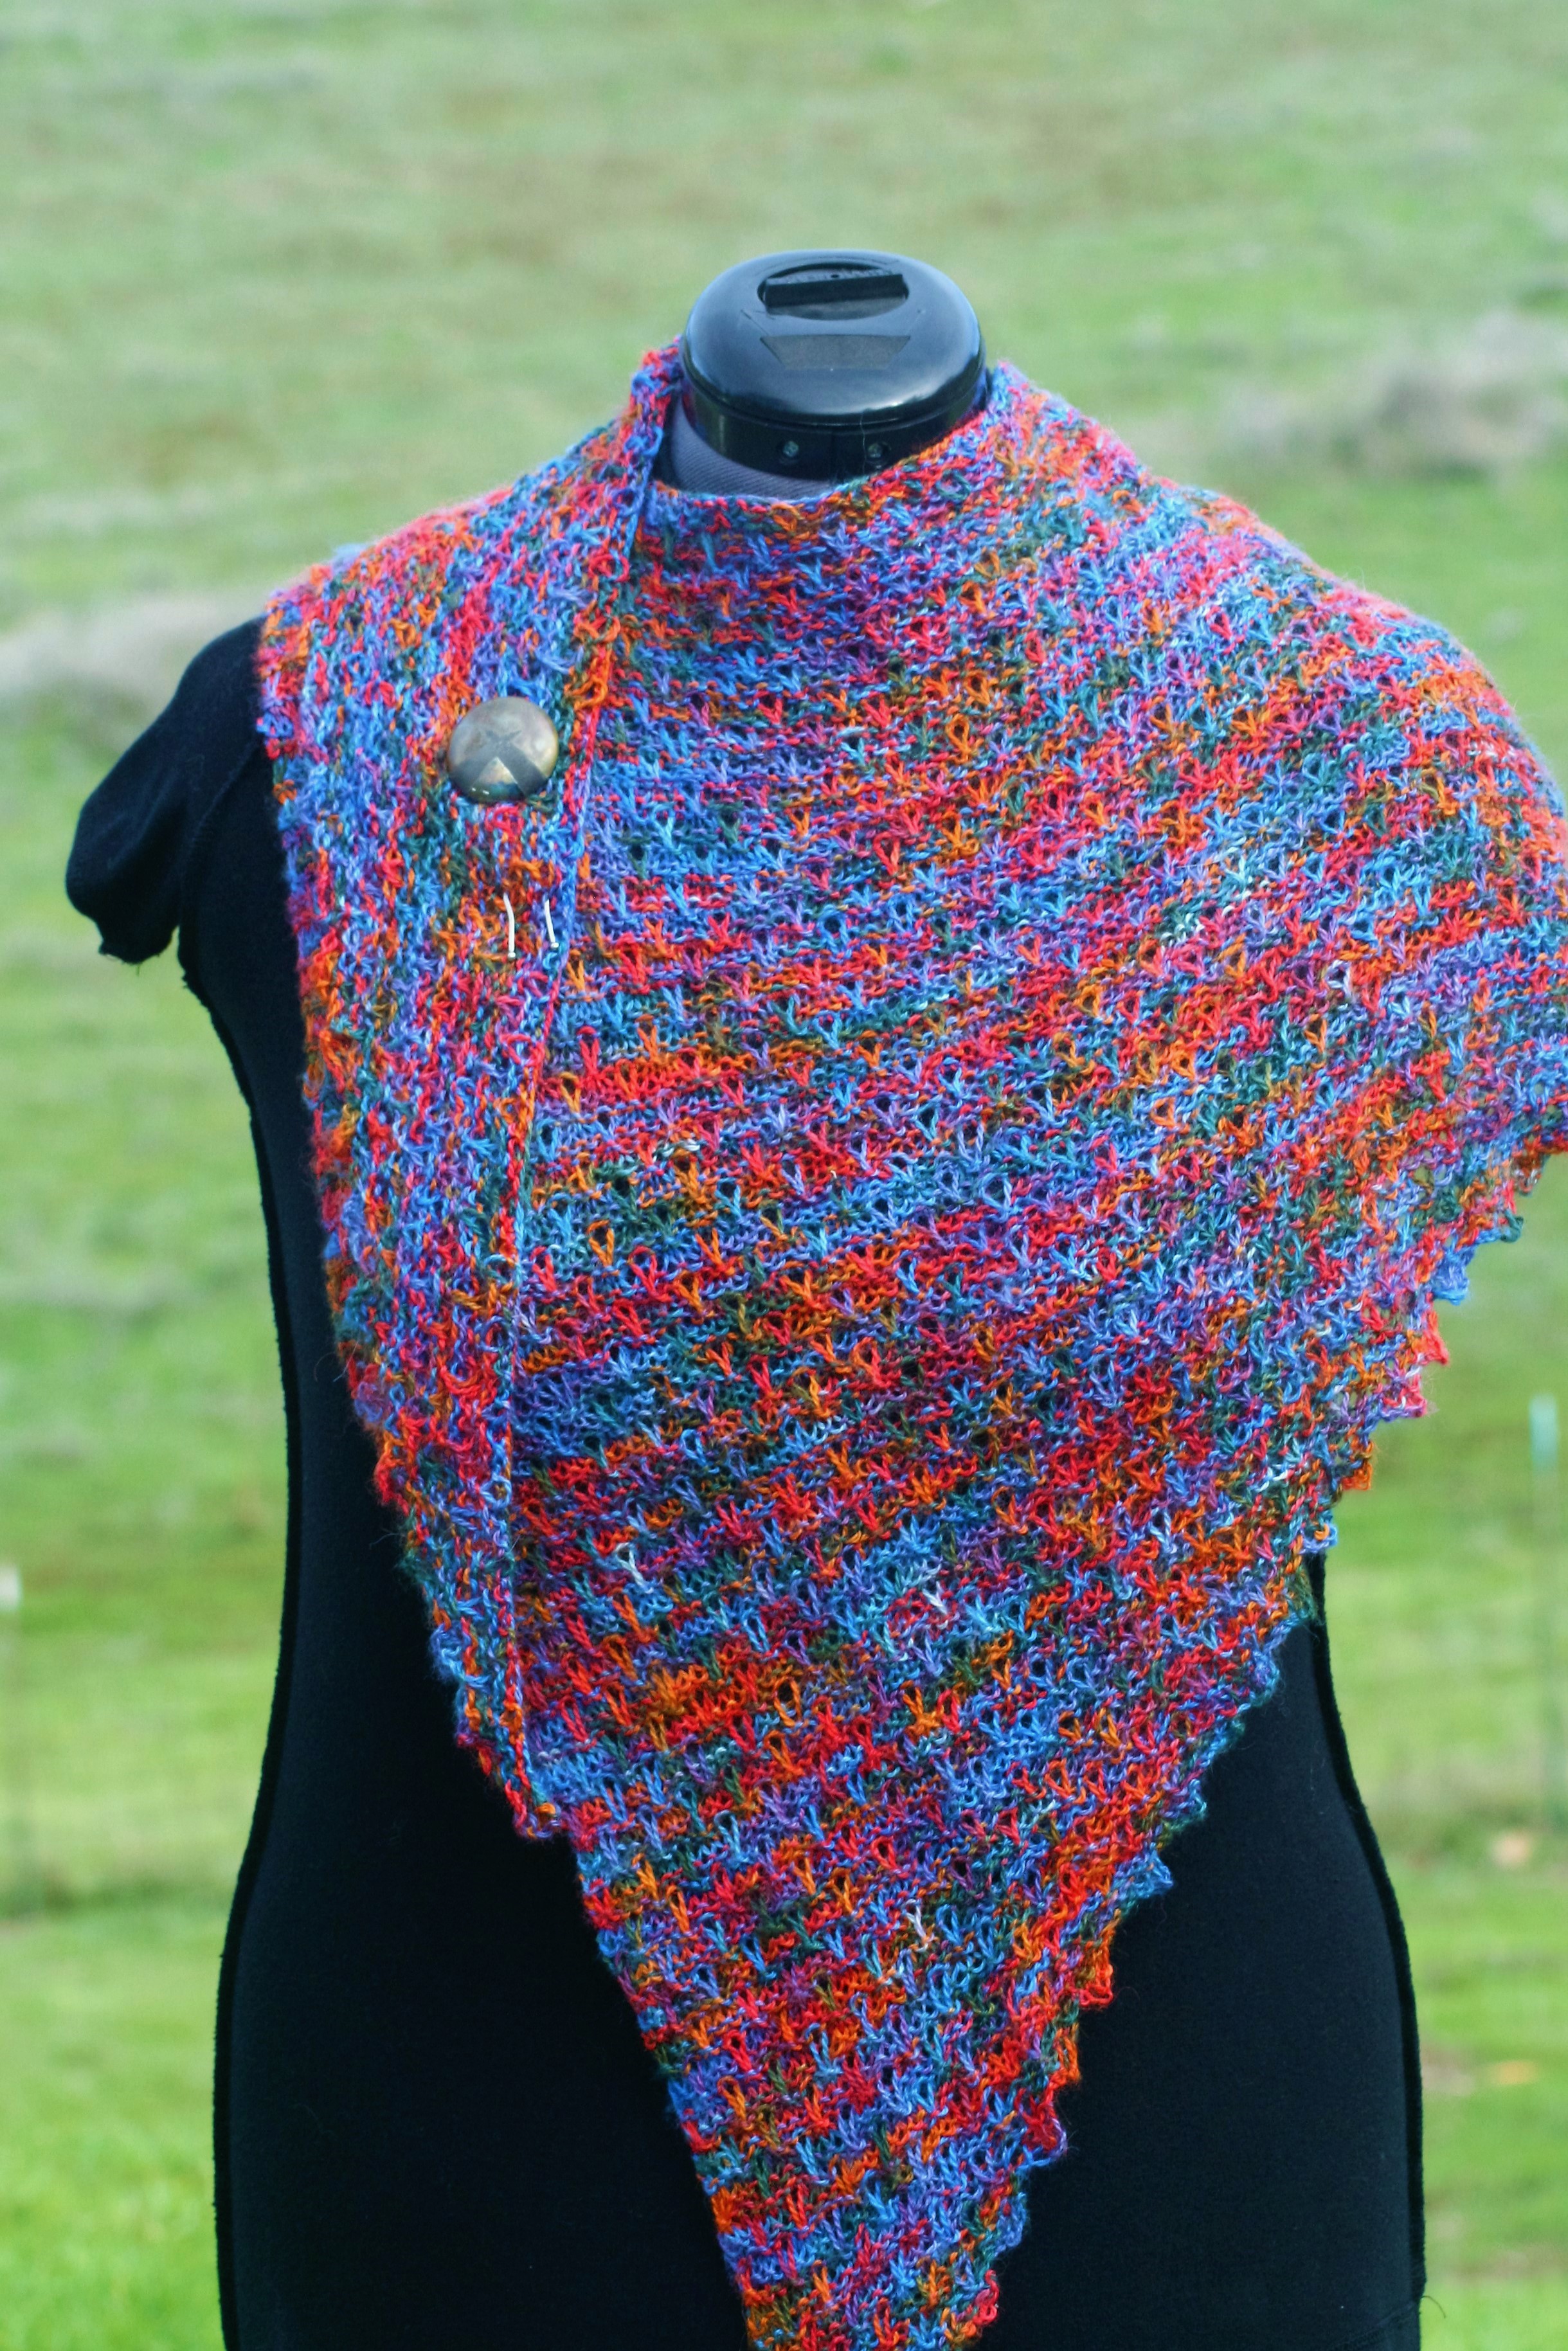
I cannot say that I have done much crocheting while camping…honestly, I have not been camping in years. I live a rural life, and have lost count of the days I spent camping as a kid, so I vacation now in a bit more of a “modern” style…someplace that offers room service.

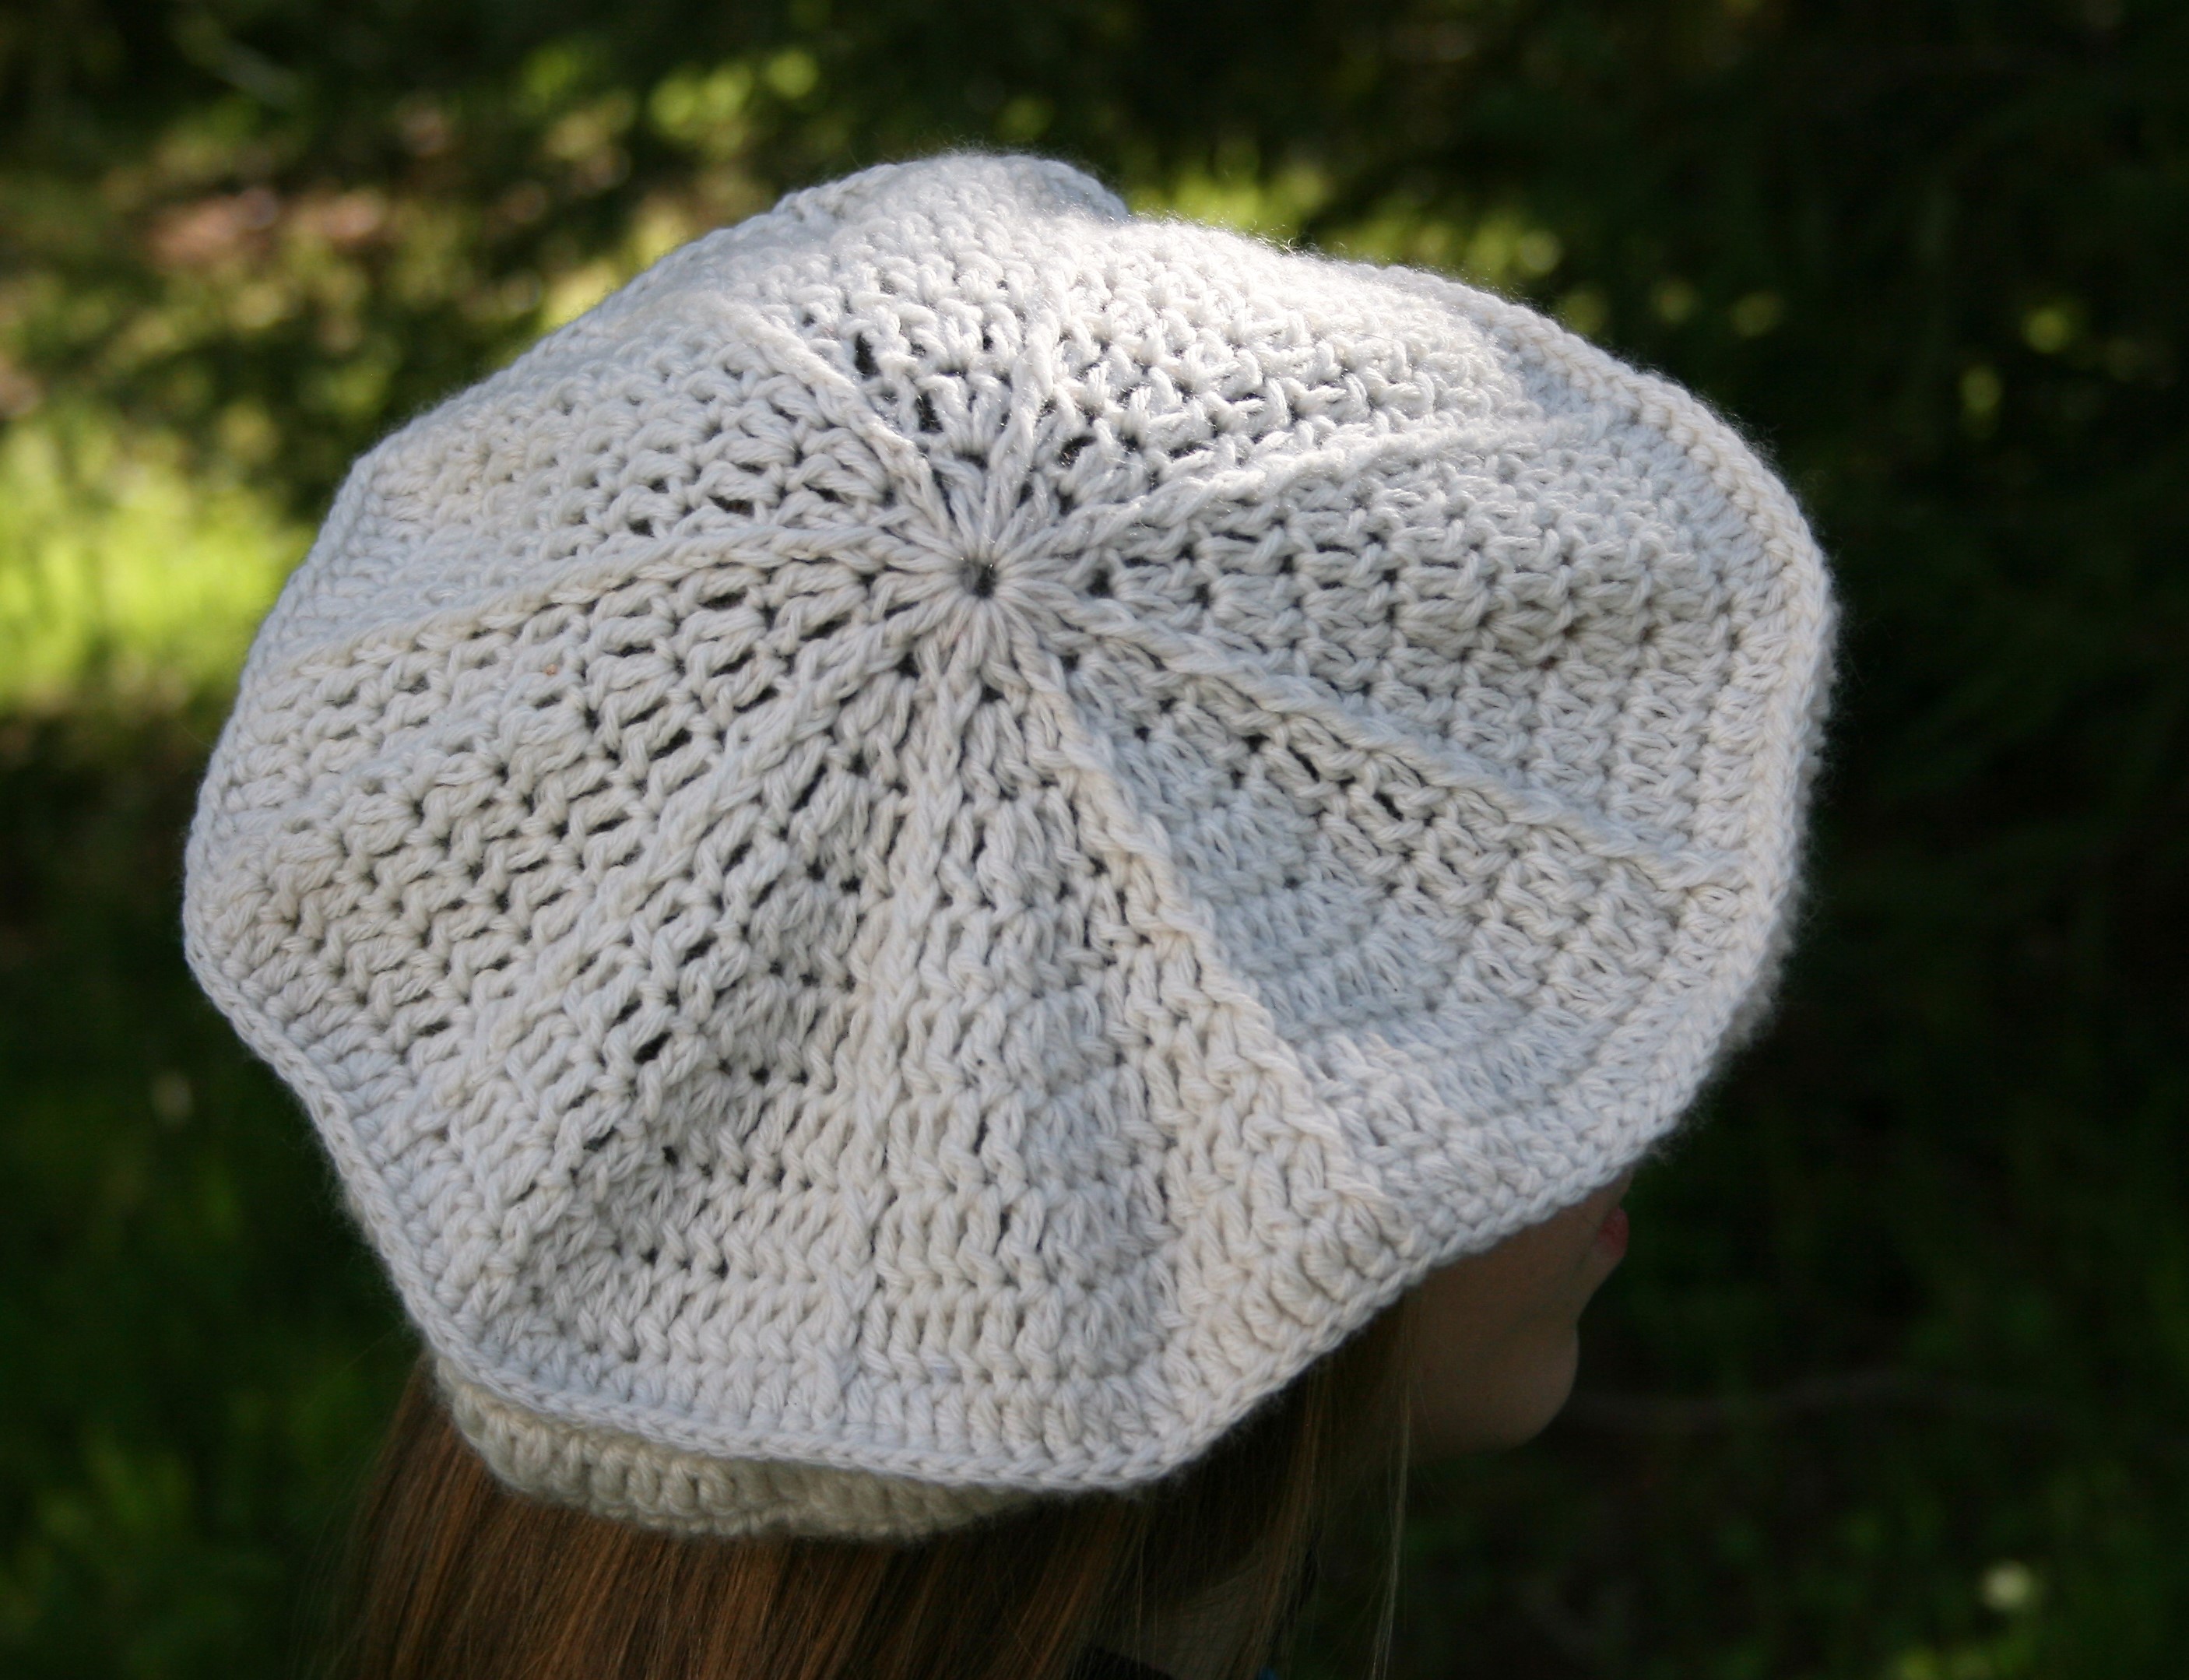
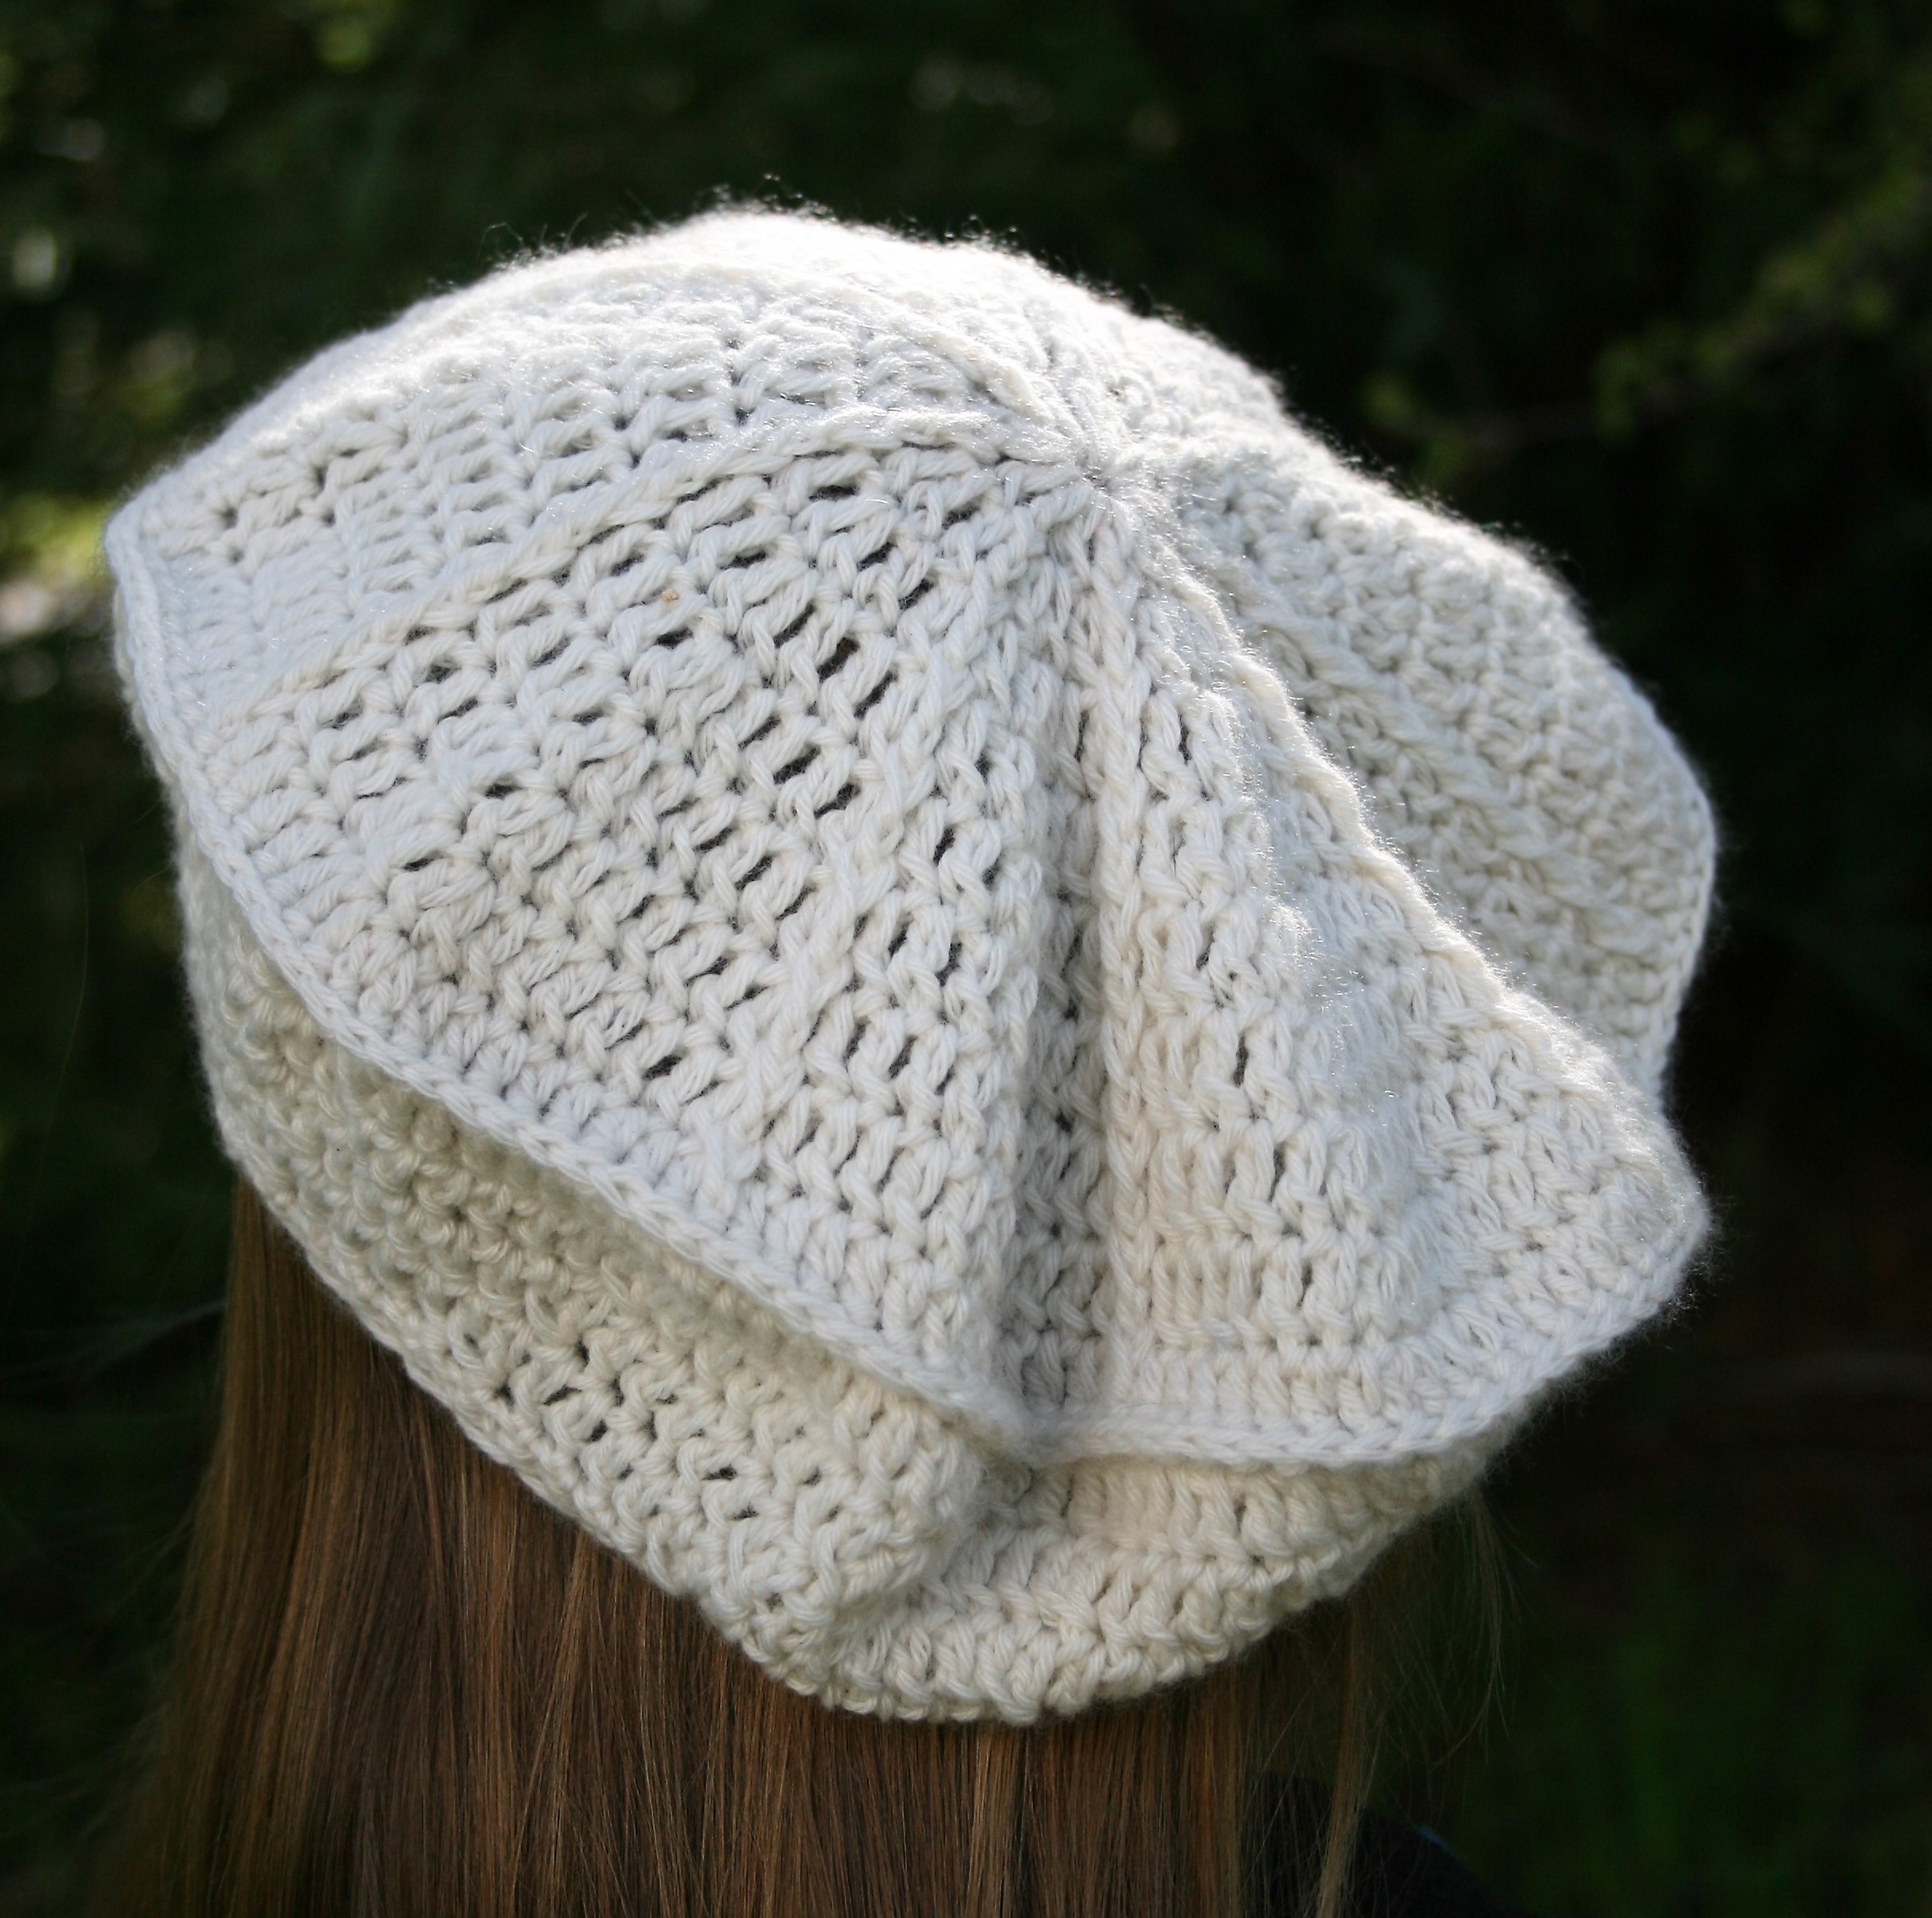
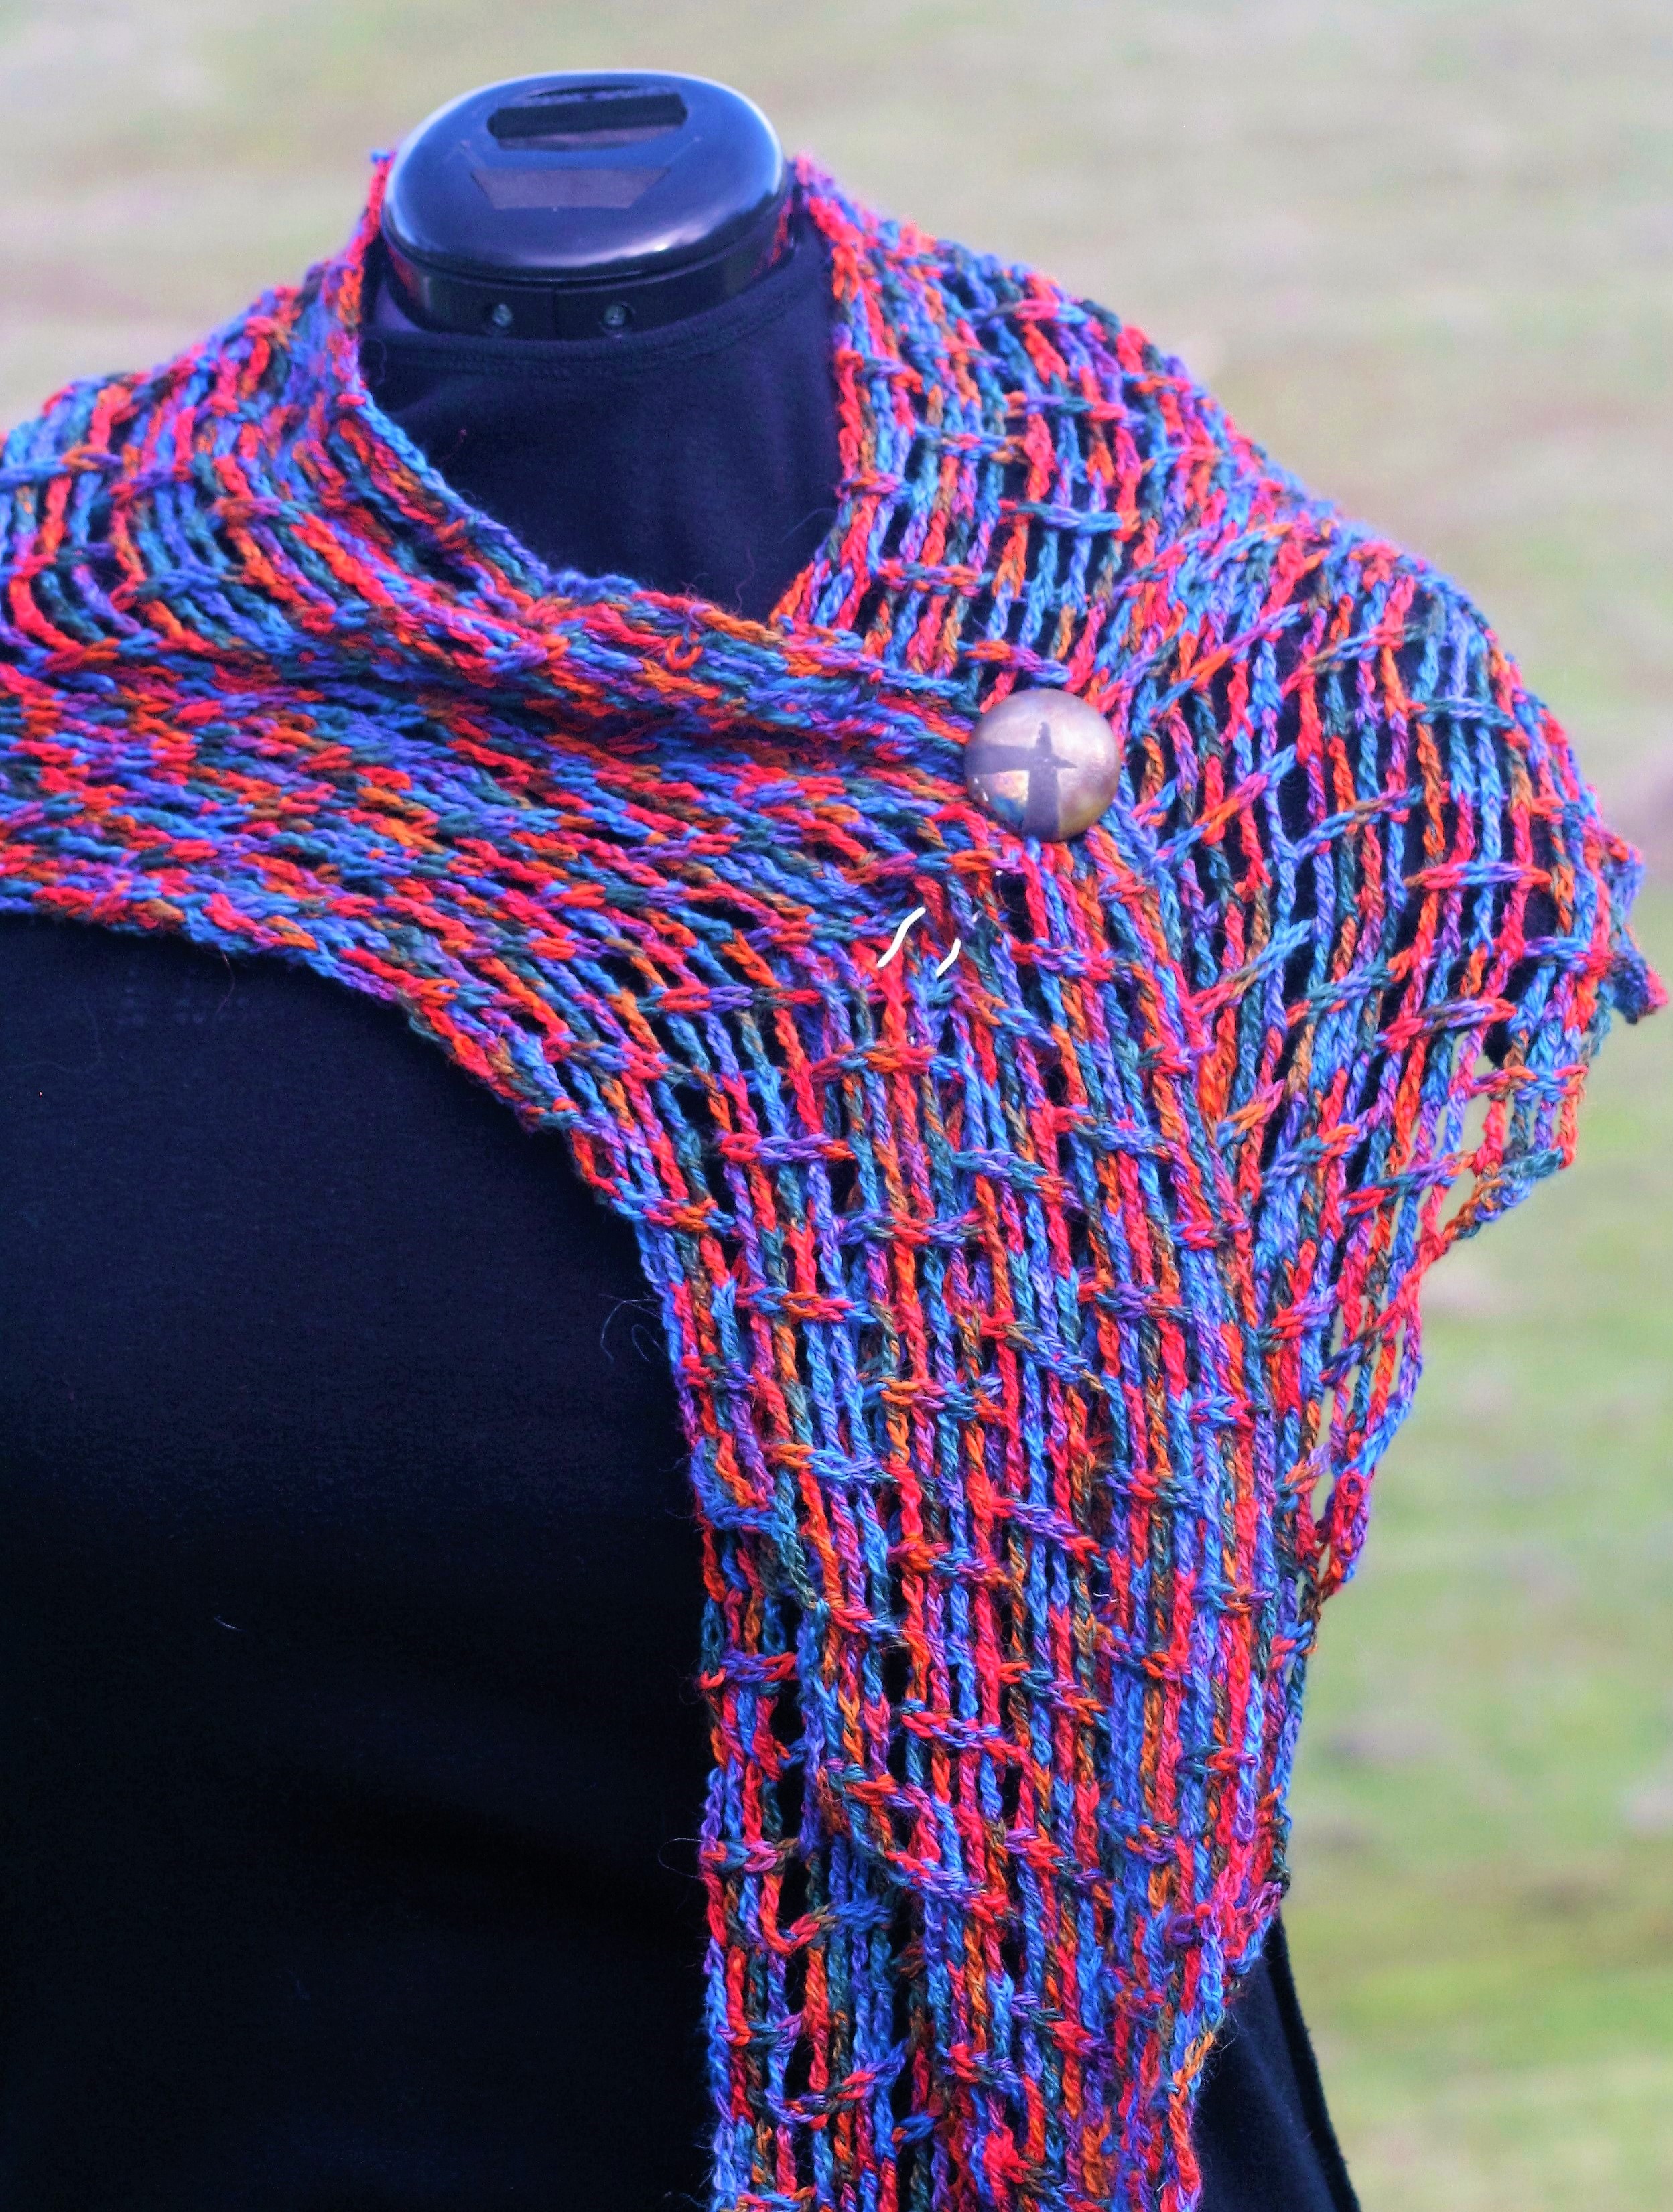
To celebrate National Crochet Month I have a free pattern to share with you as well as a discount at my Ravelry.com store (use coupon code NatCroMo2017 and receive 25% off any and all patterns).  The Spokes Tam is a simple beret hat dresses up your Glamping adventure with a bit of style. You can really use any weight yarn with an appropriate crochet hook, but I have listed what I have used below.

Spokes Tam (For a printable version, this pattern is available at Ravelry.com for $2.00)

Spokes Tam by Linda Dean www.lindadeancrochet.com

Spokes Tam

Special note: All Front Post Double Crochet (fpdc) after Round 2, are worked around fpdc the row below.

Front Post Double Crochet (fpdc): Yarn over, insert hook from front to back and then to front again around post of stitch, yarn over and draw up loop, [yarn over and draw through 2 loops on hook] twice.

Front Post Single Crochet (fpsc): Insert hook from front to back and then to front again around post of stitch, yarn over and draw up a loop, yarn over and draw through 2 loops.

Double Crochet 2 Together (dc2tog): [Yarn over, insert hook in next st and draw up a loop, yarn over and draw through 2 loops on hook] twice, yarn over and draw through all 3 loops on hook.

Materials:

*1 skein Lisa Souza Dyeworks Cashmere Sport (www.lisaknit.com)

*Size J/10 ½/6.00mm crochet hook

Gauge: Gauge is not critical for this design

Rnd 1: Ch 4, 15 dc in 4th ch from hook, sl st to join. (16 dc)

Rnd 2: Ch 3, fpdc in same st, 2 dc in next st, [(dc, fpdc) in next st, 2 dc in next st] repeat around, sl st to join. (24 dc, 8 fpdc)

Rnd 3: Ch 3, fpdc in same st, dc in next st, 2 dc in next st, dc in next st, [(dc, fpdc) in next st, dc in next st, 2 dc in next st, dc in next st] around, sl st to join. (40 dc, 8 fpdc)

Rnd 4: Ch 3, fpdc in same st, dc in next 2 sts, 2 dc in next st, dc in next 2 sts, [(dc, fpdc) in next st, dc in next 2 sts, 2 dc in next st, dc in next 2 sts] around, sl st to join. (56 dc, 8 fpdc)

Rnd 5: Ch 3, fpdc in same st, dc in next 3 sts, 2 dc in next st, dc in next 3 sts, [(dc, fpdc) in next st, dc in next 3 sts, 2 dc in next st, dc in next 3 sts] around, sl st to join. (72 dc, 8 fpdc)

Rnd 6: Ch 3, fpdc in same st, dc in next 4 sts, 2 dc in next st, dc in next 4sts, [(dc, fpdc) in next st, dc in next 4 sts, 2 dc in next st, dc in next 4 sts] around, sl st to join. (88 dc, 8 fpdc)

Rnd 7: Ch 3, fpdc in same st, dc in next 5 sts, 2 dc in next st, dc in next 5 sts, [(dc, fpdc) in next st, dc in next 5 sts, 2 dc in next st, dc in next 5 sts] around, sl st to join. (104 dc, 8 fpdc)

Rnd 8: Ch 3, fpdc in same st, dc in next 6 sts, 2 dc in next st, dc in next 6 sts, [(dc, fpdc) in next st, dc in next 6 sts, 2 dc in next st, dc in next 6 sts] around, sl st to join. (102 dc, 8 fpdc)

Rnd 9: Ch 3, fpdc in same st, dc in next 7 sts, 2 dc in next st, dc in next 7 sts, [(dc, fpdc) in next st, dc in next 7 sts, 2 dc in next st, dc in next 7 sts] around, sl st to join. (136 dc, 8 fpdc)

Rnd 10: Ch 1, turn, fpsc around same st, fpsc around each st, sl st st join. (144 fpsc)

Rnd 11: Ch 3, turn, dc in next 6 sts, dc2tog over next 2 sts, [dc in next 7 sts, dc2tog over next 2 sts] around, sl st to join.

Rnd 12: Ch 3, dc in next 5 sts, dc2tog over next 2 sts, [dc in next 6 sts, dc2tog over next 2 sts] around, sl st to join.

Rnd 13: Ch 3, dc in next 4 sts, dc2tog over next 2 sts, [dc in next 5 sts, dc2tog over next 2 sts] around, sl st to join.

Rnd 14: Ch 3, dc in next 3 sts, dc2tog over next 2 sts, [dc in next 4 sts, dc2tog over next 2 sts] around, sl st to join.

Rnd 15: Ch 1, turn, sc in each st around, sl st to join.

Rnd 16: Ch 1, turn, sc in each st around, sl st to join. Fasten off.
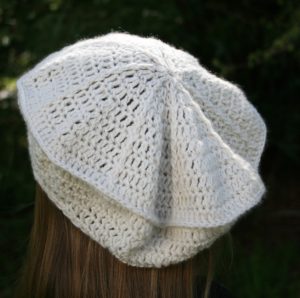
Spokes Tam by Linda Dean www.lindadeancrochet.com

Spokes Tam

Enjoy a Celebration of Crochet! Don’t forget to use coupon code NatCroMo2017 and receive 25% off any and all patterns at my Ravelry.com store until April 15, 2017.

Check out all the stops on the Crochetville.com tour for more free patterns, discounts and fabulous ideas!
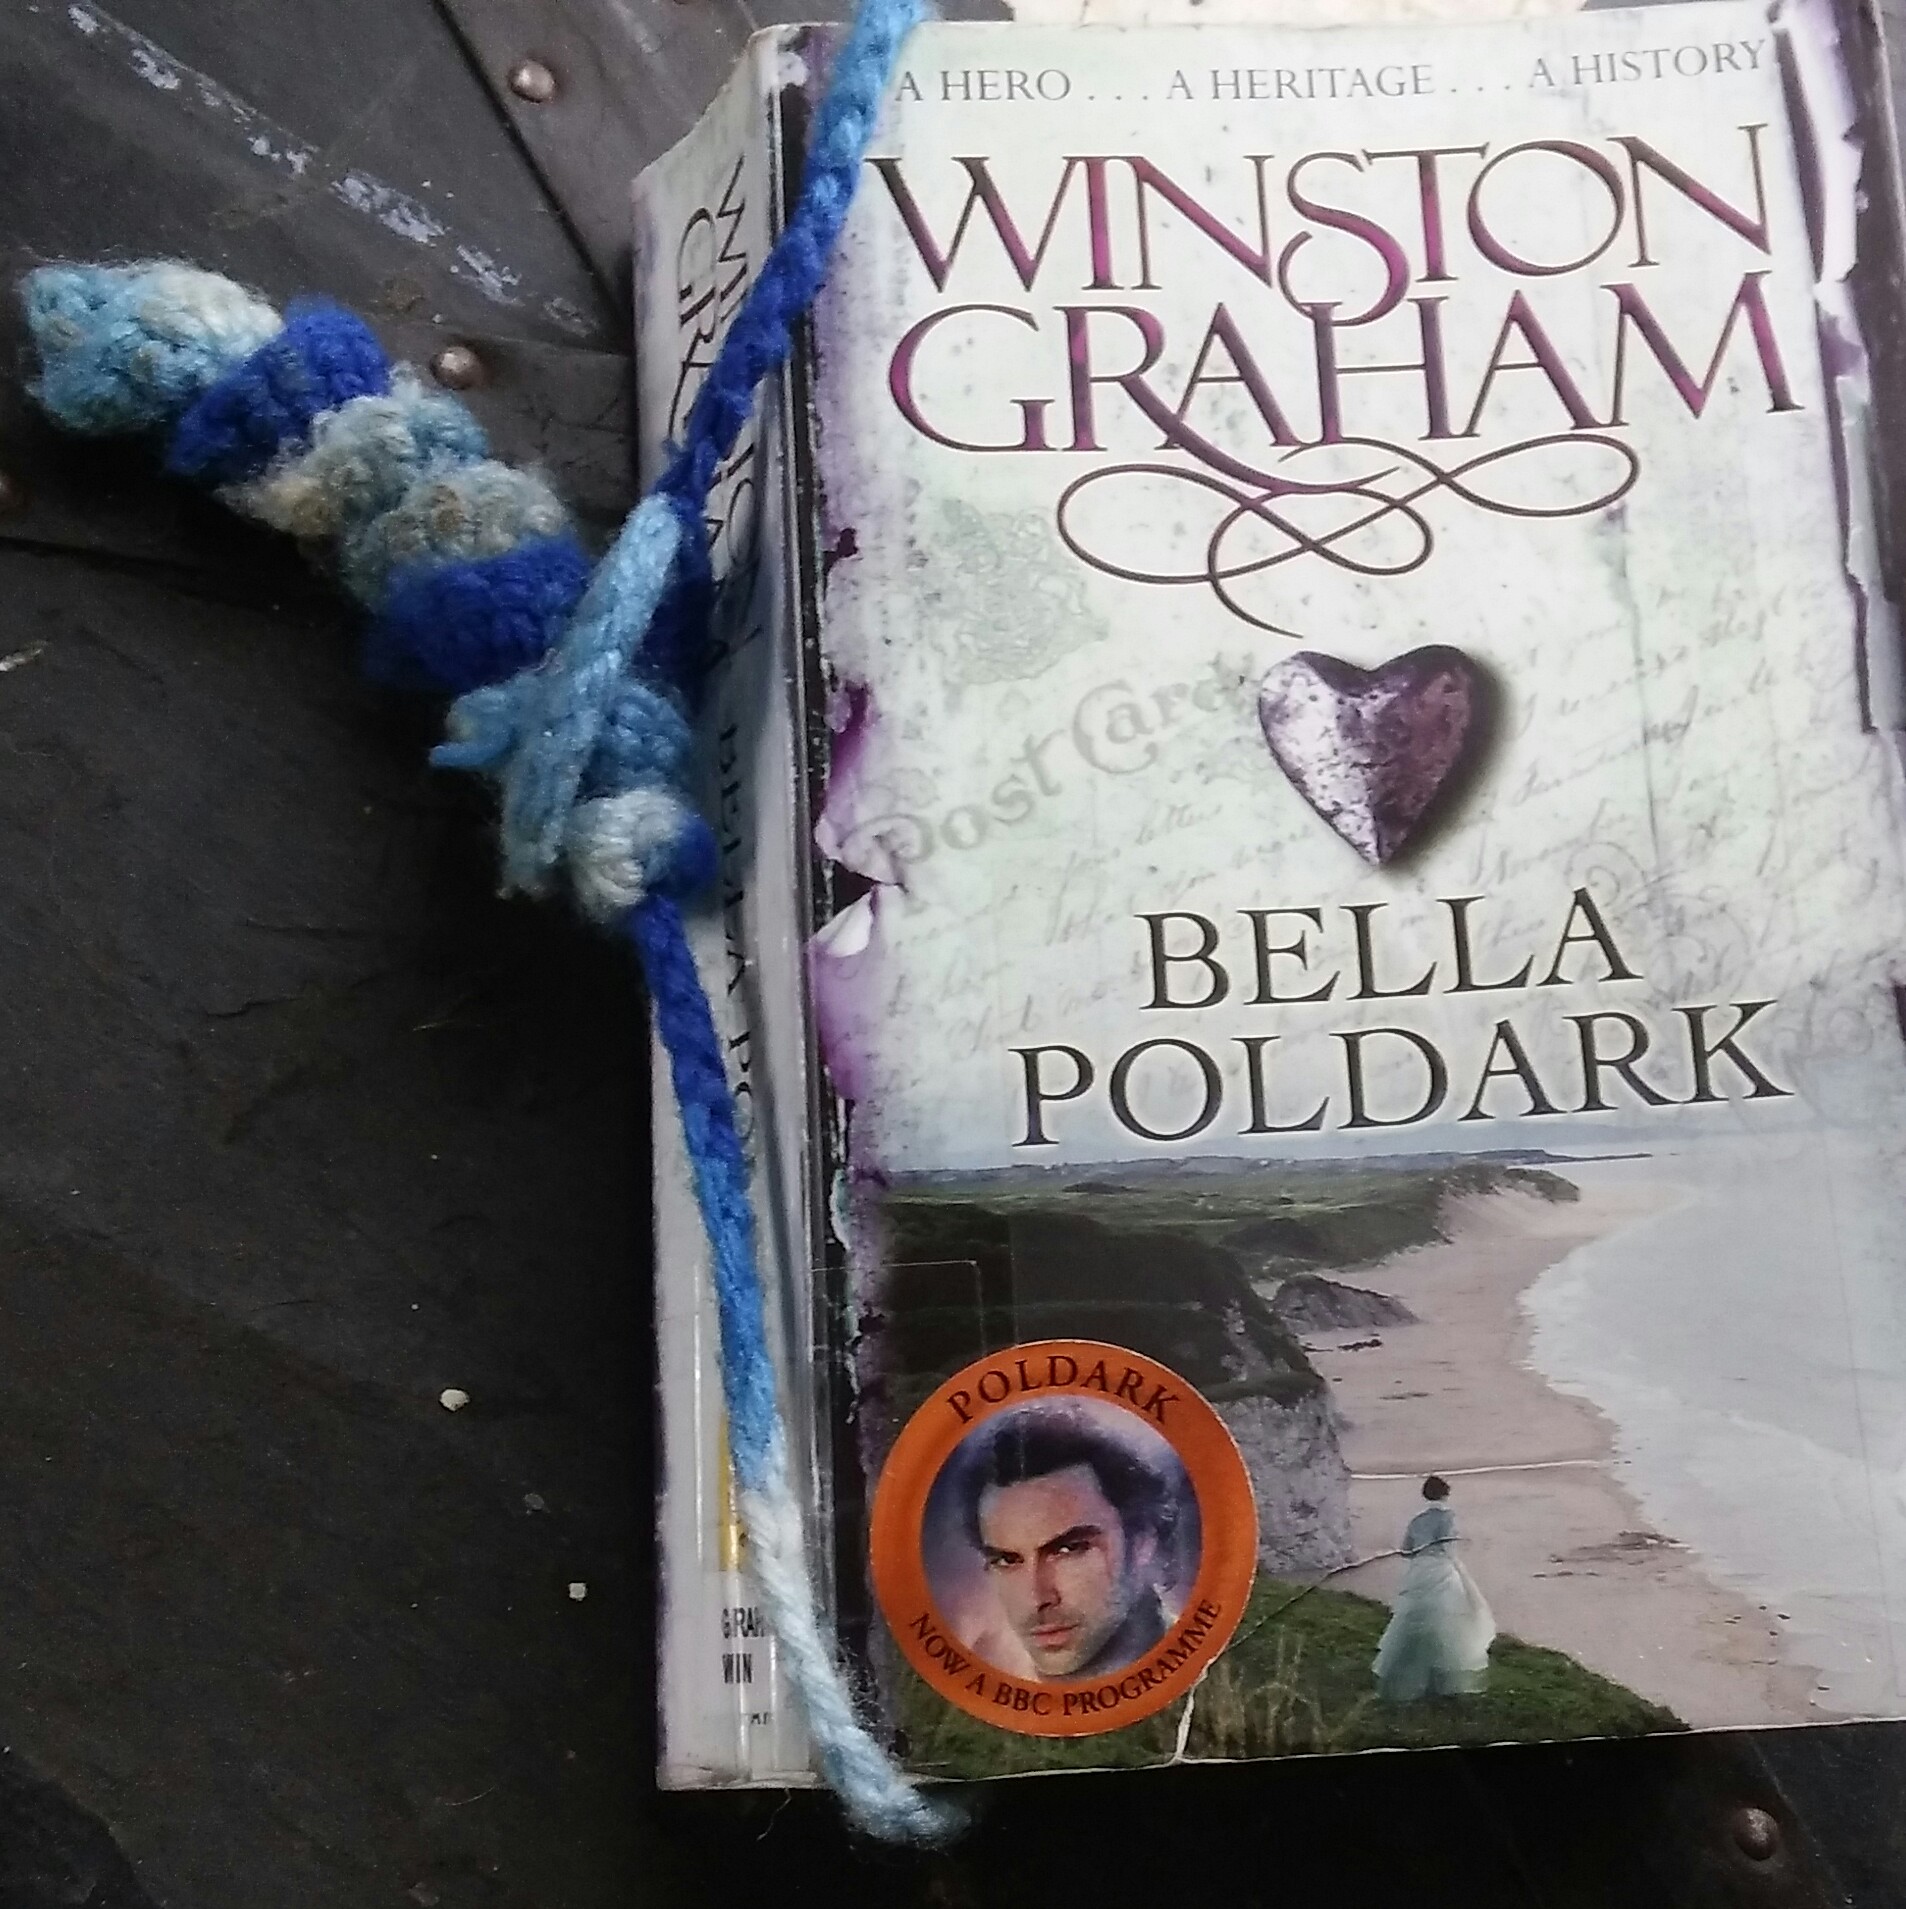
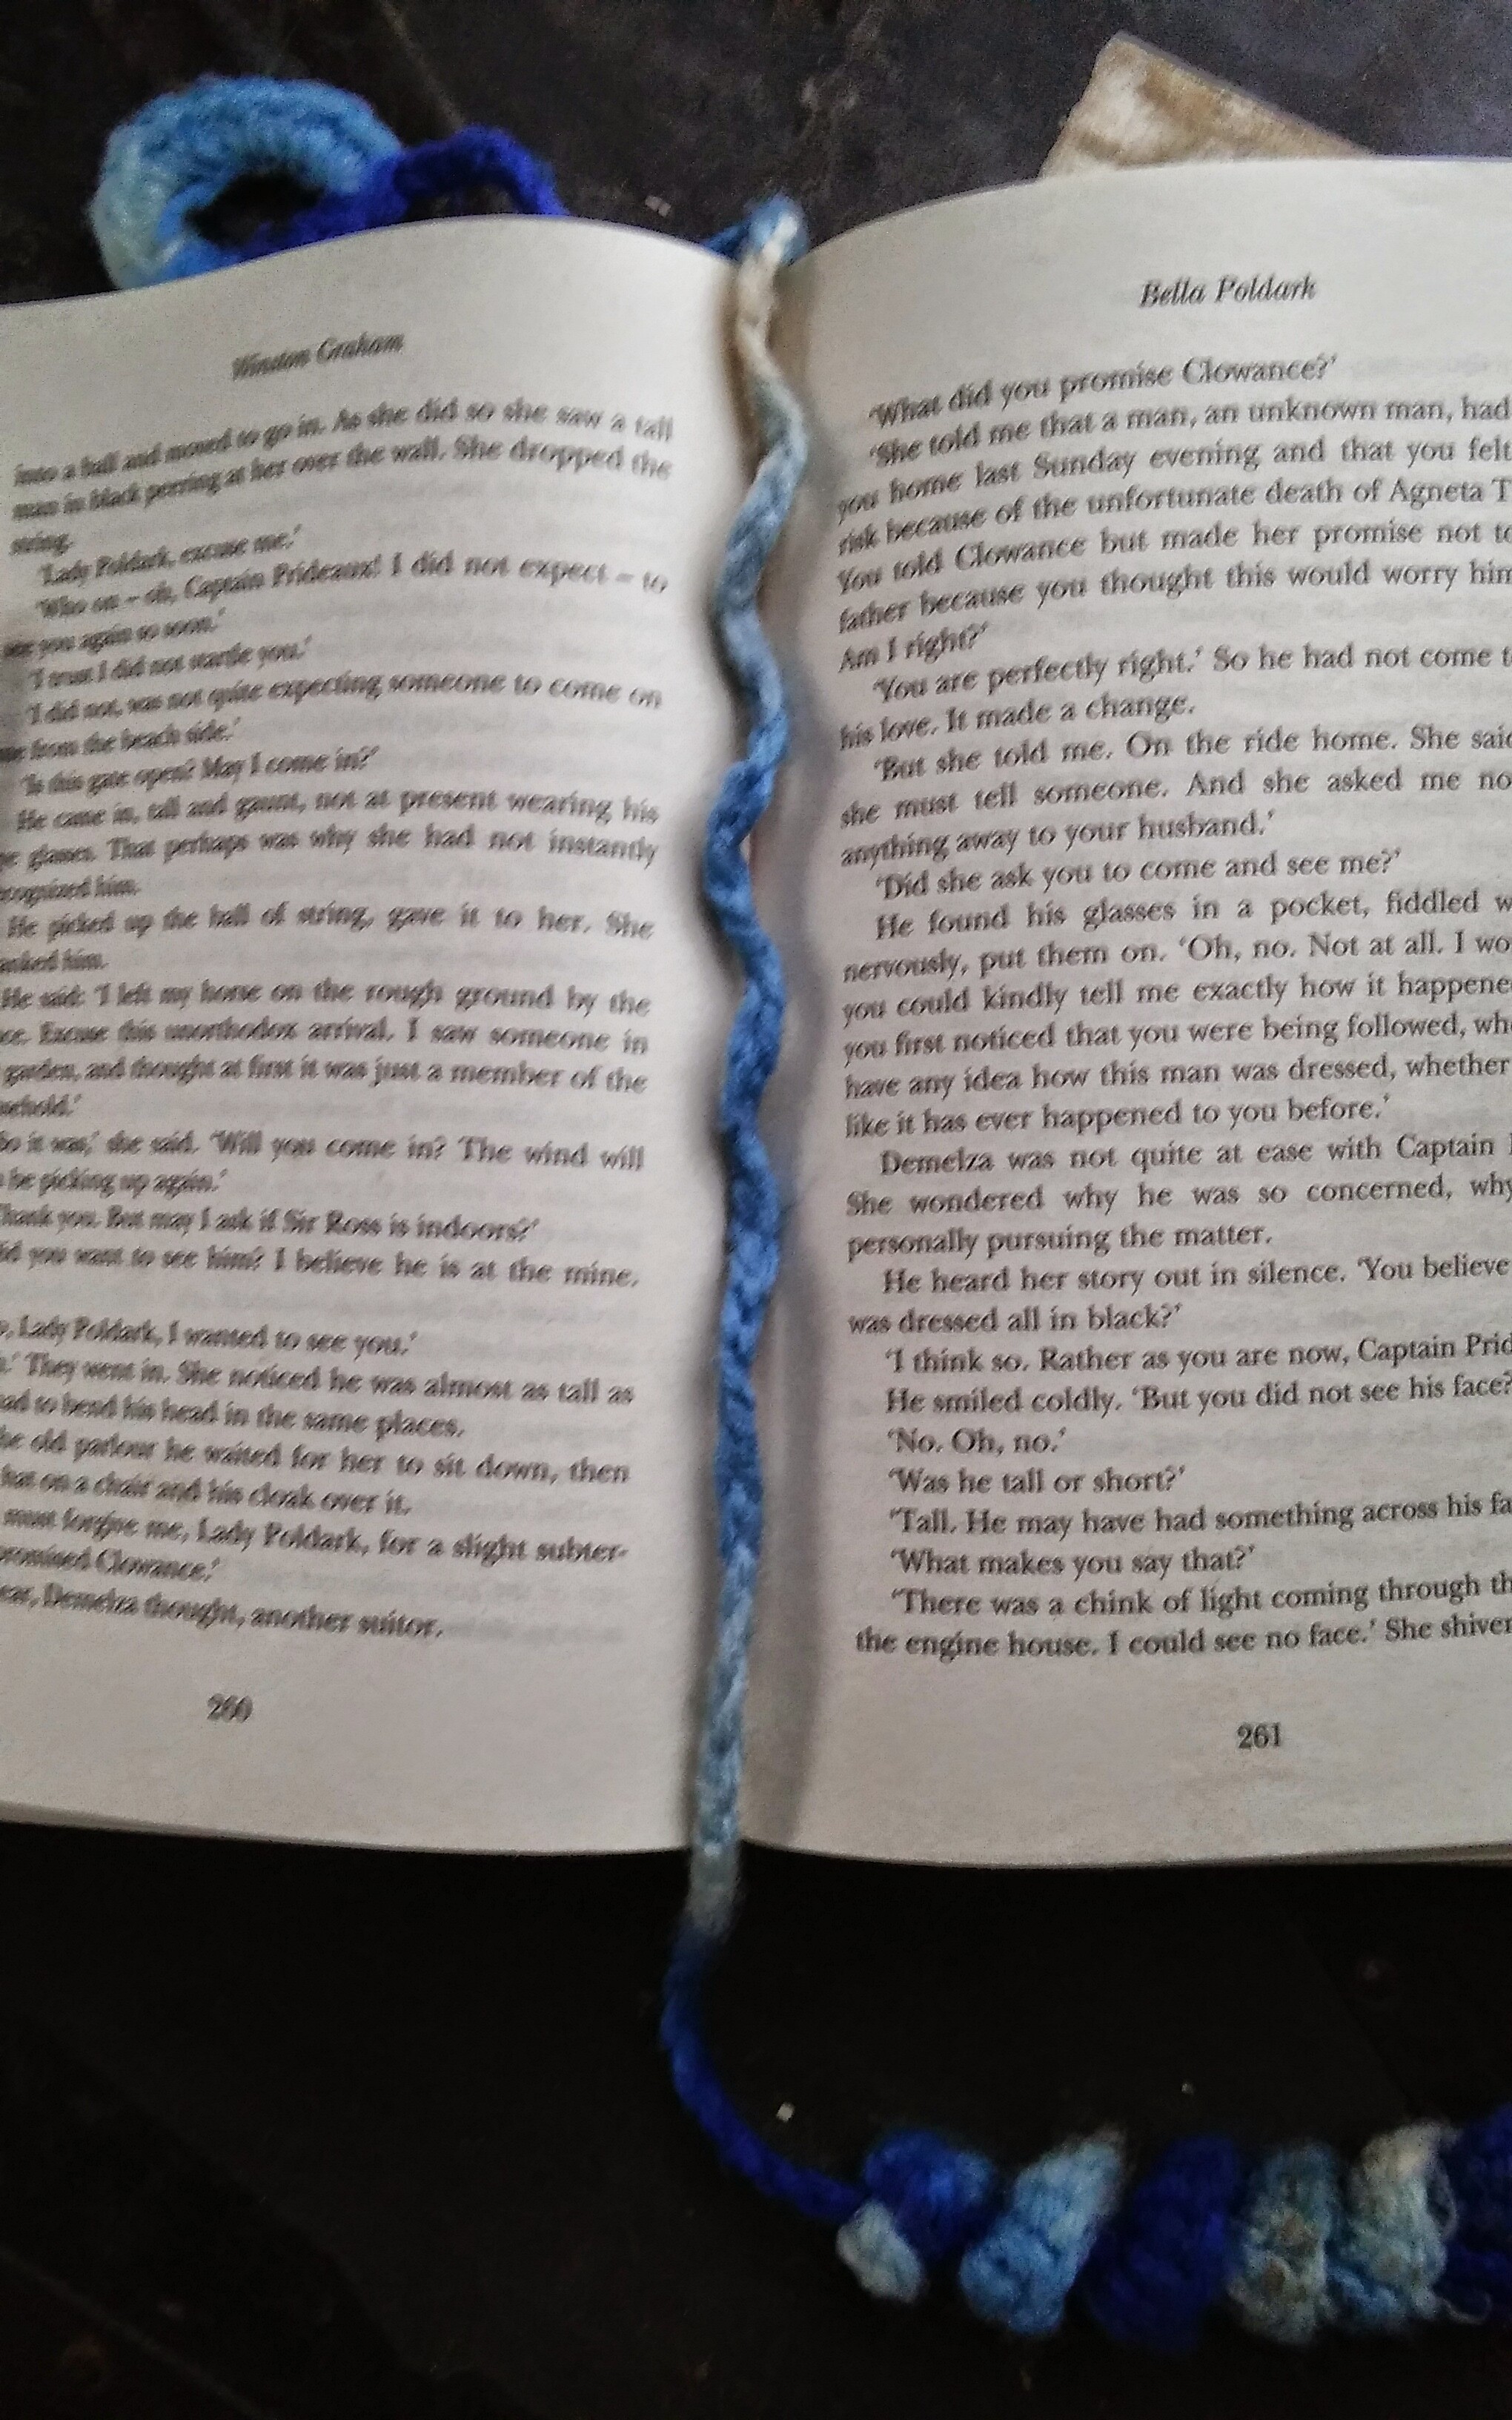
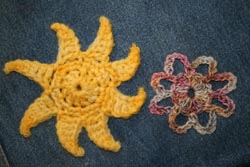
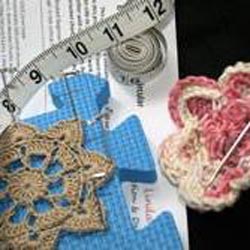
Teaching Crochet In Chicago!

If you would have told me a couple of years ago that I would be a crochet designer, published in several well-known magazines worldwide, I would have thought you were crazy. Then if you added to that, that I would be teaching on the National Stage at conferences, I would have asked for you to check what was in your water. I never would have seen this is the future journey that I would have been on. After all I was working in a support position for social works in cafe of the elderly. I found my job rewarding, knowing that I was making a daily difference in the lives of people in my community.

Well, changes in the structure of my job, as well as the needs of my young kids helped me envision a new path. I still have to pinch myself at times to realize that I really have accomplished these things, and that I am teaching again this year at the Crochet Guild of America’s annual Chainlink Conference, this year July 26-29, 2017 in Chicago.

www.lindadeancrochet.com

Needle Felt crochet motifs on fabric

I am teaching some classes you may not have expected. I am teaching how to Needle Felt your motifs directly onto fabric, allowing you to take your crochet into an entirely new direction with no sewing required! Barbed needles are great tools that can be used to create some fabulous projects, but using it with crochet is a direction that you may not have explored, until now.

www.lindadeancrochet.com

Convert It! Learn how to crochet your favorite knitting pattern

I am also teaching Convert It! This is a class that will overload you with information about how to take your favorite knit design and recreate it in crochet. Learn what drives you to choose your pattern, and then understand how to dismantle it and put it together for the exact look you want, while learning and understanding the basic differences between knitting and crochet and how to use the strength and weakness of each to complement each other.

www.lindadeancrochet.com

What the Pattern Does Not Say

What the Pattern Does Not Tell You covers all the things that designers, writers, and publishers assume you already know. There are many simple things that can get overlooked in the writing, but can really make a complete difference in the outcome of your success. Don’t let the lack of this information hold your crochet back.

While teaching Re-Invented Broomstick Lace, I have learned so much myself. People have an idea of the basics of Broomstick lace, but there are so many possibilities. This class offers inspiration in how to use this stitch to create stunning fabrics that will leave everyone asking how you did that. It can be your secret, and hopefully you will get inspired to invent even more new approaches to this lace technique.

www.lindadeancrochet.com

Re-Invented Broomstick Lace

It will be a fun couple of days in Chicago, and if you can join me it would be great to see you. I don’t know what crazy adventure I will be on in the next couple of years, but I have learned, NEVER, rule out anything!

Knit It! Crochet It! The Converse Shawl

My latest design, or should I say designs, once again grew out of the challenge of a one skein project worked in both knit and crochet. Unlike some of my other knit/crochet designs, this one does not as closely resemble each other.

Converse Shawl by Linda Dean www.lindadeancrochet.com

Converse Shawl Crochet version

The visual effect of this design is really more about how the color moves around and comes together. Not really like color pooling, but more like paint on an artist canvas. So Converse Shawl is the latest addition to my design collection. (1 pattern and you get both the knit and the crochet version).

The crochet version of Converse is worked from one side to the other, or otherwise known as vertically, while the knit version is worked basically bottom to top or horizontally. Yet they both have a line of color that then runs a vertically creating this artist affect. I feel like it is this slight line, or visual break that really makes everything come together.

Converse Shawl by Linda Dean www.lindadeancrochet.com

Converse Shawl knit version

The skills for working either of these shawls is not advanced. The crochet version utilizes post stitches, and works what is known to many as a basket weave pattern. It features tall stiches to give an airy feel that can mimic a woven inspiration. The knit version features drop stitches that are carried over a couple of simple rows allowing the color to “drip” down.

I cannot take full credit for this design. I worked with Lisa Souza, of Lisa Souza Dyeworks to create the knit effect as a compliment to the crochet. Often I work a crochet design from the perspective of recreating a knit, this time I created the crochet and the structural technique I had for the knit would not come together properly. Lisa helped me to create a knit version that was structurally sound while still sharing the same vision of the crochet version.

I have to admit thought, that this design looks great with the featured shawl pin from Lickin Flames. It could be that hand created items, like the hand dyed yarns of Lisa Souza (of which this design is 1 skein of Baby Alpaca Silk Petite in color way Jacob’s Coat), and the hand created shawl pins by Jim Atchinson of Lickin Flames just happen to enhance each other. If that is the case, great! It makes designing so much easier when the materials really work together.