Cross Stitch- Crochet For a Difference

I will admit, that featuring on how crochet can make a difference locally has really helped me remained focus on what is important. Prior to working as a freelance designer and instructor I worked in public service, I there are times that I really miss the satisfaction at the end of the day knowing that you made a difference in someone’s life. So finding a way to remind myself that crocheting is a way to make an impact, is very powerful to me.

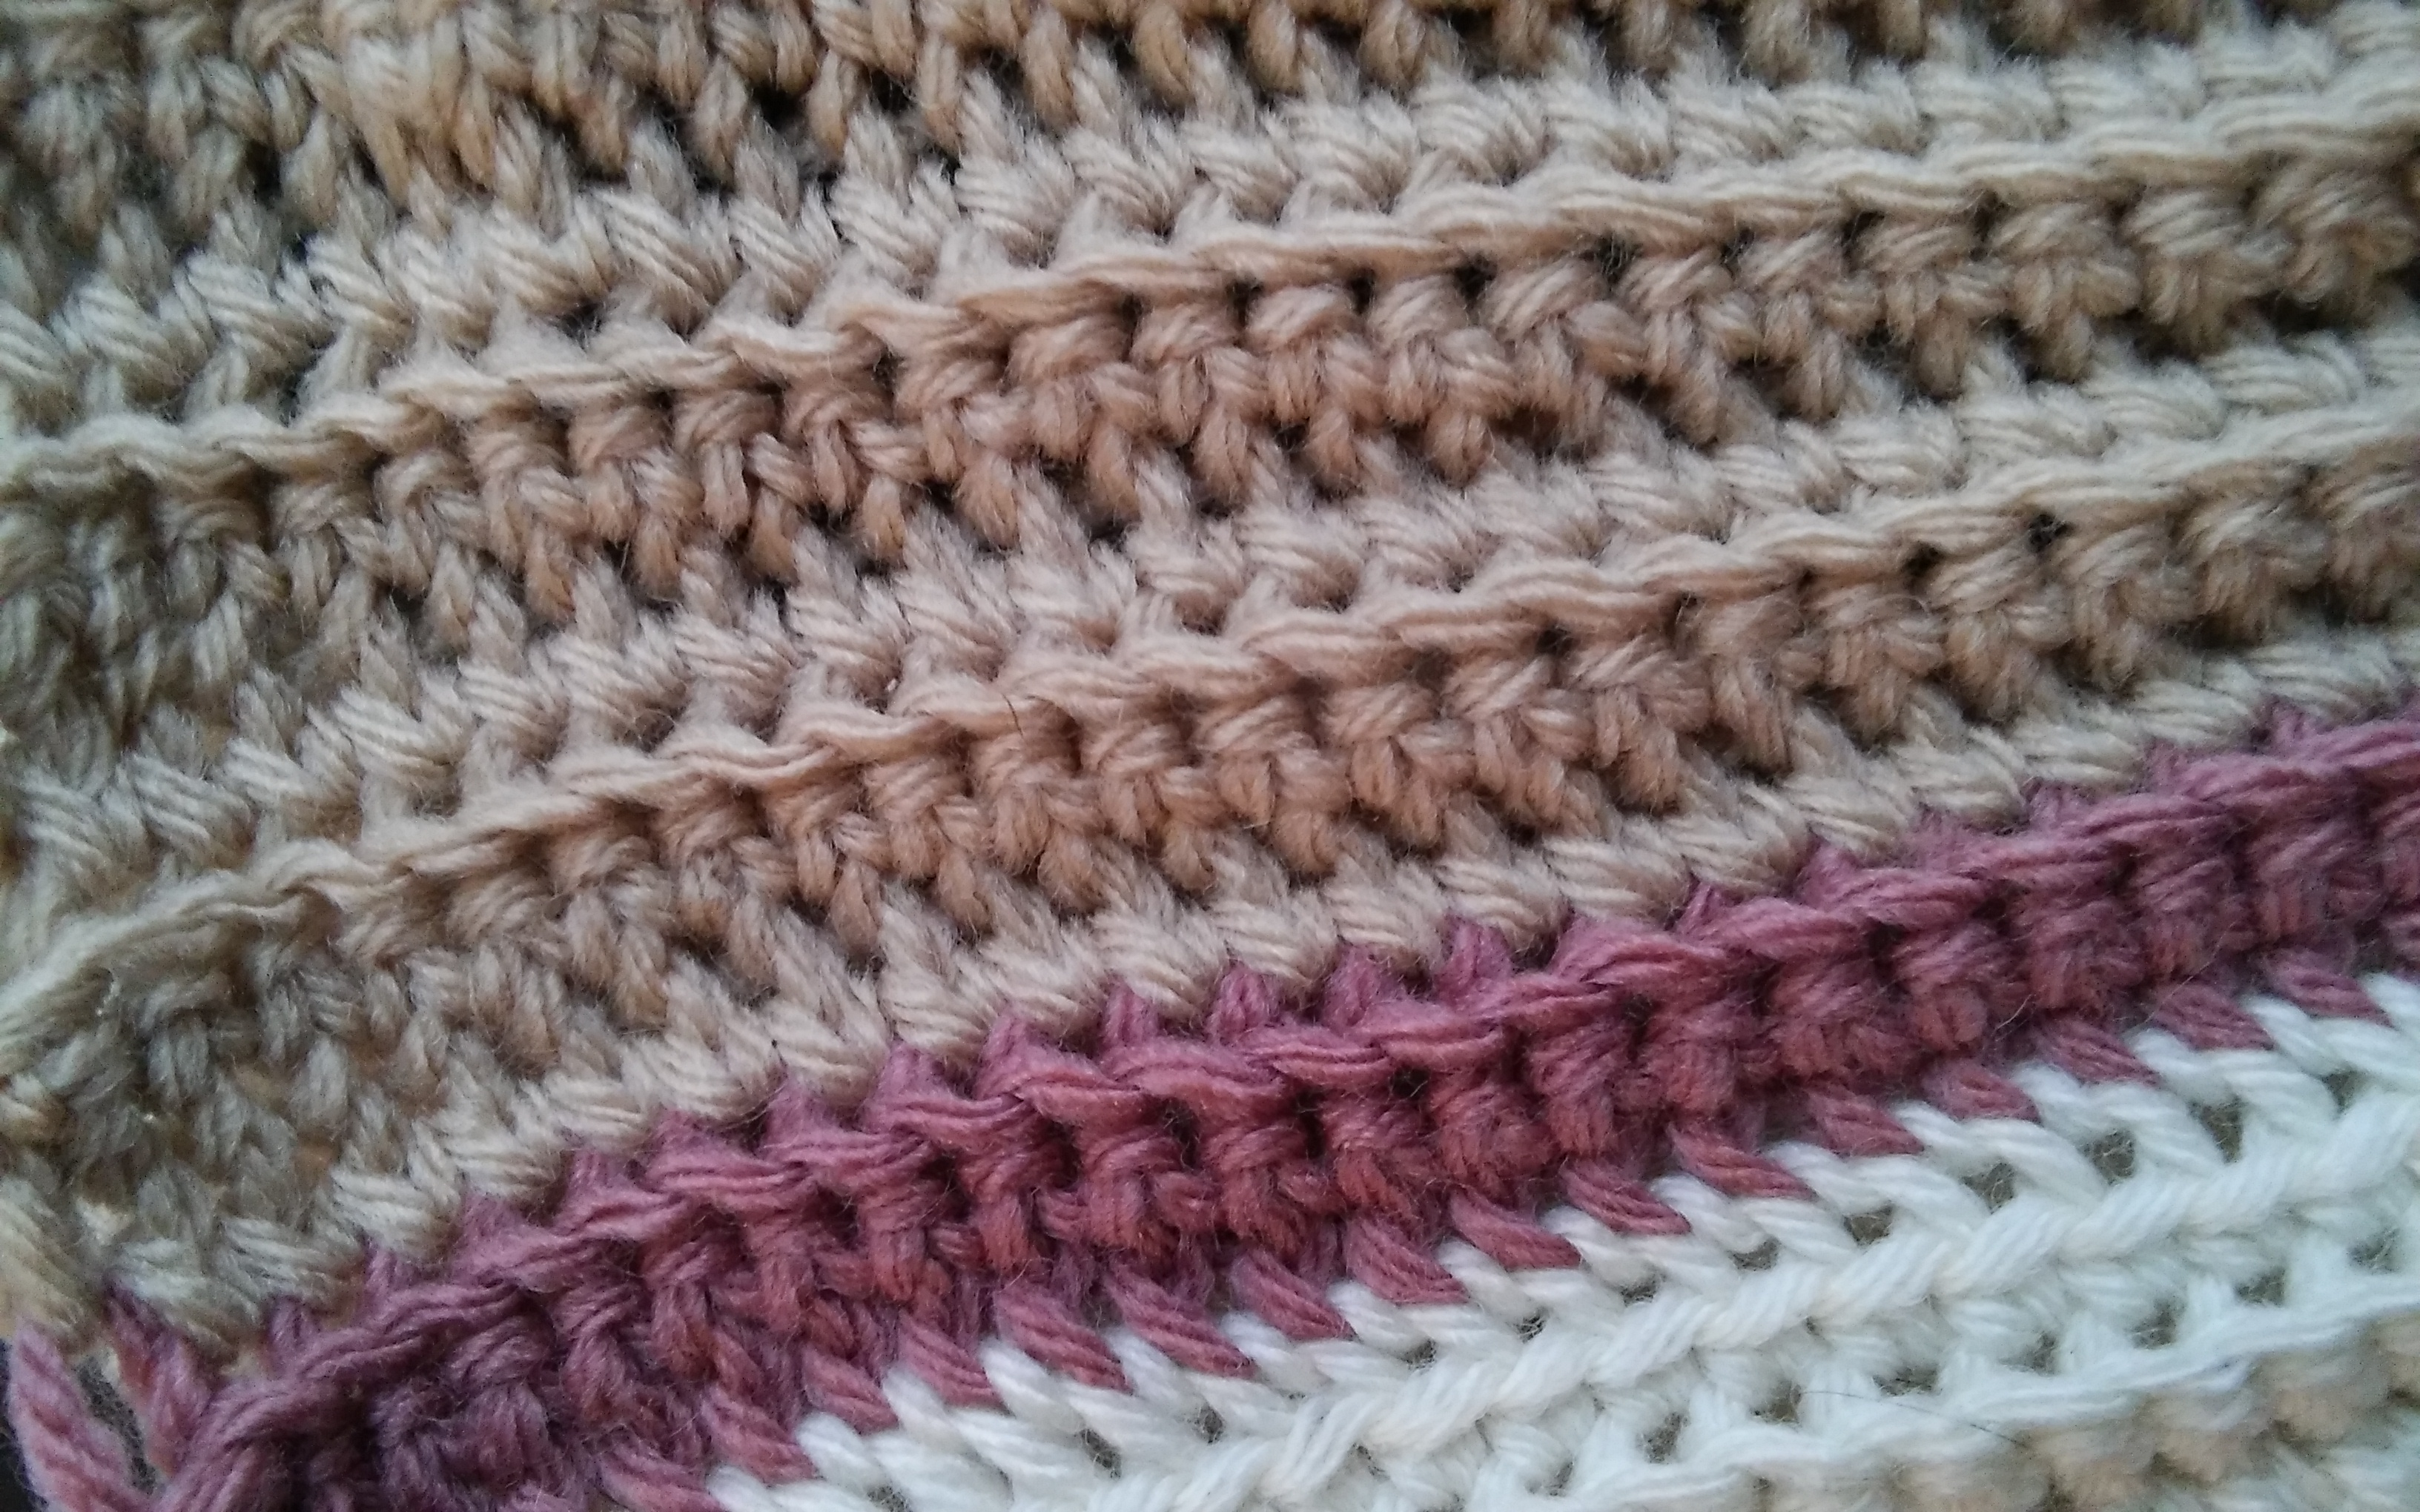
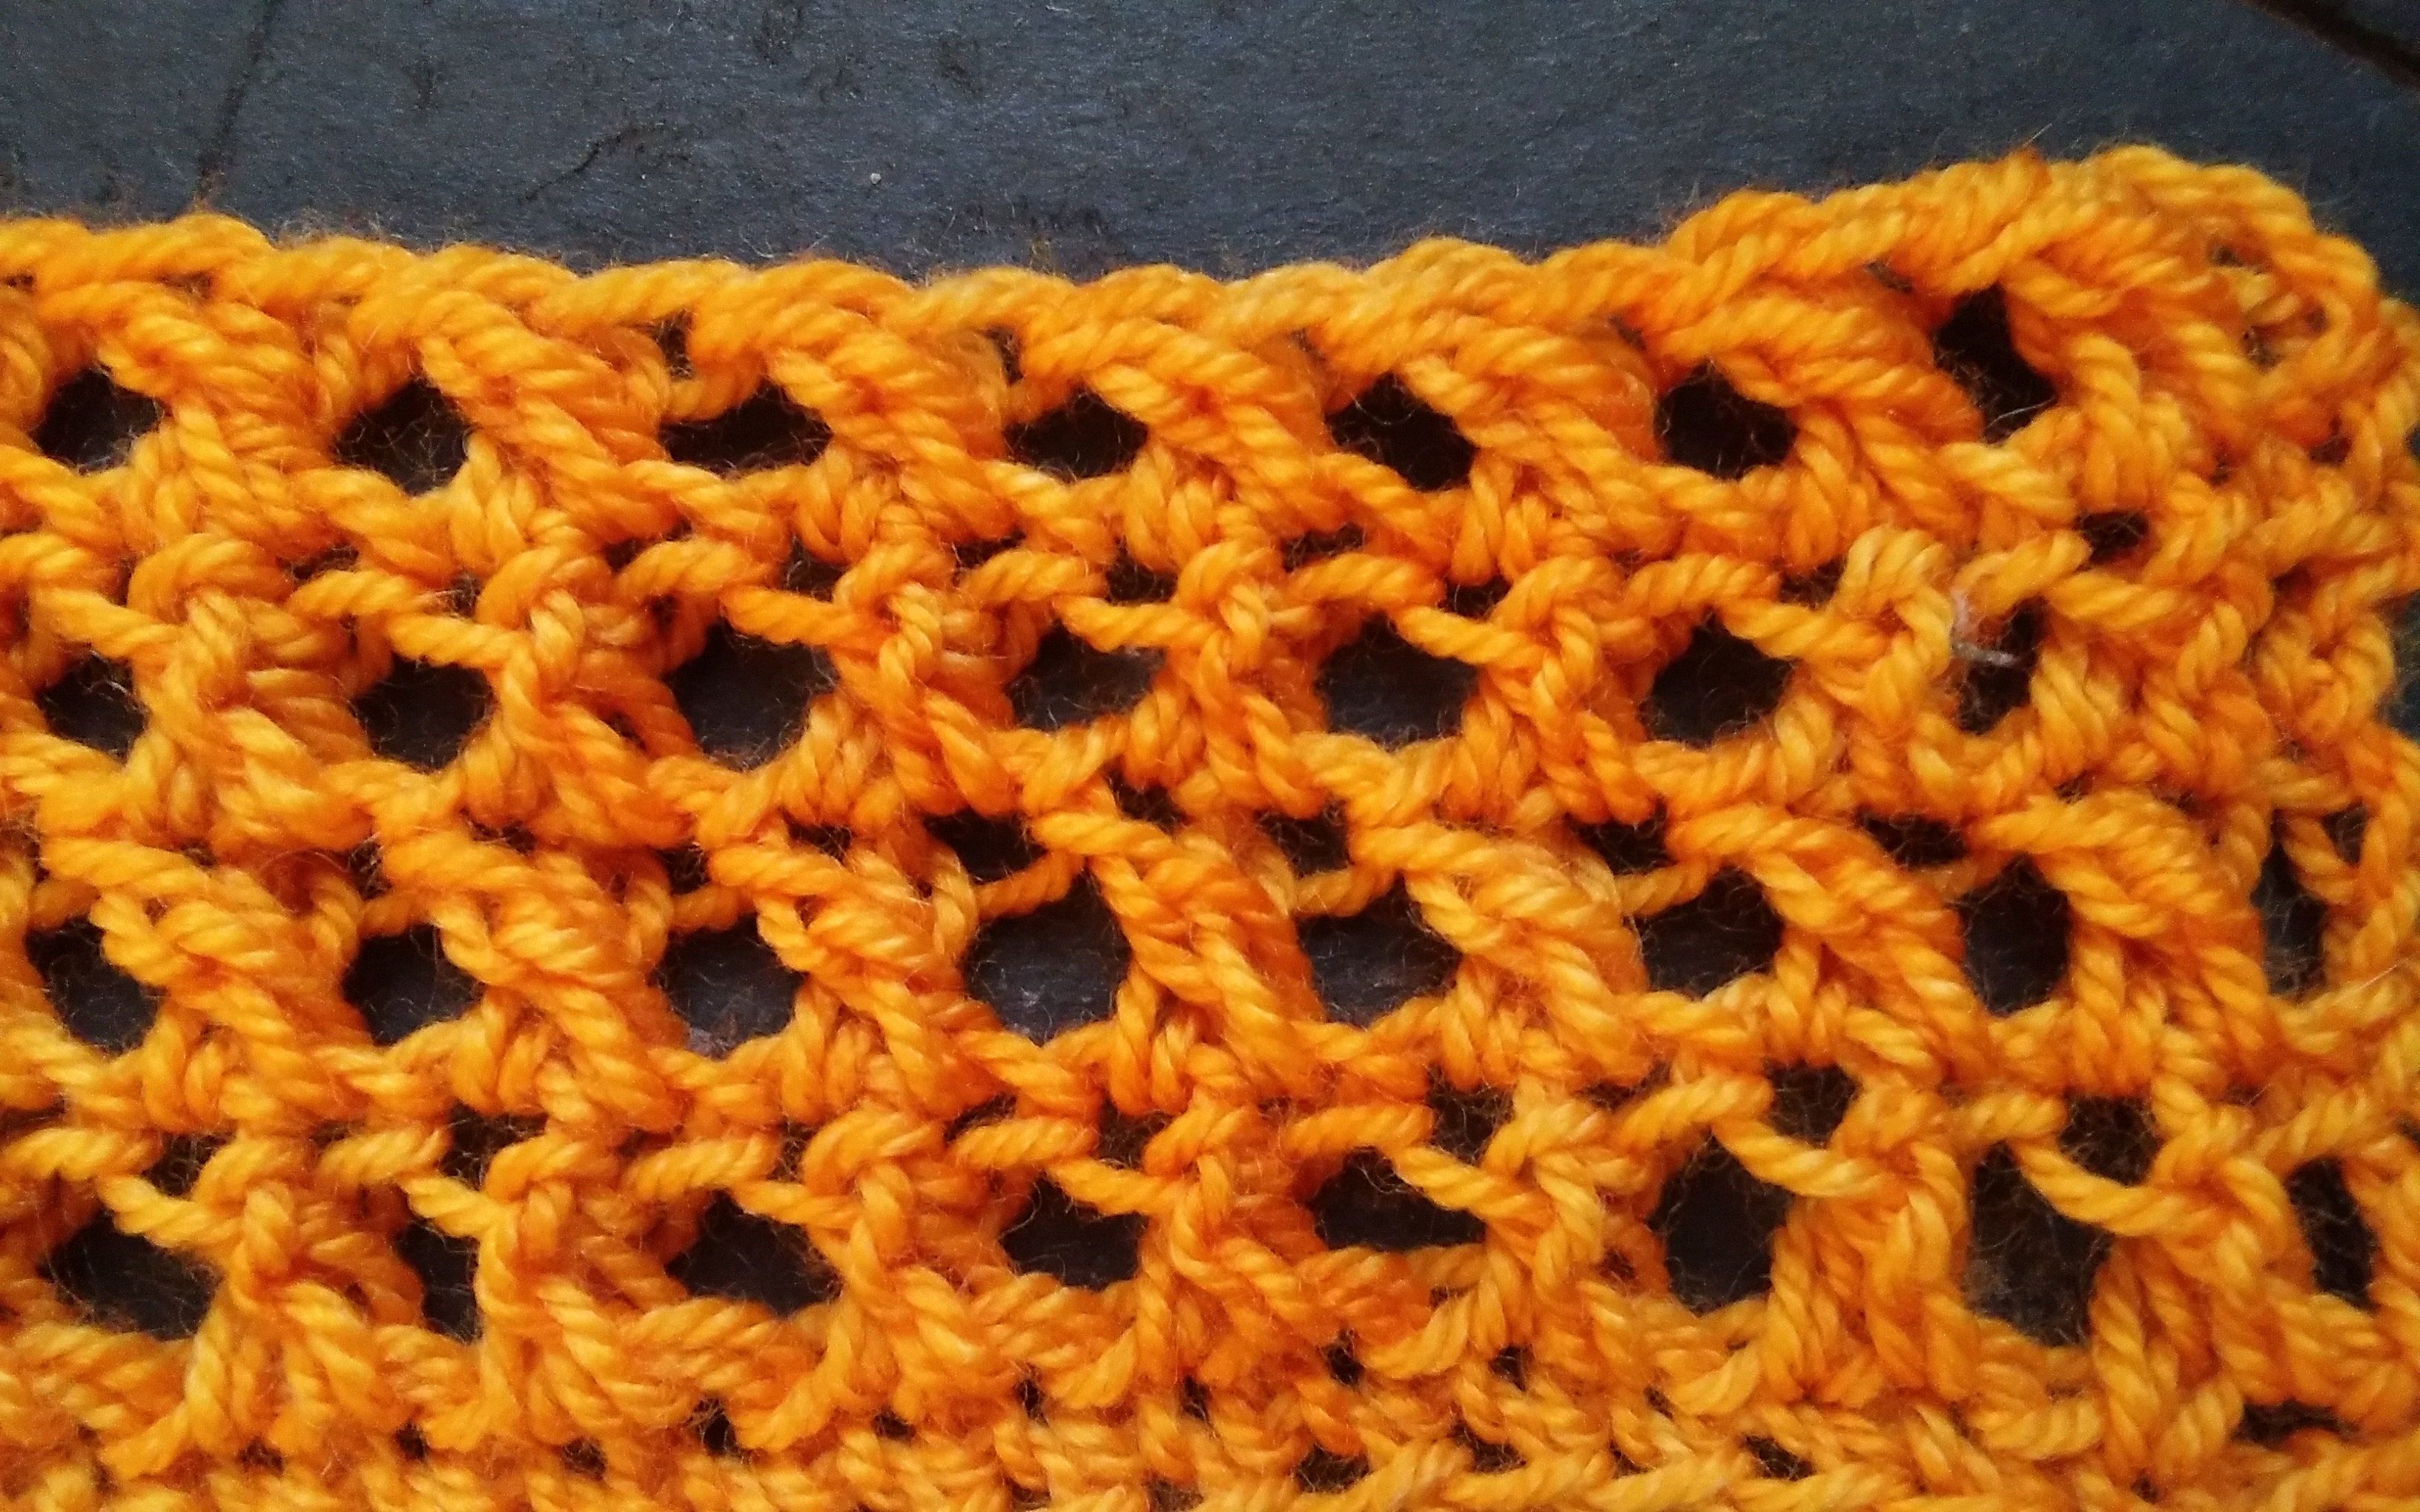
I was thinking about a simple stitch for an afghan, and my mind kept coming back to a simple cross stitch. It is made up of double crochet stitches that are, as the name states, crossed. To this stitch I work a chain in any even number, and add 1.

Row 1: Single crochet in the second chain from the hook and in each chain across, turn.

Row 2: Chain 3 (this will count as a double crochet, and not be crossed, this is the edge), [skip the next stitch, double crochet in the next stitch, now double crochet in the stitch that was skipped] repeat across, double crochet in the last stitch, turn.

Repeat Row 2 until desired length.

Final Row: Chain 1, single crochet in each stitch across.

Cross Stitch www.lindadeancrochet.com

Cross Stitch

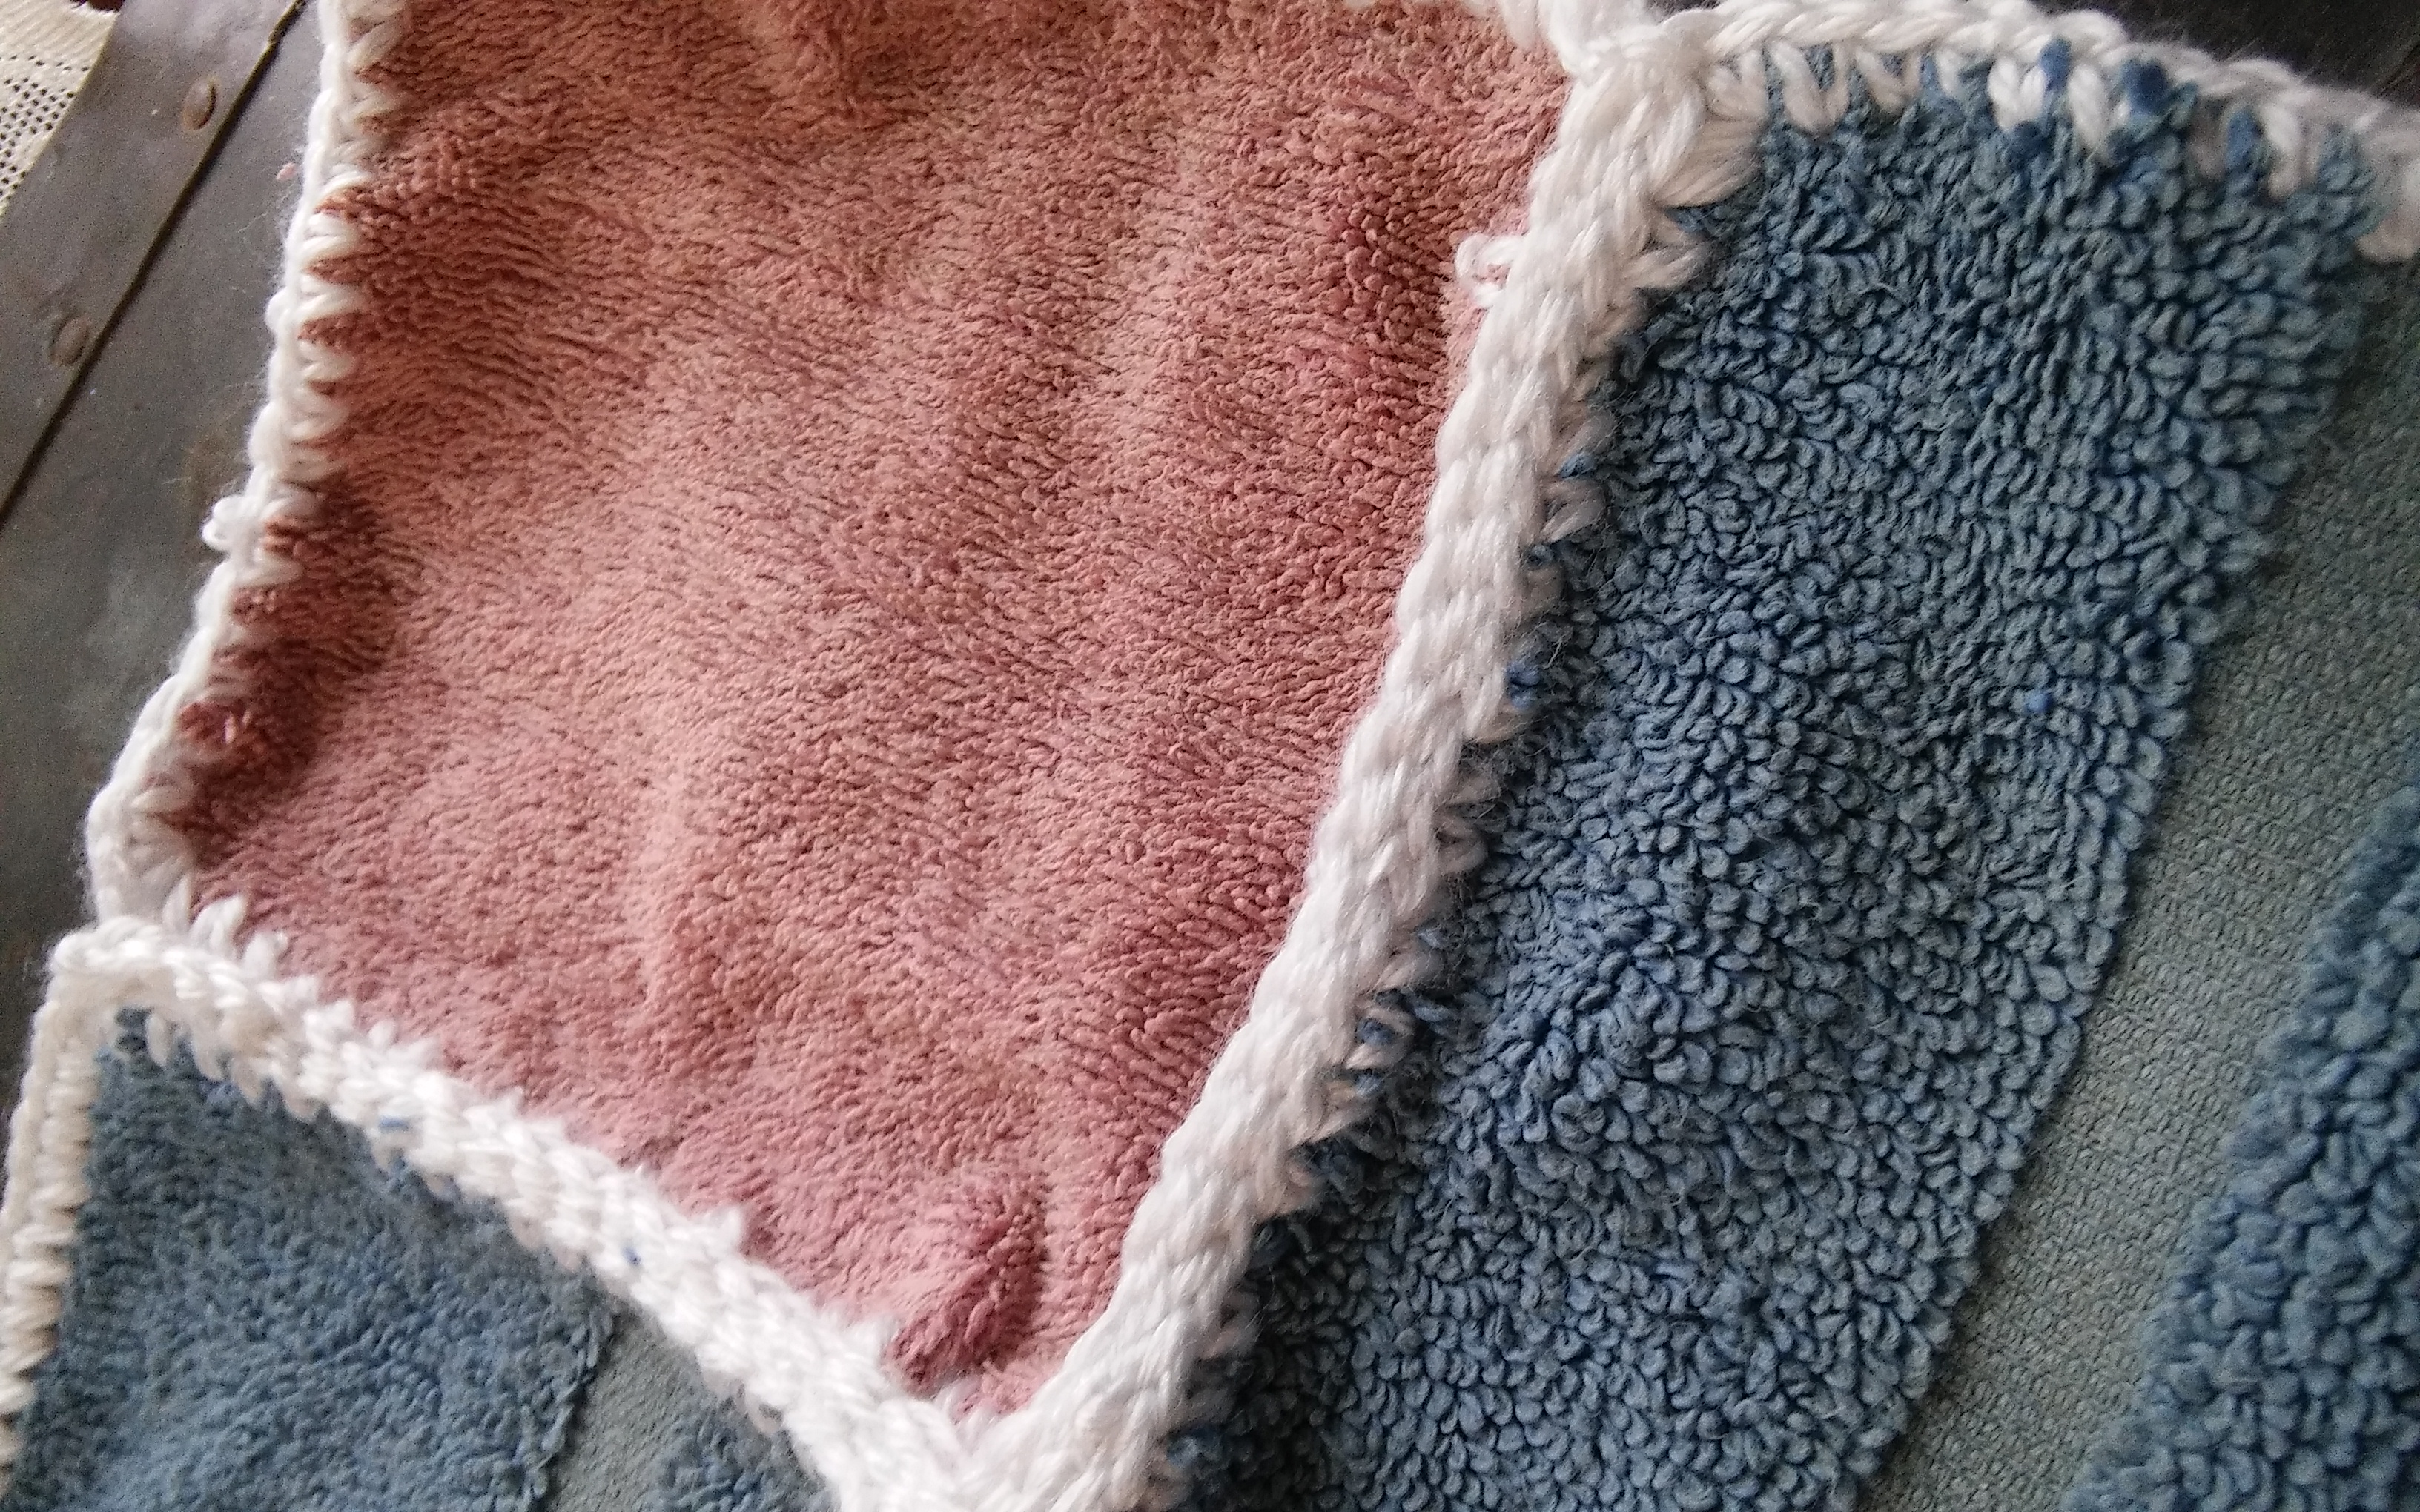
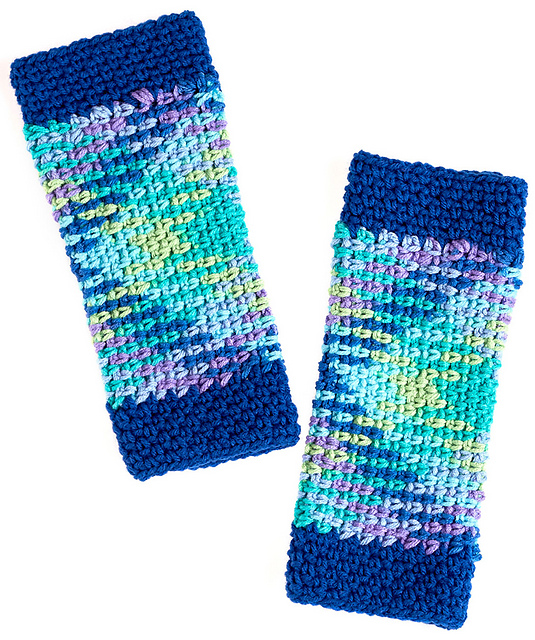
This creates a lacy type of fabric, and works well in a wide variety of yarn types. It is a simple texture as well, creating many options of feel. One of the reasons I enjoy this stitch is that once it is set up, it almost becomes a mindless stitch pattern, since it is really pretty simple to see if I made an error, thus I do not have to count my stitches.

After working this stitch up in an afghan you may want to consider donating it to a local residential care home. In any community you may be familiar with long term care homes, or what some people call nursing homes, yet there are many smaller ones that may actually be down the street from you in a simple home. To find these locally in your community contact your local Long Term Care Ombudsman Program, this program facilitates and trains volunteers to routinely visit all sorts of care facilities to ensure that the rights of the residents are not being violated. Find your Long Term Care Ombudsman within your local Area Agency on Aging, find it here.

Planned Pooling with a V Stitch

The trend of creating an argyle color pattern from variegated yarn is becoming quite popular, but it is not the only effect you can get from planned pooling. Pooling is when certain colors “stack” or “group” together from a variegated yarn, and as planned pooling might suggest, you can plan where the colors fall from the yarn and create a pattern.

Usually this argyle effect is created with yarn that has a color repeat of at least 6-18” (15-46cm) and using what some call the moss or linen stitch. This stitch is a single crochet and a chain 1, with all single crochet stitches worked in the chain-1 space the row below.

Planned Pooling Scarf www.lindadeancrochet.com

Planned Pooling Scarf Photo courtesy Red Heart

When color repeats are longer, let’s say 24” (61cm) argyle may not be effective, but you can use other stitches to come up with various patterns. My Planned Pooling Scarf that has just been released by Red Heart Yarn, is worked in a longer color repeats, using a V stitch (a double crochet, chain 1, double crochet) worked in the chain-1 space of the V stitch of the row below. The V stitch uses more yarn then the “moss stitch” and the chain works to help give a little flexibility in getting the color placed in the correct place. (Marly Bird offers great tips in getting the yarn to pool in her video, here).

The Neon Stripes color of Red Heart Super Saver offers a really great opportunity to create this large stitch color pattern. I have also seen this yarn worked up in a pooled pattern with shell stitches, and popcorn stitches. It creates a similar color effect, but a definitely different texture.

Planned Pooling Scarf www.lindadeancrochet.com

Planned Pooling Scarf Photo courtesy Red Heart

This design creates a fabric that is a bit lighter than the argyle, which makes for a nice drape, and the color play makes for a very fun flair. The fringe gives it a classic feel, while the pooling is quite modern. Hope you feel inspired to give it a try.

Merino & Acrylic- Deramores a Nice Choice

I was surprised at how soft and gentle I found Deramores Vintage Chunky yarn. It is quite lofty and works up very smoothly. I found it really pleasant to use, and would gladly pick it up again. It is not as springy as I would have thought by looking at it (yet there is a little),it is very stable and giving great stitch definition.

Deramores Vintage Chunky yarn. Www.lindadeancrochet.com

Deramores Vintage Chunky yarn

This yarn is half acrylic and half Merino Wool, which might explain the lack of springiness, as Merino may be known for its softness and warm, but it appears that this combination with acrylic reduces the amount of stretch that might otherwise be present. It is probably the Merino that gives this yarn its loft and airiness appearance, yet the acrylic tempers it enough that it could be worked as a home décor item, instead of the garment wear that I usually feel is better fitting for Merino.

It is a 5 ply yarn may have a slight tendency to pill after excessive wear, yet does not split when being worked. The fiber has a moderate length and this gives the yarn a slight halo, this is also caused by the ply. It allows light to be refracted offering a subtle type of sheen, that I cannot quite fond the word for.

This yarn is a medium weight and a generous 100 gram ball has 153 yards, which goes a bit further then you might first think. I would readily use it for hats and scarves, but also for pillows and afghans. As it does not have much weight for a hearty drape, I would not use if for hairpin lace, and it has a bit too much spring for broomstick lace and love knot stitches, but it will work well with most all of traditional crochet methods.

Repurposed Bath Towel Blanket

When I was in high school, with my first car, okay a small truck, I had an “always prepared” bag behind the seat. The bag contained a coat, snow gloves, a blanket, a bathing suit, sun block, and a towel. Not exactly the same “always prepared” that I would think of today, but at the time you never knew what plans might arise for after school (especially if I had a day off work). It might be a trip to the mountains to play in the snow, or it could be a day at the river…really depends on the season and the weather, but I was prepared.

Well, several years have gone by since then, but I still attempt to keep “prepared” kit in my vehicle…no longer my cute little truck that I would take 4 wheeling, but my much more practical Subaru Outback…I still refuse to admit it might be a station wagon. My kit now has some granola bars, napkins and wet wipes, a flashlight, and I still have a blanket. I find that this blanket has many good uses, and can even still fit in some spontaneity, like a quick picnic in the park, or what is more likely a fast food dinner during archery practice. The blanket also helps when the kids are tired, or someone is cold. It covers the seats when the dog goes to the vet, or is rolled into a ball to give the driver some more support for resting their arm on the console.

Repurposed bath towel blanket. Www.lindadeancrochet.com

Repurposed Bath Towel blanket

This blanket has been replaced over the years, and one way I like to feel that I have a blanket that is really a second life is to make one. When bath towels wear out, become a bit thread barren, or simply have too many holes, I cut them into squares. As long as the squares are the same size, that is all that matters. I then crochet an edge around the squares. I then join all the squares together, I could sew or seem them, but I prefer to crochet them together. I find that the terry cloth a nice fabric for a blanket of the necessity, but just be mindful of ensuring that you slightly roll the edge of the fabric when crocheting the edge around it, this helps to reduce the initial fraying.

Give it a try next time you have a towel that has seen better days, and create your own blanket to be prepared with.

A Really Fun Technique- Planned Pooling Argyle Wristers

Sometimes you have a design where the yarn does all the work, this means that the stitches may be fairly easy, but since the yarn has character the item really looks more difficult than it is. This is true with color pooling projects, like my latest design Planned Pooling Argyle Wristers from Red Heart Yarns.

Planned Pooling Argyle Wristers www.lindadeancrochet.com

Planned Pooling Argyle Wristers Photo courtesy, Red Heart

Planned Pooling is when you plan your stitches to have the colors of variegated yarns stack up in a desired way. I might be exaggerating slightly about it being completely easy, you do have to pay attention to your tension so that you place the correct color in the correct stitch (Marly Bird has a great video about it here).

So these wristers look great and keep your arms warm, and only take two skeins (one for the argyle, one for the trim). The argyle is worked in what is referred to as a “Moss” or “Linen” stitch, which is simply a single crochet and a chain 1, worked into a chain-1 space. This stitch has a benefit to planned pooling as it is very forgiving with a change in tension. It is necessary to change your tension (either make a stitch tighter or looser) to ensure that the correct color is worked in the correct location.

Planned Pooling Argyle Wristers www.lindadeancrochet.com

Planned Pooling Argyle Wristers Photo courtesy Red Heart Yarn

It may take a little practice to get the hang of this technique, but then you might become addicted…I have talked to several people that once they finally discovered how to make the planned pooling work, had to try it with every color variegated yarn they could find, just to see if they could get that yarn to pool too.

The wristers are worked as a rectangle then seemed, then the trim is added. If you need the wristers to fit a wider arm you simply work the rectangle longer, if you want the wristers to fit your arm longer then you work the trim wider. Making it an easy to customize pattern. The added bonus to this pattern, besides it being free, is that it is available in a free e-book with 9 planned pooling patterns….and did you notice that my design is gracing the cover? Yes, I think that is kind of cool.