Two New Patterns for Autumn- Half Price!

Looking back it seems like I always find myself in this place every year…Autumn. The time of year that apparently has the calendar skipping weeks on me, as I really do not know where the time has gone, while making me feel like there is a ton of things I need to get done in a short span of time. I guess it leaves me overwhelmed, exhausted, and feeling like I have many unmet responsibilities.

So in all this I guess I should be really thankful that I have managed to release not just one, but two new patterns!

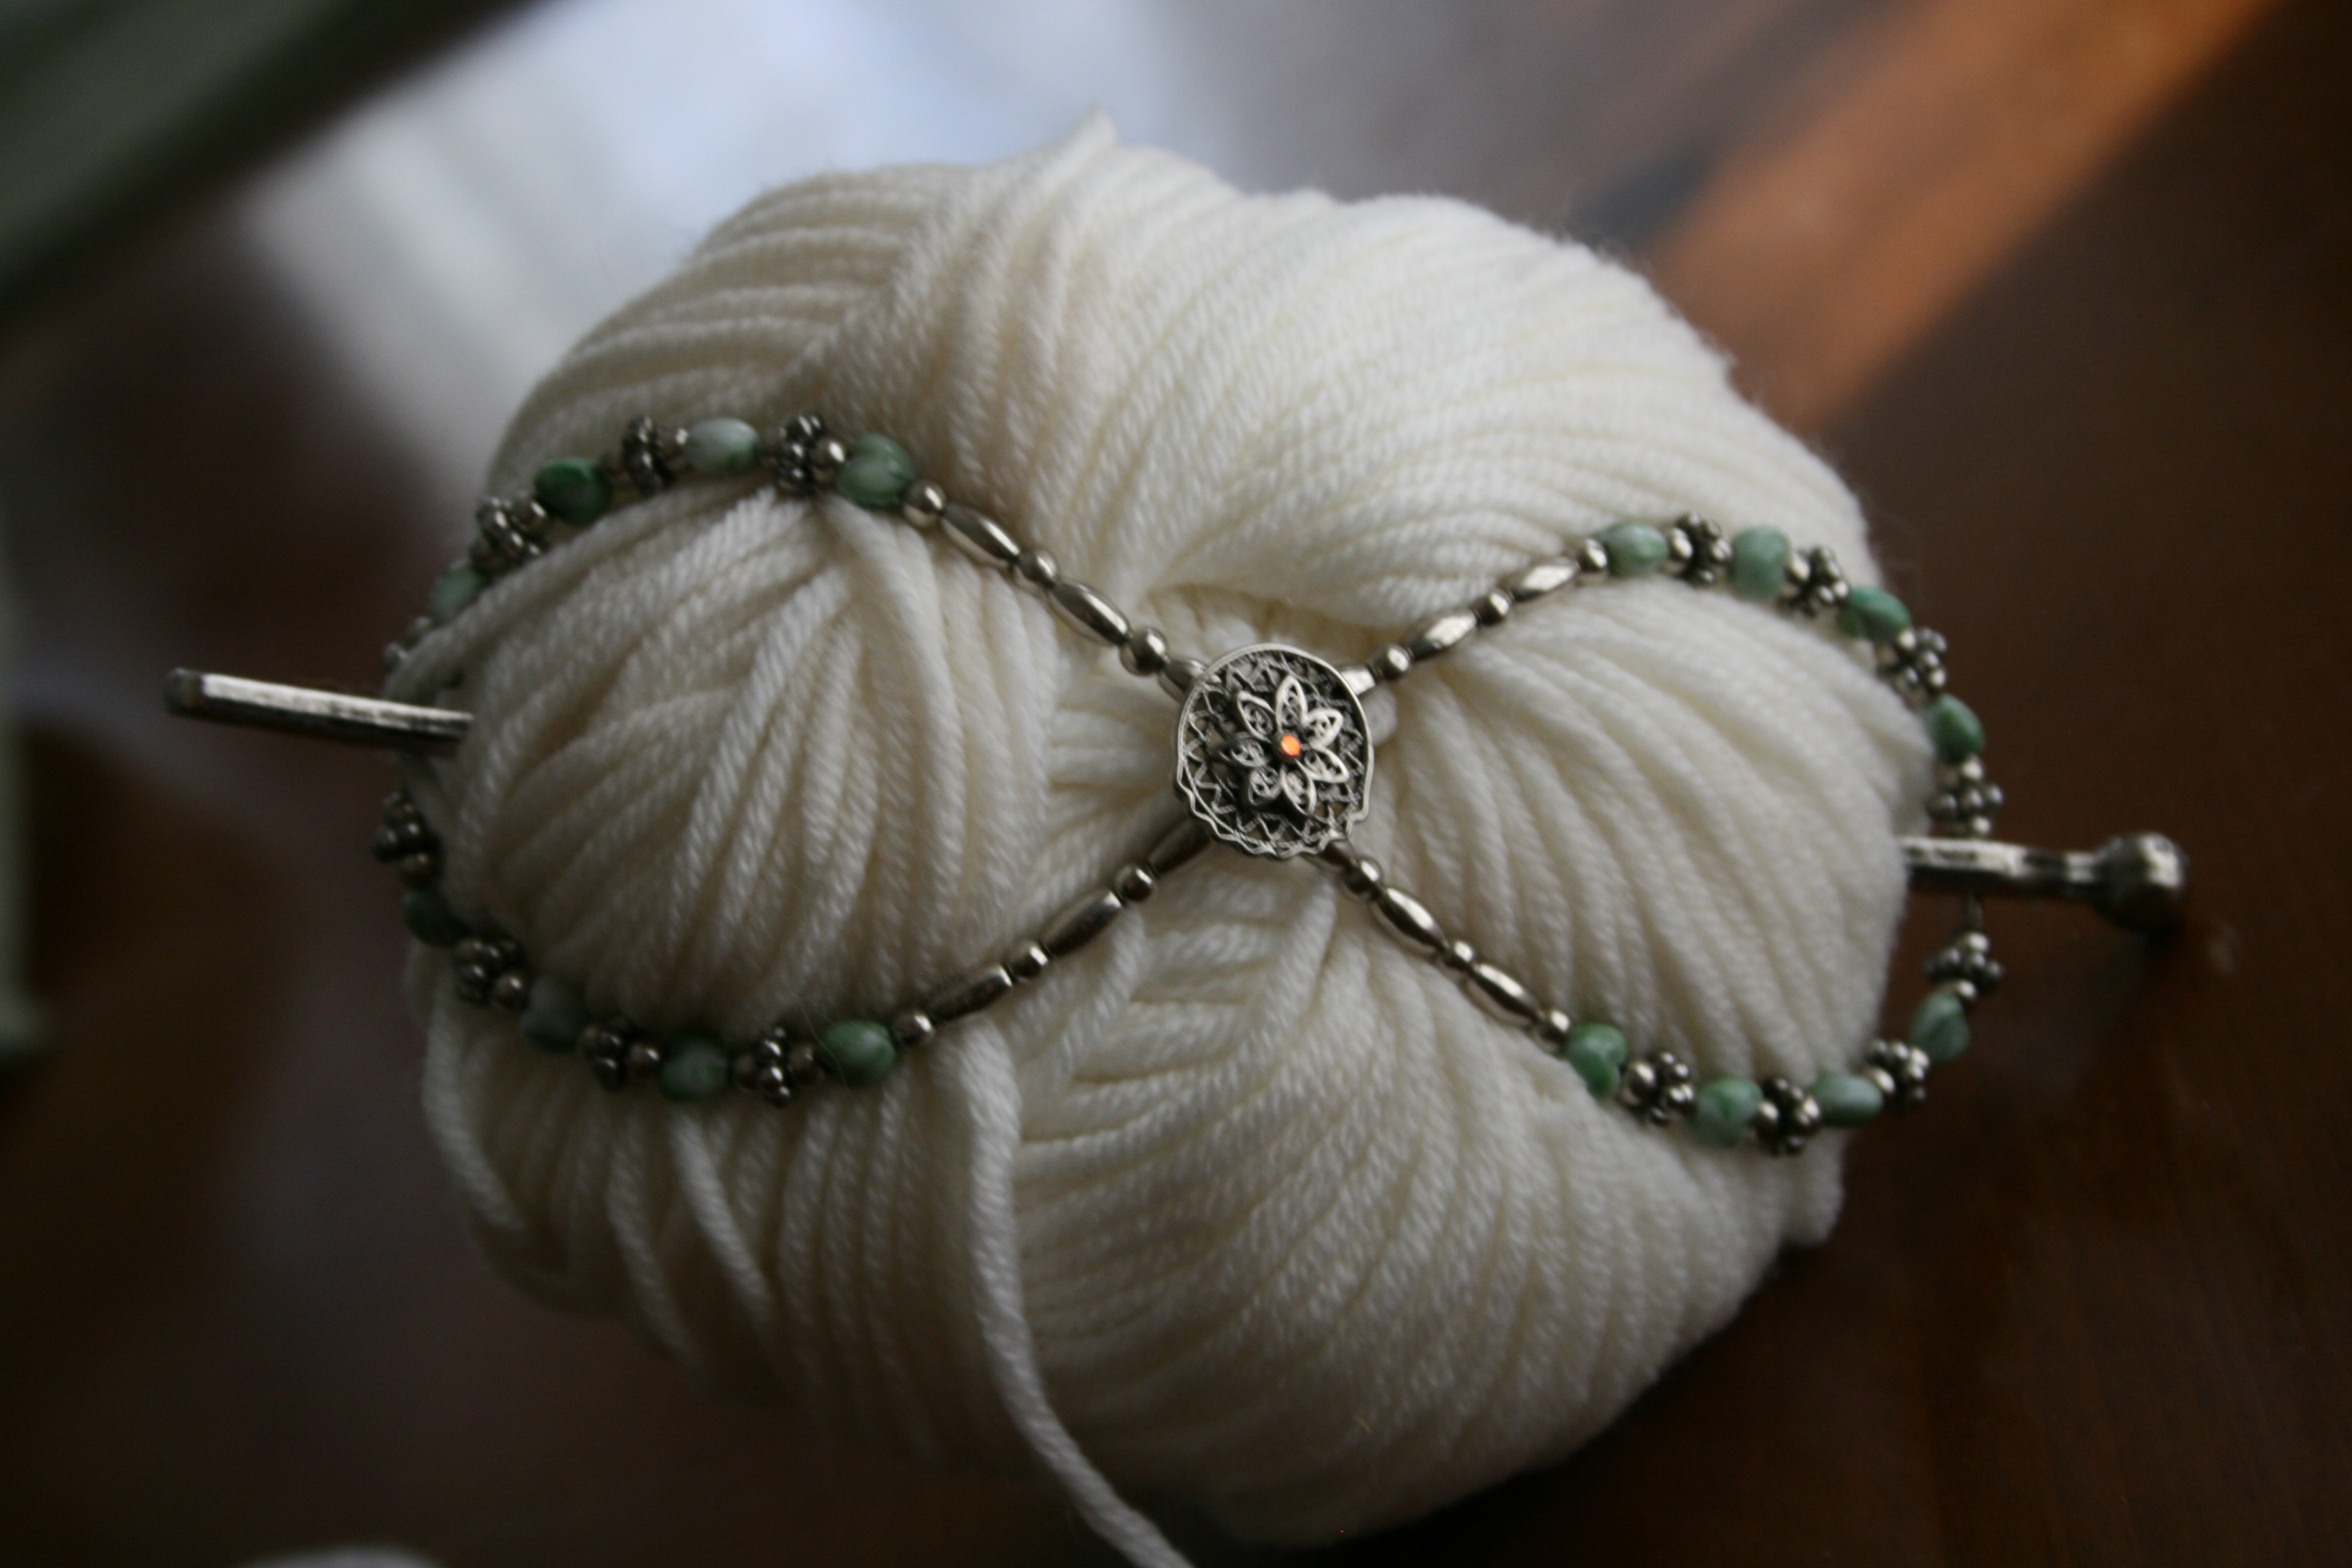
Lisa Souza Dyeworks is releasing a few new yarns, and being a designer means that I can sometimes get my hands on this yarn early to create some new ideas. As was the case with Nyam (a Superfine Merino and Cashmere fine weight yarn) and Pyrenees Bulky (a 100% Organic Merino yarn) I was able to create a 1 skein project that is perfect for the holidays.

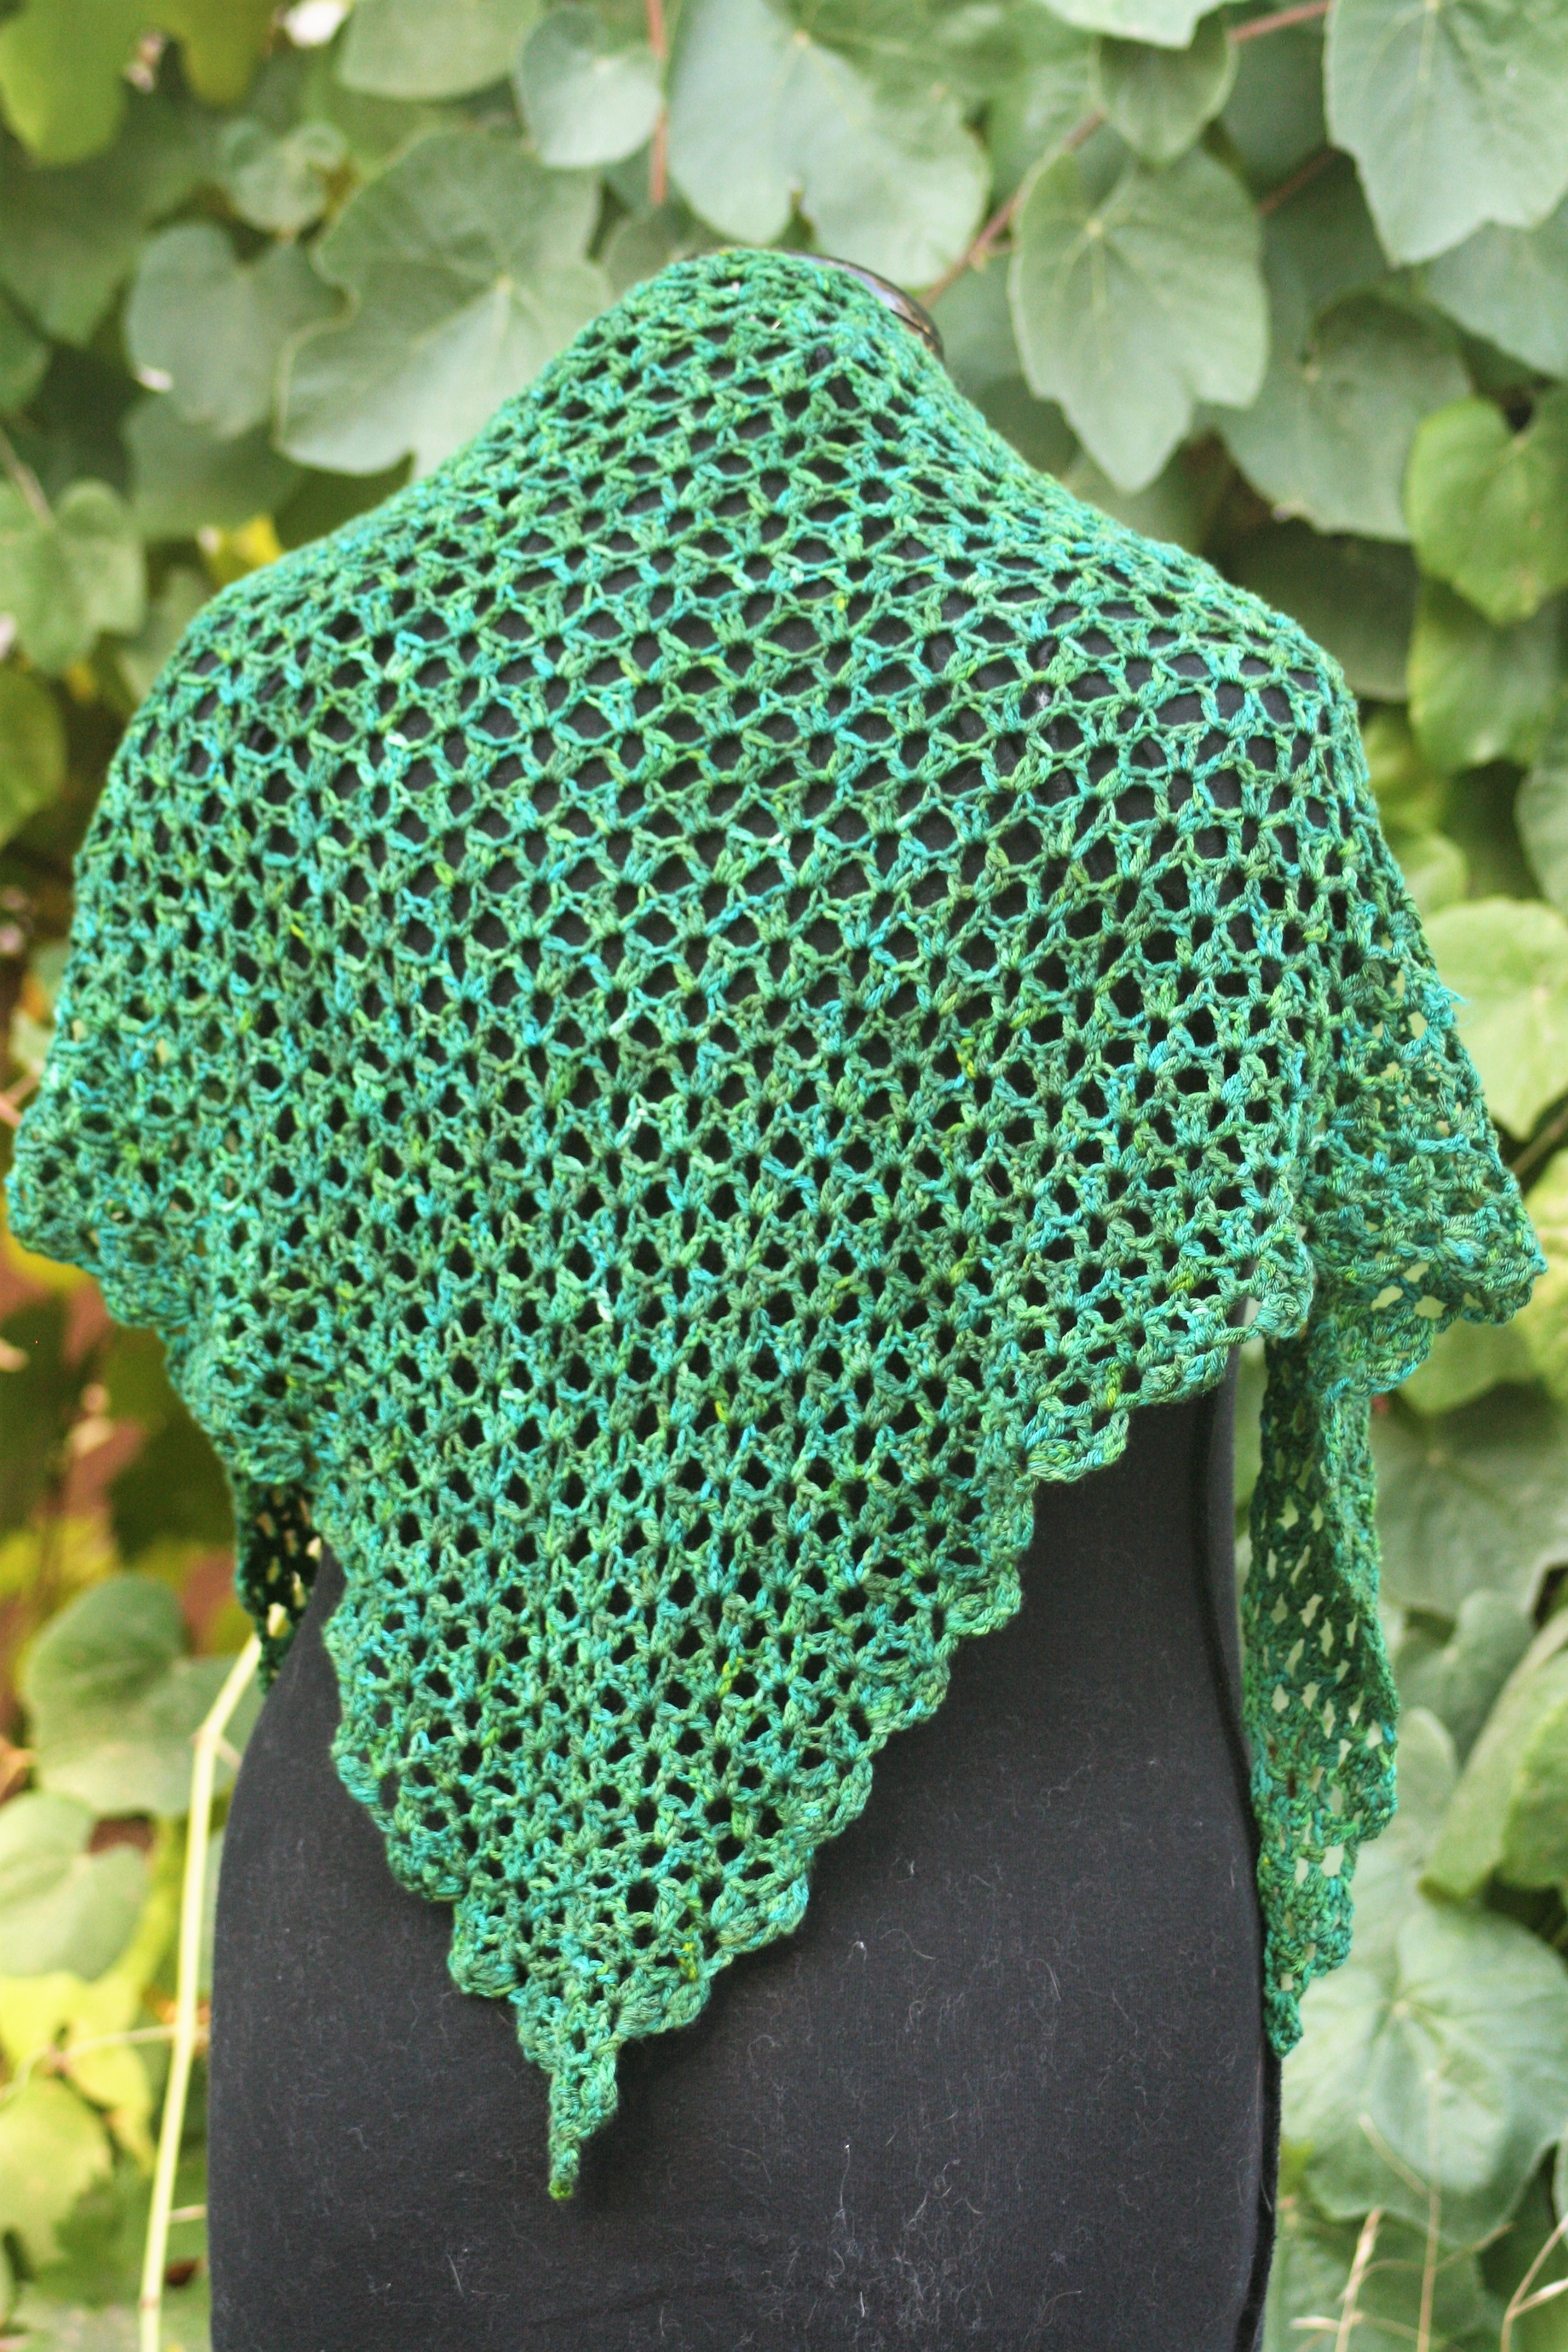
Nyam lent itself particularly well to my new pattern, Contextual Shawl. This shawl is a simple one row repeat that can really flatter almost any yarn, of any weight, of any size, any fiber content. The size can easily be adjusted to make it larger or smaller, and yet to look at it the pattern is not readily apparent. It works up fast and can be used as a project on the go. I can see this in so many different colors and styles that the possibilities are endless.

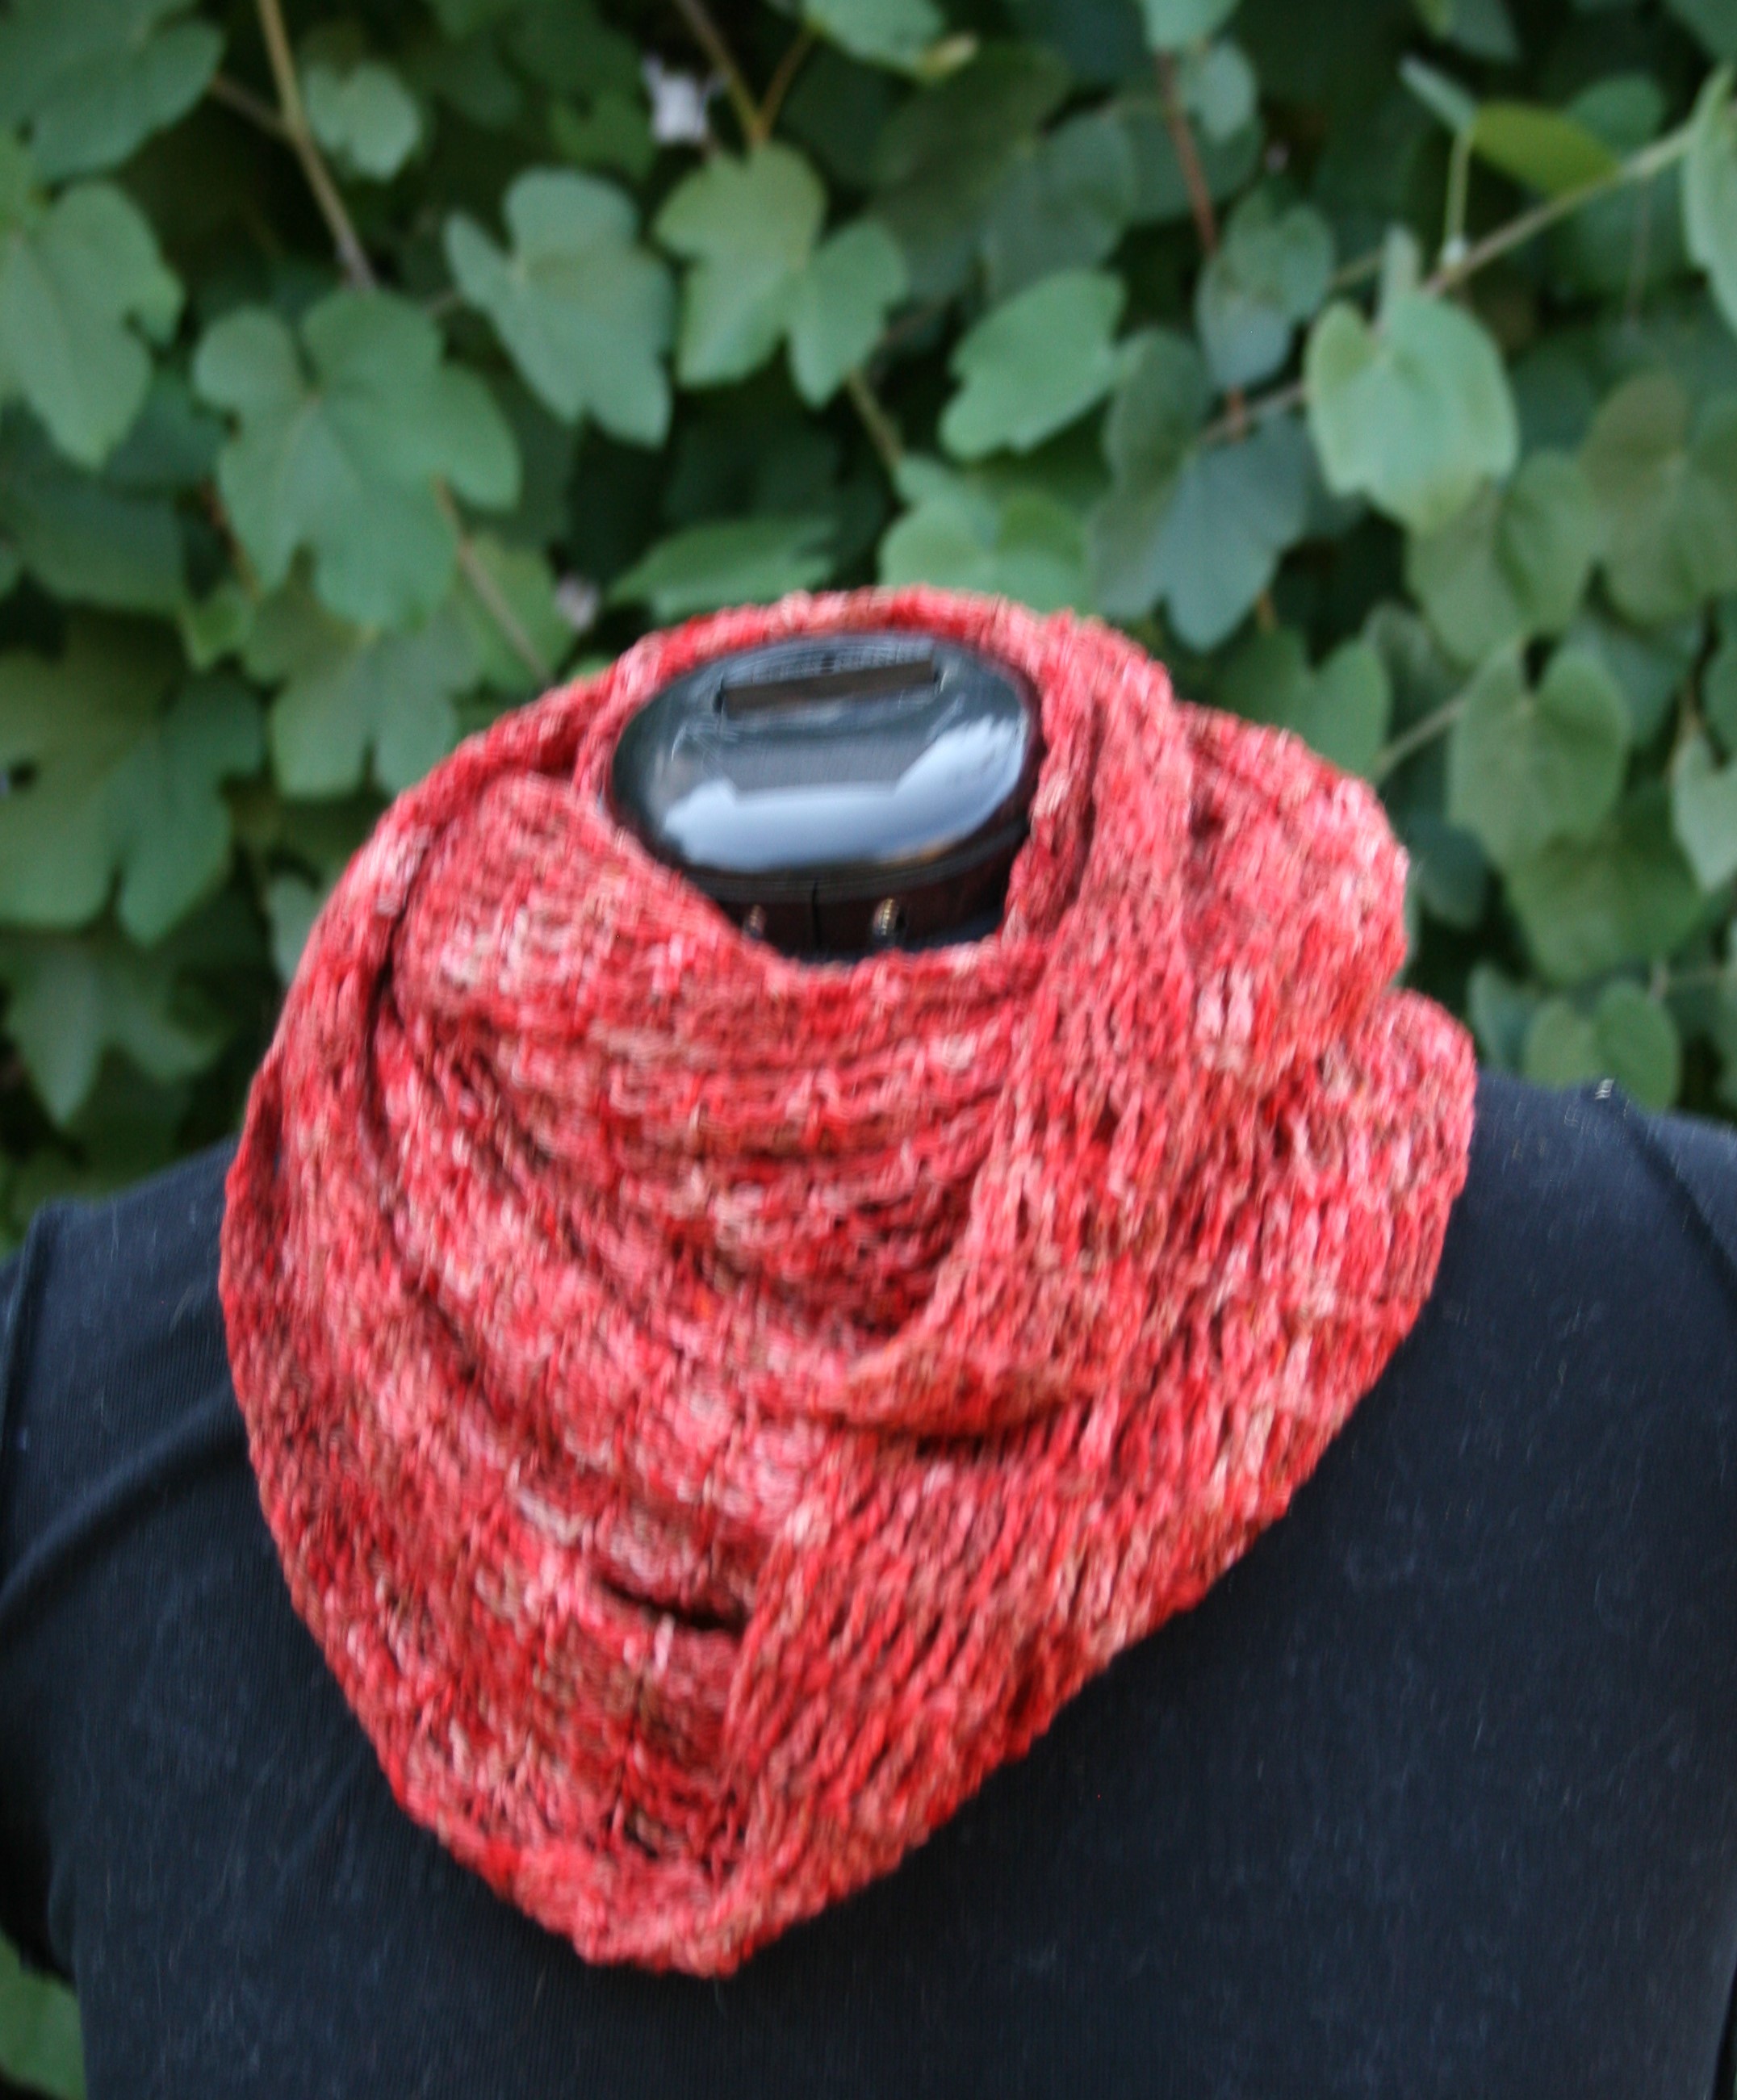
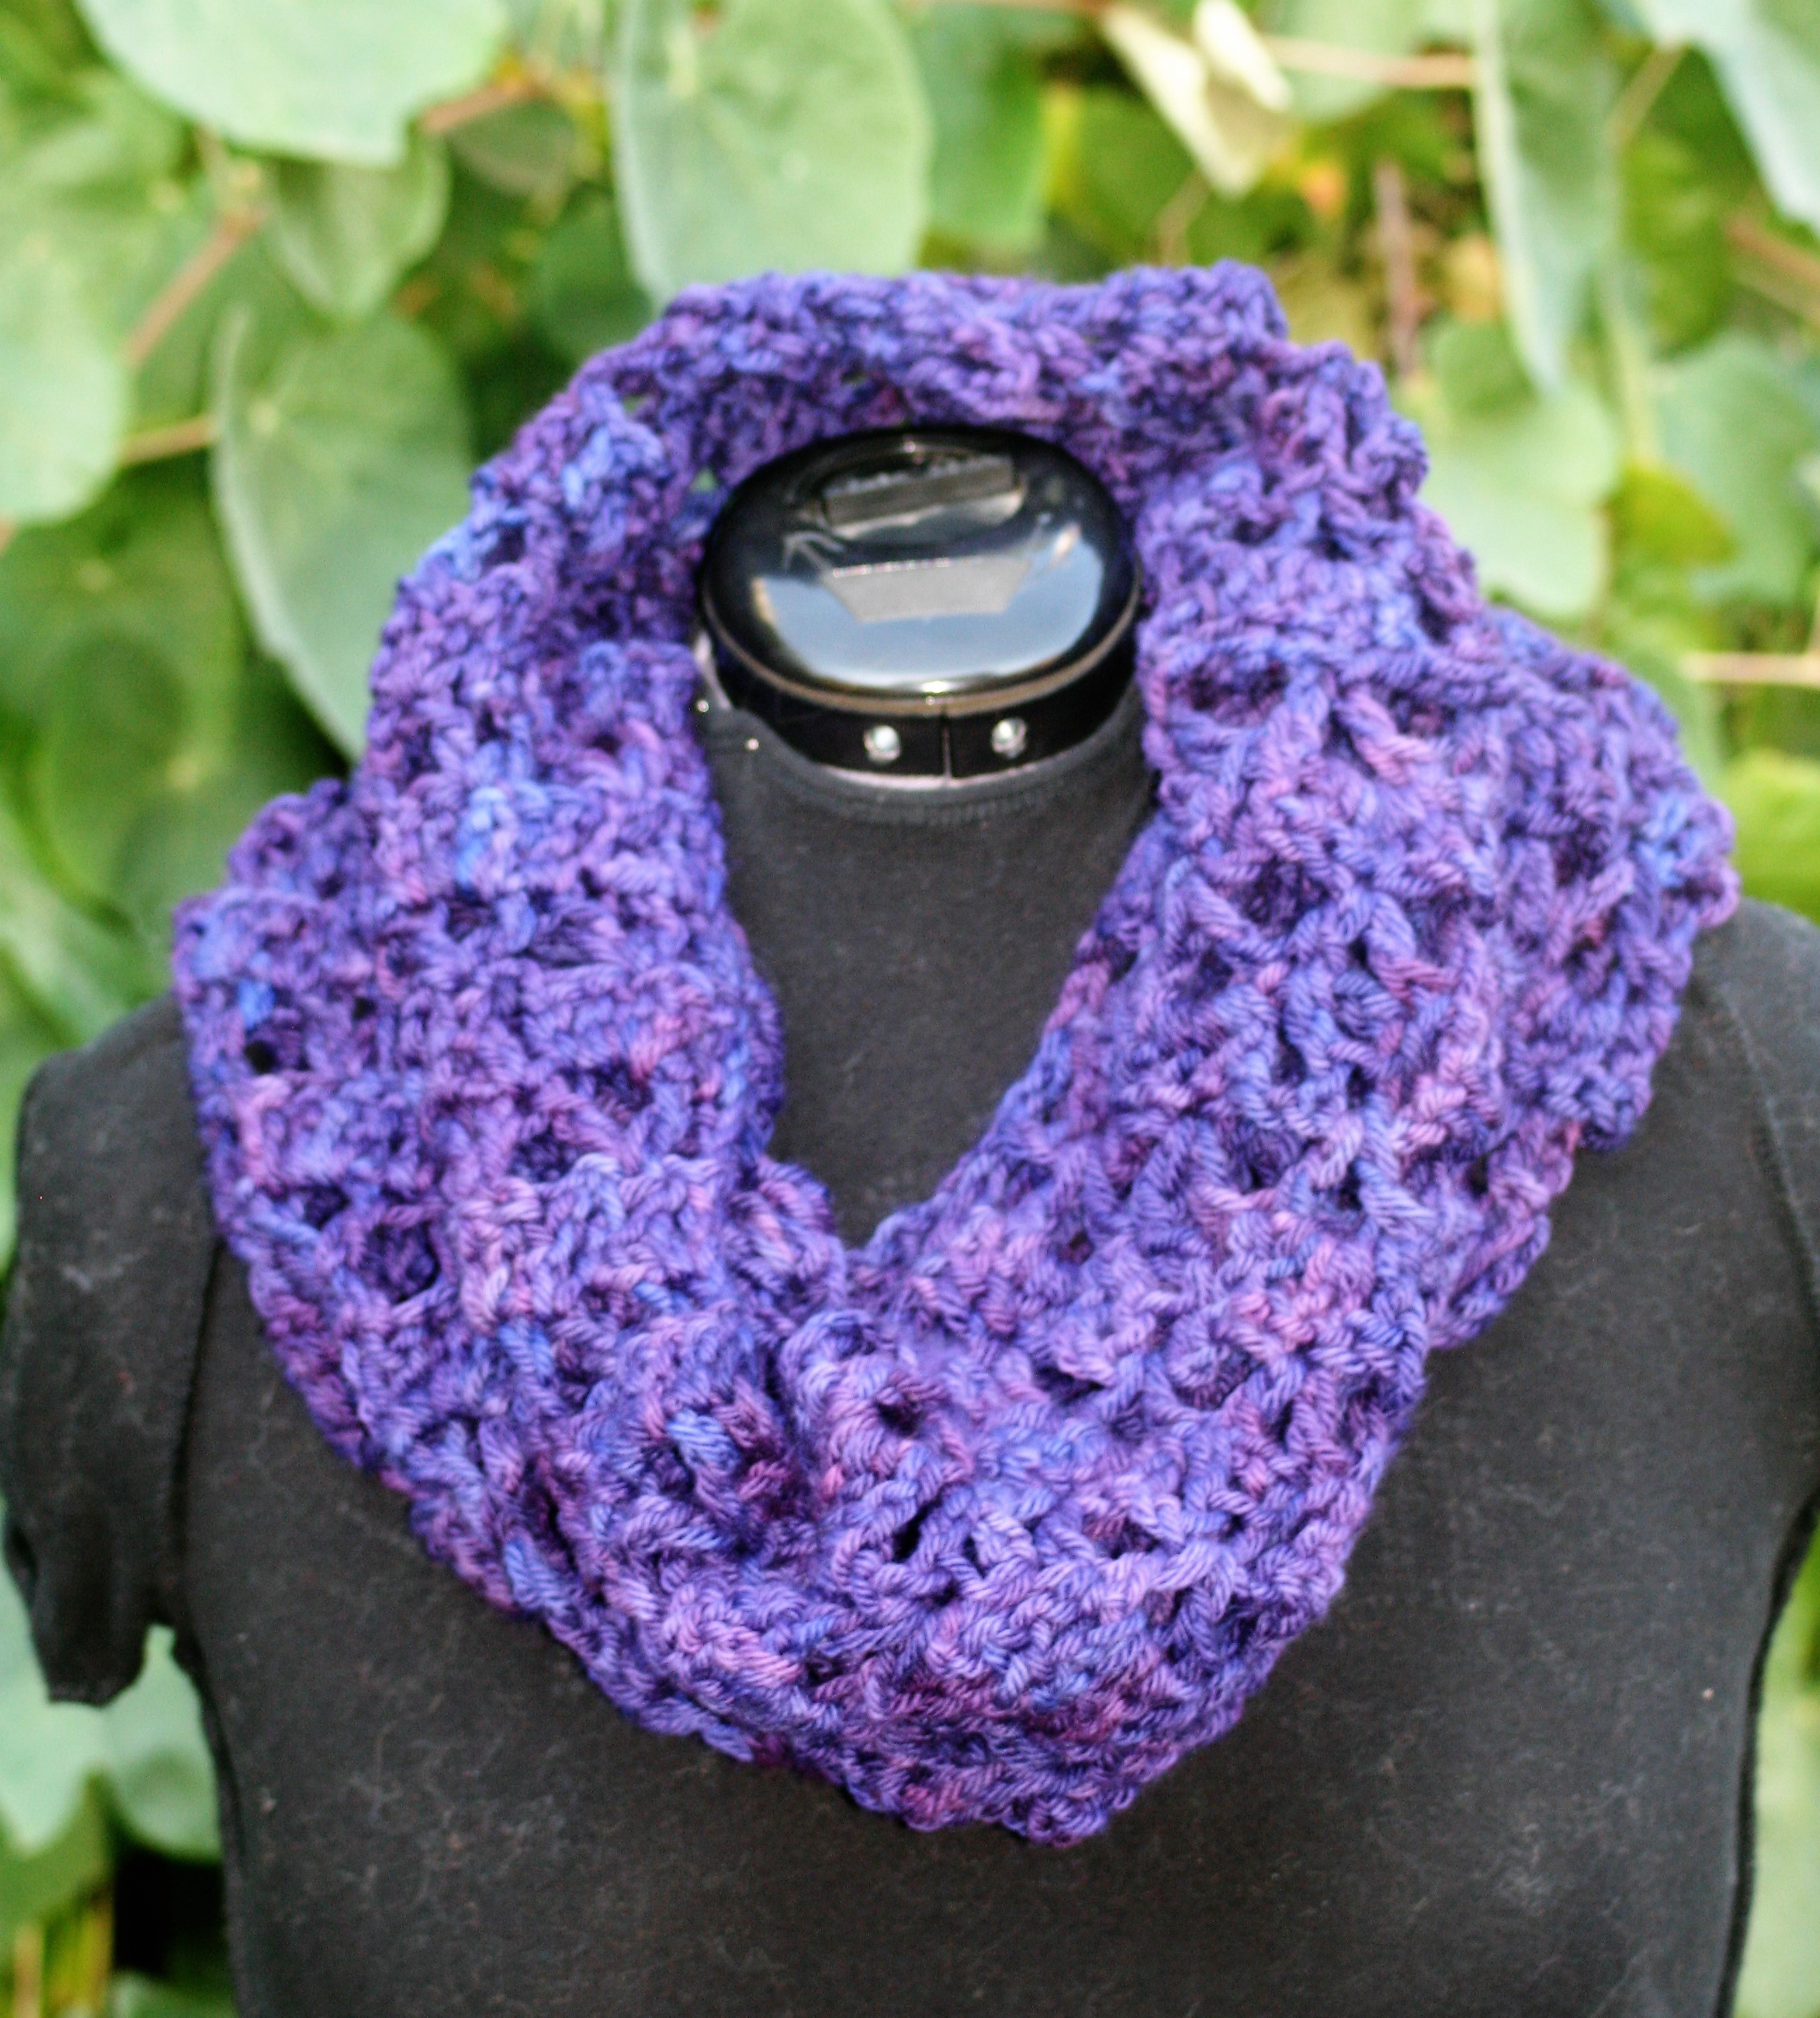
Matrix Hooded Cowl worked up great in Pyrenees Bulky. I have not made a lot of cowls in the past, but I can see the appeal. This cowl is again a one skein project that is nice and wide, and the perfect size in my opinion to warm the neck and offer protection form the cold as a hood. The pattern actually has a mirroring quality to it, as halfway across the row you work the mirror image of the beginning. It is a 4 row repeat that has a bit of fun with stacked shapes. Don’t let the open spaces fool you, paired with this yarn it is quite warm, making it tighter might just make it unwearable.

As a special offer to you, as a reader, please enjoy 50% off either of these patterns at my Ravelry Store for the next month (They will be only $2.00 then on November 30 the price resets to its original $4.00). Enjoy your quick paced autumn season.

Links:

Ravelry Store

Contextual Shawl

Matrix Hooded Cowl

Art With More Than One Use- That’s Value

I really love when I can see a real value in something. When something can fulfill different needs; when something is a real workhorse; and it if looks great while doing it, that is placing it over the top. When talking to a longtime friend of mine, I realized that her new business venture was of a product that met this description.

Lilla Rose creates hair products, which I admit are a bit different then what I have seen before. On the surface it looks like a typical hair tie, but it is actually flexible. Made from what I understand as piano wire, it is sturdy; so it holds its shape and such, but it is also flexible so that it can catch your hair more like almost a net and then cradle it. This helps it to feel comfortable all day long. 

Another different feature is that the pin that holds it in place, is actually attached to the tie, so that is it never lost, and it is in the correct place every time to keep your hair in place.

So, now what makes this a work horse, well, aside from the many different styles and looks, it also works great as a shawl pin. It adds a perfect locked in approach to keeping my shawl in place without slipping and sliding around. With the pin attached I know that it will not fall through or twist around. I know that when I put it in my shawl, it will stay. 

Then after some playing around I think I found my favorite latest use…holding my yarn balls in place. When I am working with multiple colors in the same fabric, it never fails…I get the yarn completely tangled and if I am using balls they are rolling everywhere. I can use multiple yarn bowls, but sometimes that is not practical as I am traveling with my work. However these hair clips fit perfectly in the yarn, and prevents it from rolling, while securing the end where I want it. 

I know this might seem like a small thing, holding yarn in place, either on the ball or my shawl, but sometimes it is the small things that really make a difference.

I am glad my friend and I had a chat about her products, as I think I have found a new “go-to” for a few different things. You can check out her clips here… http://www.lillarose.biz/proverbs31

Free Pattern- Tapper Cowl

It started a couple of years ago, I took a trip with Lisa Souza Dyeworks to the New York Sheep and Wool Festival, known to many simply as Rhinebeck. I teamed up with Lisa and began offering a free pattern to go along with her limited edition yarn for the show. This next weekend, Rhinebeck is occurring again, just as it does every October, and I have another new pattern for you featured yarn (this year it is in Deluxe Sock!).

Instead of making it only available to those that attend the show, this year I decided to share it with you, my followers as well. I hope you enjoy this quick and relatively simple one skein project. If you want to try it in the same yarn you can order it here (www.lisaknit.com), I don’t know if the same color will be available as it is a limited edition, but there are many other beautiful ones to choose from.

If you decide you want to change the yarn, it is pretty forgiving for substitutions, but I would recommend a yarn that is no larger then a 3 weight (sport), with the best being a 2 weight (fingering).

If you would like a printer friendly version, I have one available on Ravelry for $2.

Tapper Cowl

Stunningly simple, yet the effect is confident and enjoyable. This simple stitch pattern allows the yarn to be the star; it has great drape and fabulous flow. Long enough to double up, and wide enough to act as a hood, a cowl that is versatile.   

Skill Level: Advanced Beginner    Finished Size Approximately: 52”x 17”

Materials List:

  • I/9/5.50mm size crochet hook
  • Lisa Souza Dyeworks Deluxe Sock! light weight 80% Superwash Merino,10% Nylon, 10% Cashmere (4oz/495yds): 1 skein color: Rhinebeck 2017 (www.lisaknit.com)
  • Tapestry needle

Gauge: 4 ½ (sc, ch 3) groups/13 rows= 4”

Pattern Note /Special Stitches

This pattern is worked in the round, without turning.

Pattern

Rnd 1: Ch 233, sc in 2nd ch from hook, ch 3, sk 3, [sc in next ch, ch 3, sk 3] 57 times, sk last 3 sts, sl st to beg sc. -58 sc, (58) ch-3 sps

Rnd 2: Ch 1, sc in same st, ch 3, [sc in next sc, ch 3] around, sl st to beg sc.

Row 3-55: Rep Rnd 2.

Finishing- Weave in ends, attaching beg of original chain to the bottom of the first sc st, block as desired.

Abbreviations:

ch: chain

rep: repeat

sc: single crochet

sk: skip

sp(s): space(s)

st(s): stitch(es)

Don’t Under Estimate What You Don’t Understand- Pom-Poms

There are many ways to embellish with yarn, such as tassels and fringe, and then there is pom-poms. In my years of crocheting pom-poms have probably been my least liked of the three noted above. This is because I found they were a bit labor intensive and yarn consuming, and I could never replicate one…each looked very individual.

As a kid I understood pom-poms as short strands of yarn that were all tied together in the middle. There are supposed to be enough strands to push outward and create a sphere. I would wrap yarn around a ruler, or small book; much in the same manner I would create fringe only smaller. I attempted to tie these together to create the sphere. I found that that had a lot of trimming to do to make this item look like a ball, and this left yarn scraps everywhere. With my hand trimming no two balls ever looked alike.

I had found some other directions in books, about making cardboard rings, two that matched, and wrapping the yarn around the ring to create a pom-pom. Honestly, I never completely tried it. The cardboard I had access to was pretty light weight, as from a cereal box, and this did not lend itself well to having yarn wrapped around it. Also, I did not fully understand what the directions were asking me to do. I thought that maybe this was just one of those novelty things. As a result, I rarely made or worked with these little balls of fluff.

Recently I had a student that had purchased a pom-pom maker, and was attempting to put it to use. I was skeptical. I thought “another novelty idea”, but then we played with it and all the concepts I didn’t understand before came into clarity. By working over these two pieces of plastic, shaped in a ring like the cardboard directions had suggested, I understood that the two pieces were to help you cut and tie the pom-pom. The reason for the circular shape was that the yarn was evenly placed in the tie, unlike my wrap of a ruler where the yarn was more focused at a point. This rounding at the tie helped form the sphere shape, and also used a lot less yarn! By using a template, use as this tool, it is much easier to make more than one and have them come out the same size.

Having helped my student understand this tool, I gained a filling in my knowledge void, and started to think of ways I could use these balls; maybe some garland, tops of hats, edges of scarves. I must remember, never dismiss anything as a novelty until I actually understand it.

Stitch Order Can Make All the Difference

Simple stitch switches can create a very different appearance. Sometimes these “switches” happen by mistake…I speak from experience, and sometimes they are thoroughly thought out.

Often my students look at me with a bit of “sure, that is true” look whenever I explain that crochet essentially has only 3 stitches, everything else is just variations. They think I am even crazier when I explain, it is all about stitch location that causes all the different looks.

I happened to reinforce this for myself just the other day. I was working up a pattern, and looking at my notes it stated “sc, dc” stitches. Pretty straight forward and I thought I knew what I meant, however when working up my fabric is was not looking like the sample swatch.

I had to go back and study my sample swatch…I was working my stitches in the single crochet on both fabrics so why were they so different in appearance? I finally found my answer….I worked the stitches in the opposite order. I was working a single crochet then a double crochet in the next single crochet stitch in the swatch sample, but in the fabric I was working a double crochet then a single crochet in the next single crochet stitch. Wow, I was surprised by the difference it caused.

One swatch looks like little blocks turned slightly aside, while the other looks a bit lacy, and almost like a stacked “v”. They are both worked with the same hook, the same yarn, the same number of stitches, yet the simple error of working the stitches in the opposite order caused a very different look.

I plan on playing around more with “switching” my stitches, you never know where I new idea can be generated and maybe by intentionally changing the stitch order I might find something truly fabulous…I will have to keep you posted.