I have begun decorating candy canes with lace to help get into the mood for a great holiday season.
Honestly, I am not a fan of the candy cane. It is a candy that I usually pass on, but I have a couple of candy canes that have decorated my tree for decades. A friend created these decorated candy canes and I treasure them.
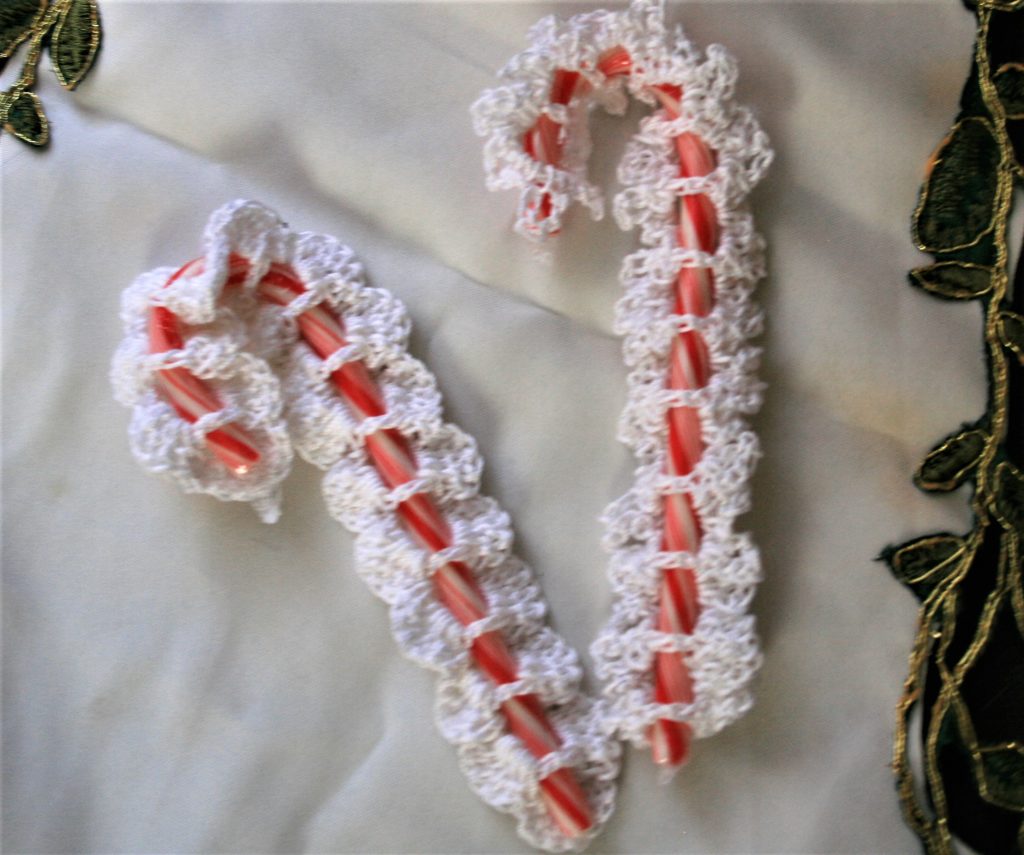
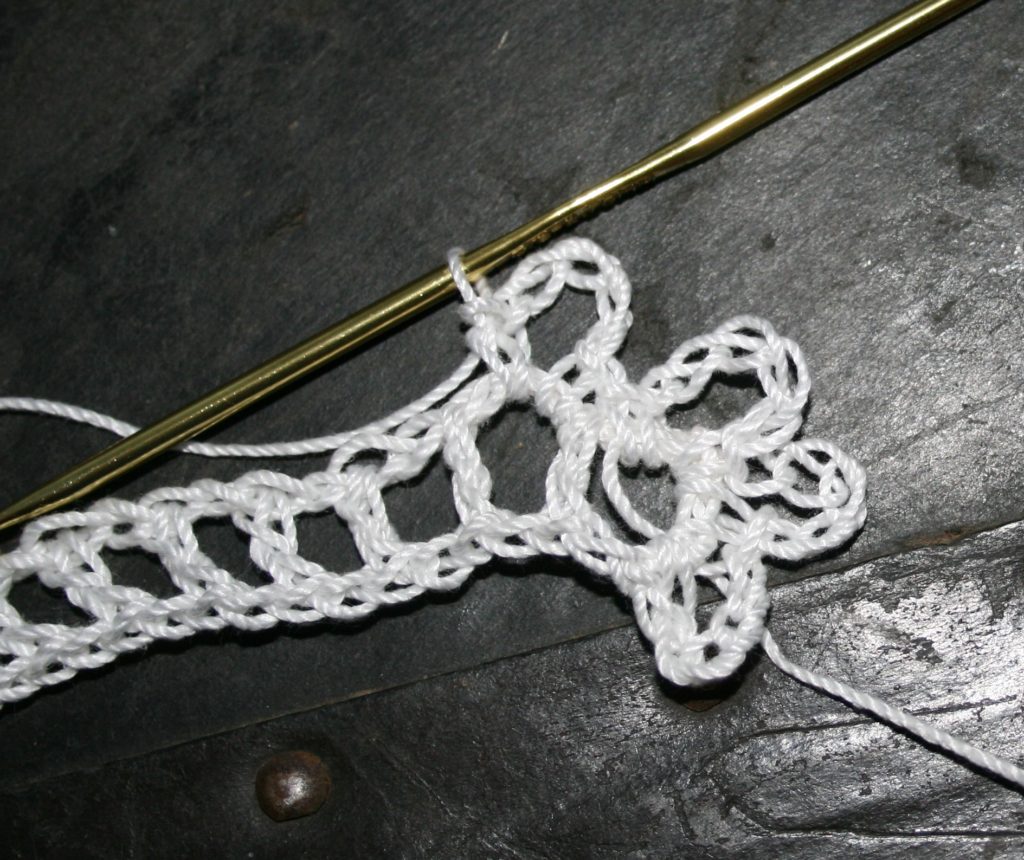
Candy Cane Lace Solid Shells and Lacy Loops
I want to share my own approach to these decorations to help adorn your tree or even a package or gift. Since it is a simple two row pattern that you can be altered and personalized many ways it is great way to spread cheer.
Materials
#10 Crochet Cotton Thread (or a lace weight yarn)
C/2/2.75mm crochet hook
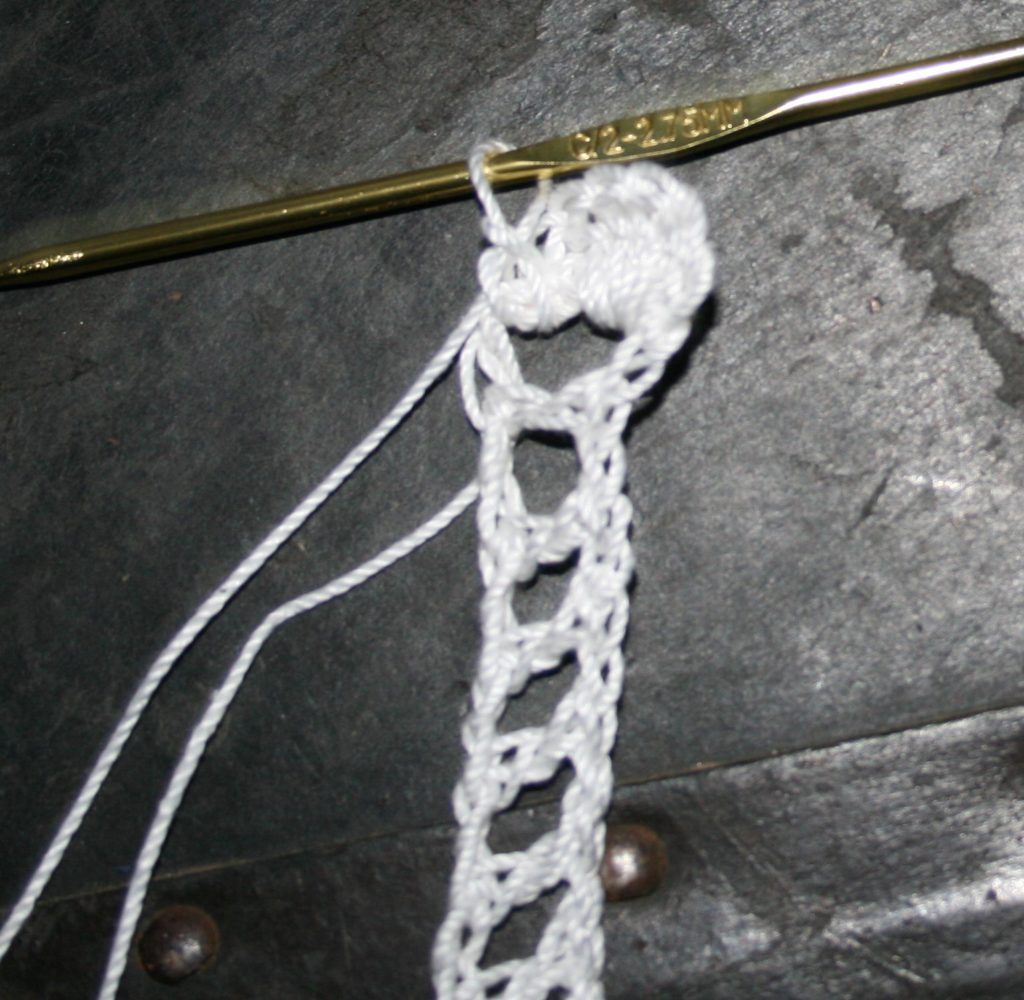
The First Row- Creates the Woven Strip
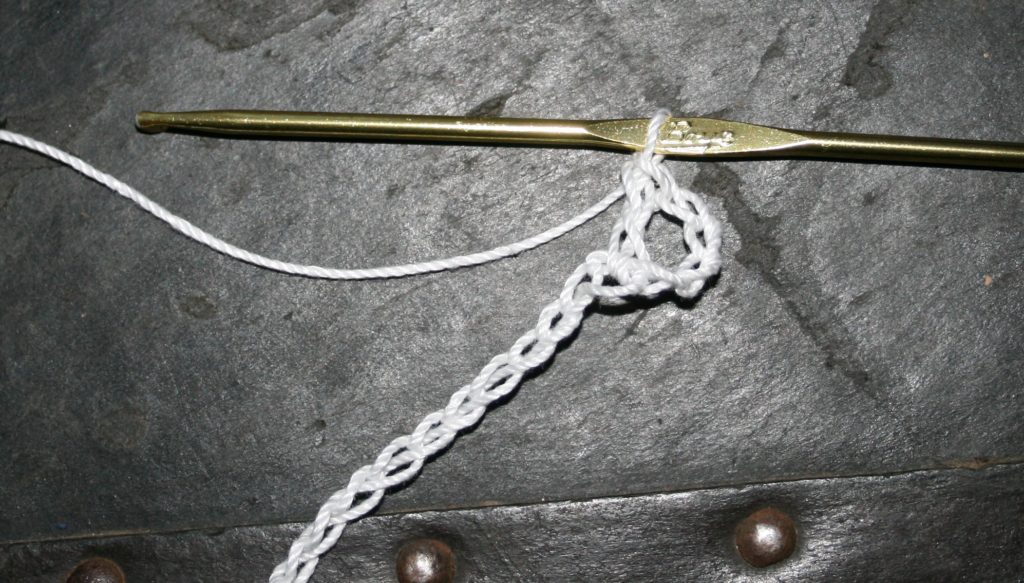
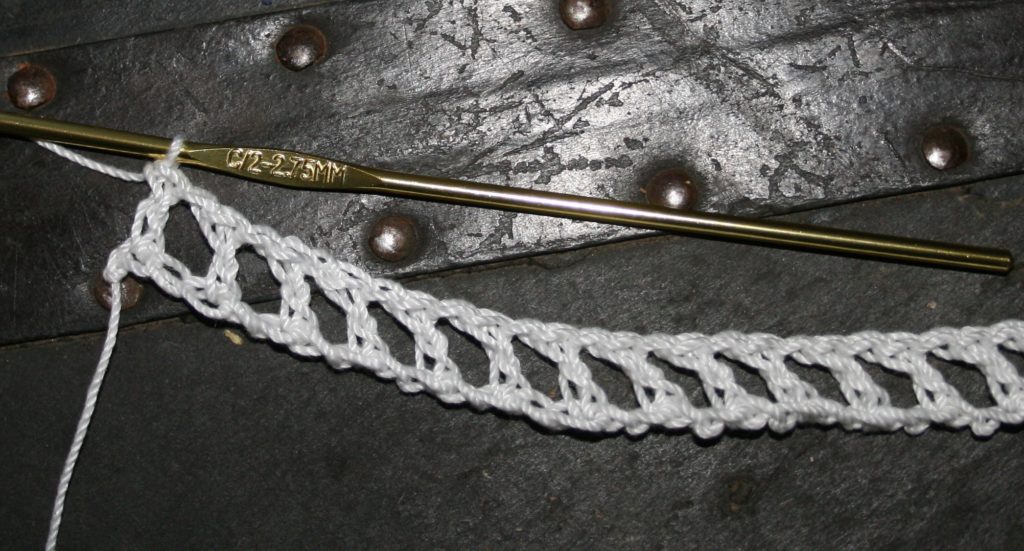
Row 1: Ch 55, dc in 6th ch from hook, [ch 1, sk 1, dc in next st] across.
Make a chain as log as the candy cane working an odd number (basic candy cane works at 55 chains)DC in the 6th chain from the hookChain 1, skip 1, dc in next chain, across. This is the ladder bade that the candy cane will weave through
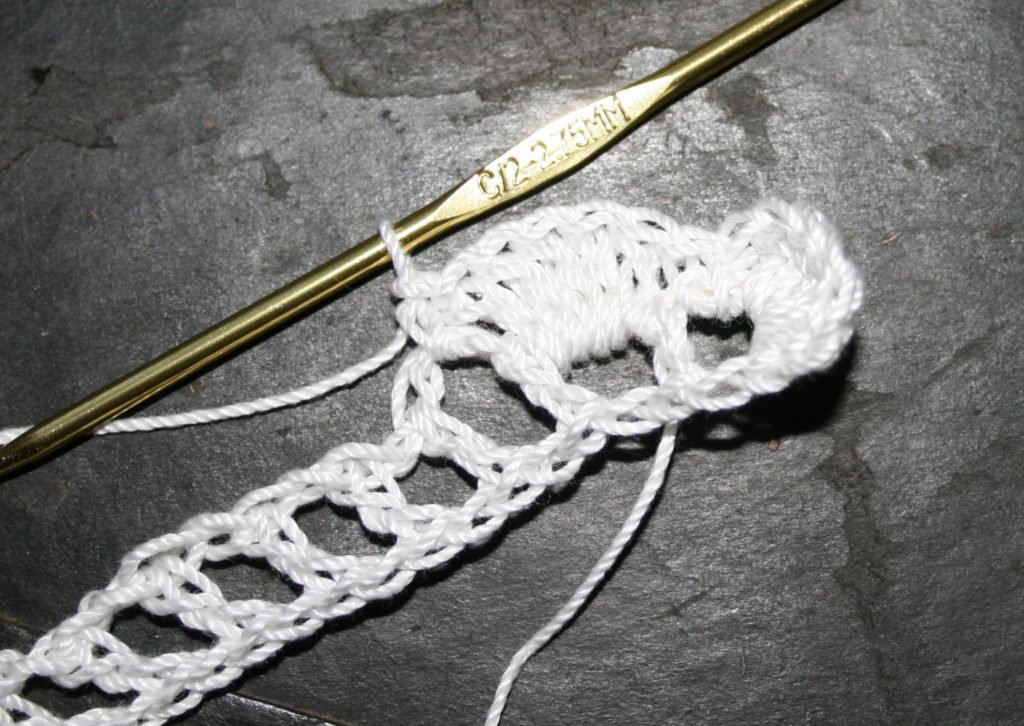
Option 1- Solid Shells
Round 1 Option Solid Shells: Ch 1, working around the last dc st or Row 1, sc around post, ch 1, 5 dc around same post, ch 1, sc around same post, turn to work over beginning ch, [5 dc in next ch-1 sp, sc in next ch-1 sp] across to end, ch 1, working around the end ch-5 loop, 5 dc in same space, ch 1, sc in same sp, turn to work over the top of Row 1, 5 dc in next ch-1 sp, [sc in next ch-1 sp, 5 dc in next ch-1 sp] across, sl st to first sc. Fasten off.
To start the shell lace, sc 5 dc sc in the end of the laddersc in the next ladder rung, 5 dc in the next ladder rung, sc in the next ladder rung, across to the other end and repeat all the way around the other sideSolid Shell Lace
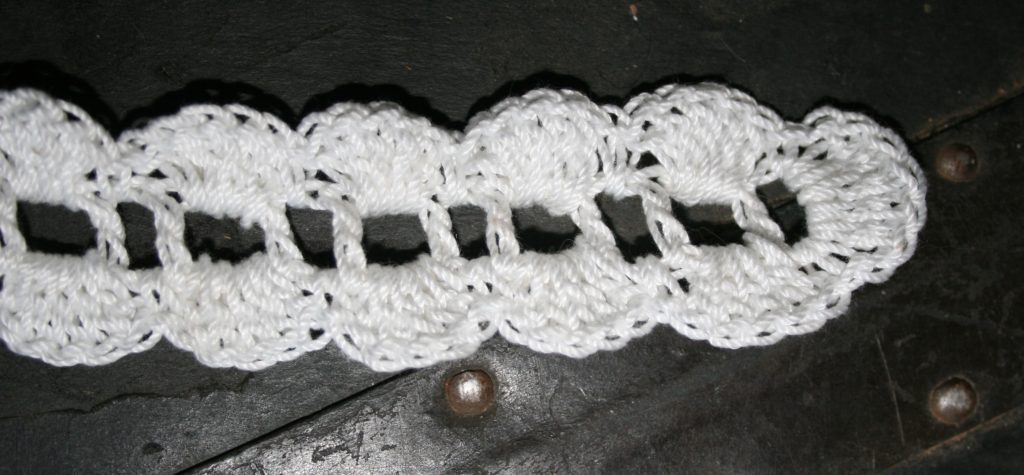
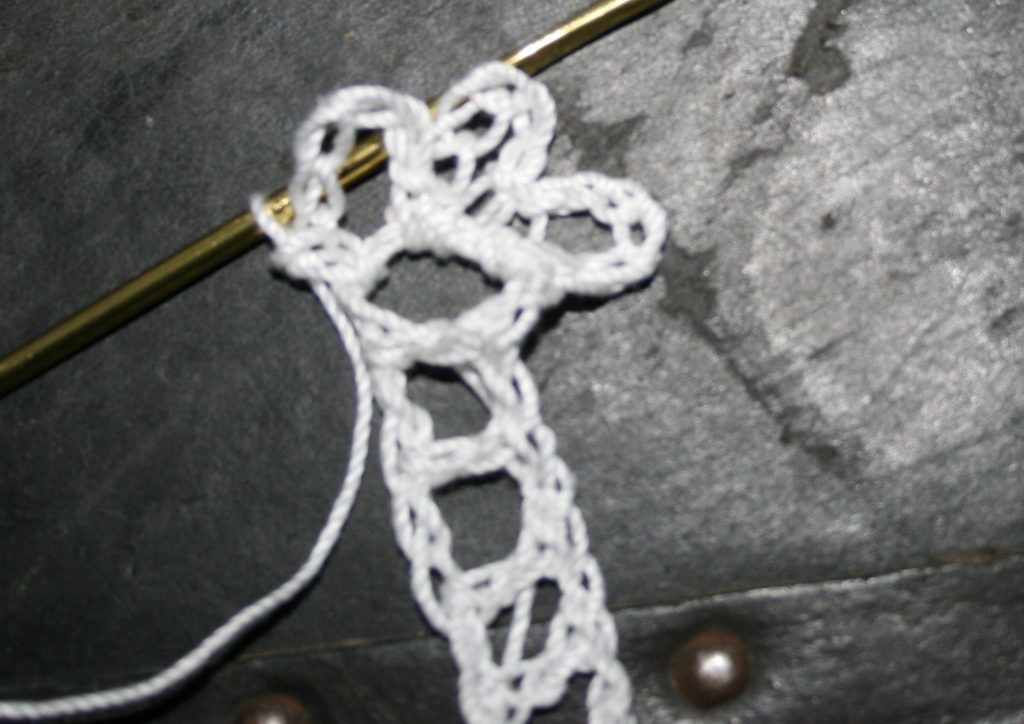
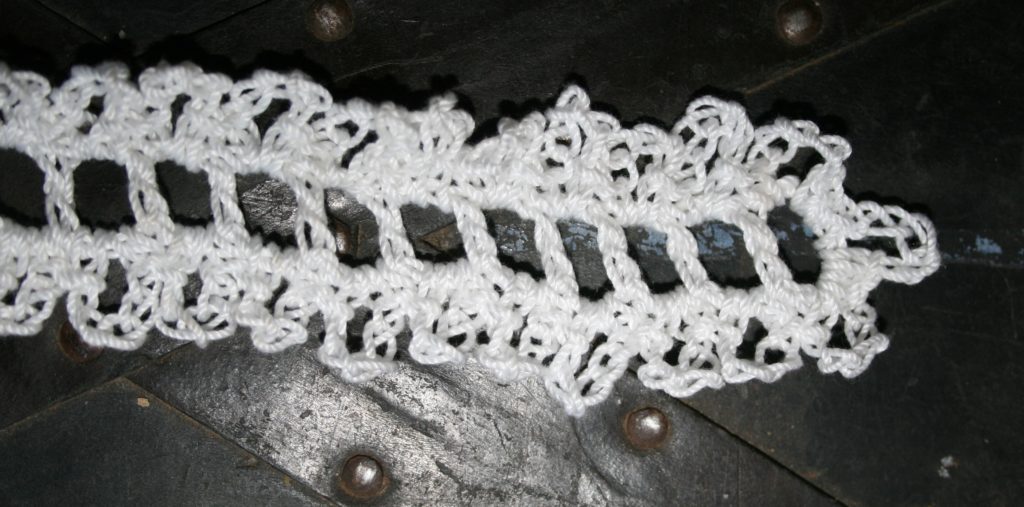
Option 2 Lacy Loops
Round 1 Option Lacy Loops: [(sc, ch 5, sc)] 3 times around last dc, (sc, ch 5, sc) in each ch-1 sp across to other end, [(sc, ch 5, sc)] 3 times around beg ch-5 loop, (sc, ch 5, sc) in each ch-1 sp across, sl st to join. Fasten off.
To start Loops end work sc ch 5 sc, 3 times in end of the laddersc ch 5 sc in each rung aroundLacy Loops
Finishing Up
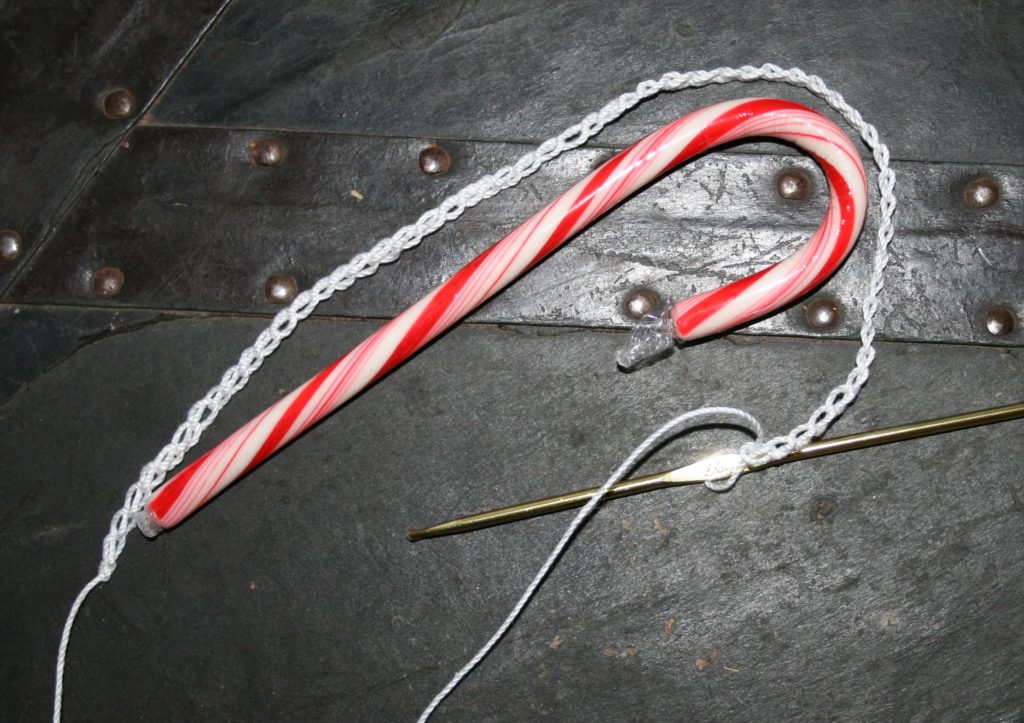
Weave in ends and weave candy cane through the spaces or Row 1.
A free pattern means that it is that time again, the New York Sheep and Wool Festival (a.k.a Rhinebeck)! Just like most everything else this year, it will be done a bit differently…as in virtually (find out information here).
This means that you do not have to live in or travel to Duchess County New York. You can be anywhere in the world and take classes, visit booths, and get a little hint of the New England turning leaves.
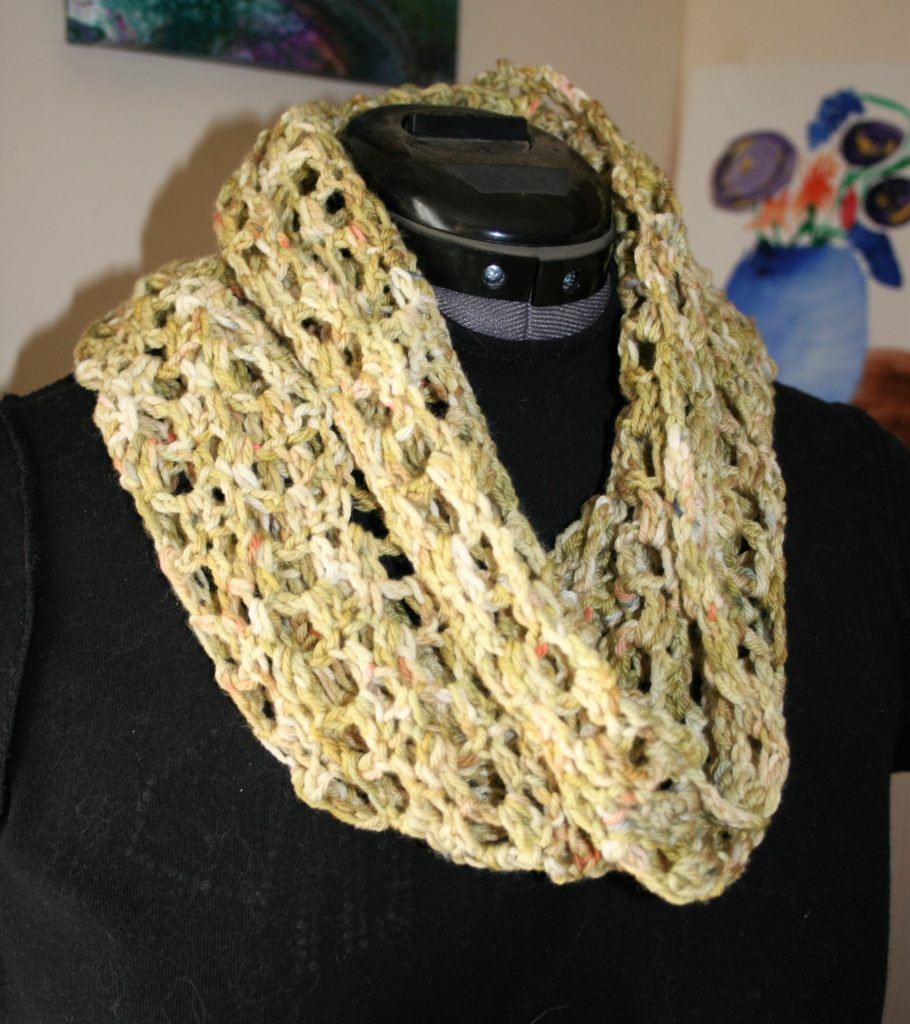
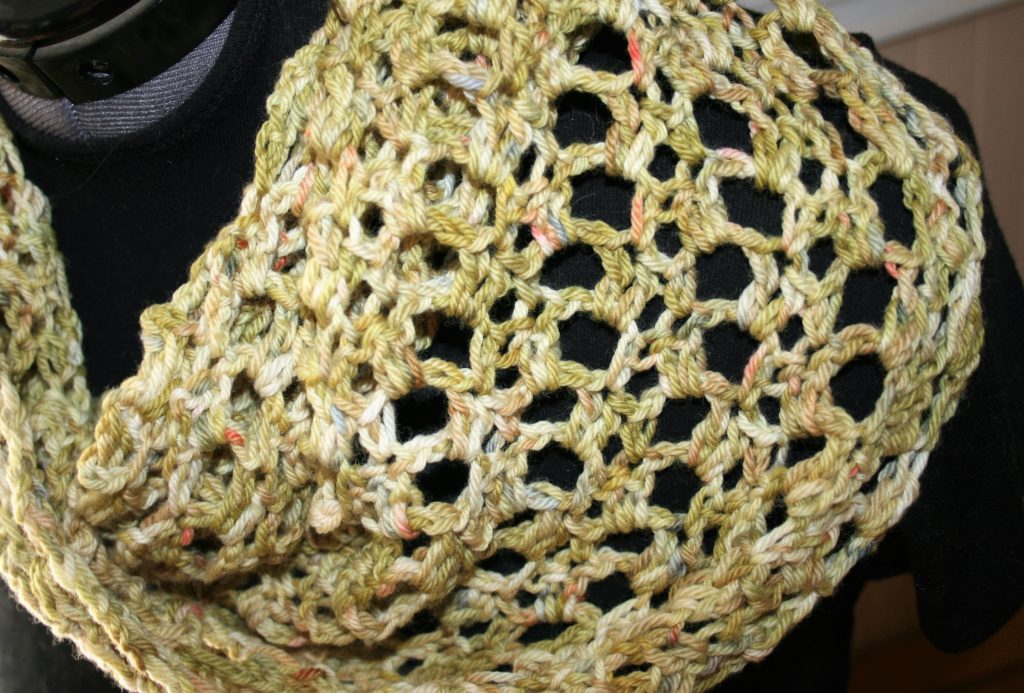
Lisa’s Ladder Cowl
For the last several years I have been teaming up with Lisa Souza Dyeworks and providing a free pattern to accompany her limited addition colorway for the week. This year is no different.
Help me help local communities by creating blocks for Warm Up America, by making a block for yourself and one for a community project with this free pattern. I will be creating a new block every two weeks and sharing it with you, I just ask that make one for donation.
Warm Up America is a nation wide organization that encourages local donations, but will also except donations to be sent to their office so that blocks can be assembled and then blankets can be donated through the United States.
Even if you do not want to participate with Warm Up America, please consider creating blocks, or blankets for your local community. There are various places in every community that accept donations.
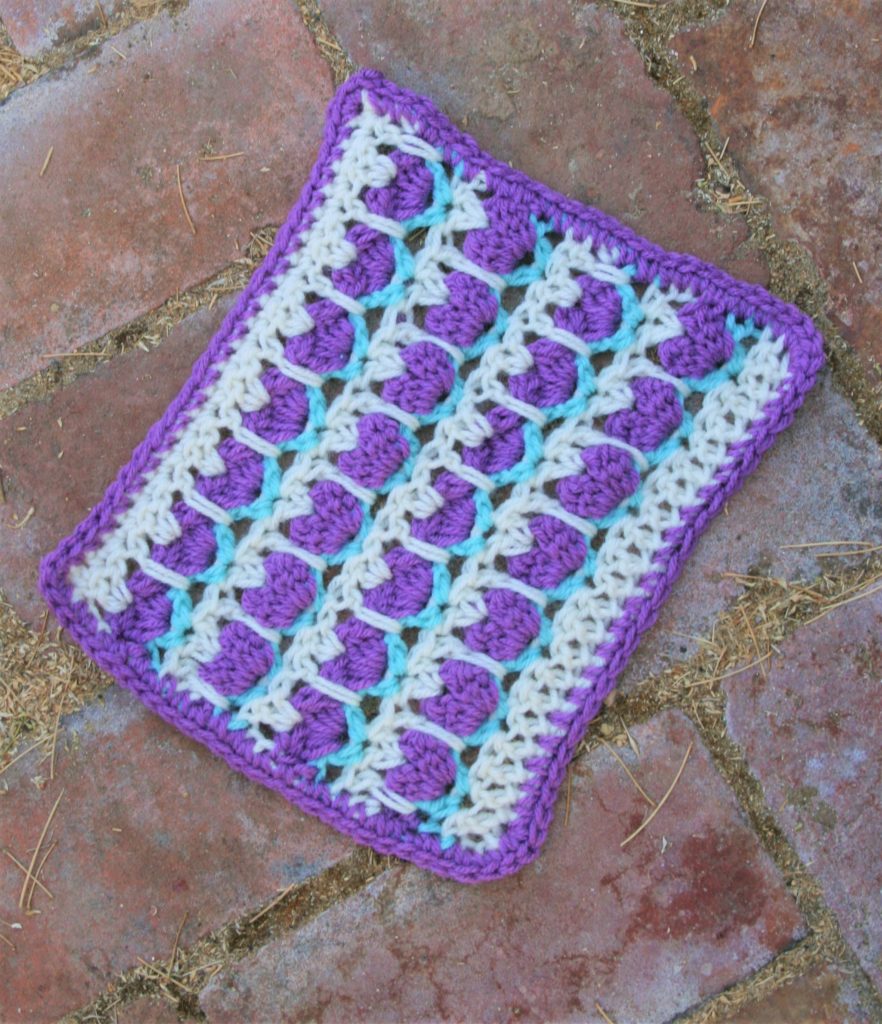
Garden Block
This block features color change, that does not require you to break the yarn. You can carry the yarn up the edge, as the color changes every row, and then finish the sides with edging.
I was inspired to create this block due to my lack of a green thumb. I try, and I think this season will be different. Yet it always ends the same…with a bunch of brown where I was expecting green.
This block lets me enjoy a little row of crocheted flowers.
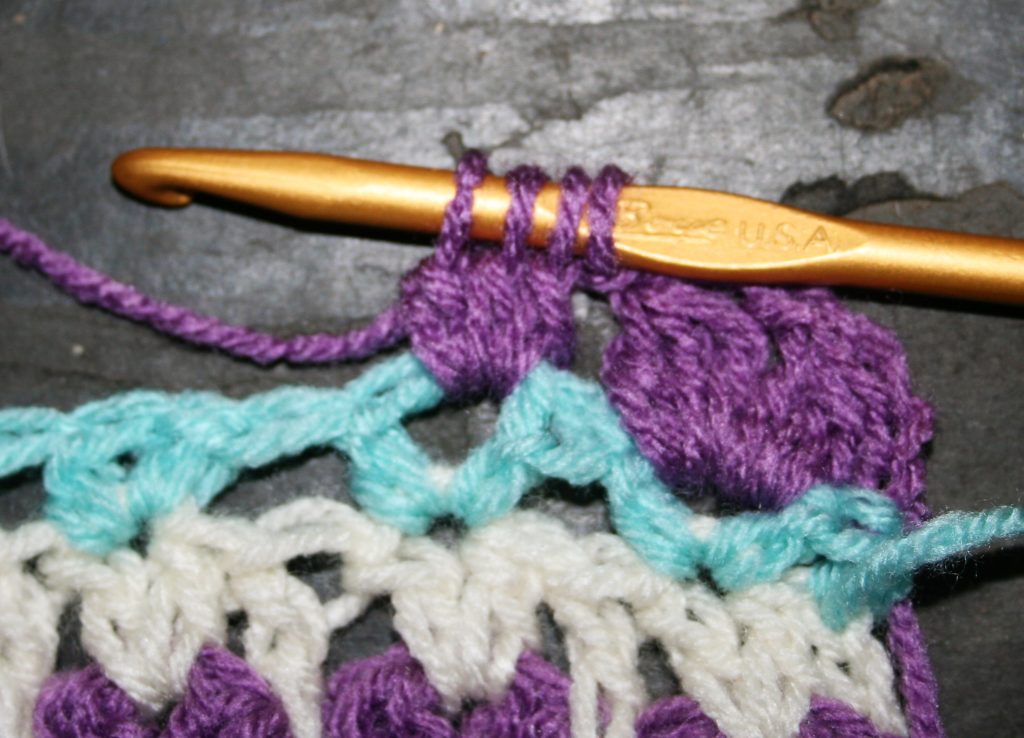
Flower Bobble (FB): [Yo, insert hook in indicated stitch, yo, pull up a loop, yo pull through 2 loops] 3 times, pull through all 4 loops on hook, ch 1, [Yo, insert hook in indicated stitch, yo, pull up a loop, yo pull through 2 loops] 3 times, pull through all 4 loops on hook.
First half of a Flower Bobble
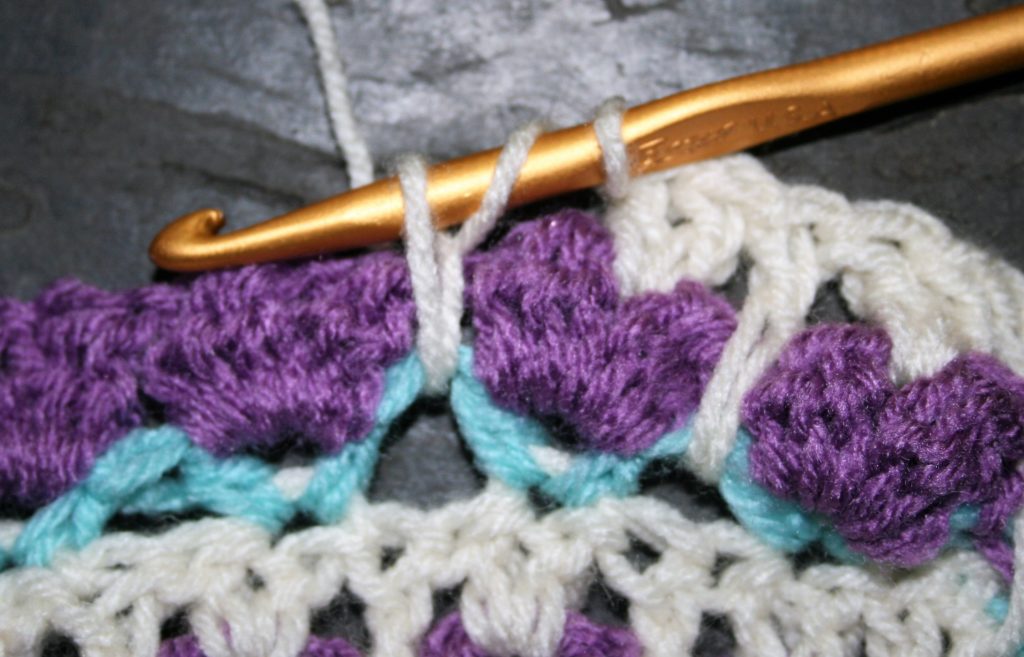
Long Loop Double Crochet (LLdc): Work as a regular double crochet, however the placement if the first Yo and insert hook is worked two rows below working row, Yo, pull loop up to height o working row, and complete double crochet.
Yo, insert hook, pull up a long loopFinish double crochet stitch
Block Pattern
Ch 25
Row 1: With (A), dc in fourth ch from hook, dc in each ch across, change to (B), turn. -23dc
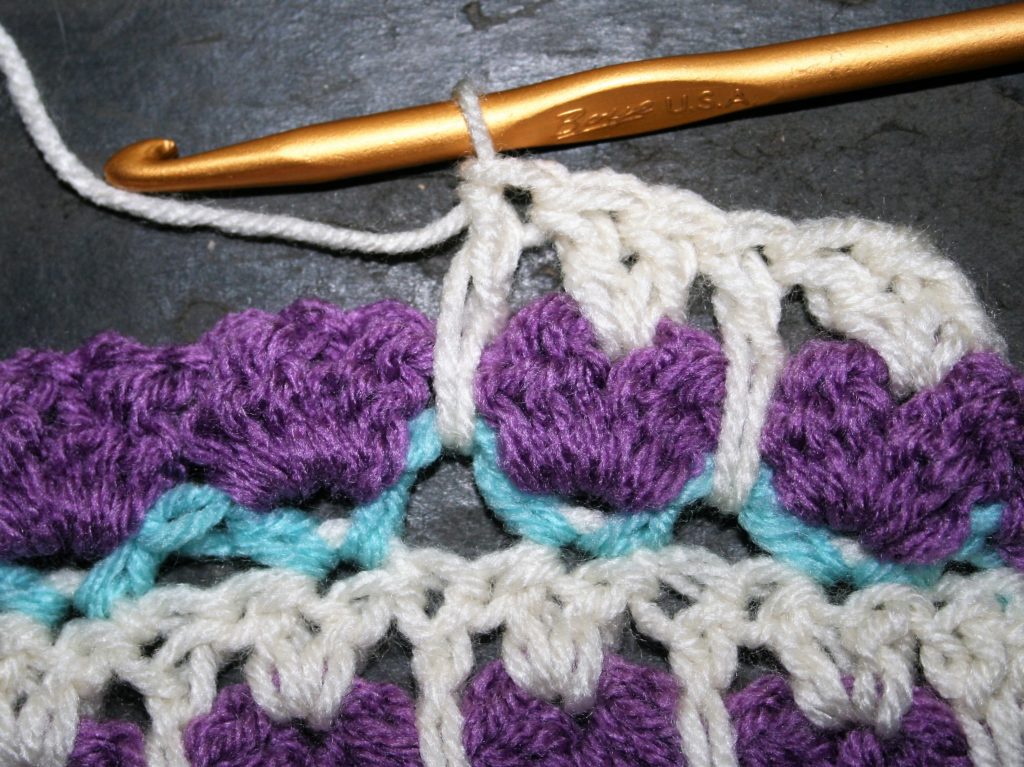
Row 2: Ch 2, sk 1, (hdc, ch 1, hdc) in next st, [sk 2, (hdc, ch 1, hdc) in next st] rep 6 times, sk 1, hdc in last st, change to (C) turn. -7 (hdc, ch 1, hdc)
Row 3: Ch 2, FB in each ch-1 sp across, hdc in last st, change to (A) turn. -7FB
Row 4: Ch 3, [2 dc in ch-1 sp in center of FB, LLdc between hdc stitch 2 rows below] 7 times, dc in last st, change to (B) turn.
Row 5-13: Rep Rows 2-4, do not change color at the end of Row 13.
Row 14: Ch 1, sc in each st across. Fasten off.
Rnd 1: Join with B to any corner, orking around edges of block, sc evenly working 3 sc in each corner. Fasten off. Weave in ends.
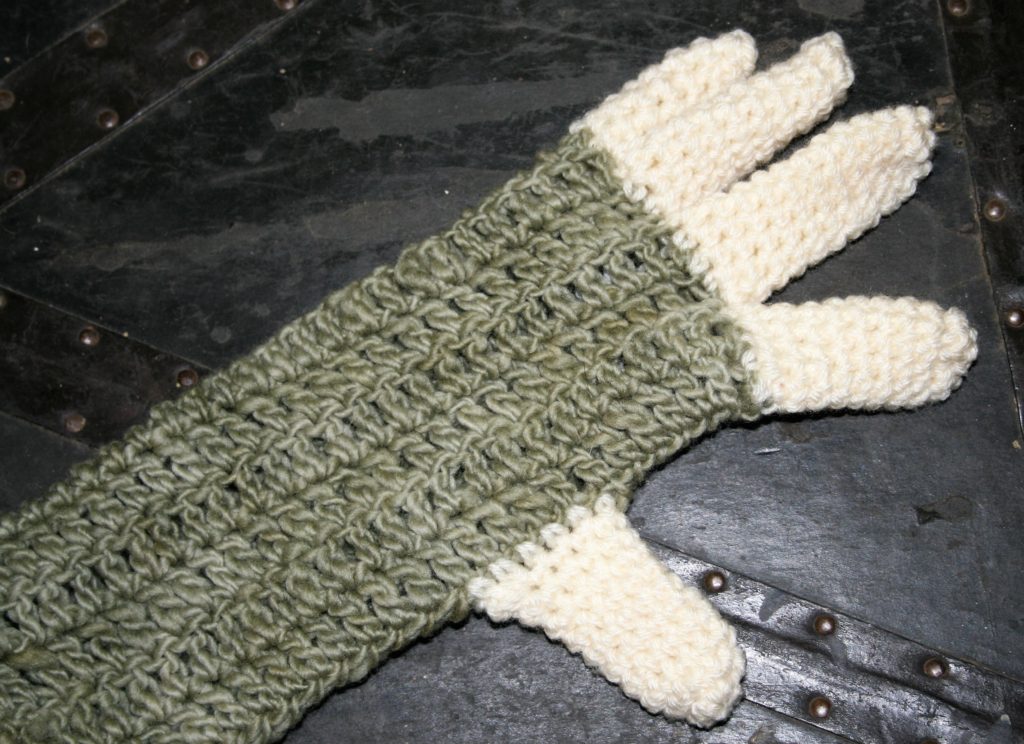
I see a lot of fingerless glove patterns, however not a lot of actual gloves. I have had some people tell me that they think that gloves are just too hard, well to this I disagree.
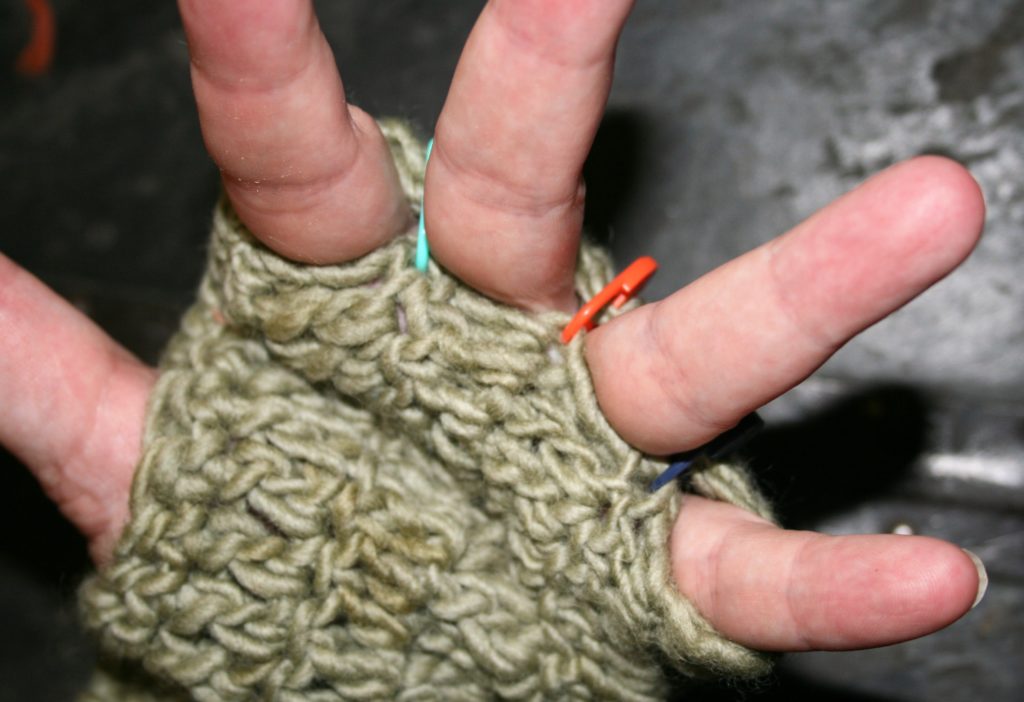
Once you have your fingerless glove made, the next set is to put it one. Take 3 removable stitch markers (or safety pins), insert them between your fingers through both the front and back of the glove fabric.
Insert stitch markers of safety pins between the fingers.
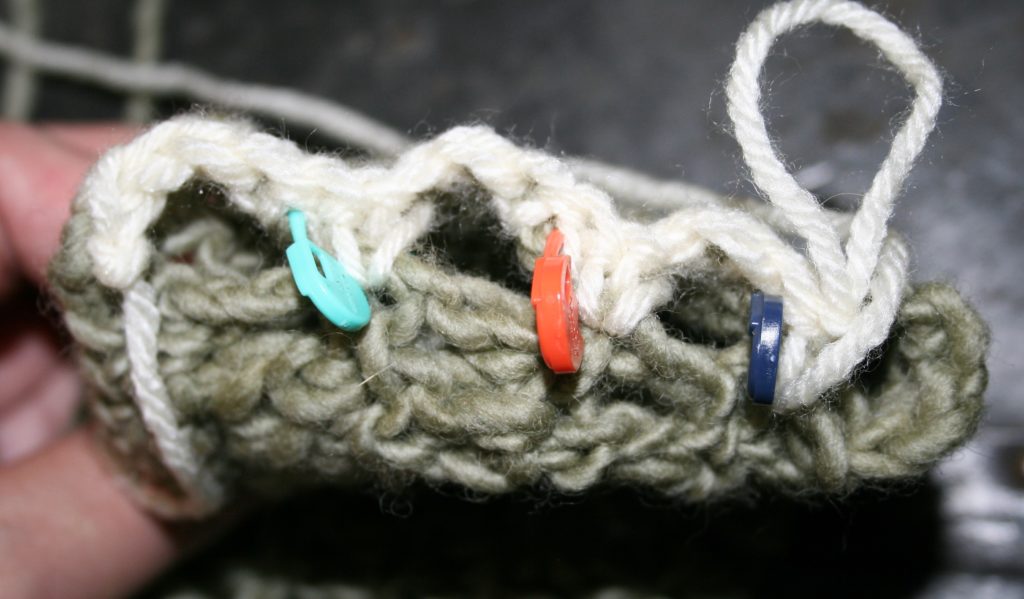
Join yarn anywhere along the finger edge of the fabric. If you were working a pattern that was stitched wrist to fingers, you can simply keep working the yarn from the last round without finishing off.
Start crocheting the “separations”
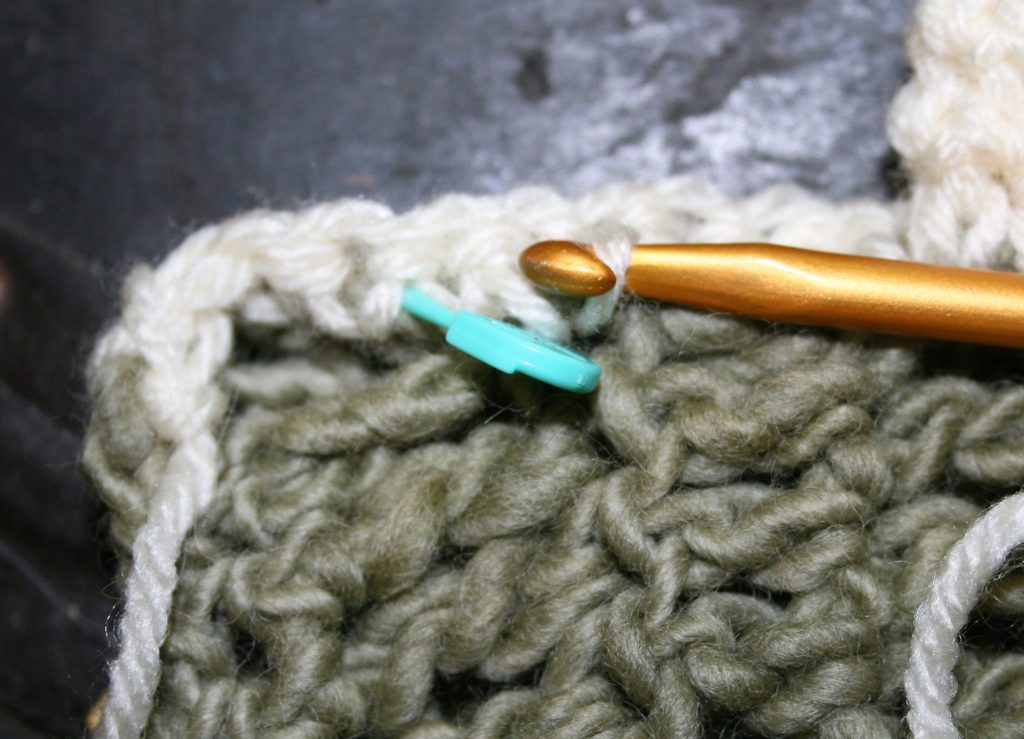
Work stitches, I recommend single crochet, evenly along edge. Work a slip stitch to the adjacent stitch (the one on the fabric on the other side of the hand) whenever you come to a stitch marker. This will create the “separation” between the fingers. I even just work this technique when I am still just creating fingerless gloves. I feel like it helps them stay in place and not twist around my hand.
When working the single crochets, slip stitch across the fabric on the opposite side of the glove to create the finger “separations”.
Spiral your fingers
When you begin to work on the opposite side of the hand, and come to a slip stitch, work a single crochet in the one leg of the slip stitch that is closest to the last single crochet worked. Single crochet in a spiral by working on the fabric side previously worked, and work a tube the length of your finger.
Finish off your yarn, and join to fabric right next to the finger just made. Make the next finger working a stitch in the “one leg” of the slip stitch, of each side of the finger, and continue with the spiral method until the length meets your need. Repeat this of the remaining two fingers.
Work a single crochet in “one leg” of the slip stitch.
Make a thumb
Work the thumb in the same manner, joining to the edge of the thumbing opening and crocheting around it. However this opening may be much larger than the end of your thumb. Work two single crochet together (sc2tog) once in the first and second round. Then continue until the desired length is reached.
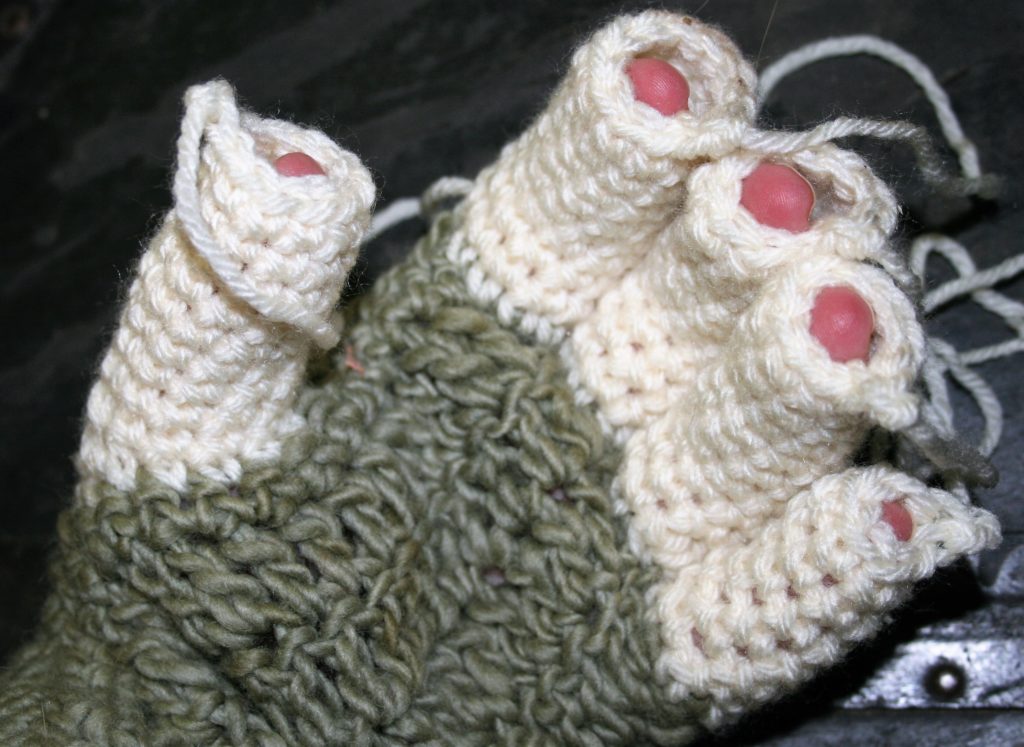
Work the spirals until each finger is the desired length.
Cinch them closed
Prepare to weave in the ends. Thread the tails at the ends of the fingers through the stitches in the last round of each finger and pull tight to cinch closed.
Glove
I do recommend that working fingers, it is best to use thinner weight yarn, nothing above a sport weigh (number 3). I usually work most of my gloves, and even fingerless gloves out of wool blended yarns that are either a fine or medium weigh (number 2 or 3). This is because anything heavier just becomes too bulky and feel clumsy on my hands. The nice thing about gloves is that you can complete a pair with only one hank of yarn, and feel really accomplished in your skills.
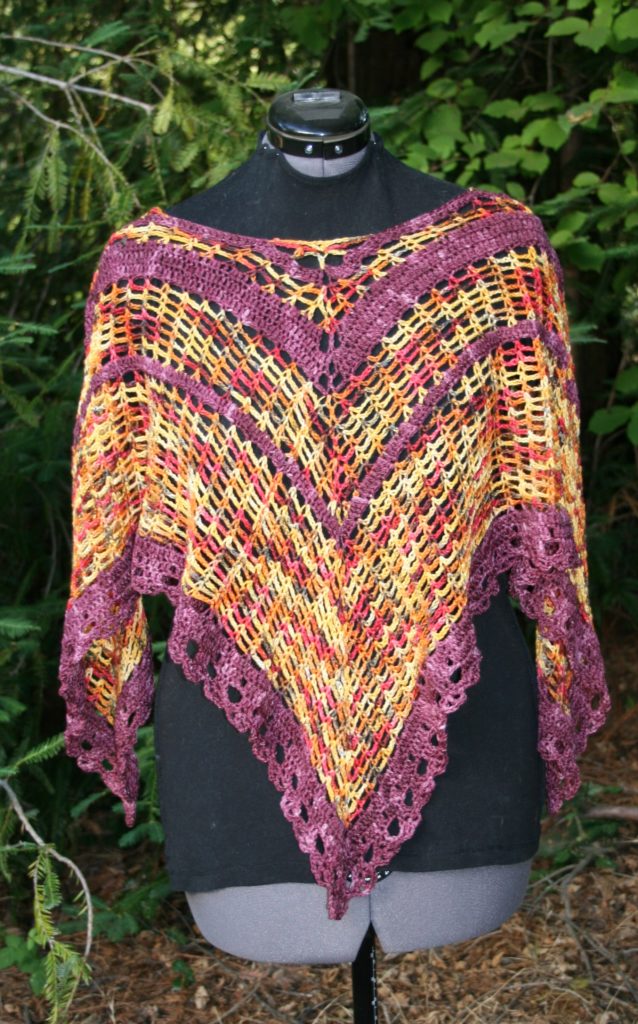
I think everyone needs a little pick me up in July, so I am releasing my latest free pattern. I hope to brightens the dances of your hook.
Worked from the neck outward, this is a poncho that easily adds a bit of flare to any wardrobe. The simple stitch pattern lends to great coloring pooling and a fabulous drape.
Phoenix Poncho
Size
40” square
Skill Level
Intermediate
Gauge
5 (sc, ch-3) sts/ 13 rows=4”
Materials
H/8/5.0 mm crochet hook
Alexandra The Art if Yarn Silverton Fine weight 75% Superwash Merino/ 15% Nylon/ 10% Tencel yarn (434yrds/397m/3.5oz/100g) 1 skein each color Wine (A), Fire (B)
Notes
When joining at the end of round 1 ensure that the round is not twisted.
Neck Edging is worked as four separated corner points.
Pattern
Rnd 1: With A, ch 150, dc in 4th ch from hook, dc in next 36 chs, [ch 2 (corner made), dc in next 37 chs] rep 3 times, ch 2, sl st to top of beg ch, (weave tail into base of the beg chain to close ring) change to B. – 148 dc, 4 ch-2 sps
A little bit of an airy stitch…
Rnd 2: Ch 1, sc in same st, {[ch 3, sk 3, sc in next st] rep across to ch-2 corner, ch 1, (sc, ch 3, sc) in ch-2 sp, ch 1, sc in next st,} 3 times, [ch 3, sk 3, sc in next st] rep across to ch-2 corner, ch 1, (sc, ch 3, sc) in ch-2 sp, ch 1, sl st to join. – 40 (ch-3) sps, 8 (ch-1) sps
Rnd 3: Ch 1, sc in same st, {[ch 3, sc in next sc] across to corner, ch 3, dc in ch-3 sp of corner} rep 4 times, ch 3, sc in next sc, ch 3, sl st to join. – 4 dc, 52 (ch-3)sps
Rnd 4: Ch 1, sc in same st, {[ch 3, sc in next sc] across to corner, ch 3, (sc, ch 3, sc) in dc} rep 4 times, ch 3, sc in next sc, ch 3, sl st to join, change to A.
Making it a bit more solid…
Rnd 5: Ch 3, {[3 dc in ch-3 sp, dc in sc] rep across to corner, ch 3, dc in ch-3 corner sp, ch 3, dc in sc} rep 4 times, 3 dc in ch-3 sp, dc in sc, 3 dc in ch-3 sp, sl st to join.
Rnd 6: Ch 3, [dc in each dc across to corner, 3 dc in ch-3 sp, (dc, ch 3, dc) in dc, 3 dc in ch-3 sp] rep 4 times, dc across to first st, sl st to join.
Rnd 7: Ch 3, [dc in each dc across to corner, ch 3, dc in ch-3 sp, ch 3] rep 4 times, dc across to first st, sl st to join, change to B.
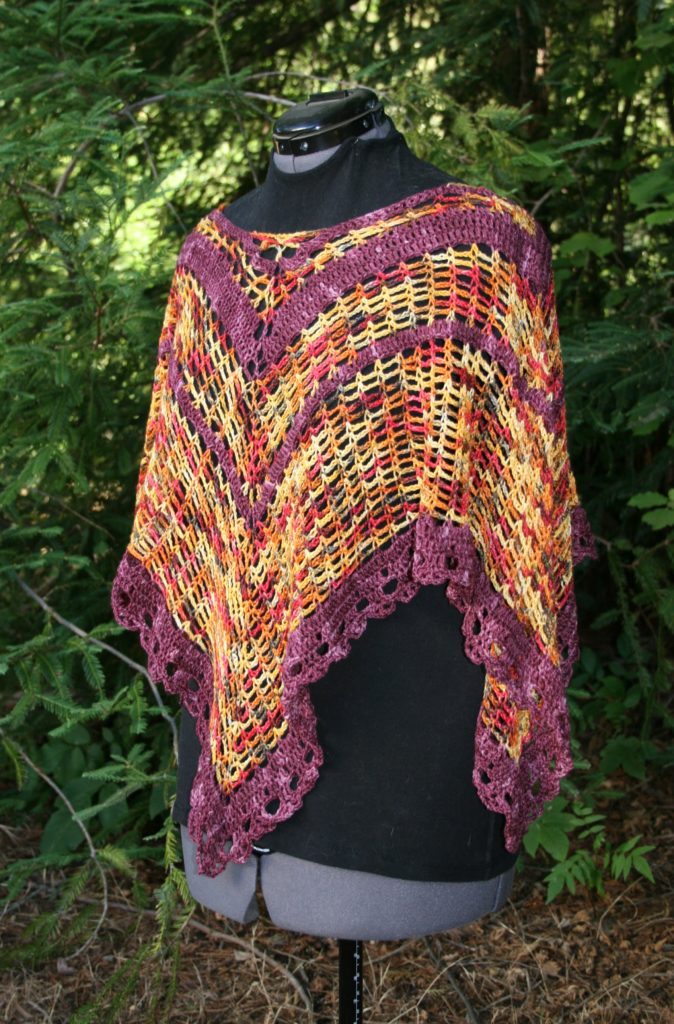
Phoenix Poncho
Back to being airy…
Rnd 8: Ch 1, sc in same st, {[ch 3, sk 3, sc in next st] rep across to corner, ch 3, (sc, ch 3, sc) in dc, ch 3, sc in next dc} rep 4 times, [ch 3, sk 3, sc in next st] 3 times, sl st to join.
Rnd 9: Ch 1, sc in same st, {[ch 3, sc in next sc] across to corner, ch 3, dc in ch-3 sp of corner} rep 4 times, ch 3, [sc in next sc, ch 3] across to first st, sl st to join.
Rnd 10: Ch 1, sc in same st, {[ch 3, sc in next sc] across to corner, ch 3, (sc, ch 3, sc) in dc} rep 4 times, ch 3, [sc in next sc, ch 3] rep across to first st, sl st to join.
Rnd 11-14: Rep Rnds 9 & 10.
Rnd 15: Rep Rnd 9, changing to A at join.
A bit of solid…
Rnd 16: Ch 3, {[3 dc in ch-3 sp, dc in sc] rep across to corner, 3 dc in ch-3 sp, (dc, ch 3, dc) in dc} rep 4 times, 3 dc in ch-3 sp, [dc in sc, 3 dc in ch-3 sp] rep across to first st, sl st to join, change to B.
Needs to be airy…
Rnd 17: Rep Rnd 8.
Rnds 18-33: Rep Rnds 9 & 10, change to A at the join of Rnd 33.
Rnd 34: Rep Rnd 9.
Rnd 35: Rep Rnd 16.
Let’s finish it up…
Rnd 36: Sl st in next st, ch 3, dc in next 4 sts, ch 1 sk 1, {[dc in next 5 sts, ch 1, sk 1] rep across to corner, (dc, ch 1, dc, ch 1, dc) in ch- 3 sp, ch 1, sk 1} rep 4 times, [dc in next 5 sts, ch 1, sk 1] across to first st, sl st to join.
Rnd 37: Sl st in next st, ch 3, dc in next 2 sts, {[ch 3, sk dc, sk ch-1 sp, sk dc, dc in next 3 dc] rep across to corner, ch 3, sk dc, sk ch-1 sp, sk dc, dc in next ch-1 sp, ch 1, dc in next dc, ch 1, dc in ch-1 sp} rep 4 times, [ch 3, sk dc, sk ch-1 sp, sk dc, dc in next 3 dc] across to first st, ch 3, sl st to join.
Rnd 38: Sl st in next st, ch 5, (dc, ch 2, dc) in same st, sc in ch-3 sp, sk next dc, {[(dc, ch 2, dc, ch 2, dc) in next dc, sc in ch-3 sp] across to corner, sk next dc (dc, ch 2, dc, ch 2, dc, ch 2, dc, ch 2, dc) in corner dc, sc in ch-3 sp} rep 4 times, [(dc, ch 2, dc, ch 2, dc) in next dc, sc in ch-3 sp] across to first st, sl st to join. Fasten off. Weave in ends.
Neck Edging, Work in each corner
Row 1: From any corner, join with B to stitch 7 away from corner, ch 3 (counts as dc), dc in corner, sk next 6 sts, dc in next st, turn.
Edging: Ch 2 sc in base of dc, ch 3, sk 3 sts of neck, sc in next st, turn, ch 5, dc in center dc of Row 1, ch 1, dc in same st, ch 5, sk 3 sts from join of Row 1, sc in next st, turn, ch 3, sc in join of Row 1, ch 2, sl st to center dc in Row 1. Fasten off. Weave in ends.