Tunisian Mini Shawl- Free Pattern!

ScannedImageWelcome to those visiting me from ELK Studios! Enjoy the Crochet-a-Long (if you would like to join, please check out the ELK Studio Christmas Present CAL)

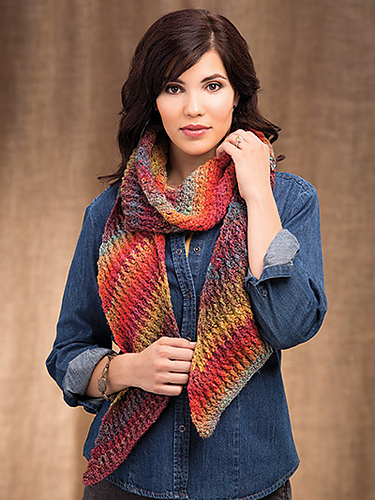
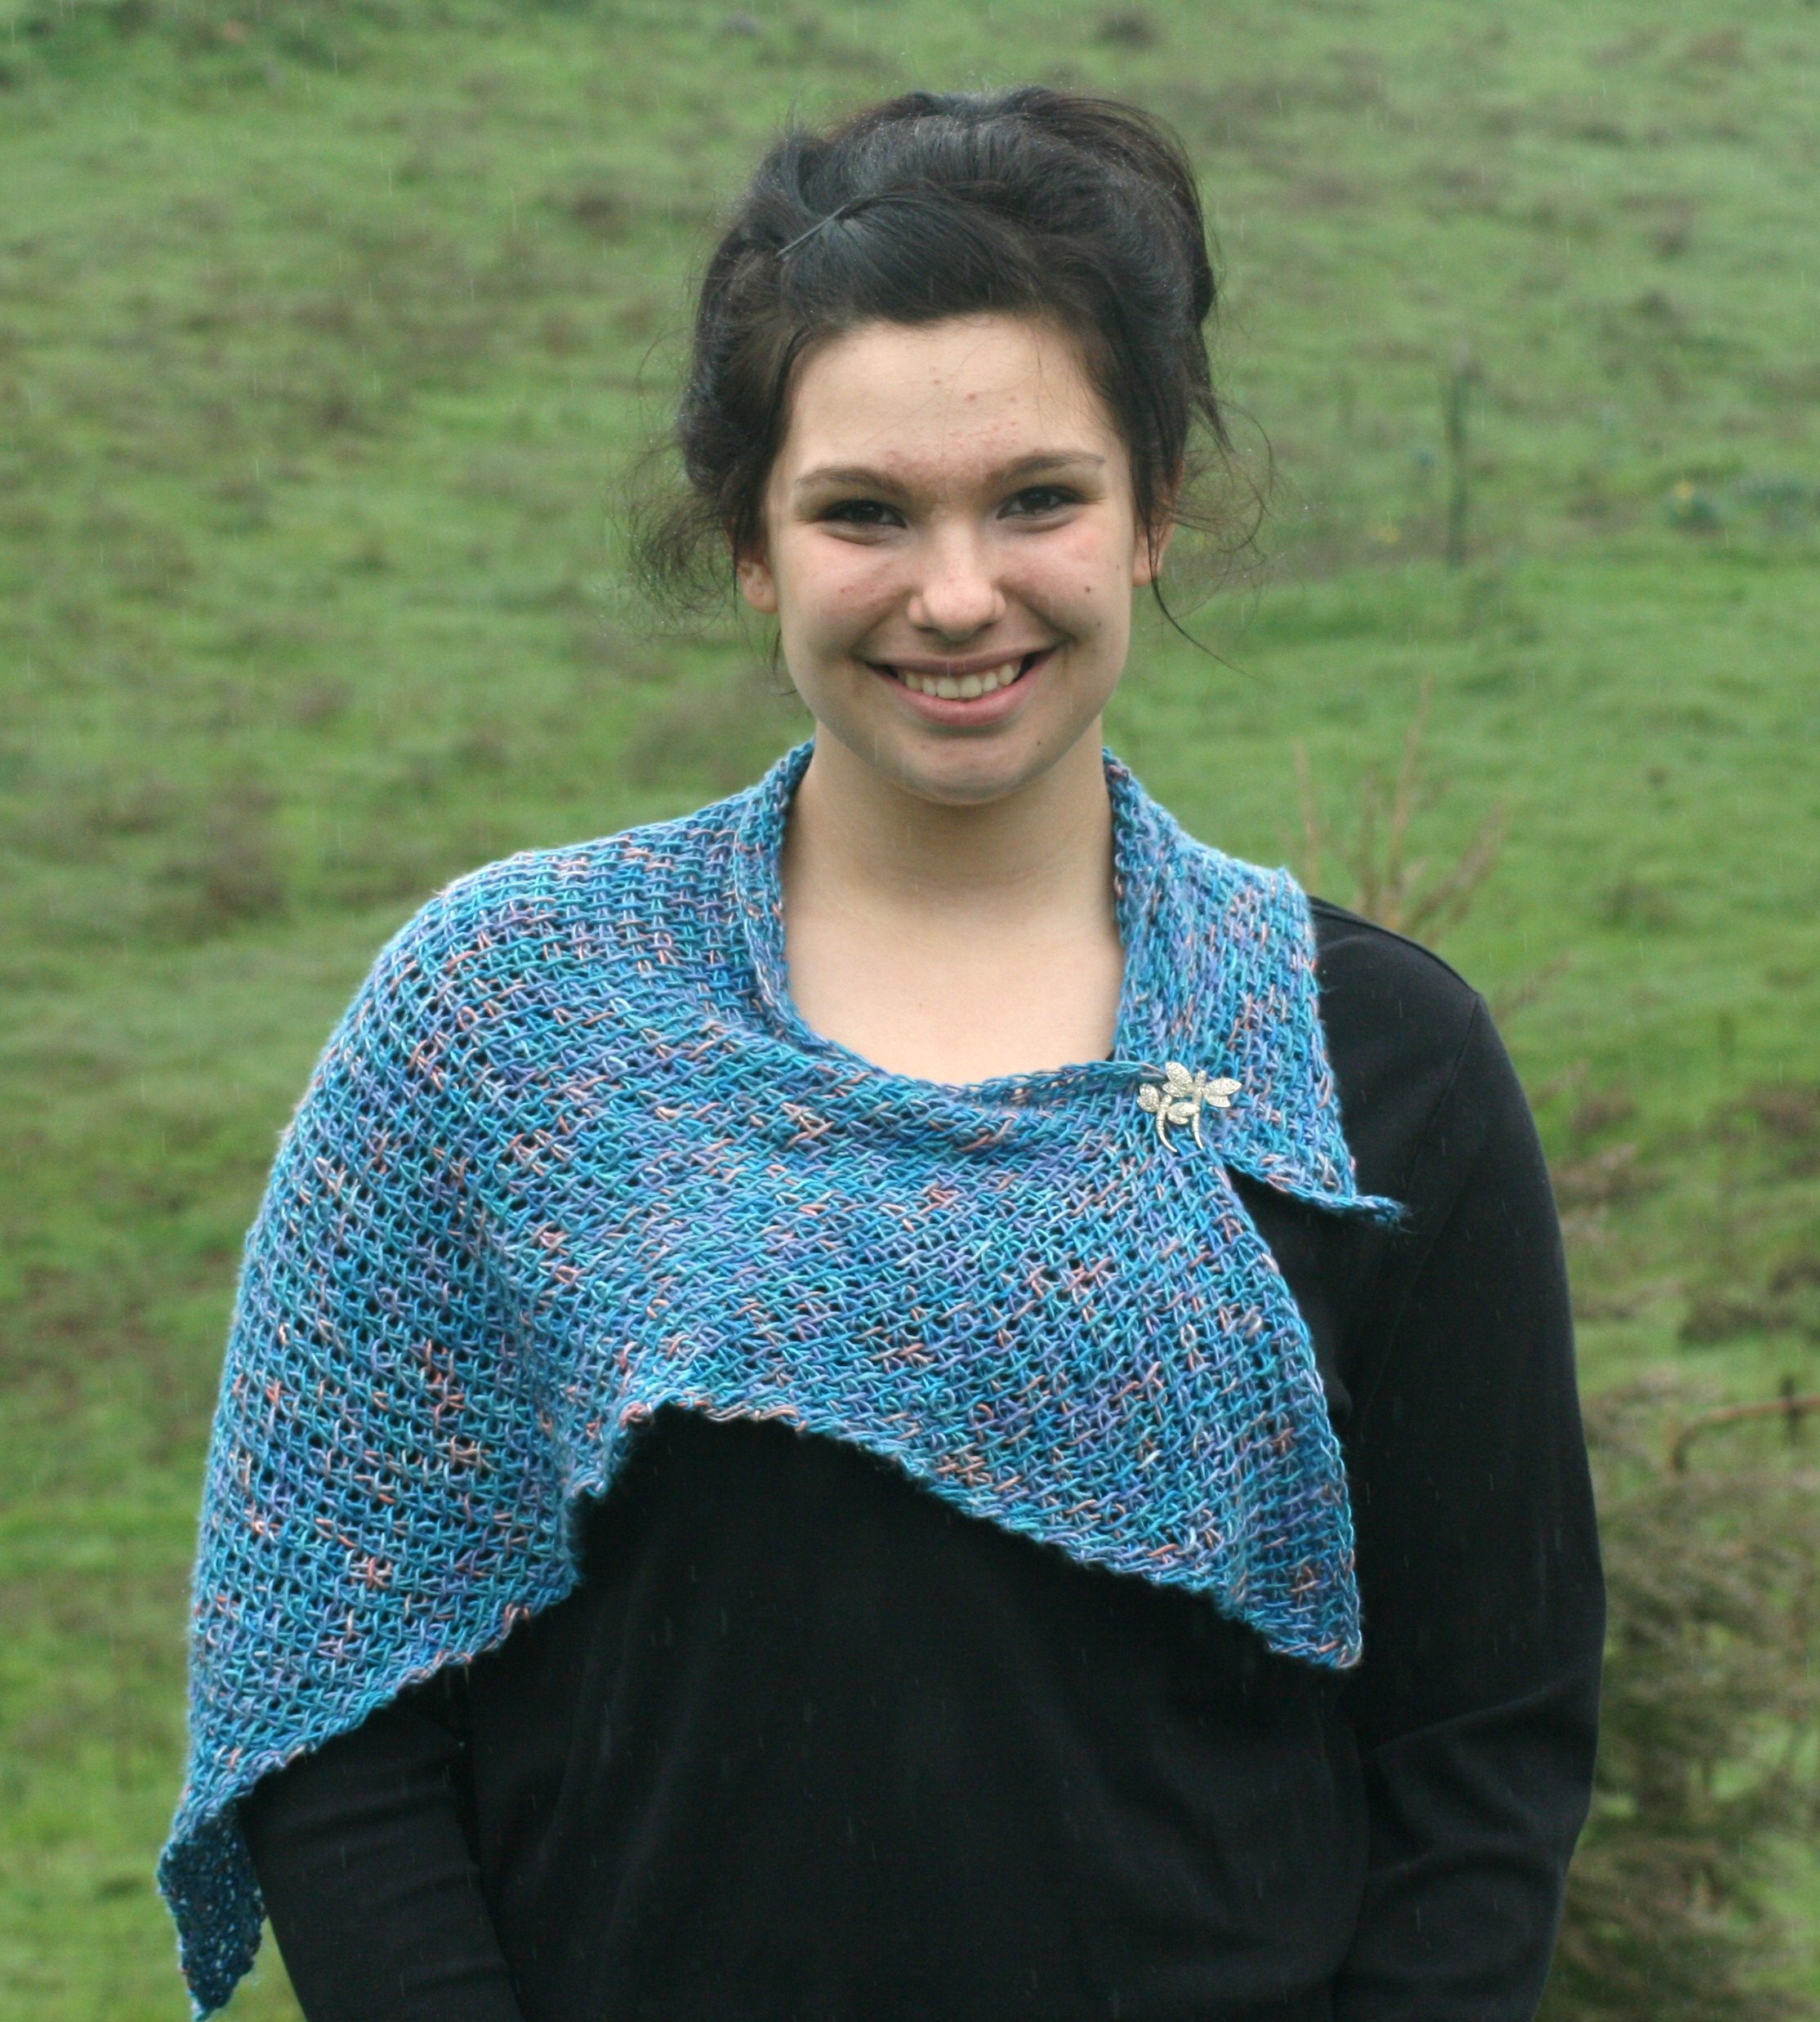
Hard to believe that the holidays are fast approaching! To help work up some holiday gifts I am sharing my Tunisian Mini Shawl pattern. This is a shawl that is worked from the bottom point upward, with increases on either end of the row. I will admit that the very first row can seem like a bit of a challenge, but it becomes a simple repeat after that.

IMG_5531

Tunisian Mini Shawl

Tunisian Mini Shawl by: Linda Dean 

Add a little color to your wardrobe and brighten up any ensemble with this silk mini shawl. Worked in Tunisian crochet on a large hook, this project works up quickly and can be easily made into a full size shawl. Don’t be discouraged by the tricky start, it gets easier by row 2!

Skill Level: Advanced Beginner/Intermediate

Finished Size: 40” wide, 24.5” long

Materials List (for sample):

Tunisian Crochet Hook size P/ 11.5mm or size needed to achieve gauge.

1 skein Lisa Souza Glacier, sport weight, 100% Bombyx Silk Yarn (273yds/3.5 oz, 250m/100g) color: Flahridduh (www.lisaknit.com)

Tapestry needle

Material list options:

Any fine to medium weight yarn

Tunisian hook at least 2 sizes larger than standard crochet hook to be used for chosen yarn (i.e. if you would use a H/8/5.00mm standard crochet hook with yarn then use a K/10 ½/6.5mm Tunisian hook)

Tapestry needle

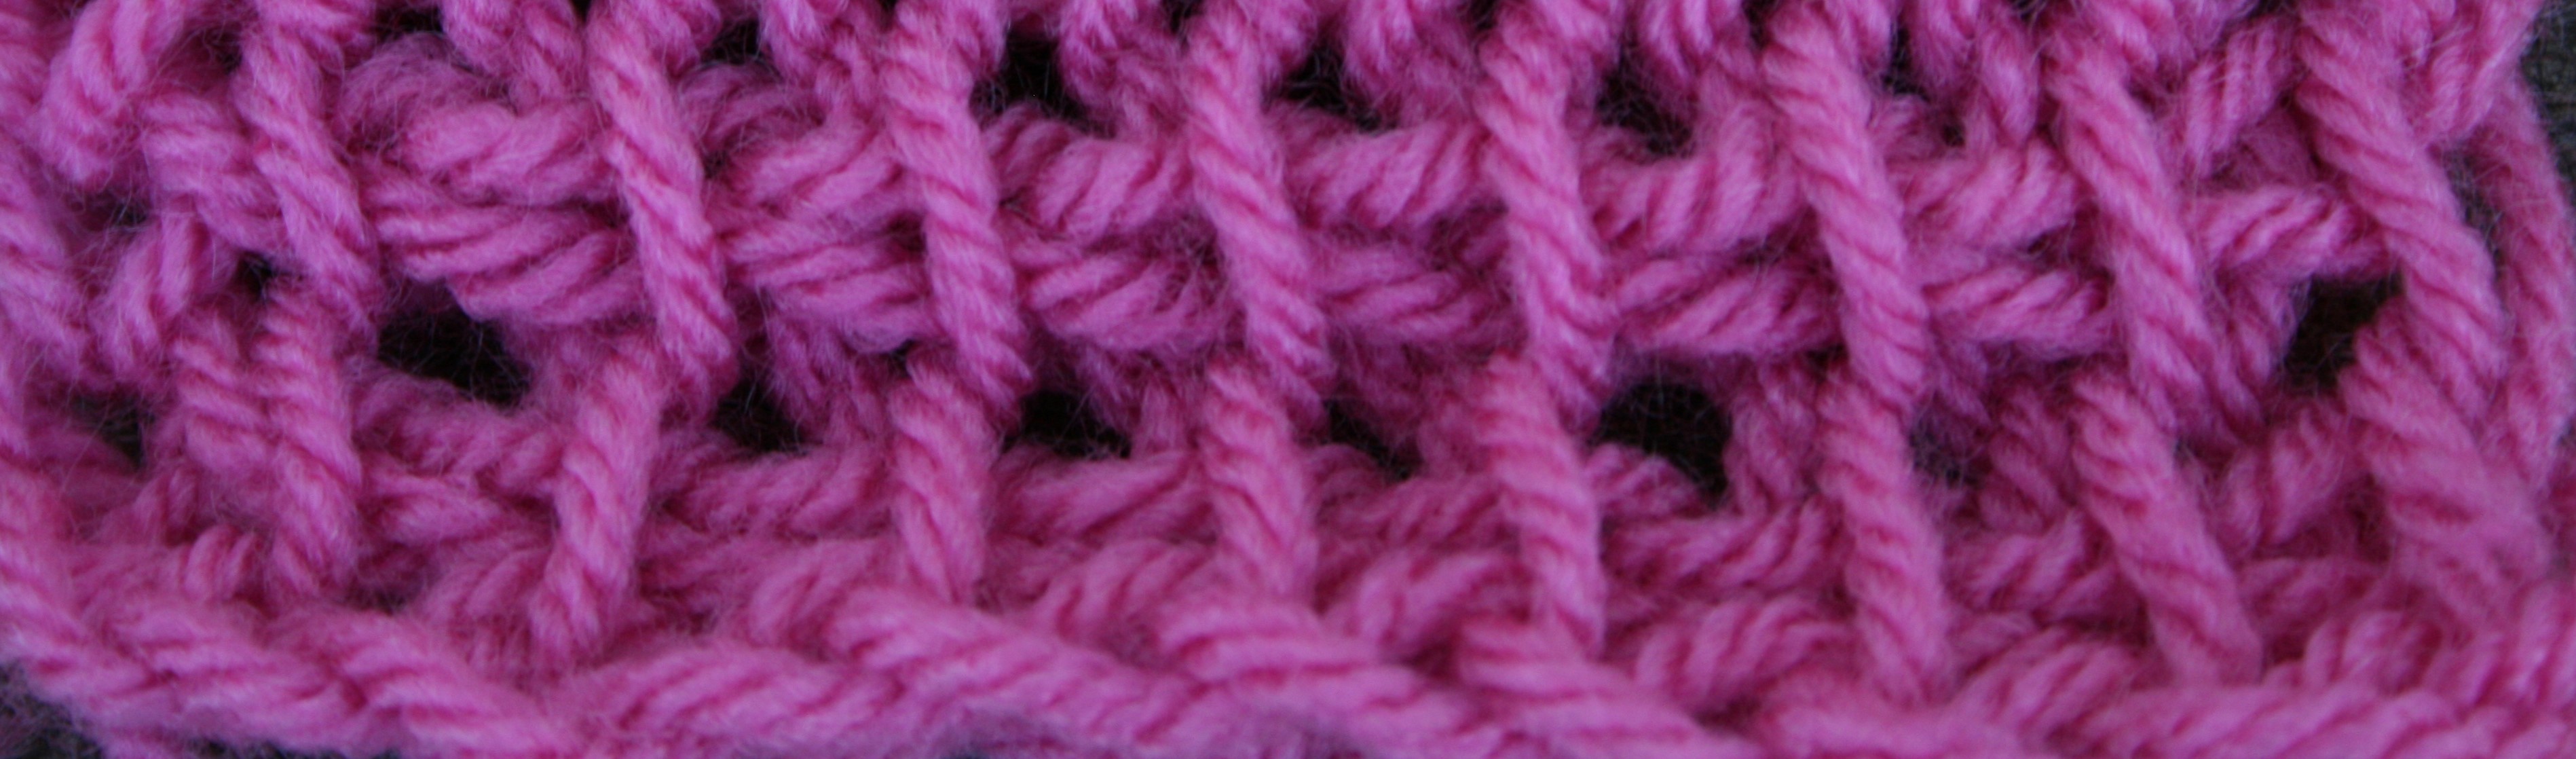
Gauge: 10.5 tss /8.5 rows =4”

Pattern Note

Each row consists of a forward pass and a return pass.

Increases are worked on either side of this triangle by addition of loop to hook; worked by inserting hook into the same stitch as previously worked, but in a different location.

Abbreviations:

ch: chain

rep: repeat

RP: Return Pass: YO, pull through first loop, *YO and pull through 2 loops on hook; Rep from * across row until 1 loop remains on hook. (need a visual? Check out my tutorial)

Tss: Tunisian Simple Stitch: Insert hook behind vertical bar, YO, pull up a loop. (need a visual? Check out my tutorial)

sc: single crochet

st(s): stitch(es)

YO: yarn over hook

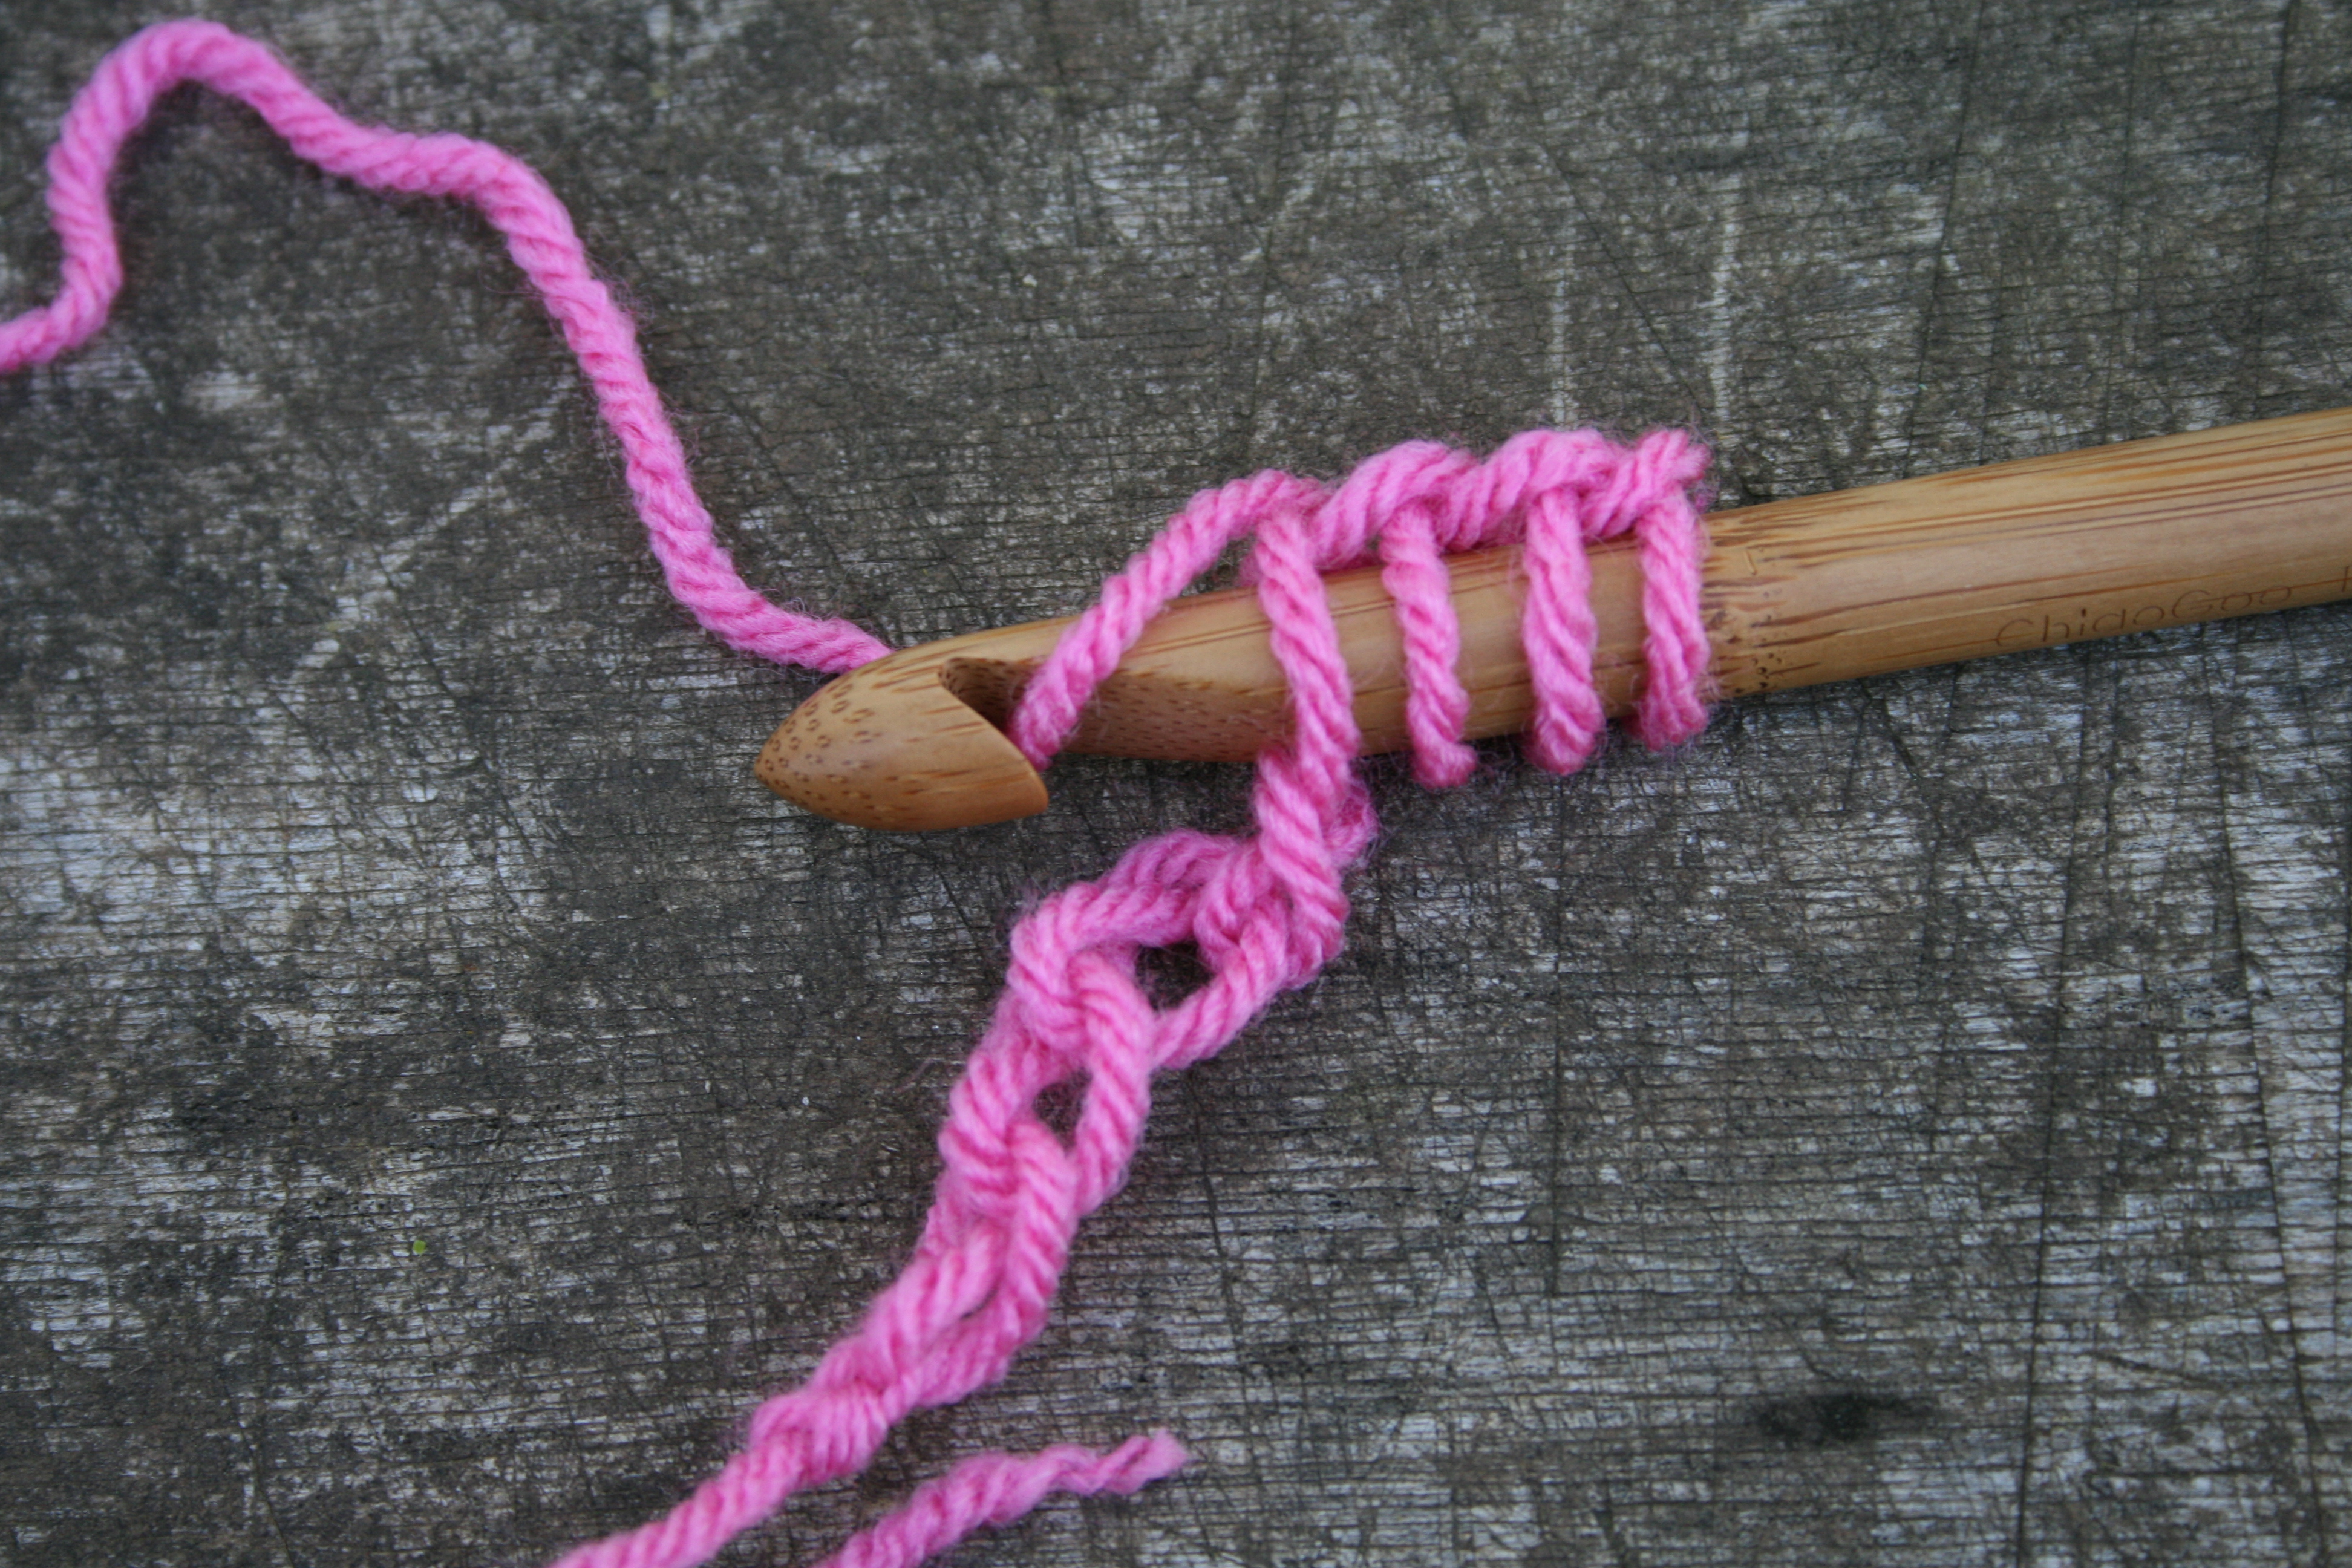
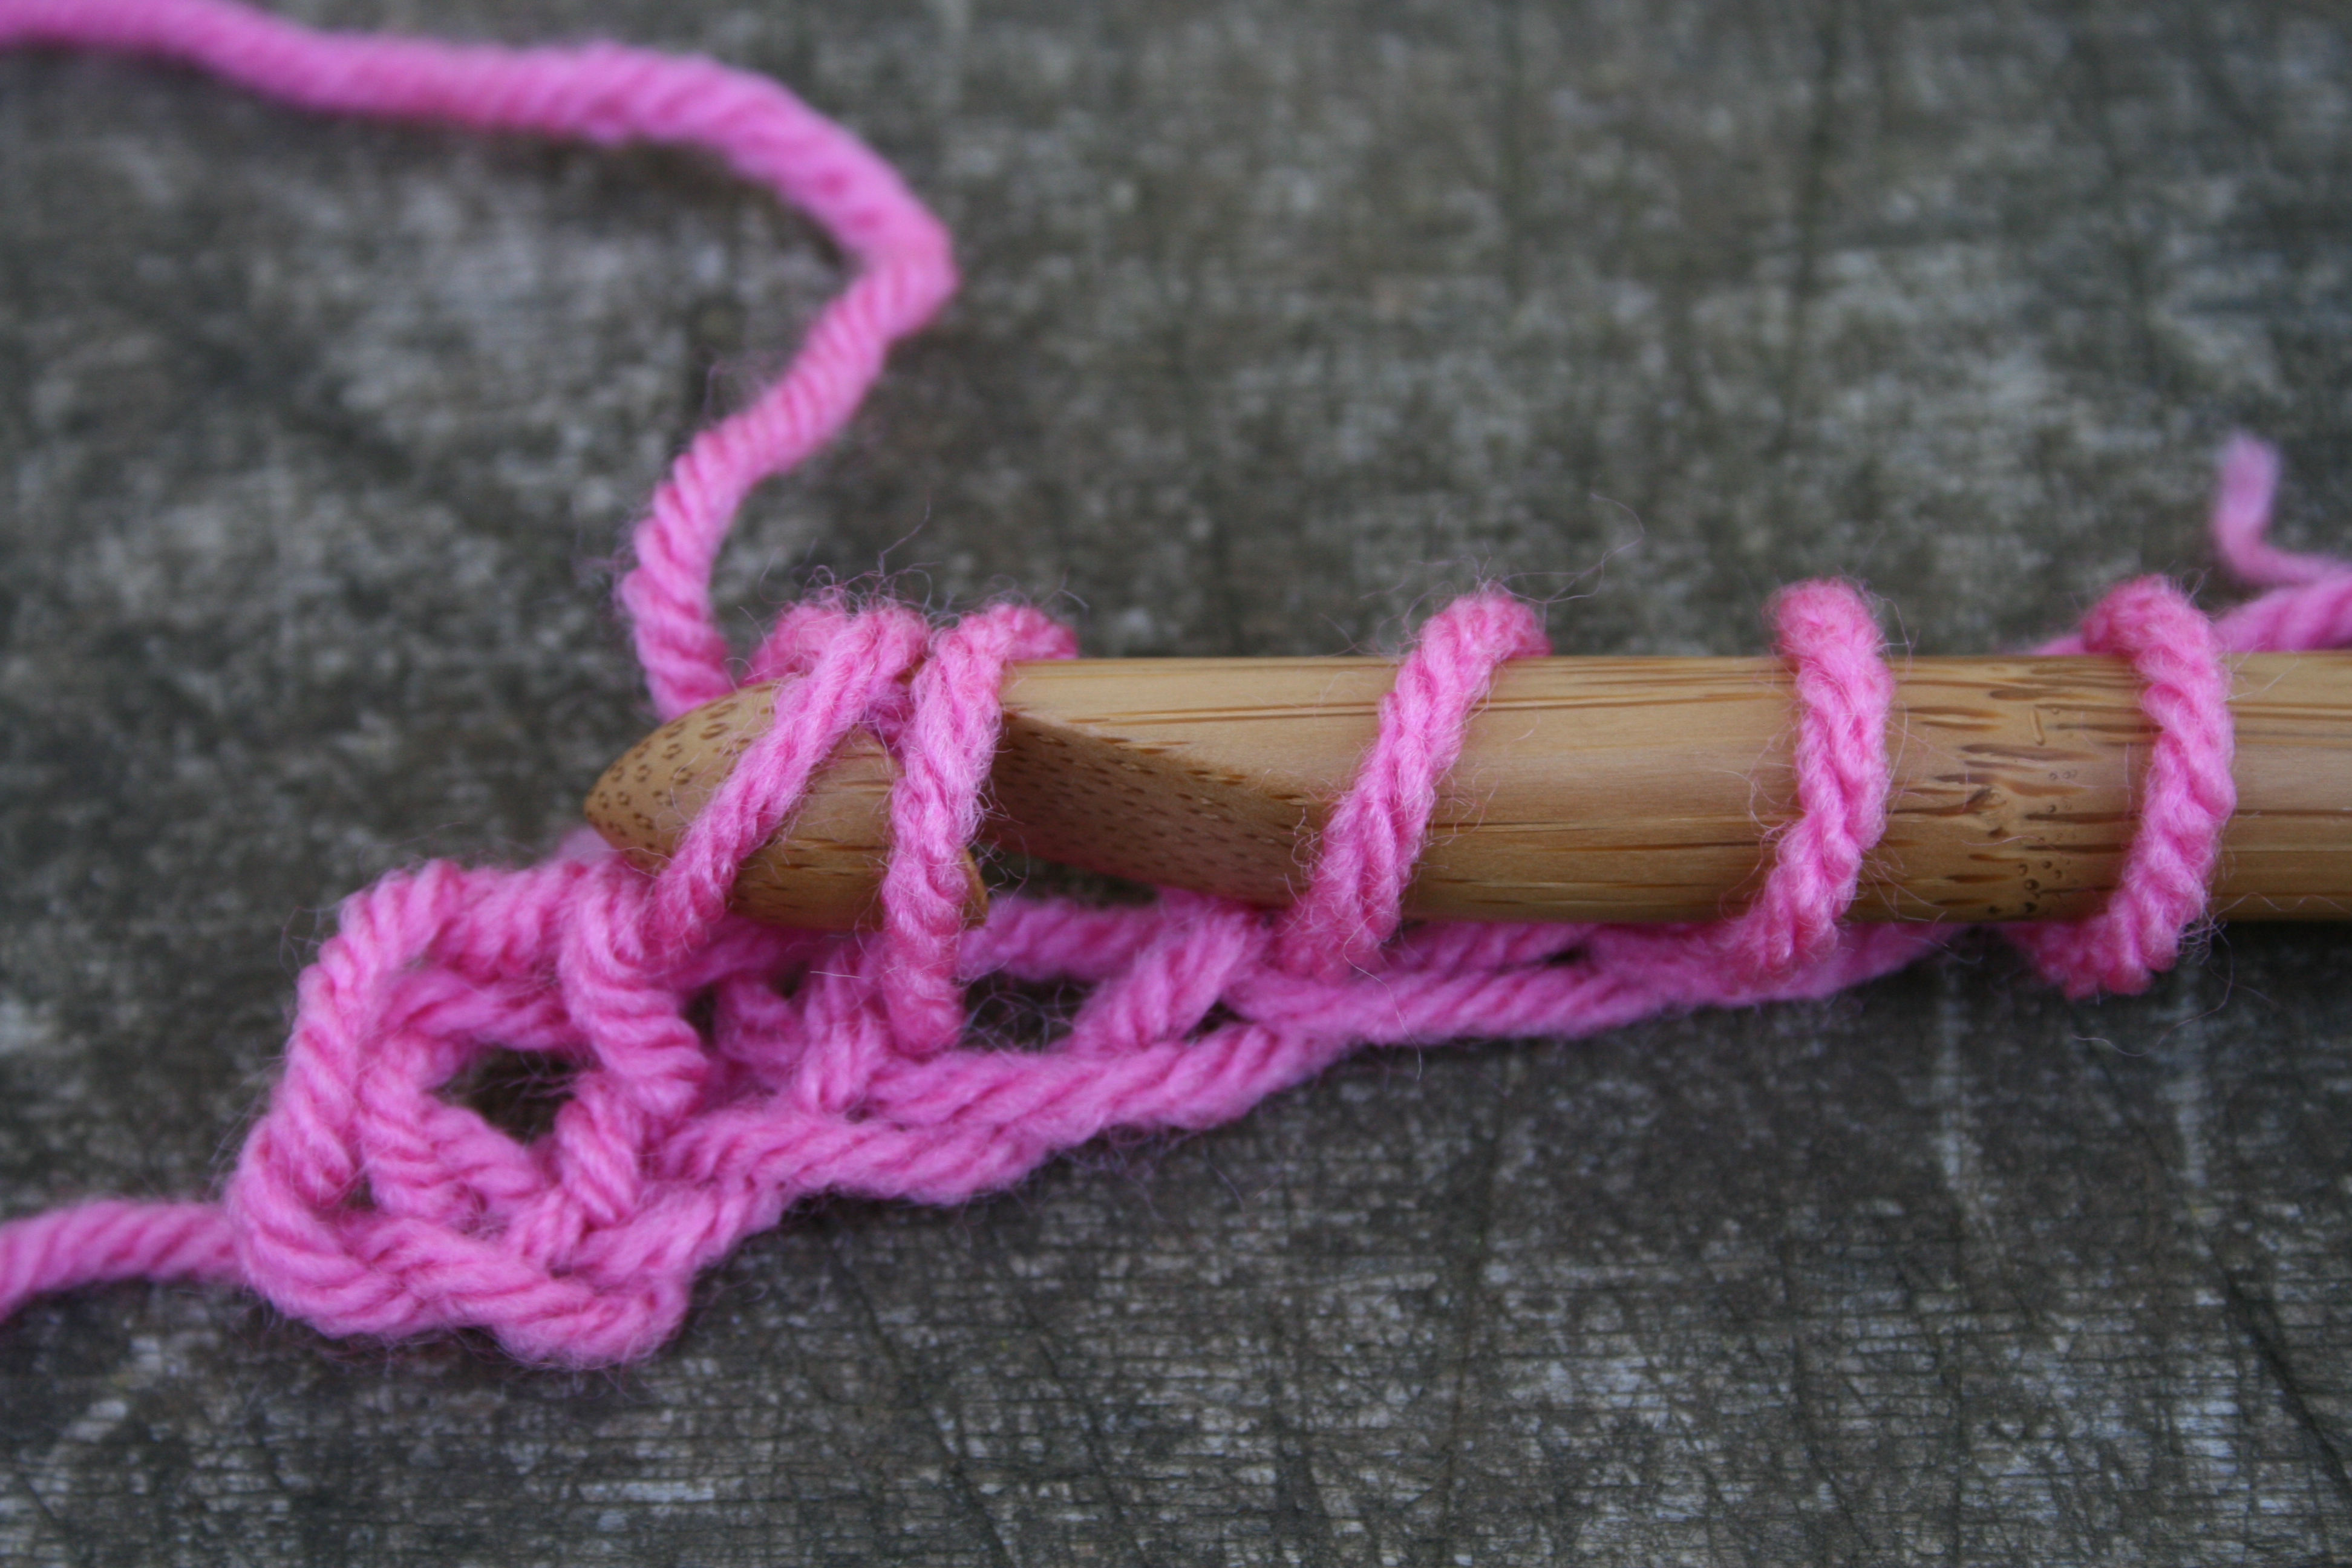
Row 1: Ch 2, insert hook from back to front through the ch closest to hook (this is so that the current working loop does not work off), YO, pull up a loop, insert hook in back bump next ch, YO, pull up a loop, insert hook between the remaining two loops of same ch just worked in, YO, pull up a loop (4 loops on hook), RP.

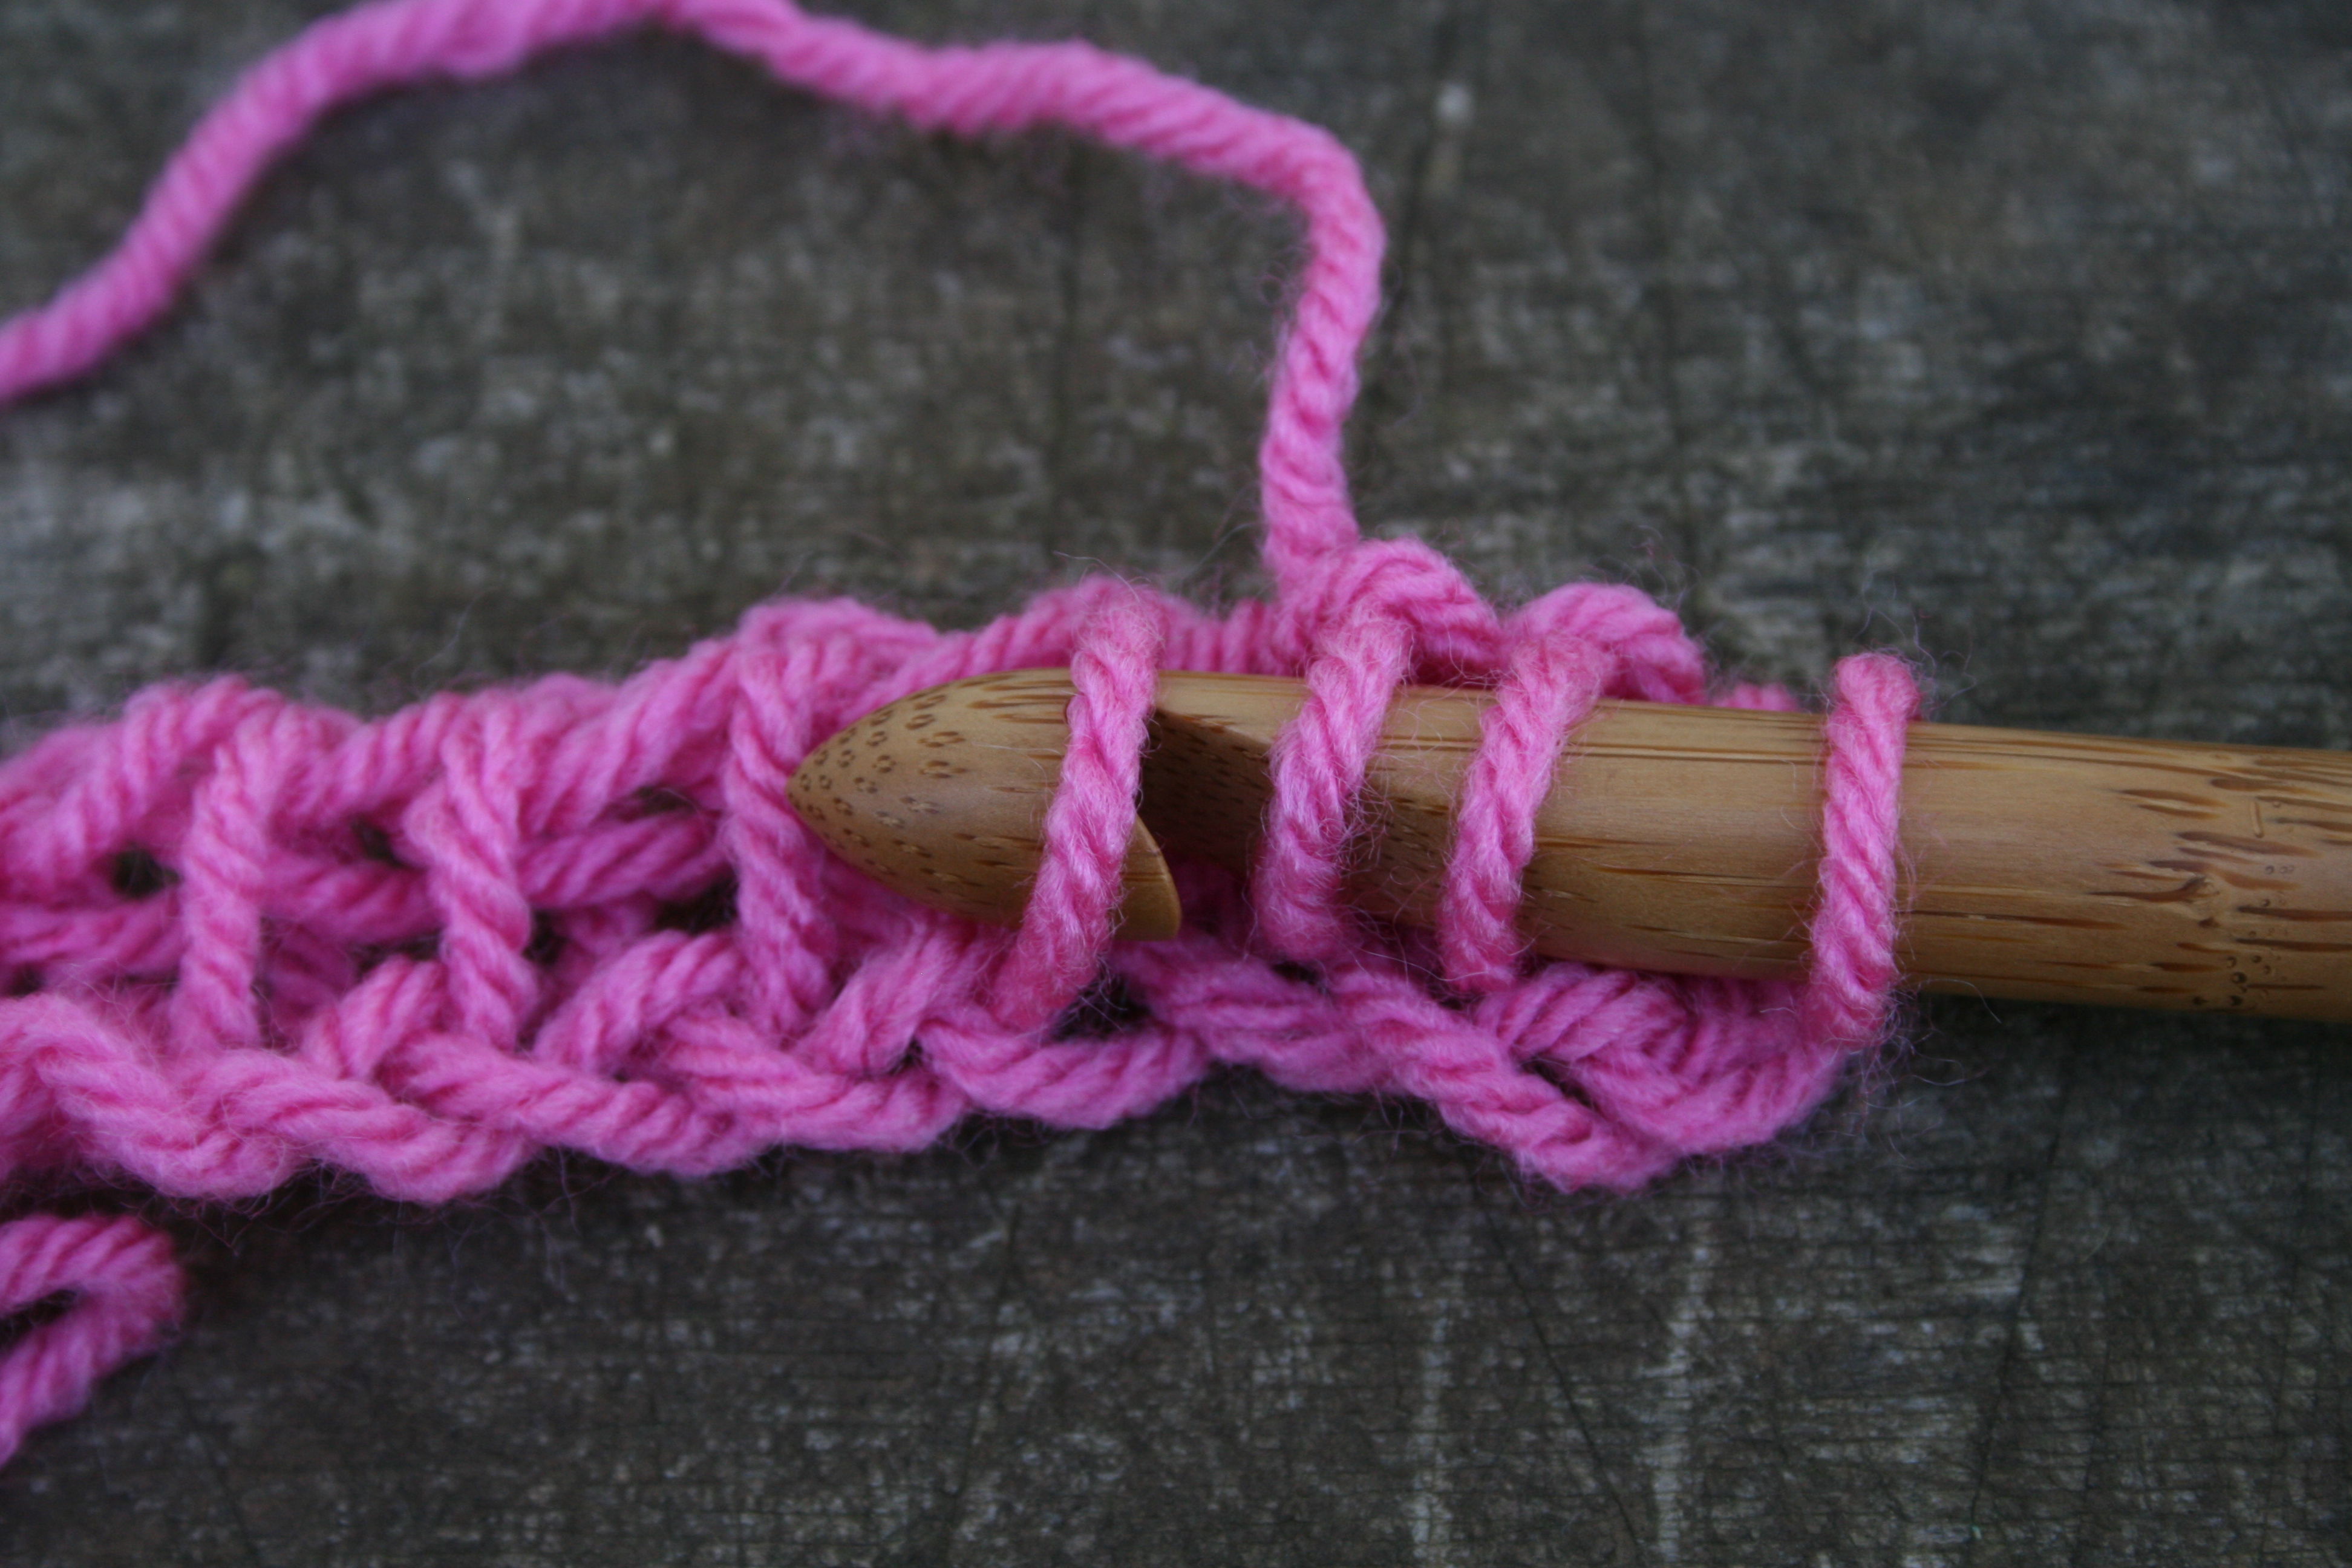
Row 2: Insert hook from back to front of the loop created just below working loop, YO, pull up a loop, Tss in each bar across to end (including bar directly below starting loop), and end by inserting hook through ch st, YO pull up a loop, insert hook between 2 loops remaining of ch, YO, pull up a loop (6 loops on hook), RP.

Rows 3-52: Rep Row 2, increasing by 2 stitches every row as established. (106 loops on last row)

Row 53: Ch 1, sc through each bar across, and through last ch st.

Finish off.  Weave in all ends.

©2013 Linda Dean Crochet

Be a Dinosaur!

ScannedImageHalloween is right around the corner, and my latest design in the October 2016 issue of the digital magazine, I Like Crochet, has a quick costume to turn your little one into a dinosaur!

The Dizzy Dino consists of a hat and sleeves (or arm warmers) that feature spikes, to highlight this reptile features. Everything really works up pretty fast, and can be created in a variety of colors to have a dinosaur pack on your trick or treating adventure.

5H9A1472-300x300

Photo courtesy of I Like Crochet Prime Publishing

One of the reasons I enjoy this design, is that it is soft, so kids with issues of textural feel can be comfortable. It is washable, so that it can have a life after the holiday as part of the dress up box. Finally it has warmth. Halloween in my geographic area is always a toss-up, it could be raining and 50 degrees or it is hot at near 100 degrees. This always makes it a little difficult to plan costumes, but in with this hat and arm set I can pair it with a sweatshirt or T-shirt and still have an effective dinosaur.

I will admit, this design did not begin as Halloween, it actually grew into creation from kids party ideas. One year I actually crocheted hats for all of my guests to my son’s birthday party. I filled these hats with candy and such, essentially turning the hat into a party favor bag, which had life after the party. This might seem a little over board, but I know that when my kids typically attend a party they come home with a simple bag of small toys and candies. These party favors usually leave a trail through my house of wrappers and scraps of paper, and me attempting to secretly throw this out, while my kids treasure them as memories of a good time. So by creating hat party favors I felt like it was actually a memento that could be kept without feeling like my kids were hoarding trash.

At my son’s party the hats seemed to be a hit, they poured out the candy to wear them, and even used them to help distinguish teams for a game a soccer in the back yard, hats vs hair.

Any way you look at it this design as possibilities, and will bring a smile to every kids face.

Tunisian Simple Stitch….Yes, It Is That Simple

ScannedImageTunisian stitches are unique in crochet as they are worked by “loading” your hook with live loops across the row then working a Return Pass to work all the loops back off. So every row has a two part process, load up the loops, and then work the loops back off. It is also unique as you do not turn your work, but work back and forth on the same side. Tunisian Simple Stitch is a classic stitch in Tunisian crochet, it was one called the “afghan stitch” and creates a vertical line where the stitches stack up upon one another.

Before beginning Tunisian crochet, you need to select the correct size hook, this technique can create a dense fabric if the hook size is too small. My standard rule of thumb is that whatever stand size crochet hook I would use with the chosen yarn, I go up at least 2 sizes in Tunisian. Meaning if with standard crochet I would use a size H/8/5.00mm with a yarn I would choose a Tunisian hook of K/10 ½/6.5mm to get the same drape and feel of the fabric.

To work this stitch, you begin with a chain, insert your hook into the second chain from the hook and pull through a loop, insert your hook into the next chain and pull through a loop, continue this insert hook and pull up a loop until you have worked all the chains have been worked. You will have the same number of loops on the hook as the number of chains you began with. Now you work a Return Pass.

img_5582

Insert hook into chain stitch, yarn over, pull through a loop. Repeat this process in all chain stitches across.

The Return Pass is always the same regardless of the Tunisian stitch, unless otherwise stated. You begin with working a chain 1 with the first loop on the hook, then yarn over and pull through 2 loops, yarn over and pull through 2 loops across the loops until 1 loop remains. Now you are ready to begin the next row.

img_5586

Return Pass….Chain 1 (with the first loop only, this creates the last stitch), yarn over and pull through 2 loops, repeat the yarn over, pull through 2 loops until 1 loop remains on the hook.

As with most things with crochet the Tunisian Simple Stitch (Tss) is where you place the hook. You do not work in the stitch directly below the loop on your hook, unless otherwise stated as this will cause an increase in the work, working from right to left you insert your hook under the vertical bar of the next stitch, yarn over and pull through a loop, continue inserting your hook under the vertical bar and pull through a loop until you reach the end of the row. Insert your hook into the chain 1 created in the beginning of the Return Pass, this is a little more difficult to work into, and is the last stitch of the row. Now you work the return pass again.

img_5587

Insert hook under vertical bar from right to left (reversed if you are left handed), yarn over, pull up a loop, repeat to “load” the hook.

Continue this process, as you are now creating the Tunisian Simple Stitch.

img_5593-copy-2

Tunisian Simple Stitch, also known as the Afghan Stitch

Stress Free & Seamless… The Best of Crochet

ScannedImageI had a surprise in the latest special issue of Crochet! Magazine,(Stress Free Seamless Crochet, Fall 2016), I had another design on the cover! What was really surprising is that I was not even expecting this design to be in this issue.

LAVISH_LAYERS_SCARF_medium

Autumn Blaze Scarf Photo courtesy Annie’s

132120_small2The Autumn Blaze Scarf that adorns the cover is really an interesting pattern that creates a great texture while creating a fabric that is on the biased, meaning that it has increases and decreases worked every row to give it a much angled direction. This really allows yarn that has some length to the color repeats to shine.

DHARMA-tote_medium2

Dharma Tote Photo courtesy Annie’s

The second design I have in this issue also benefits from long color repeat yarn, the Dharma Tote uses crochet miter squares to bring color to life in angles. Miter squares are worked from two edges worked, a corner, and worked toward the opposite corner. There is essentially a decrease worked in the center of the worked row, and my continuing the row with a decrease every row, it reduces to a point.

One of the really nice features about miter squares is that you can easily work it as join as you go, by beginning an edge directly on a created square. I played around a bit with the square locations, as I really didn’t want everything facing the same direction, yet I didn’t want to create a square that would be difficult to create with too many joins. I added some leather strap handles, and this bag was ready to go. I love the stretch that it has, I can stuff it full of crochet samples for my classes, or items that my kids need for “insert name of event here”.

Both of the designs benefit from long color repeat yarns, there is a couple of reasons for this. First you do not have to think about color combinations. The yarns already have some harmony in the palette of color, thus making sure that your finished product will be pleasing to the eye. Second, the long spans of color allow for the design to be highlighted. Whenever color changes are short, a little of every color works into almost any stitch, and things looked speckled. When to color change is long, you can create a shape in the color, as with Dharma Tote, you can see the directions for the squares. Neither of these designs would shine if they were speckled or in solid colors.

Astral Flowers Throw with Humble Beginnings

ScannedImageI fell in love with the Astral Flowers Square the moment it came from my hook, and still enjoy It as a throw in the October 2016 issue of Crochet World MagazineAs with much of my design style I happened upon this by playing and a little bit of a challenge, however the story of its beginning is not a happy one.

M01232_15_medium

Astral Flowers Throw Photo courtesy of Annie’s

A friend and fellow designer lost her daughter last year, and as a way of letting her know that she was the hearts and minds of vast community a fellow friend organized a formation of a friendship afghan. She asked for six inch squares in various colors that had significance to members of the suffering family. She selected a certain type of yarn, so that everything would work together nicely, and agreed to sew all the squares together. When all was said and done enough squares were created by various crochet designers, and others in the industry, that in the end there were at least 3 afghans created, the Astral Flower Square is among them.

I originally sat down with the three colors and just began putting them together without thinking of the stitches themselves, but the difficult time my friend was going through. I created a total of 6 squares, no sense in having partially used skeins when more squares could be created. In this methodical challenge of working squares I worked one with post stitches, this grew into this square.

133005_small2I will admit that I was a bit taken aback by the way the color can be so deceptive and making the square appear to have more going on than it really does. At one moment I can see a star in another I can see a flower, there seems to be depth and volume in the work, yet it really is just a couple of rounds. The only magic that happens is that the post stitches create an illusion of the color being worked in other ways.

The other thing that I find striking with this square is that the sides are not actually straight. The corners are slightly higher then than the center of each side, creating a little “key hole” type effect. I really like how this shape works at bringing a little something extra to the throw overall, and seaming the squares in the back loops only of the stitches creates a simple framed edge. The one drawback to the square, used in the fashion that I have, is that it really does need to be hand sewn together, no join as you go…but maybe if I play with a different edging…no, I think I like it the way it is.