Essentially there are 2 ways to create a thermal crochet stitch. I was first introduced to this technique over a decade ago. “Thermal” is worked one way, and today you can find it worked in a completely different manner. This is proves to me even more, that you cannot rely on the fancy names of crochet stitches, make sure and check the special stitches of a pattern.
However, I thought I would share what I have learned about this stitch. Basically a thermal stitch is one that creates a double sided fabric. Stitches are connected by working through the loops of 2 different rows to create the third.
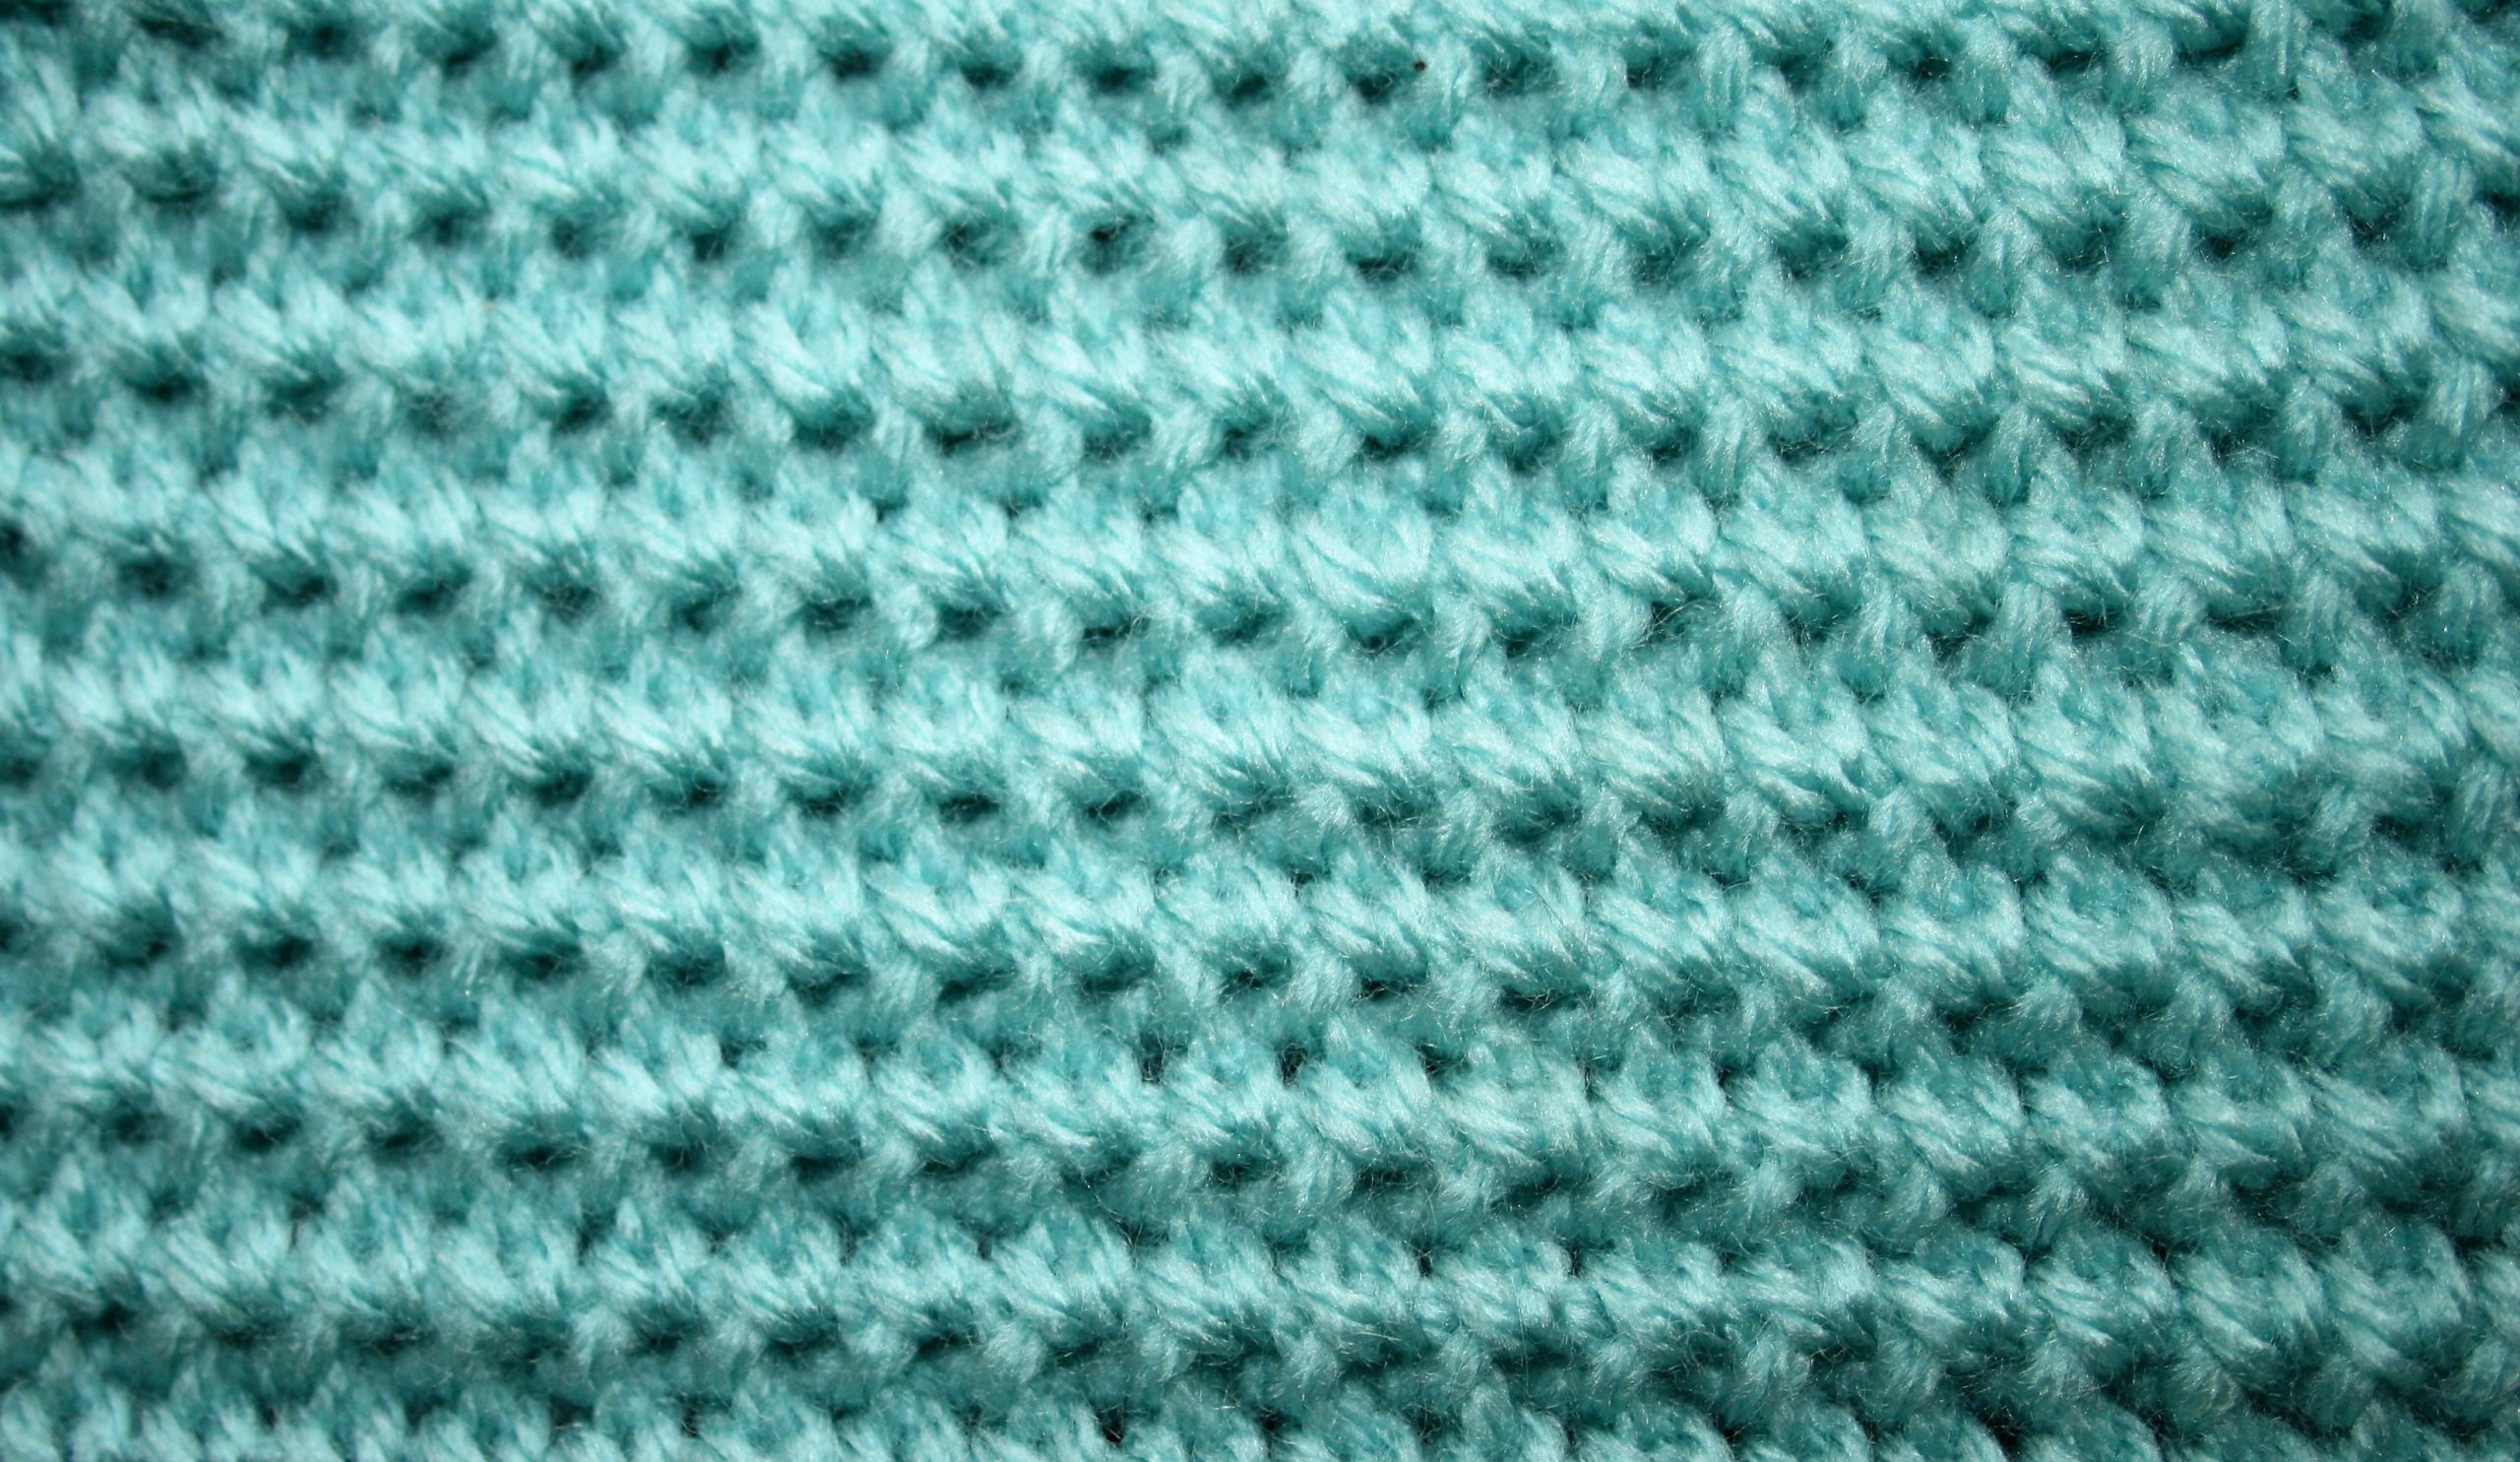
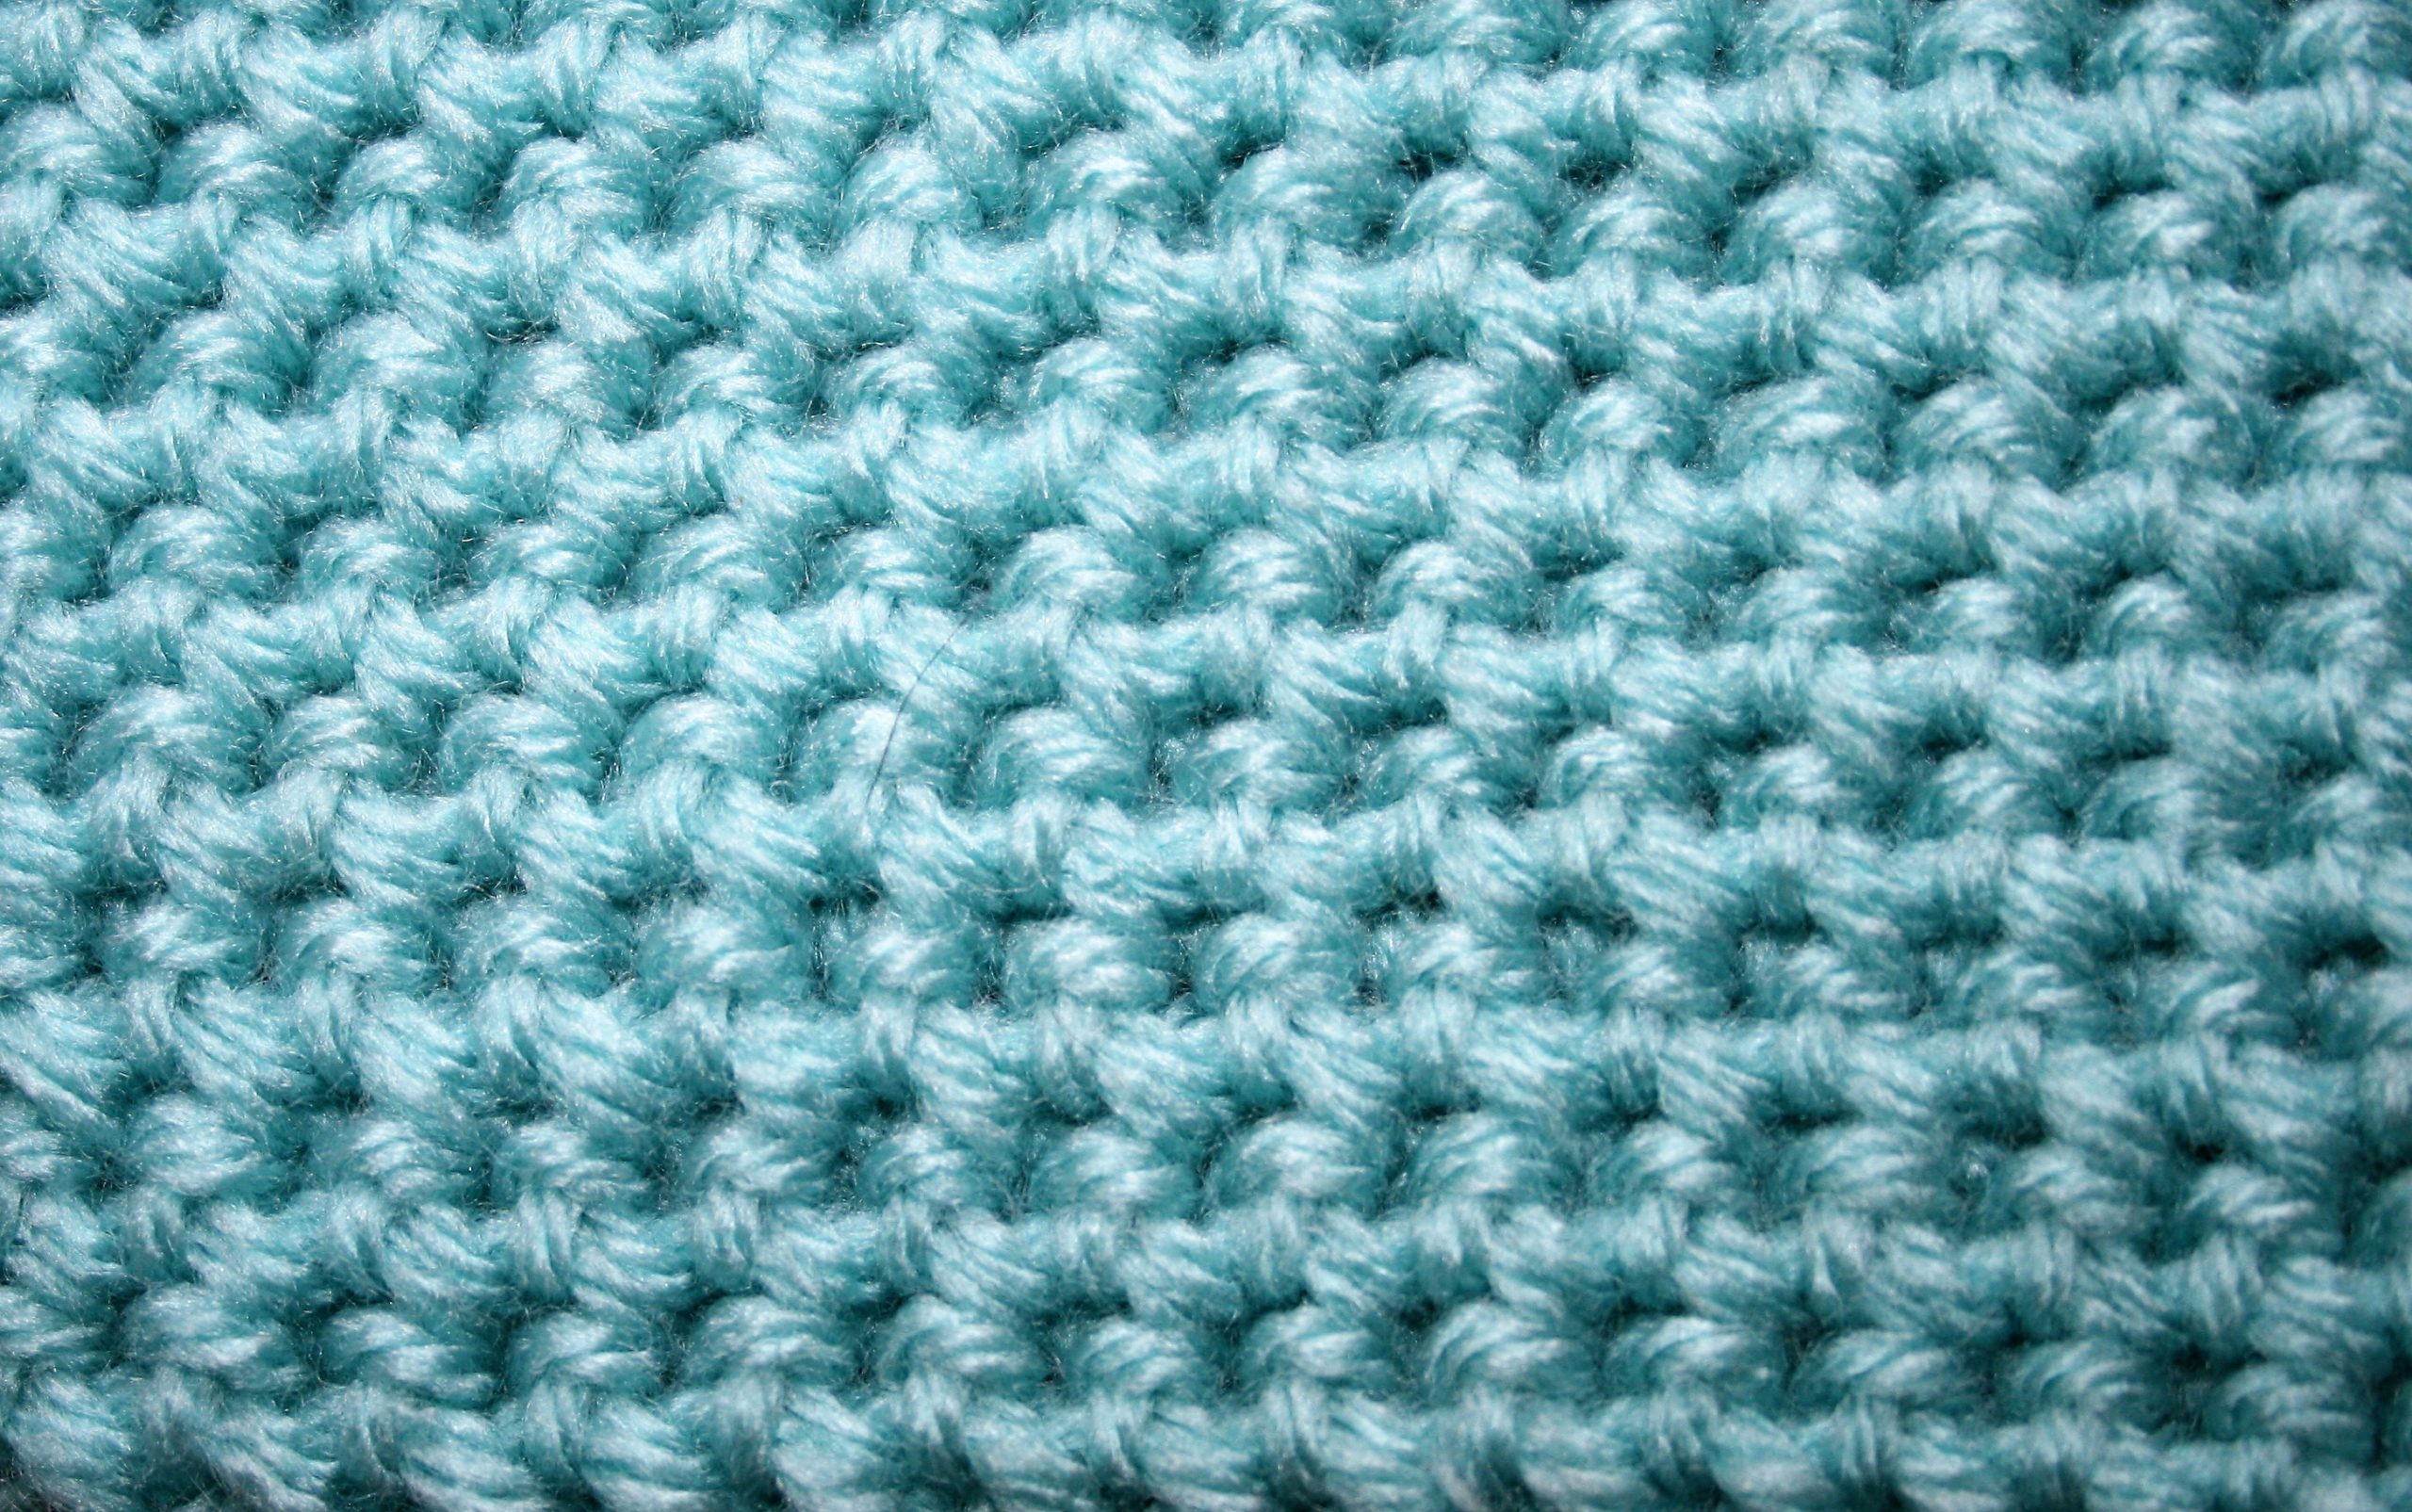
Bottom Up method of Thermal Single Crochet FabricTop Down Method Thermal Single Crochet Fabric
Bottom Up -1 of 2 ways thermal crochet
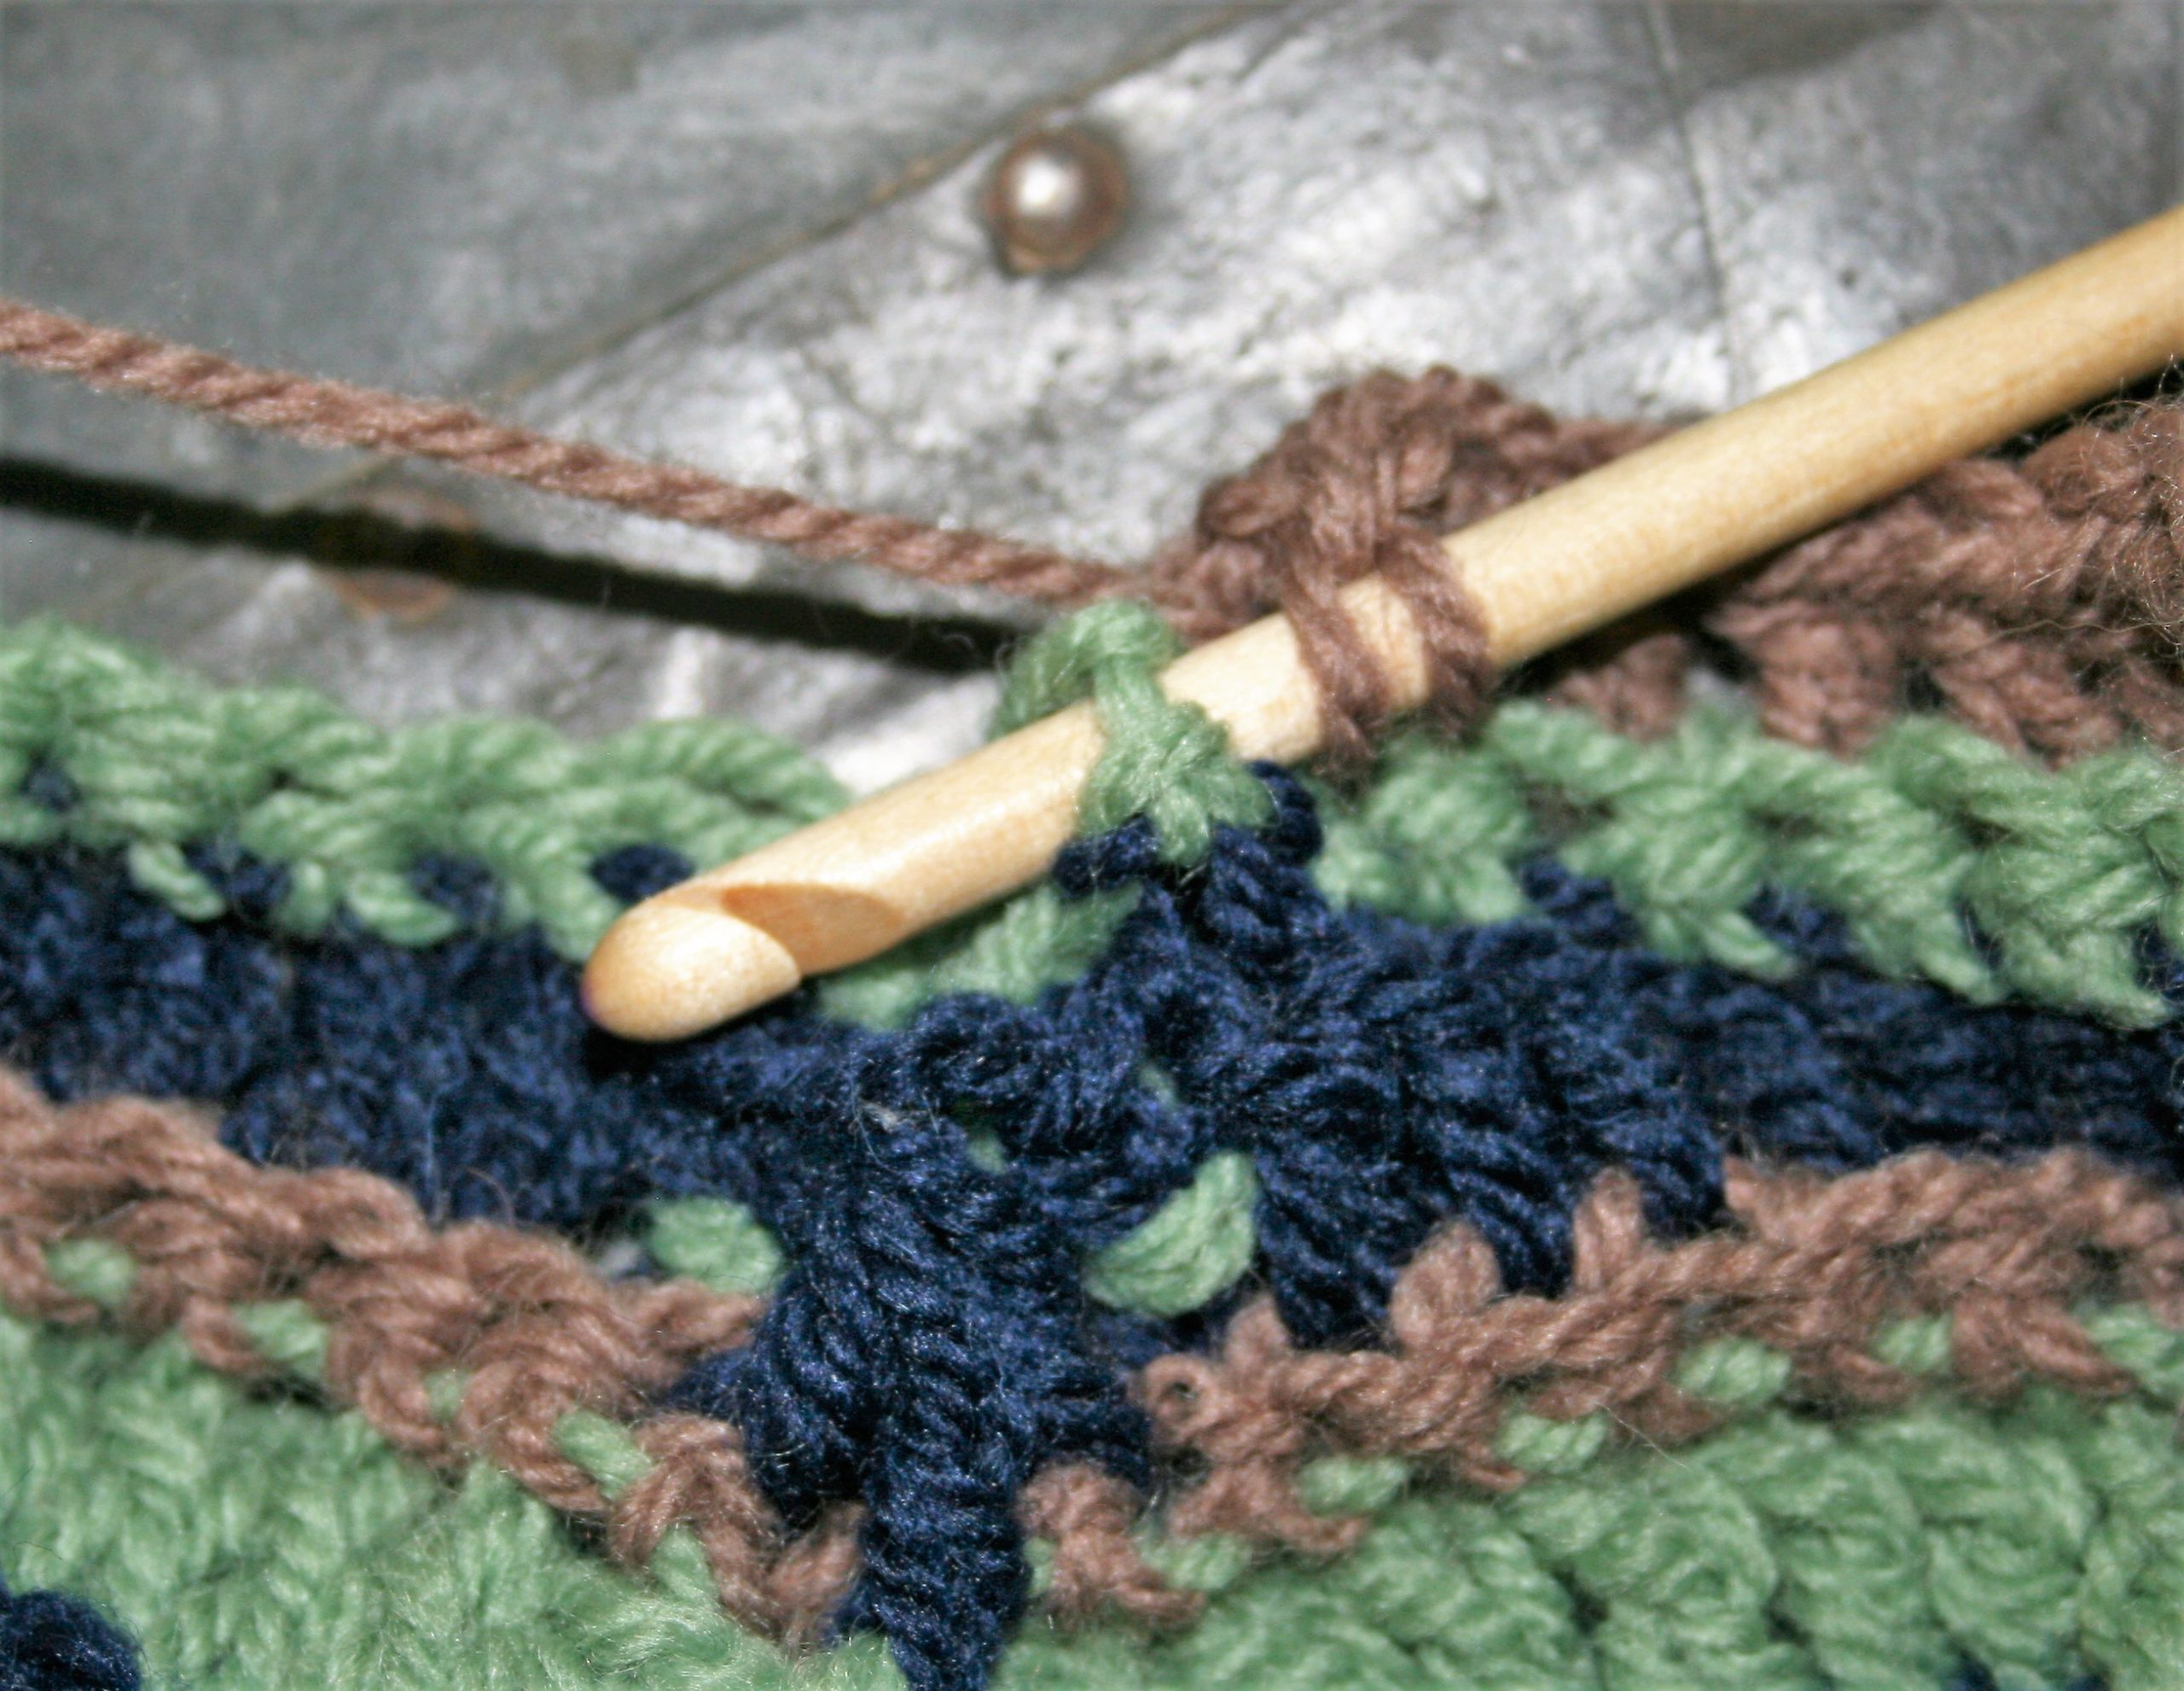
I learned to connect these stitches from the “bottom up”. Insert the hook through the loop of the row 2 rows below upwardly and then through the front loop of the row typically be worked into. Yarn is wrapped around the hook and then pulled through these 2 loops. There is an additional yarn over, and pull through the last two loops; a single crochet thermal stitch is created. Learn it here.
Inserting hook from the “bottom up” to create the thermal single crochet
The bottom up method creates a fabric that has the “front” or “right” side of the fabric facing outward, while the “back” of the stitch is captured in the center of the fabric.
Top Down -1 of 2 ways thermal crochet
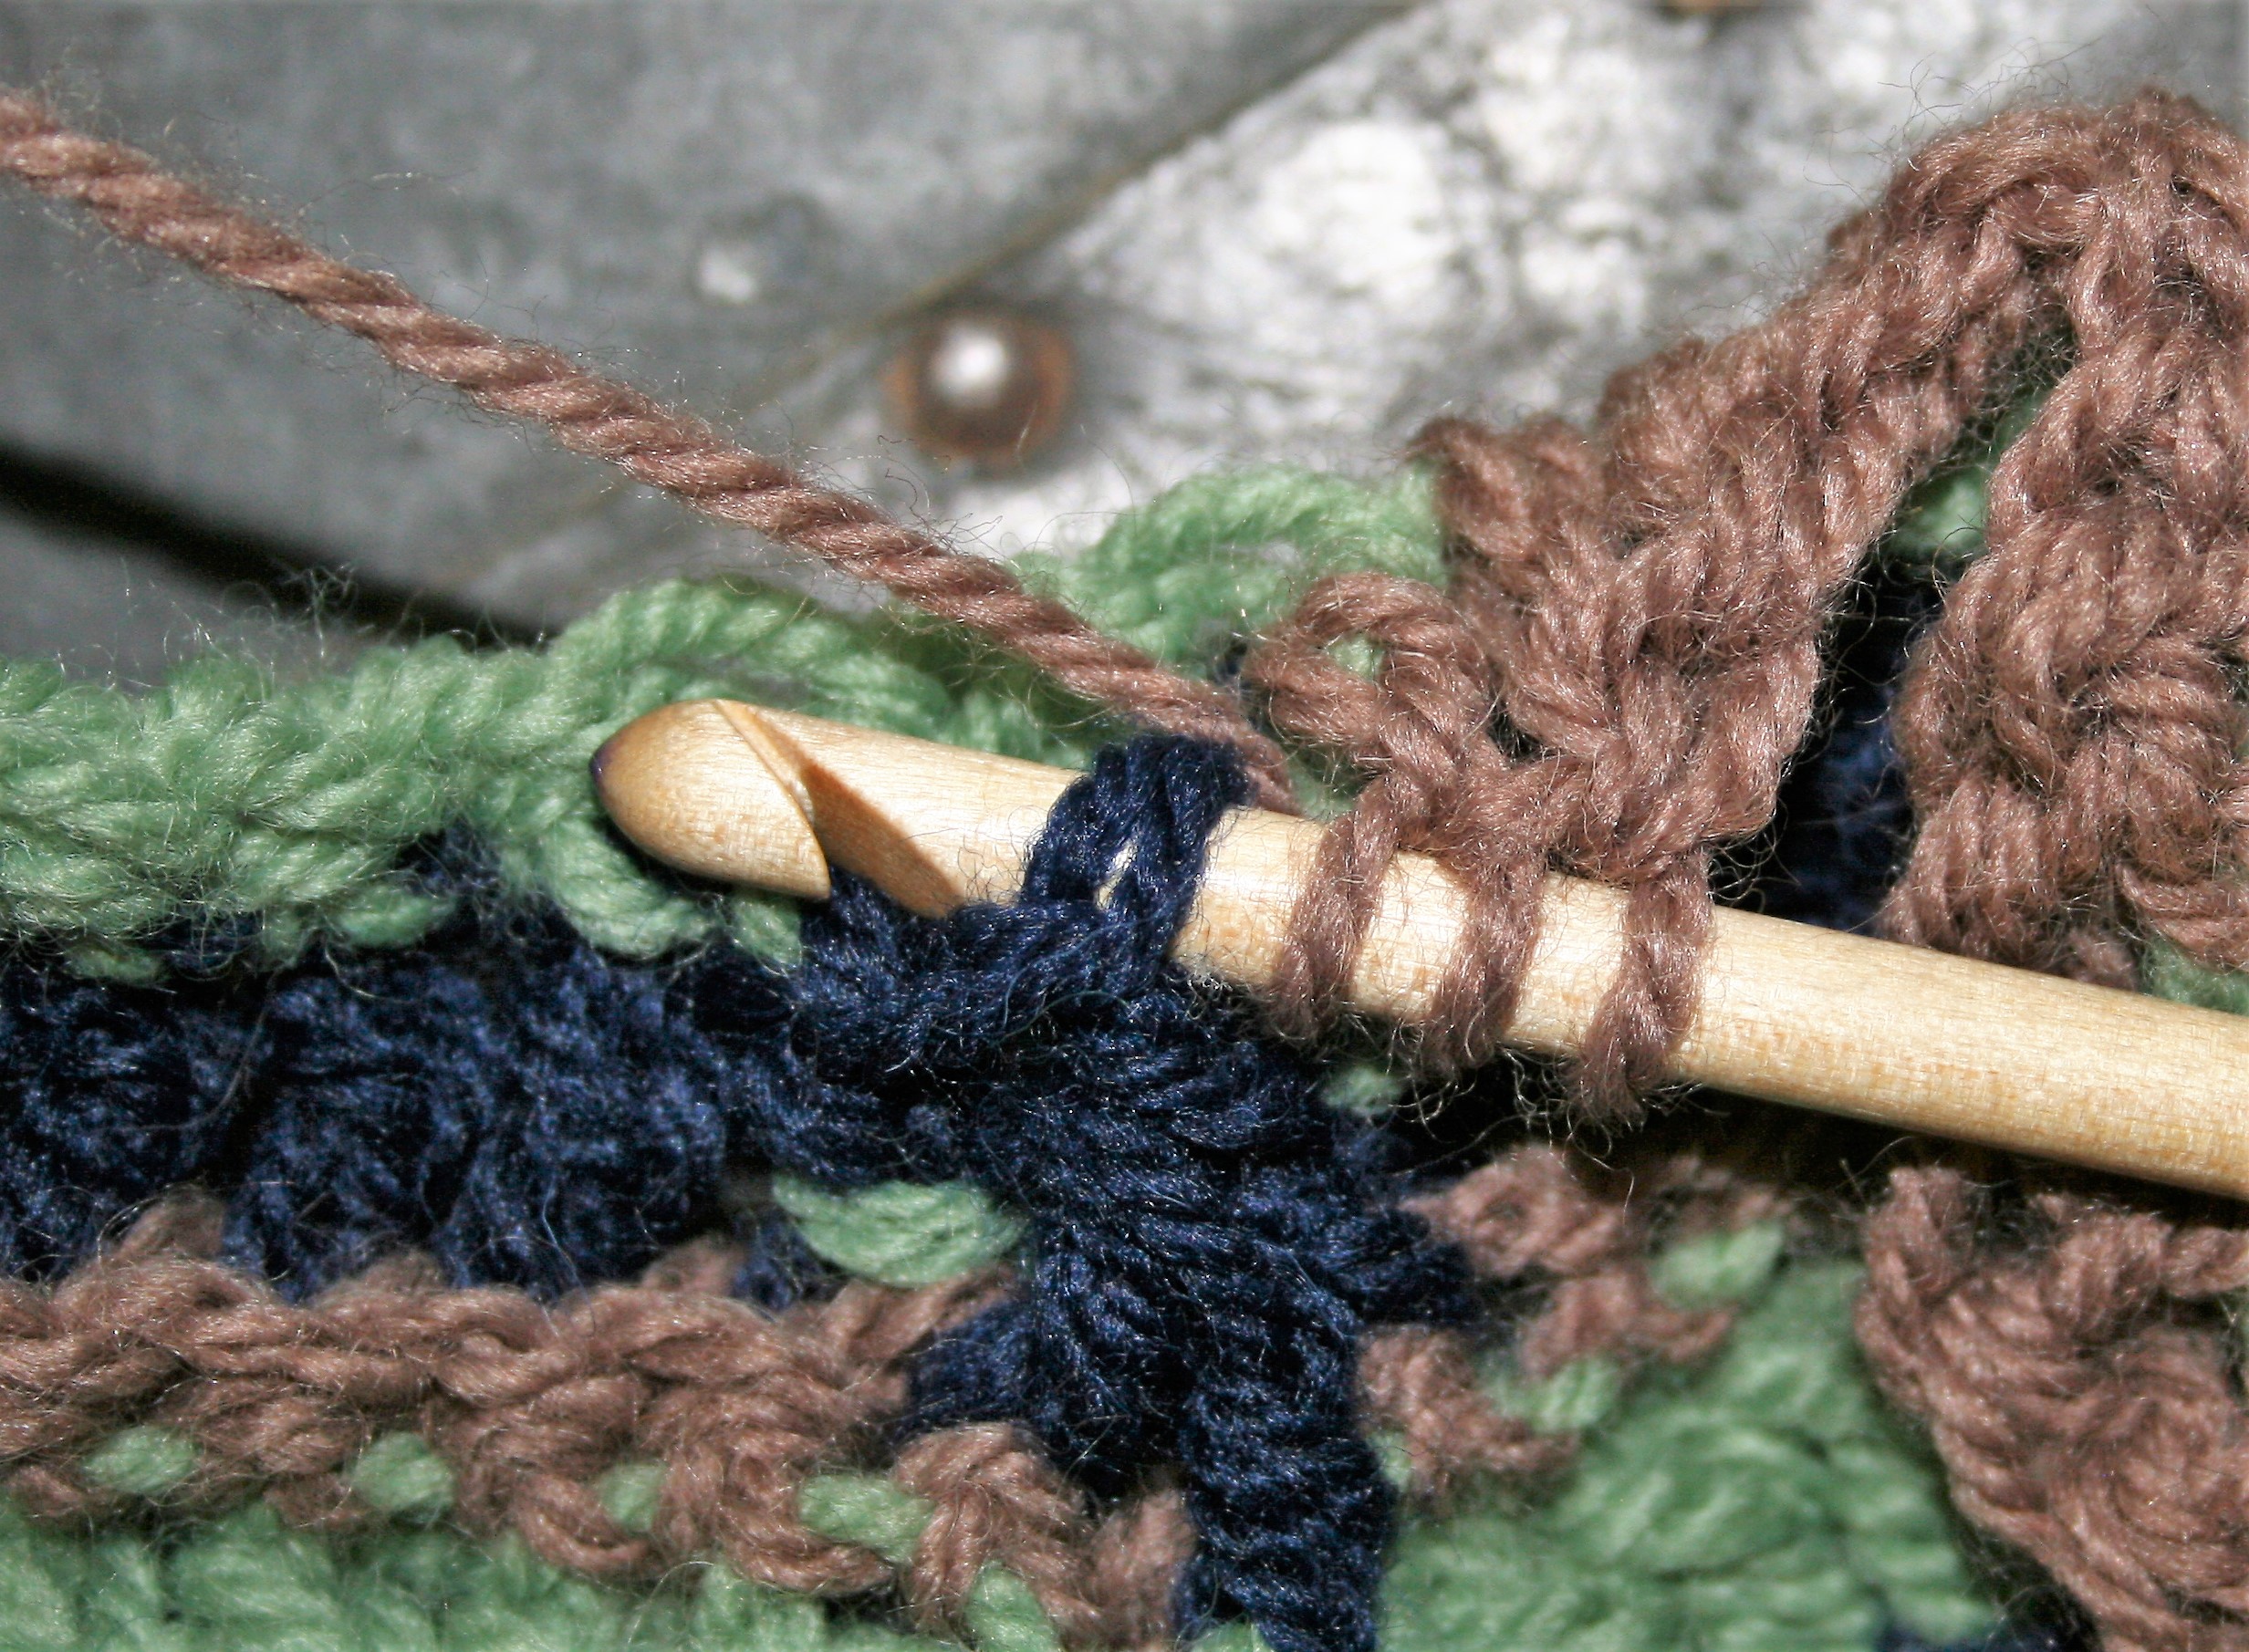
The latest way I have seen this stitch explained, uses the same loops of the stitch rows has the base of the stitch, but instead works the hook down through the front loop of the regular working row and then through the unused loop of the row 2 rows below.
Created from the “top down” method thermal single crochet
To prevent the stitches from twisting, the work is essentially worked “backwards”. Meaning that you are crocheting the fabric in the opposite direction from that which you usually do. This “top down” method creates a fabric that has the “wrong” of “back” side of the fabric facing outward with the “front” encapsulated in the center.
There are some slight visual differences with these methods, and the Bottom up approach tends to lend itself better to working in the round.
This is an interesting stitch, either way you work it. I am continuing to explore its possibilities.
I always look forward to March, otherwise known as National Crochet Month, and participating in the blog tour by Crochetville with this year’s theme “Pawprints on our Hearts”. Make sure and follow along on the tour here.
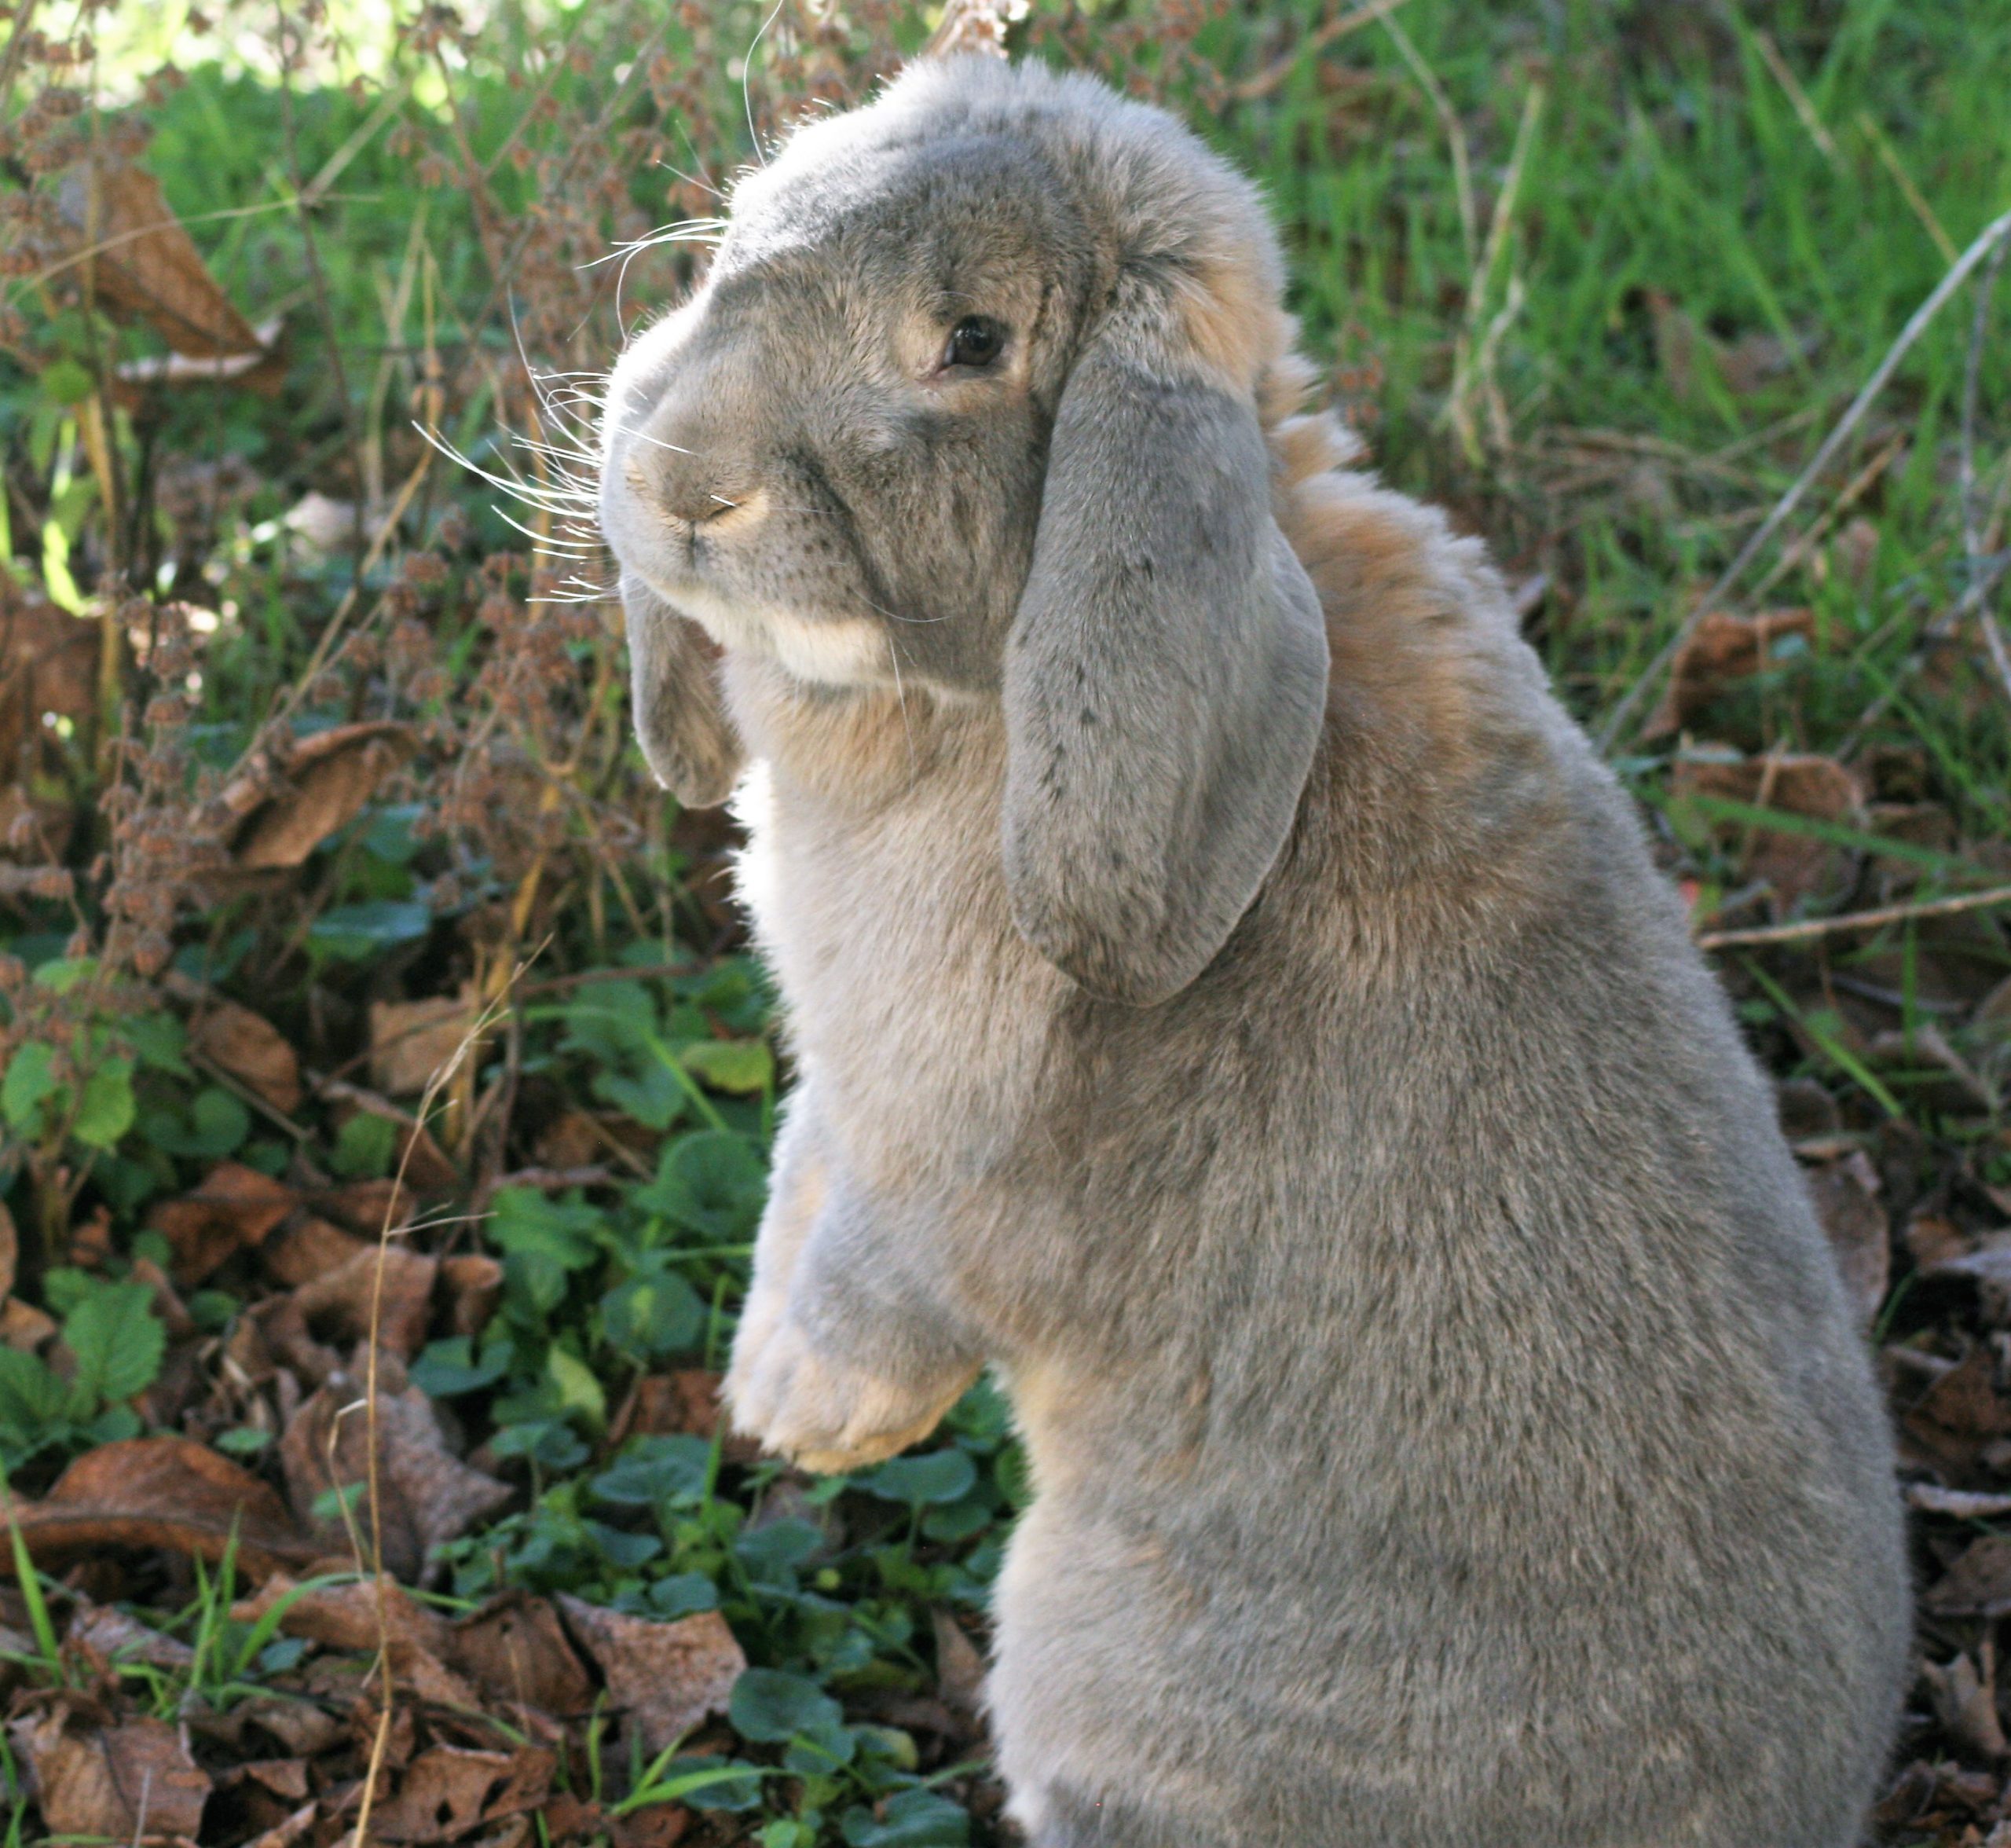
This theme was a bit difficult for me. I still have a heavy heart from the passing of a pet, the family house rabbit, Storm. He managed to capture my heart in a way that the other pets in the home just haven’t managed. Storm was always nearby as I was working on projects and designs. You might not believe it, he would share his opinion of my work. He was always a critic.
Storm, the house rabbit
Imagine a rabbit that managed to be the dominate pet in the house. Keeping the 80 pound dog and cat in line. Stealing the dog’s bed and chase the cat, and learned to scratch on the refrigerator door to get blueberries. He is missed.
I have always had a soft spot for rabbits, and I am not sure why. I have had a few different bunnies over the years, and their personalities are always so varied. It is so unplanned, how our hearts can just open up to our pets.
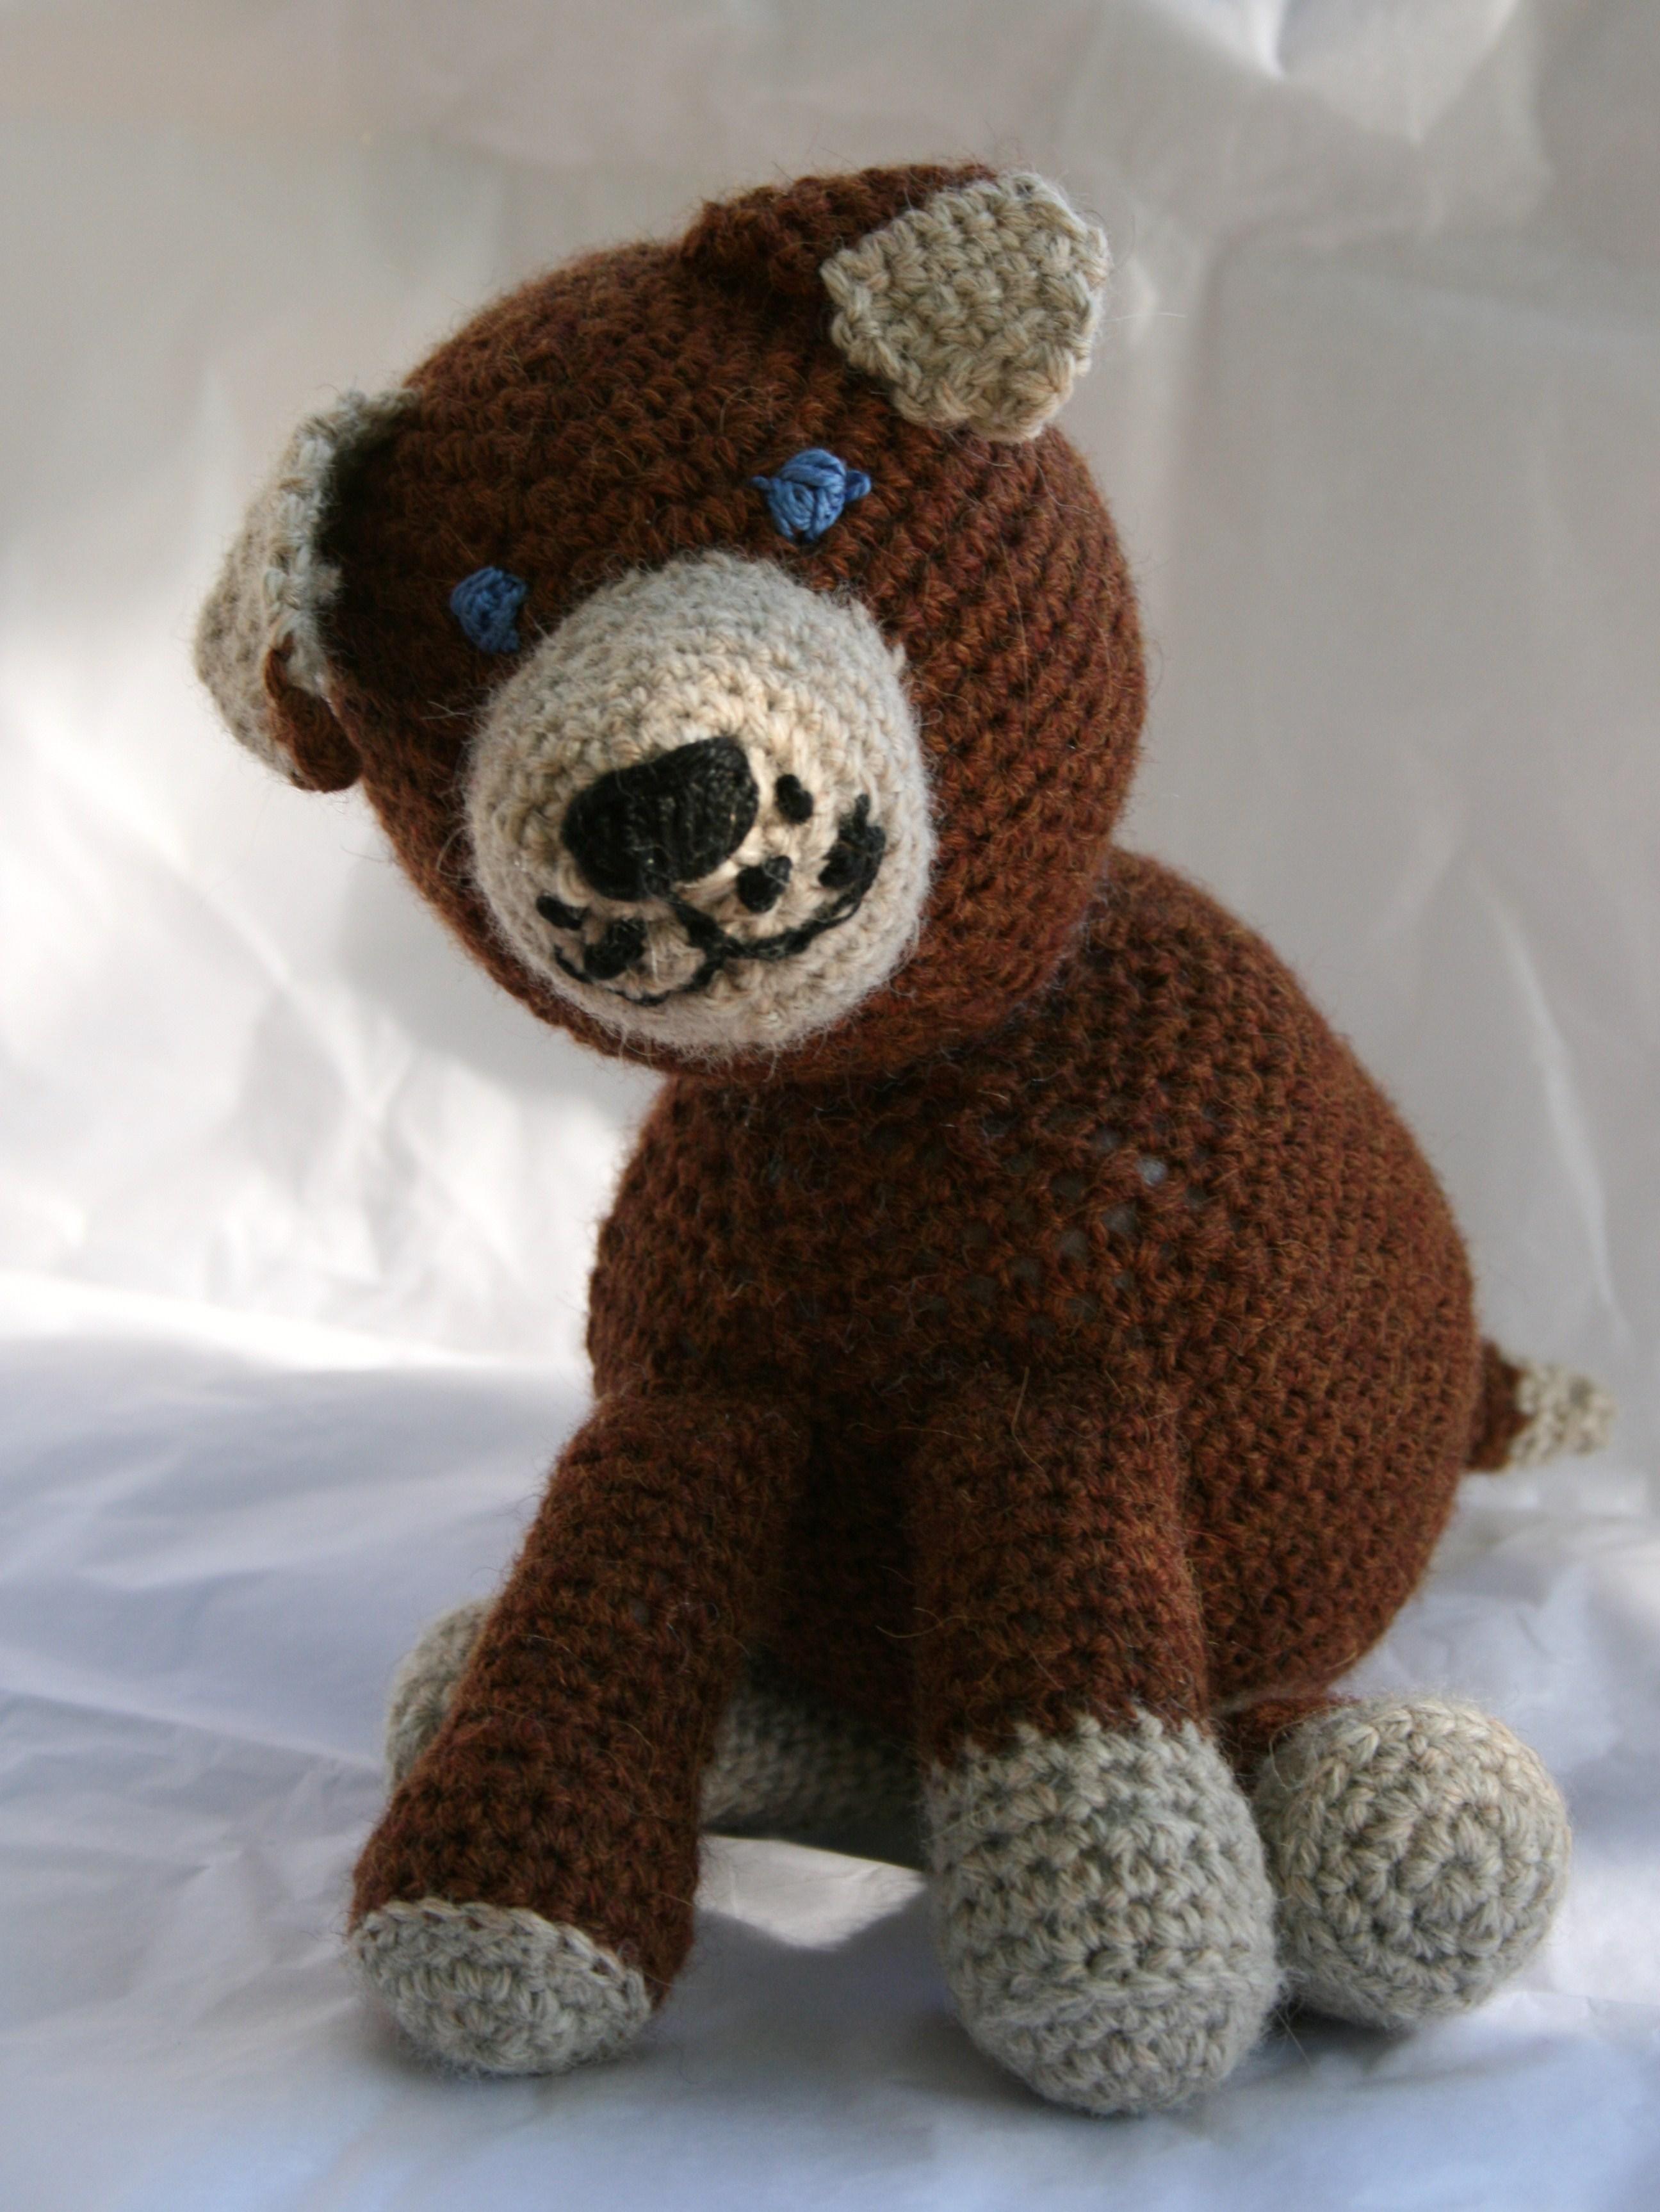
BBD (Baby Brown Dog)
As a way of celebrating this love we have for pets with you during National Crochet Month, I am offering my pattern for BBD (Baby Brown Dog) at half price (get it here). This is a toy puppy with weighted feet that hopefully will find a way into your heart.
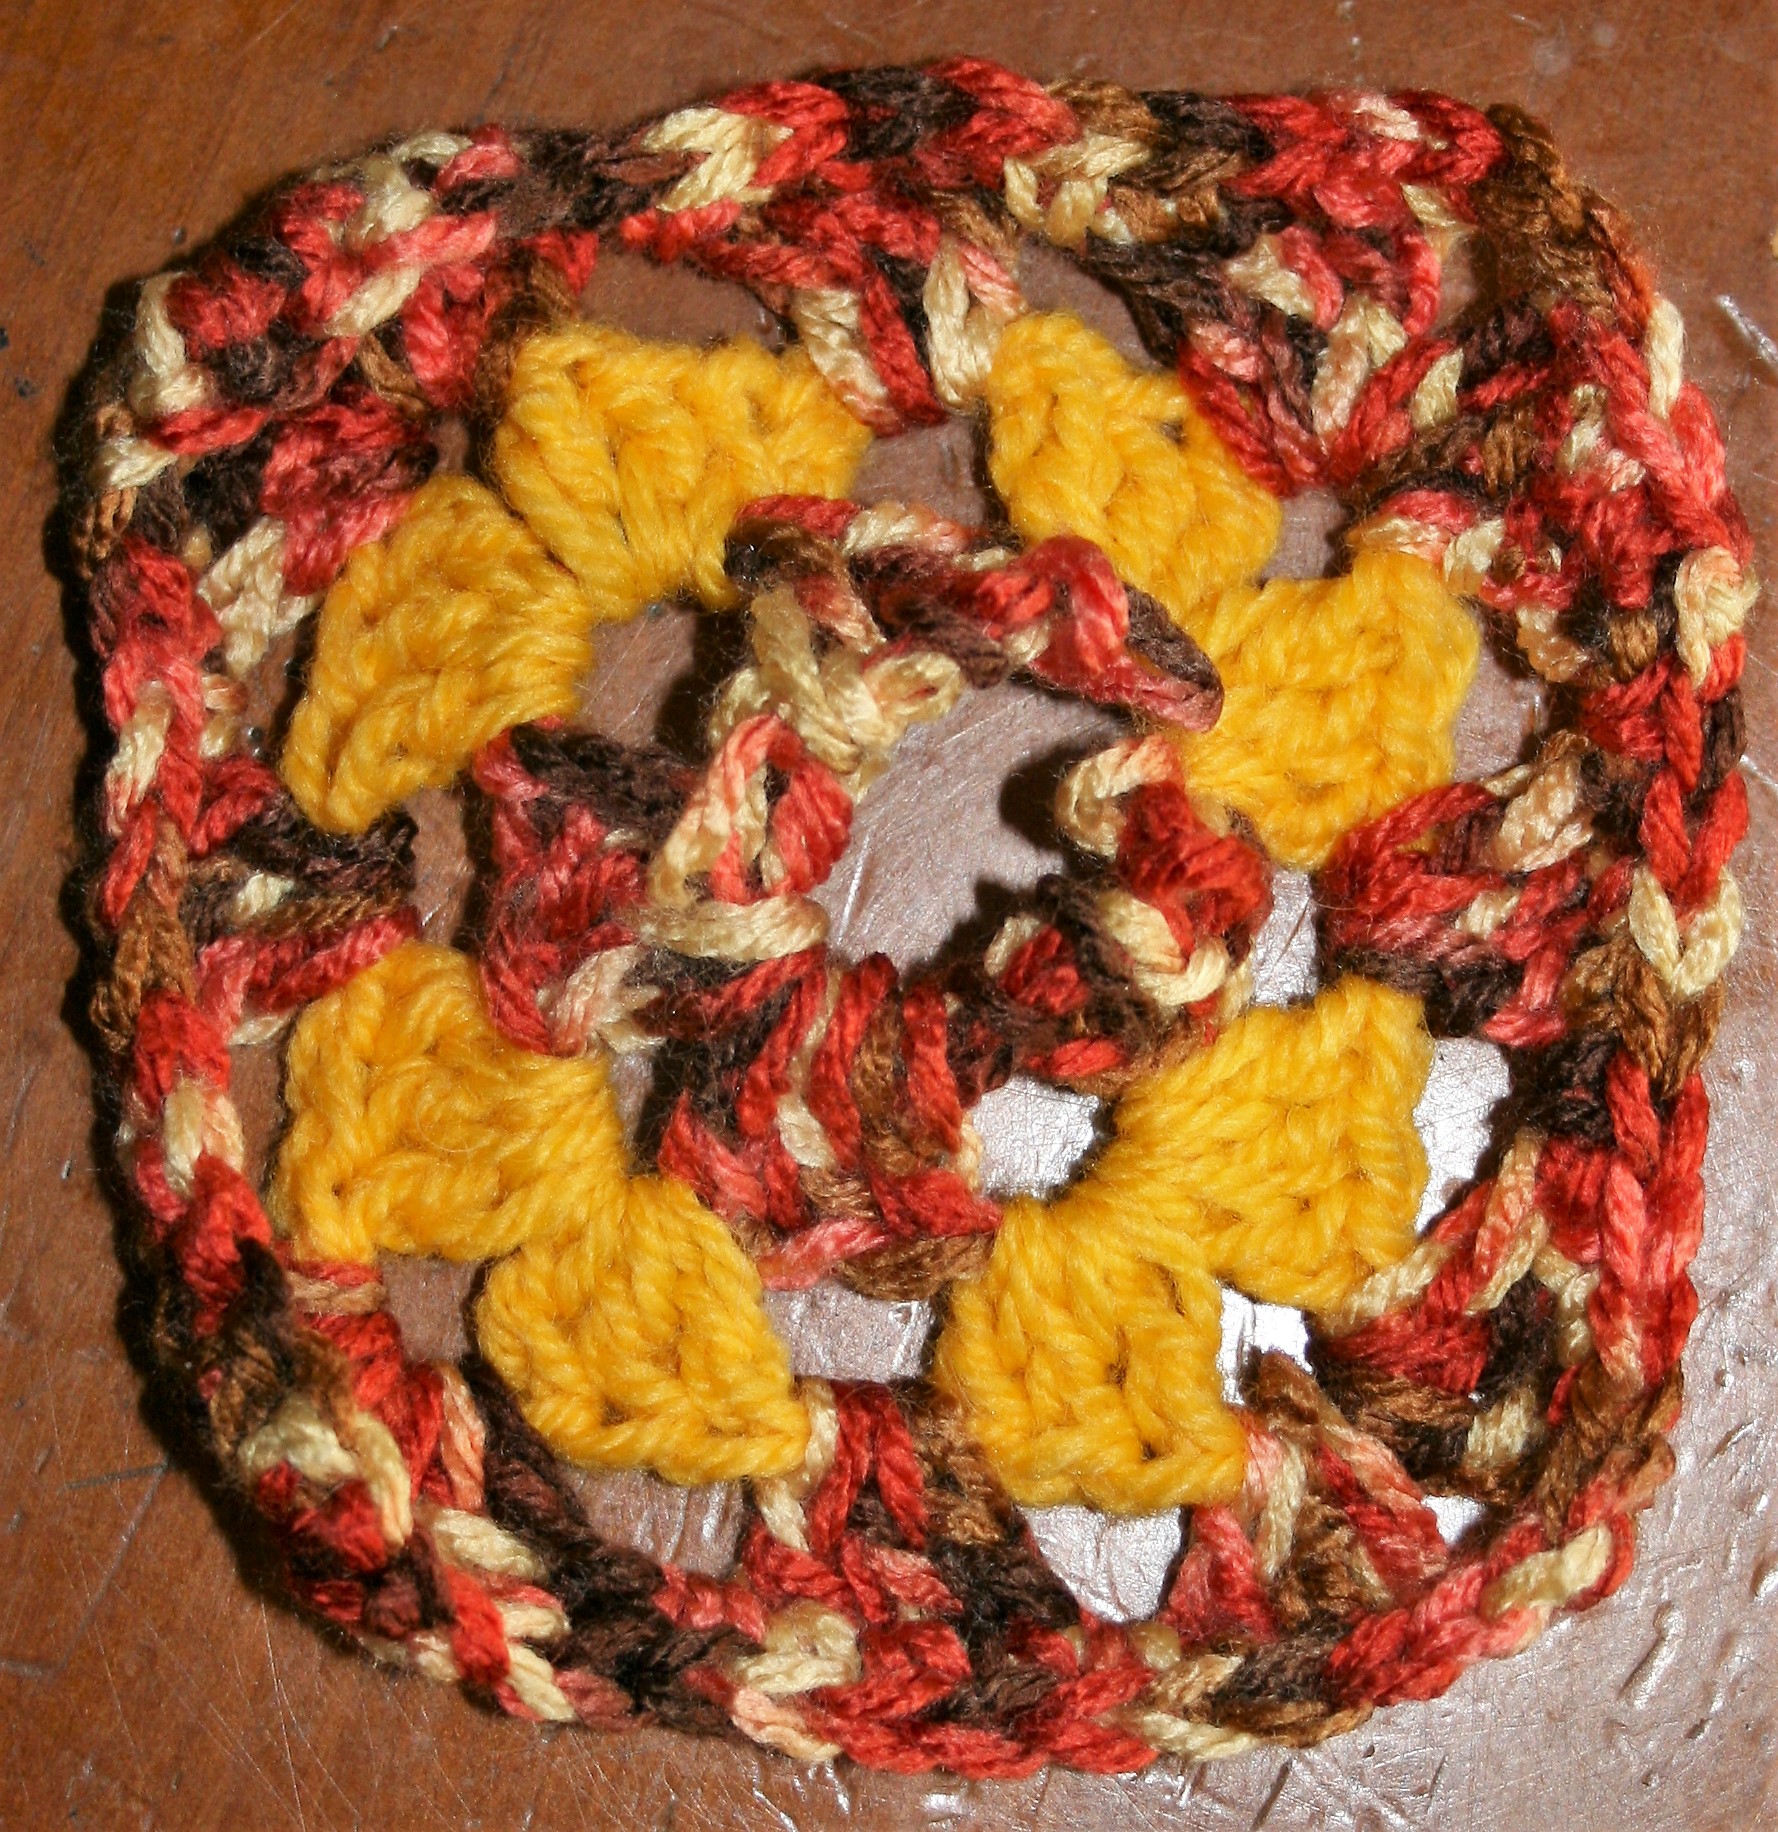
Repairing a crochet granny square can be an easy fix. Often the center of a granny square is the weakest point. There is a lot of stress with many stitches worked around a small piece of yarn.
To begin this repair, find yarn that matches the damaged area. I find this to be the most difficult part of doing a repair. Often you will not find the exact yarn that was originally used, so try to match these three criteria as close as possible:
Color- hue and tone
Yarn weight- super fine, fine, light, medium, etc.
Fiber content – what is it made of, cotton, wool, synthetic
After finding a yarn, cut a sting about 12” (30cm), and thread a yarn needle.
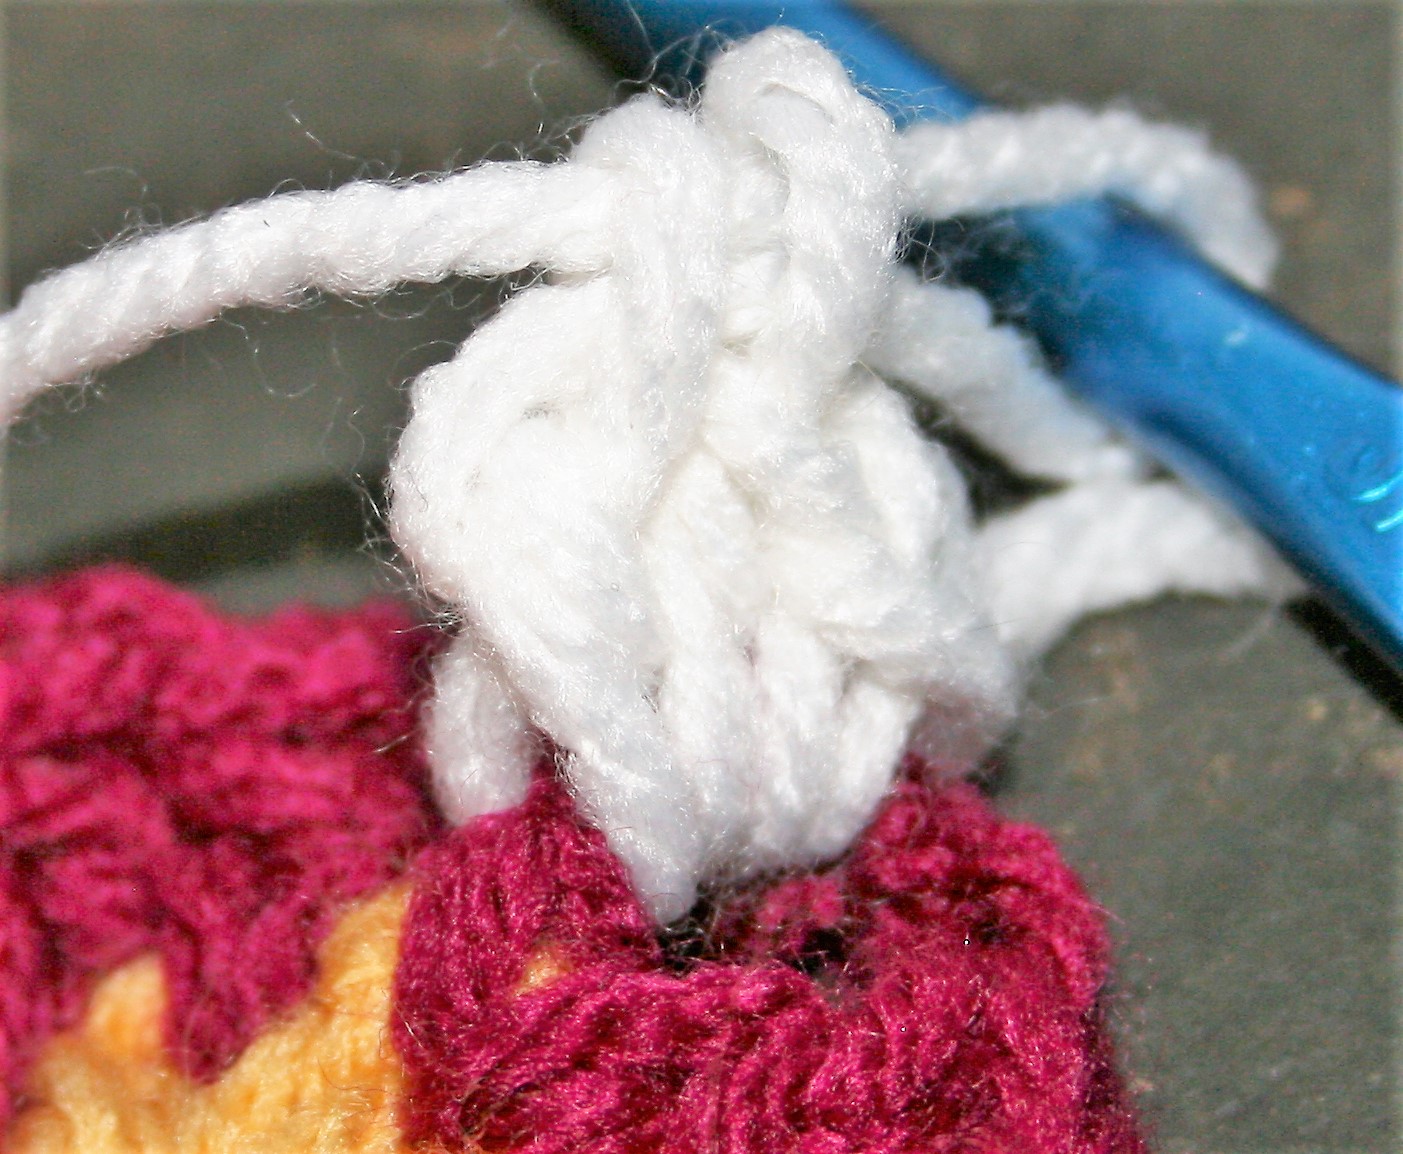
Begin repairing a crochet granny square
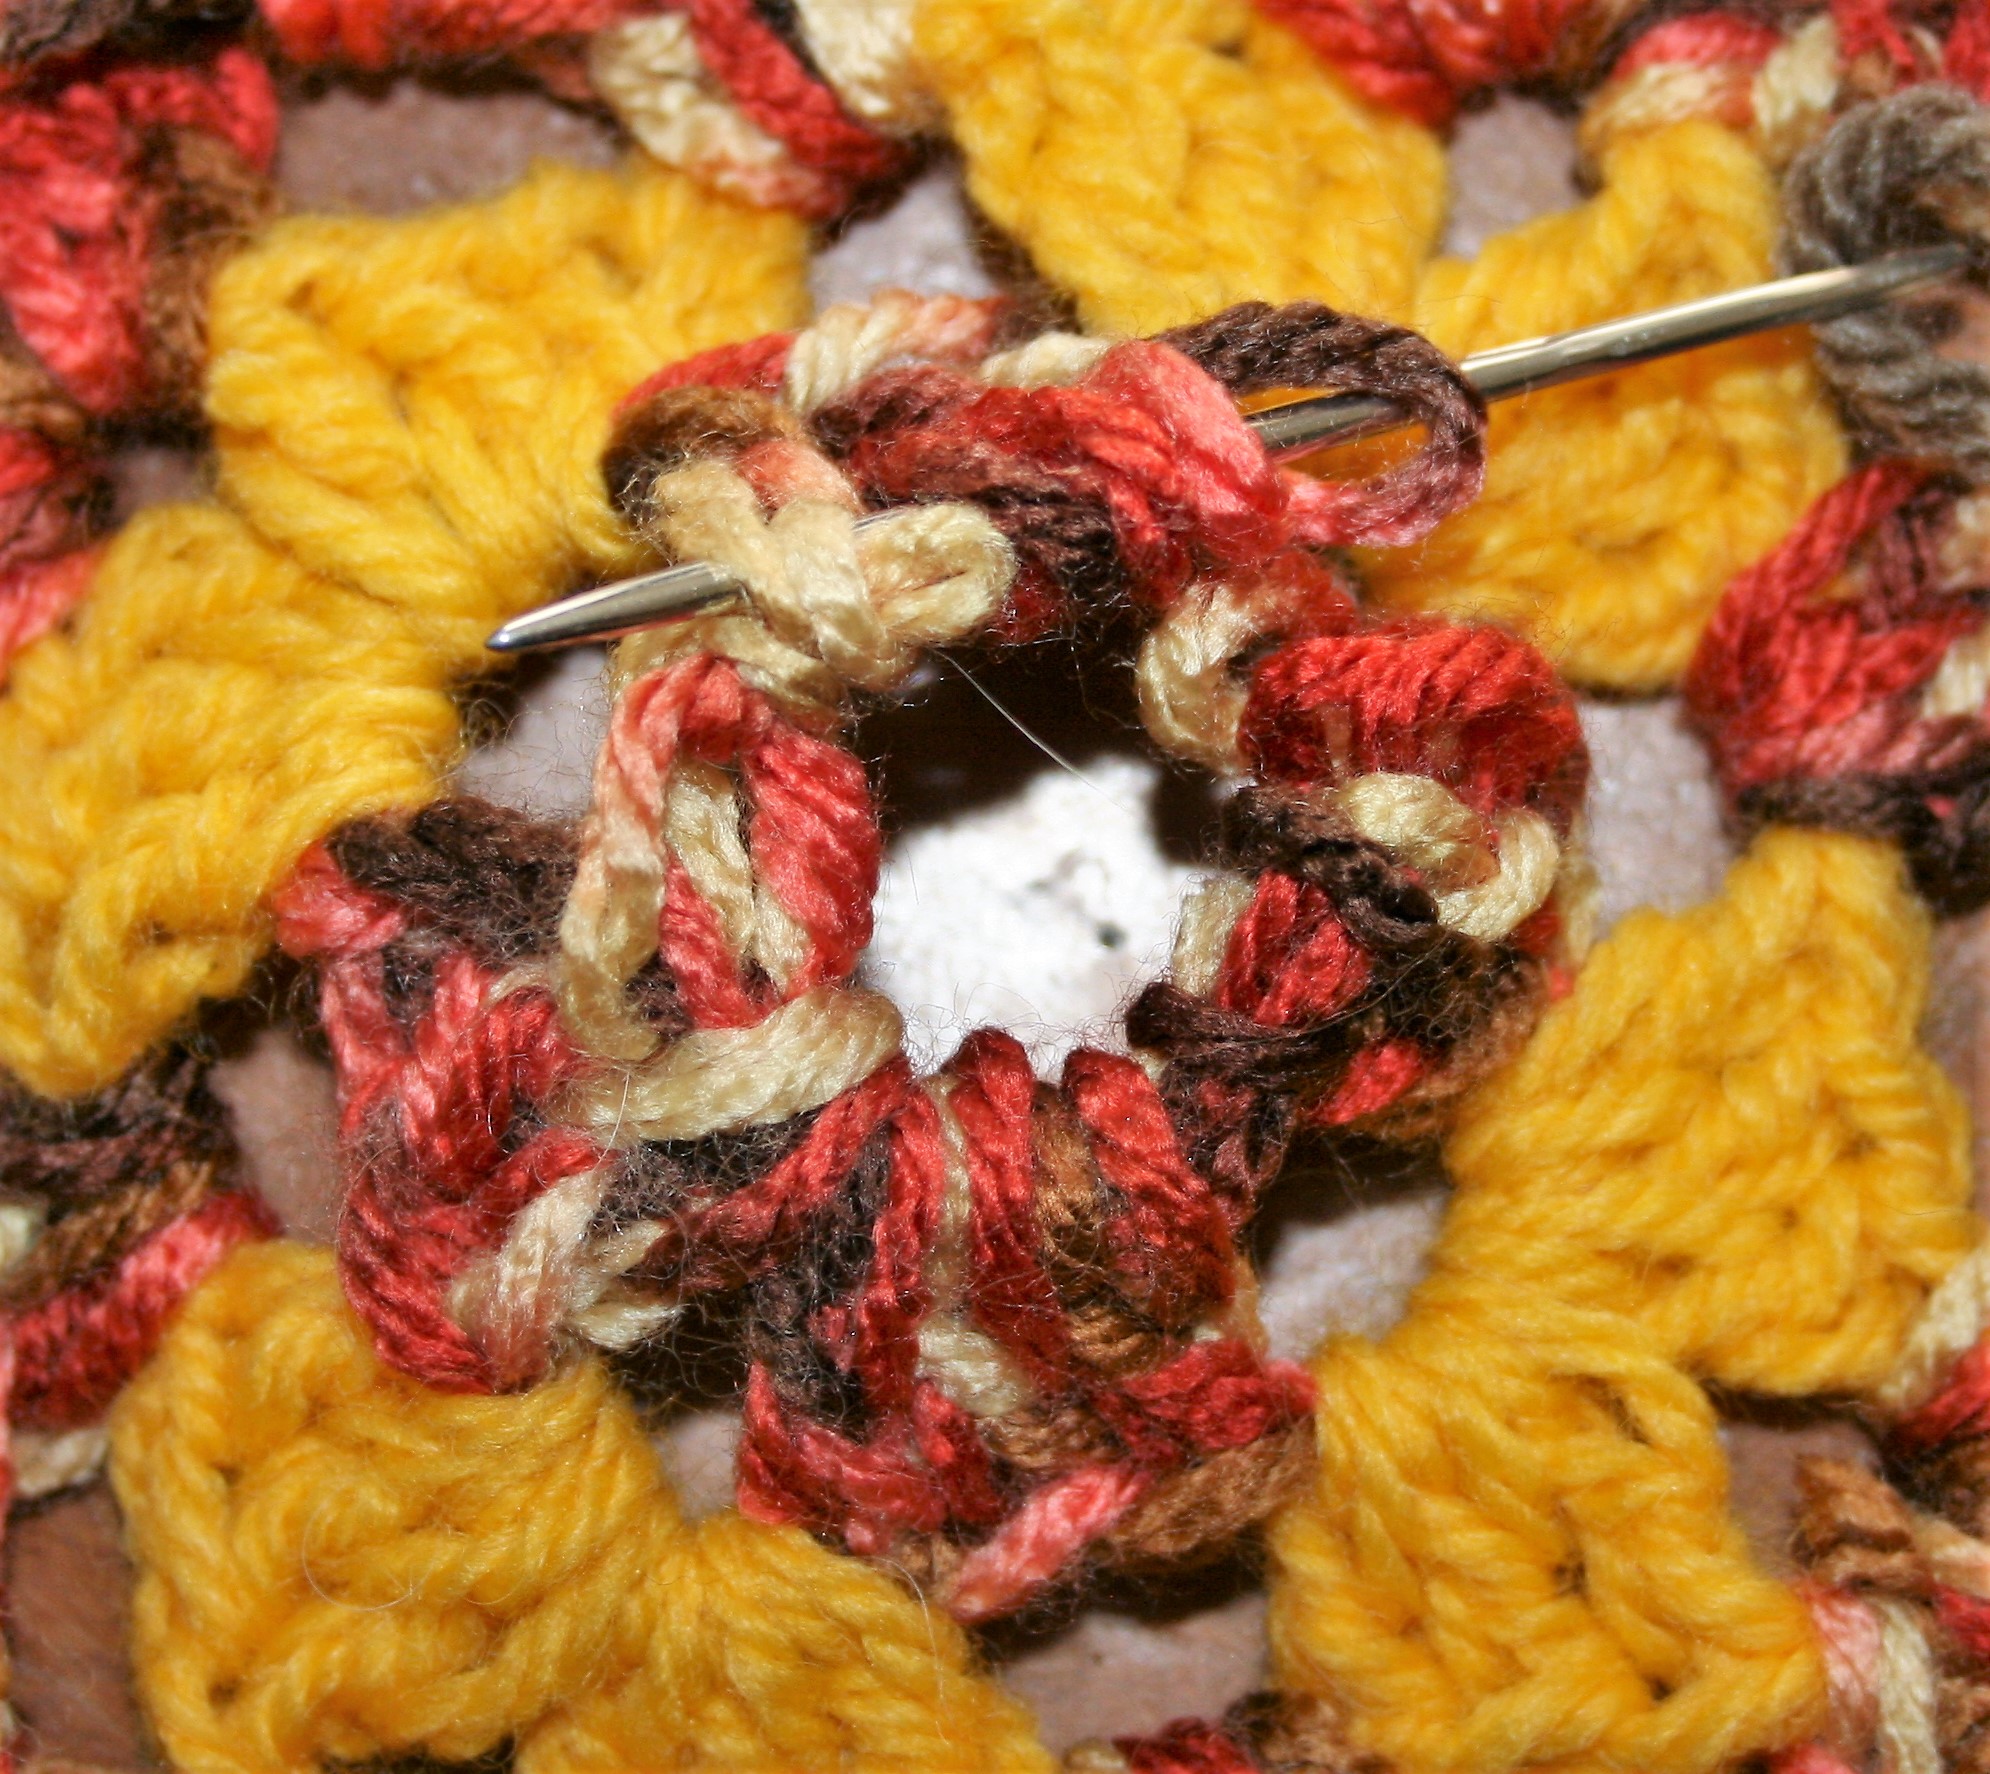
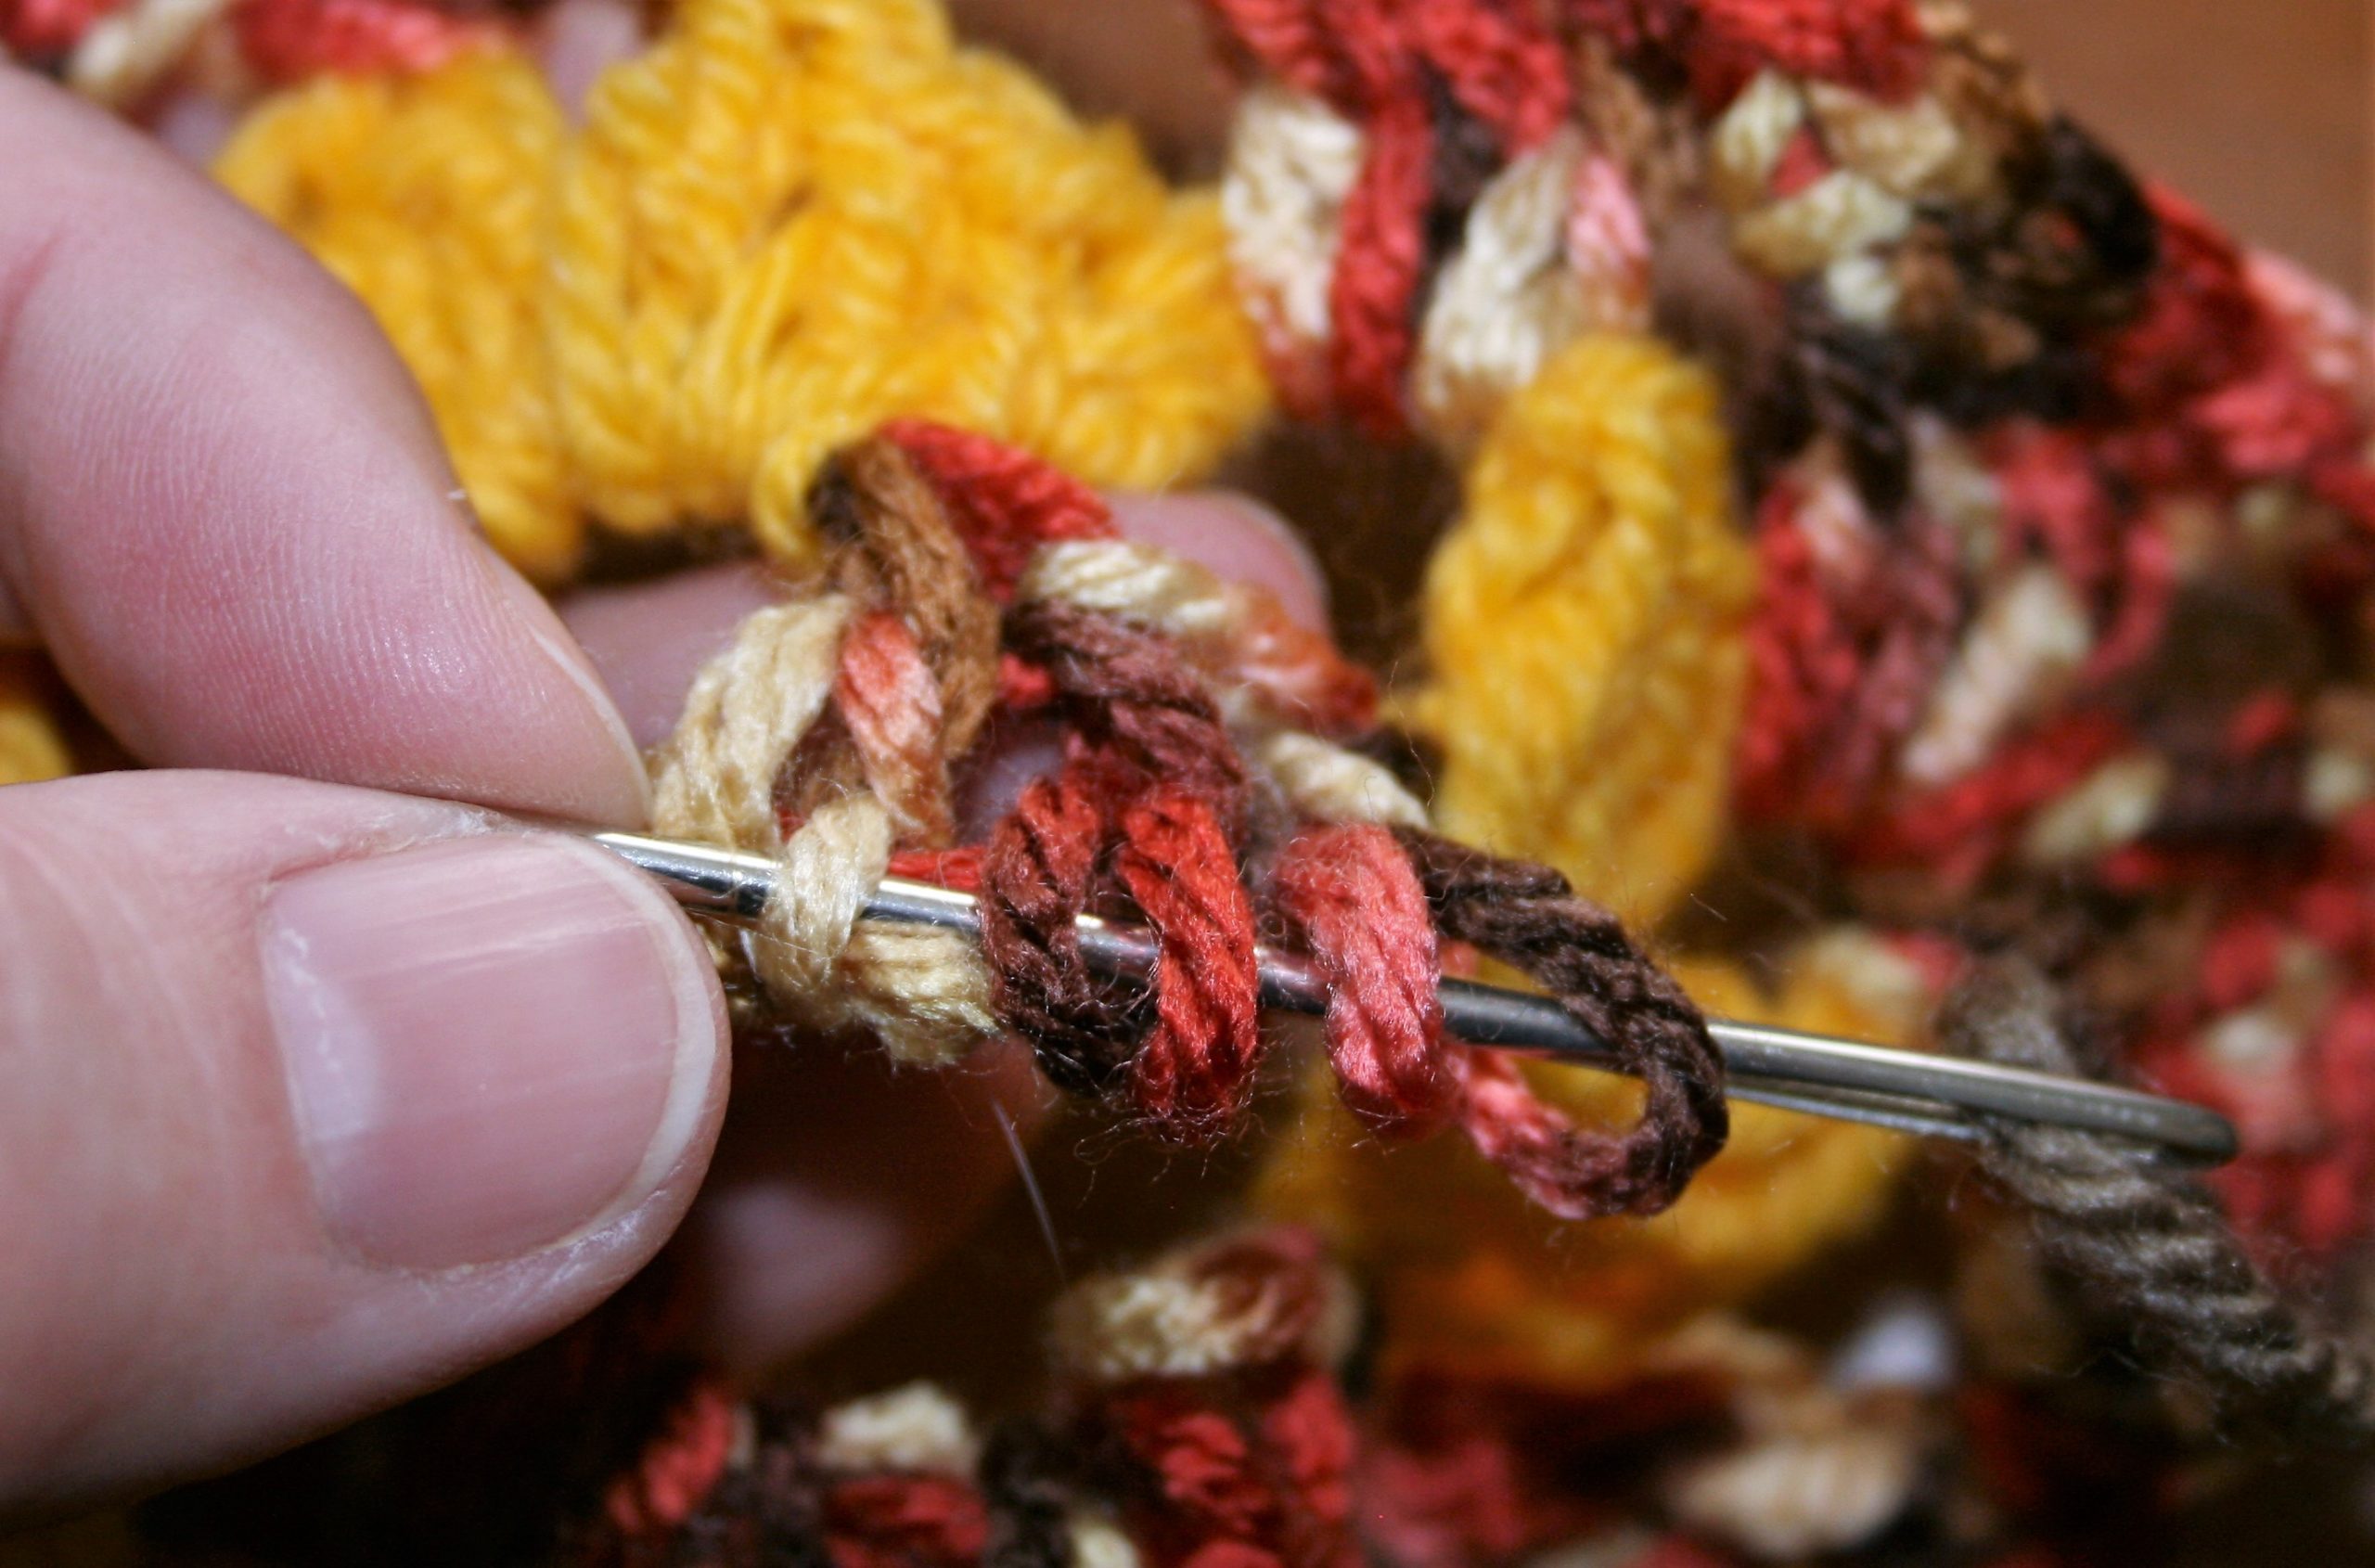
The first step is to pick up all the “feet” of the stitches in the first round. These loops may have a bit of a twist, and that is fine, just ensure that the threaded yarn is worked through even loop at the base of the stitches.
Pick up all the “feet” of the stitches
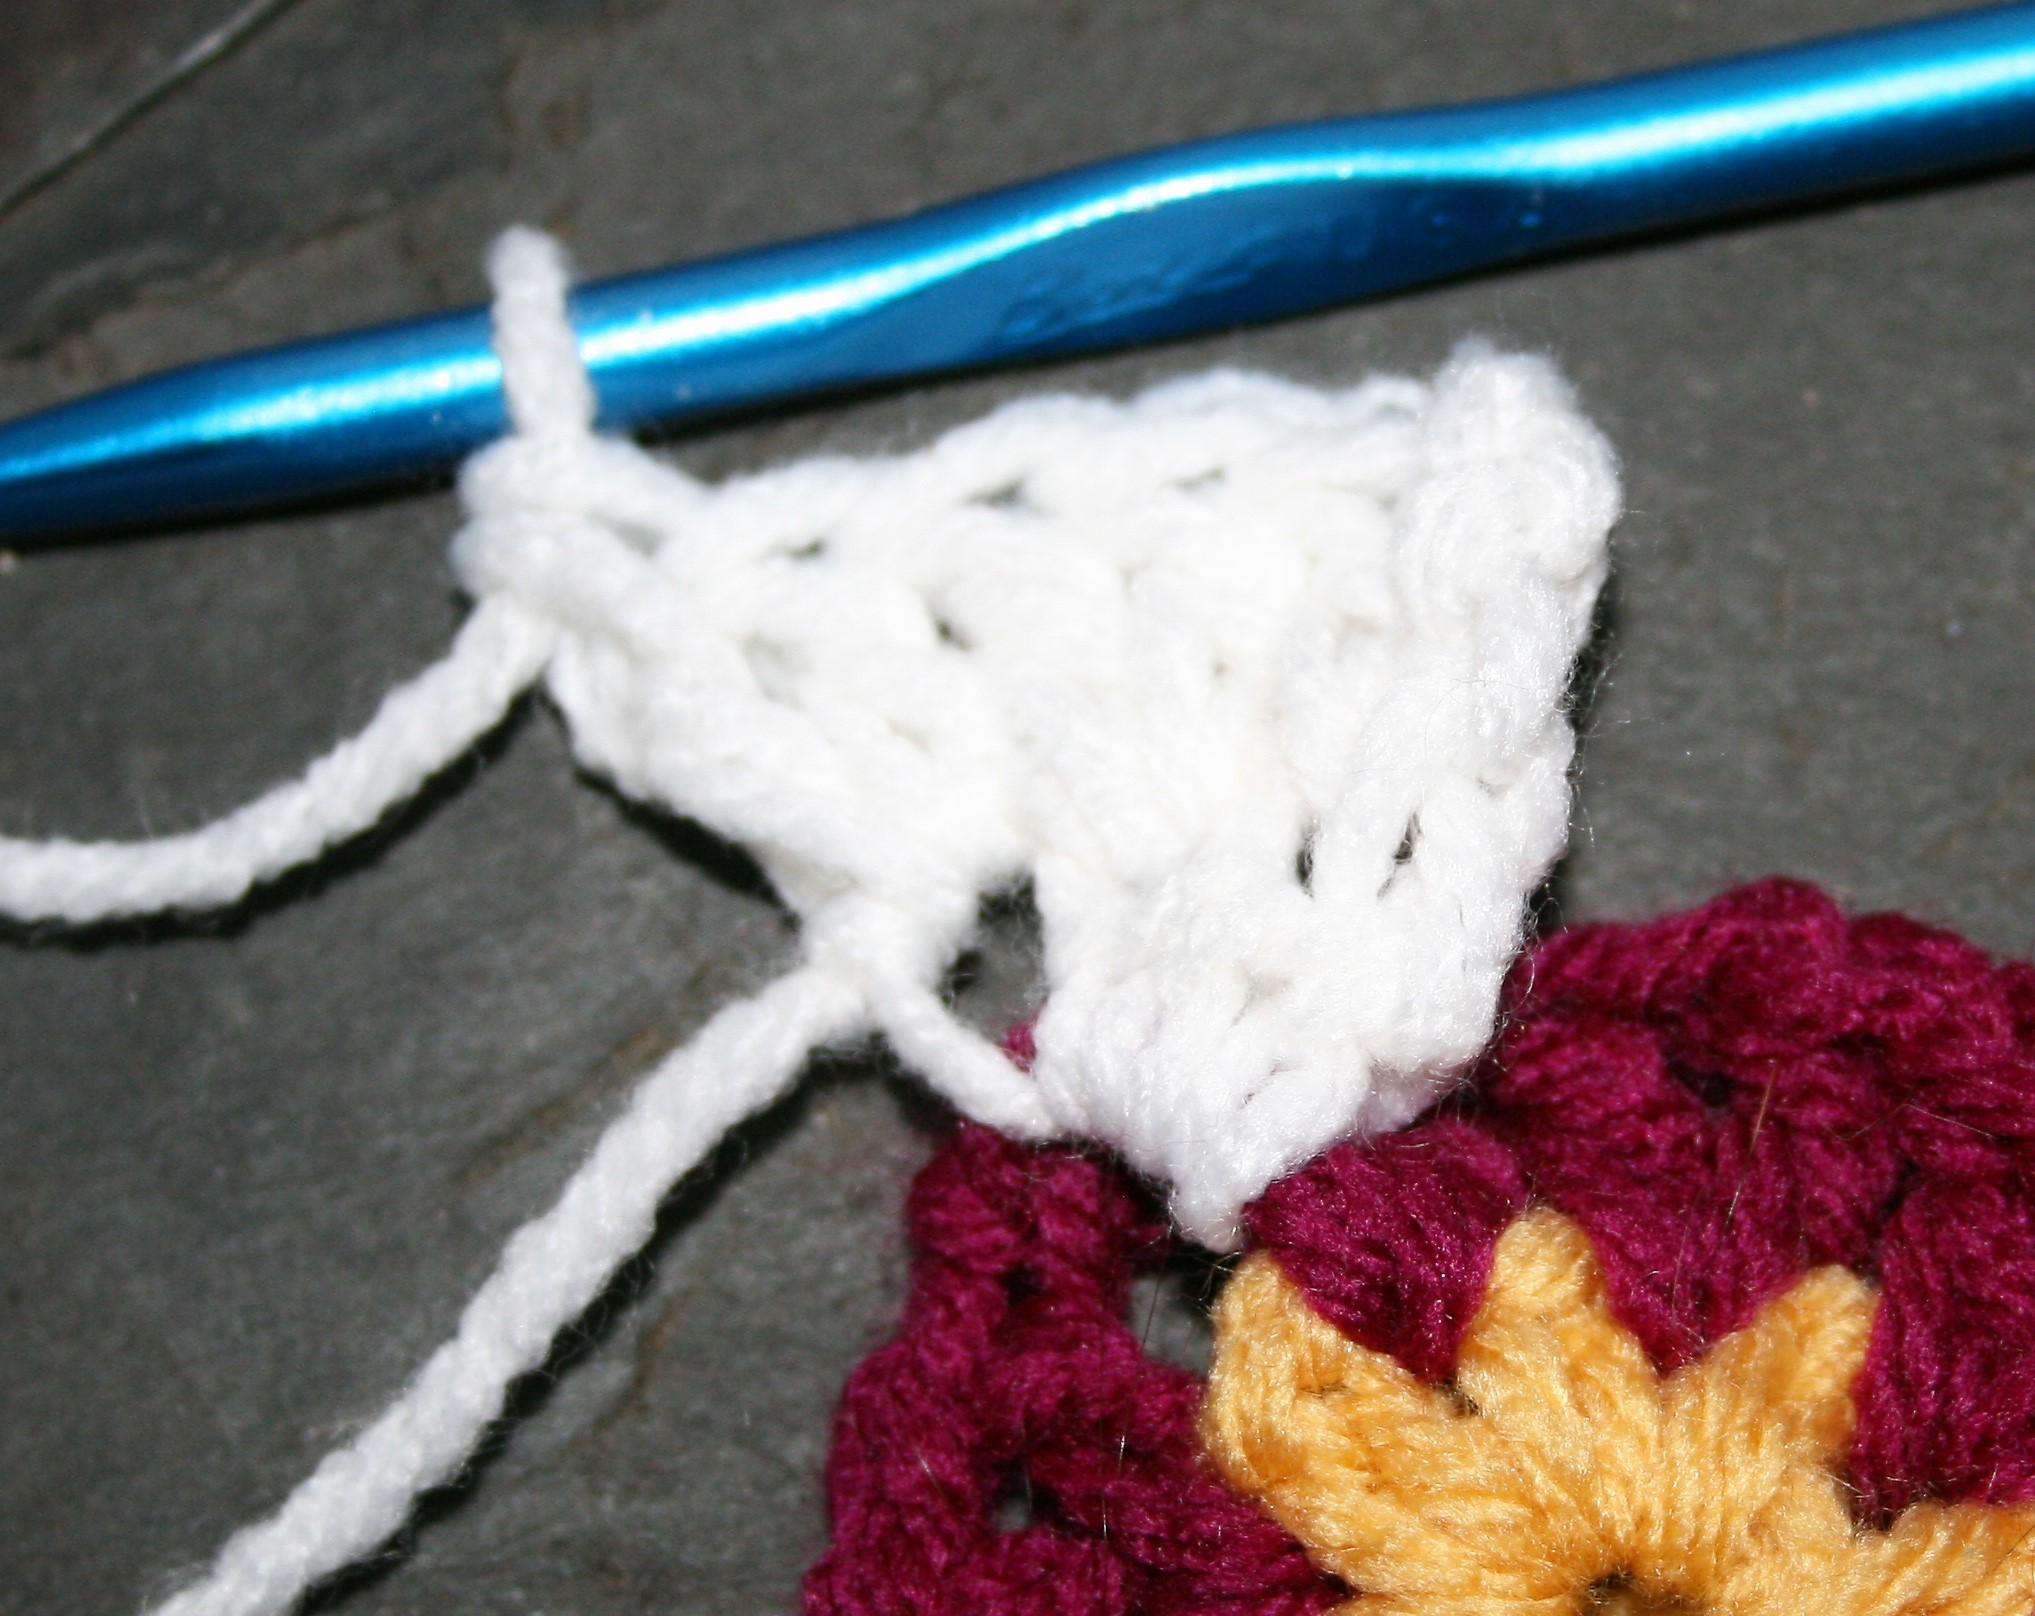
If stitches are missing in the round, use the threaded yarn to secure loops of remaining stitches to ensure that they do not unravel further. After creating a loop of yarn you can rework the stitches in these missing locations.
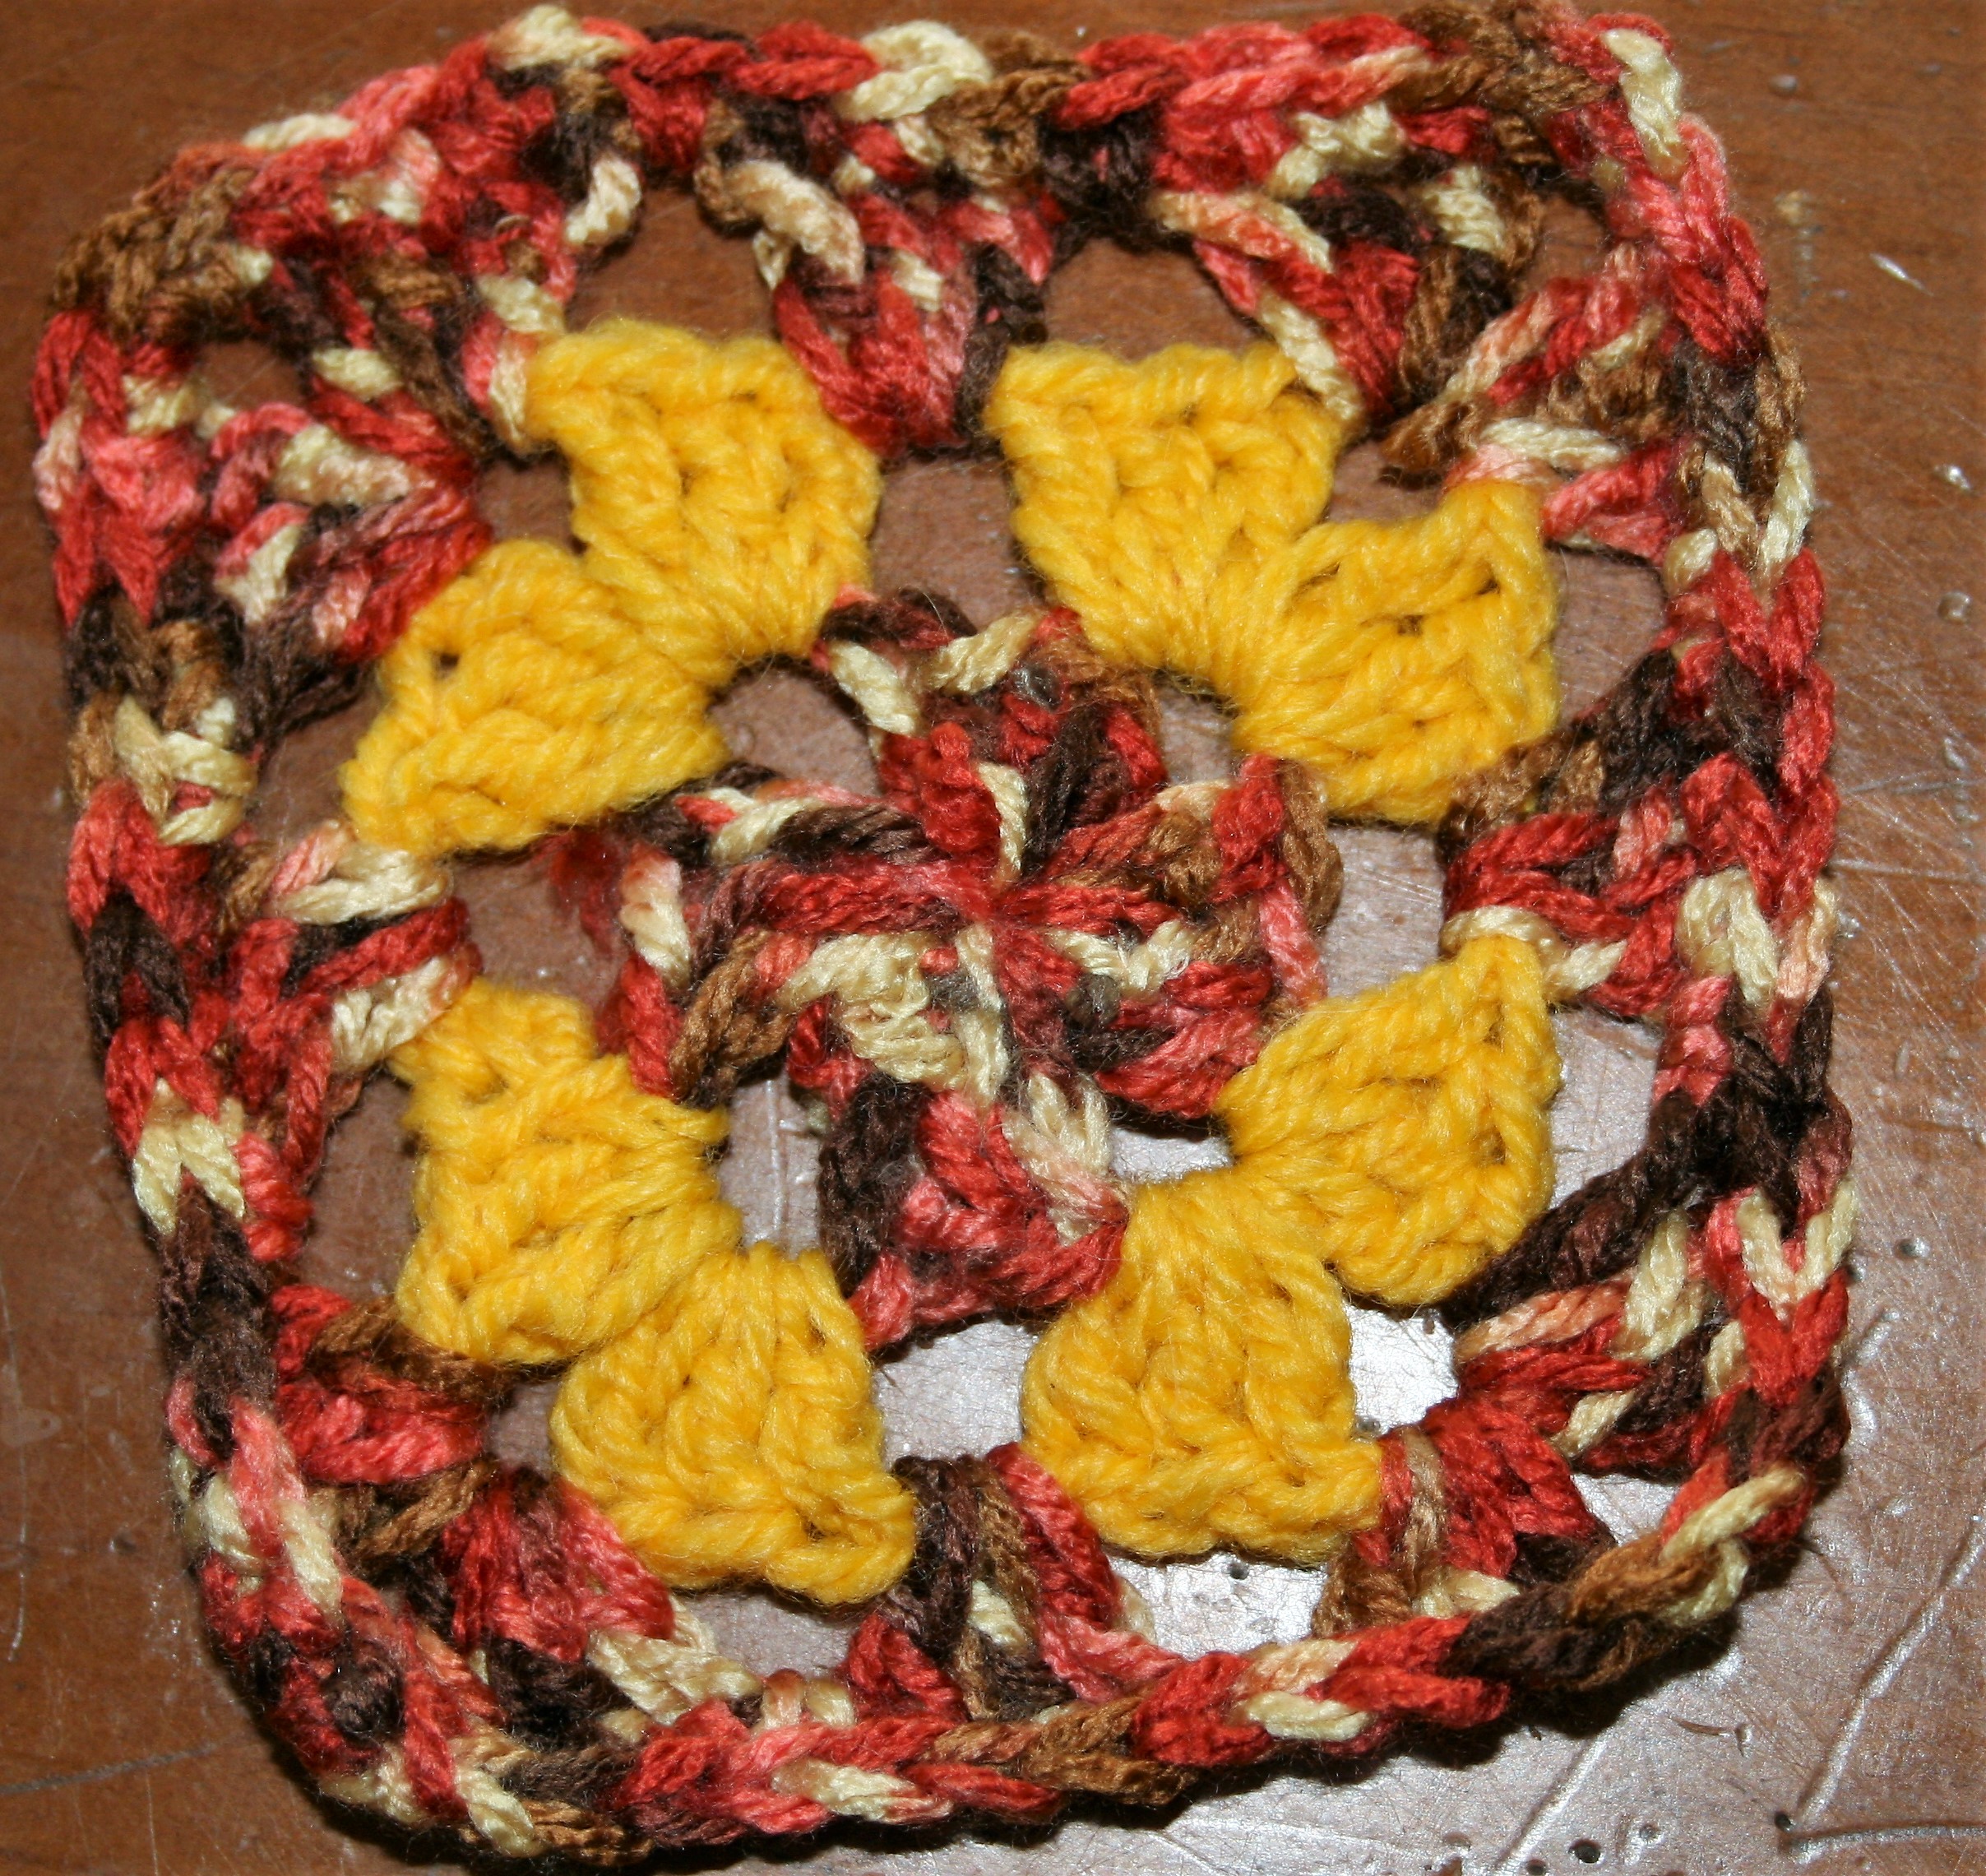
Repaired Granny Square
Pull the yarn tightly in the center, and weave the yarn through a second time. Tie the ends of the yarn together to create a knot, and then weave in the ends.
If you want to cut sections out of the granny square, or understand more about stitch structure to fix it, check out “Cutting Crochet“.
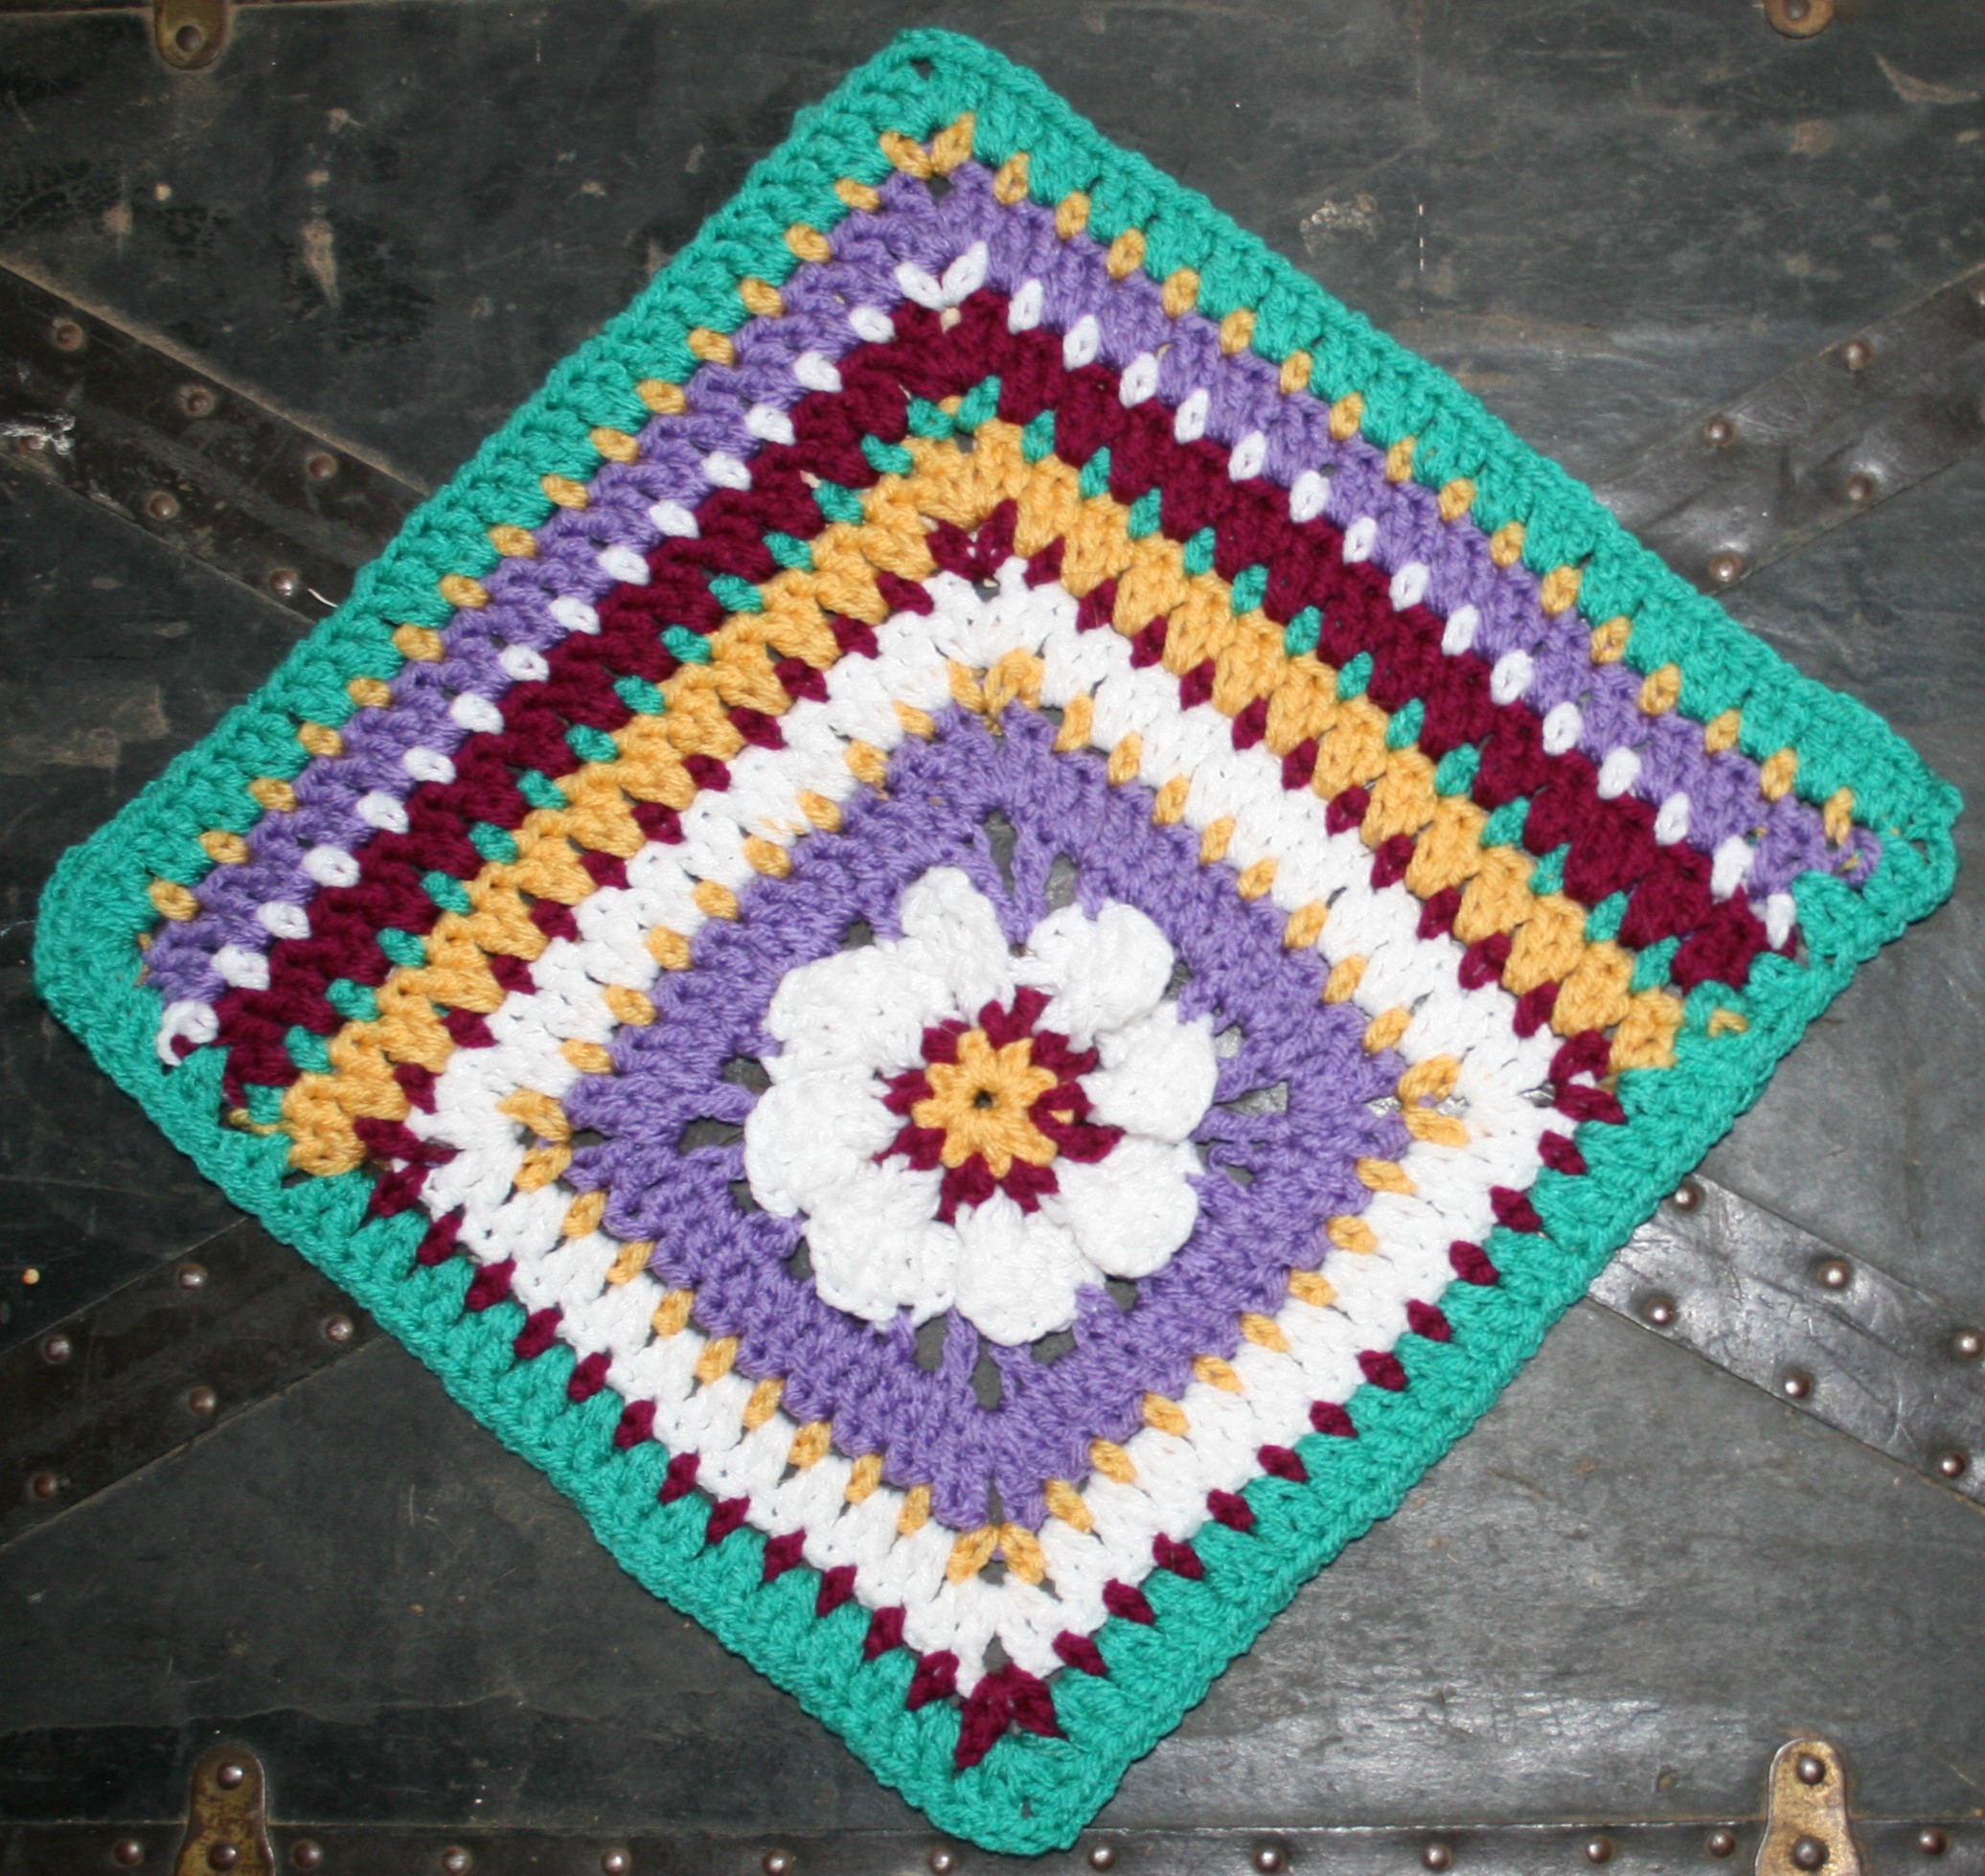
I feel really honored to be joining the Moogly CAL again this year, and I have decided to crochet my Darla’s Daisy Square! This adventure is a great way to learn new skills and make an afghan over the year. Check out all the blocks here. (Check out Moogly’s version of this square here)
Darla’s Daisy square was inspired by the fact that I needed a bit of cheeriness before the coming Spring. I find that there is no better way to bring in some cheeriness then a square inspired by flowers and bright colors. Granted, Darla is a friend and student that has studied to become a Master Gardener, so I am sure that I can find a few more flowers to brighten up my day.
Red Heart With Love, Medium weight 100% acrylic yarn
#1207 Cornsilk (A)
#1907 Boysenberry (B)
#1001 White (C)
#1538 Lilac (D)
#1562 Jadeite (E)
Hook J/10/6.00mm
Gauge: 12”x 12” square (30.5 x 30.5cm)
Notes
The squares starts in the round, then works only 2 sides of the square as rows.
The petals in Round 3 are created by working stitches around a double crochet post, then working a second row of stitches atop those just created, before repeating on a new post stitch.
Rnd 2: With B, join to any ch-1 sp (check out joiningwith a standing double crochet instead), ch 4 (counts as dc +ch 1), dc in same sp, (dc, ch 1, dc) in each ch-1 sp around, sl st to join, fasten off. -16 dc, 8 ch-1 sps
Watch for the back and forth of the petals- crochet the daisy!
Rnd 3: With C, join around the post of any dc, ch 1 (check out joining with a standing single crochet instead), fpsc around post of dc st, (fphdc, fpdc) around same post of dc, ch 3, turn, dc in same st, 2 dc in the next 2 sts, (petal made), turn, [sk 1 dc post, (sc, hdc, dc) around next dc post, ch 3, turn, dc in same st, 2 dc in next 2 sts, (petal made), turn] 7 times, sl st to join, fasten off. – 8 petals (consisting of 2 rows each, first row has 1 sc, 1 hdc, 1 dc, second row has 6 dc)
Completed “1st Row” of petal, stitches worked around a double crochet post.Completed “2nd row” of petal…work has been turned.Start the next petal….
Now we set up some corners on the crochet daisy square
Rnd 4: With D, join to the final st of any petal, ch 6 (counts as dc, and ch-3 sp), dc in same sp (corner made), ch 2, sc in 4th st of 2nd row of petal, ch 2, sk 1 dc, dc in final st of petal, ch 2, sc in 4th st of 2nd row of petal, ch 2, (dc, ch 3, dc) in final st of petal (corner made), [ch 2, sc in 4th st of 2nd row of petal, ch 2, sk 1 dc, dc in final st of petal, ch 2, sc in 4th st of 2nd row of petal, ch 2, (dc, ch 3, dc) in final st of petal (corner made)] 2 times, ch 2, sc in 4th st of 2nd row of petal, ch 2, sk 1 dc, dc in final st of petal, ch 2, sc in 4th st of 2nd row of petal, ch 2, sl st to join. – 4 corners, 8 sc, 16 ch-2 sps, 4 dc on sides (1 dc on each side)
Rnd 5: Ch 3, [(2dc, ch 1, 2 dc) in ch-3 sp of corner, dc in each st and 2 dc in each ch-2 sps across to ch-3 corner sp] 4 times, sl st to join, fasten off. -68 dc, 4 ch-1 sps
Rnd 6: With A, join to any ch-1 sp, ch 1, (sc, ch 3, sc) in same sp, {[ch 1, sk 1 st, sc in next st] 8 times, ch 1, (sc, ch 3, sc) in ch-1 sp, [ch 1, sk 1 st, sc in next st] 8 times, ch 1} three times, sl st to join, fasten off. -40 sc, 36 ch-1 sps
Rnd 7: With C, join to to any ch-3 sp, ch 3, dc in same sp, ch 1, 2 dc in same sp, 2 dc in each ch-1 sp across to ch-3 sp corner, (2dc, ch 1, 2dc) in ch-3 sp, 2 dc in each ch-1 sp across to ch-3 sp corner, [(2dc, ch 1, 2dc) in ch-3 sp, 2 dc in each ch-1 sp across to ch-3 sp corner] 2 times, sl st to join, fasten off. -88 dc, 4 ch1 sps
Rnd 8: With B, join to any ch-1 sp, ch 1, (sc, ch 3, sc) in same sp, [ch 1, sk 1 st, sc in next st] 11 times, ch 1, {(sc, ch 3, sc) in ch-1 sp, [ch 1, sk 1 st, sc in next st] 11 times, ch 1} 3 stimes, sl st to join, fasten off. -52 sc, 48 ch-1 sps, 4 ch-3 sps
Only working 2 sides of the crochet daisy square as part of the Moogly CAL
Row 9: With A, join to any ch-3 sp, ch 3, dc in same sp, 2 dc in each ch-1 sp across to ch-3 sp, (2dc, ch 1, 2dc) in ch-3 sp, 2 dc in each ch-1 sp across to ch-3 sp, 2 dc in next ch-3 sp, fasten off. – 56 dc, 1 ch-1 sp
Row 10: With E, join first st of Row 9, ch 1, sc in same st, [ch 1, sk 1, sc in next st] 13 times, ch 1, (sc, ch 3, sc) in ch-1 sp, [ch 1, sk 1, sc in next st] 14 times, fasten off. -30 sc, 28 ch-1 sps, 1 ch 3 sp
Row 11: With B, join to the first ch-1 sp of Row 10, ch 3, dc in same sp, 2 dc in each ch-1 sp across to ch-3 sp, (2dc, ch 1, 2dc) in ch-3 sp, 2 dc in each ch-1 sp across, fasten off. -60 dc
Row 12: With C, join to the first st of Row 11, ch 1, sc in same st, [ch 1, sk 1, sc in next st] 14 times, ch 1, (sc, ch 3, sc) in ch-1 sp, [ch 1, sk 1, sc in next st] 15 times, fasten off. -32 sc, 30 ch-1 sps, 1 ch 3 sp
Row 13: With D, join to the first ch-1 sp of Row 12, ch 3, dc in same sp, 2 dc in each ch-1 sp across to ch-3 sp, (2dc, ch 1, 2dc) in ch-3 sp, 2 dc in each ch-1 sp across, fasten off. -64 dc
Row 14: With A, join to the first st of Row 13, ch 1, sc in same st, [ch 1, sk 1, sc in next st] 15 times, ch 1, (sc, ch 3, sc) in ch-1 sp, [ch 1, sk 1, sc in next st] 16 times, fasten off. -34 sc, 32 ch-1 sps, 1 ch 3 sp
All the way around again- Crochet the Daisy Square for the Moogly CAL
Rnd 15: With E, join to the first ch-1 sp of Row 14, ch 3, dc in same sp, 2 dc in each ch-1 sp across to ch-3 sp, (2dc, ch 1, 2dc) in ch-3 sp, 2 dc in each ch-1 sp across, (2dc, ch 1, 2dc) in next st, working down the end rows 9-14, evenly work 6 dc (to keep a visual pattern work 3 groups of 2 dc), 2 dc in the ch 3 sp of Rnd 8 (this sp will have the end of Row 9 worked in it), 2 dc in each of the ch-1 sps across to ch-3 corner sp, (2dc, ch 1, 2dc) in ch-3 corner sp, 2 dc in each of the ch-1 sps across including the ch-3 sp or round 8 (this sp will also have the first stitches of Row 9), evenly work 6 dc over end of rows 9-14, 2 dc in the same stitch as the join (beginning of Rnd 15), ch 1, join, fasten off. -144 dc, 4 ch-1 sps
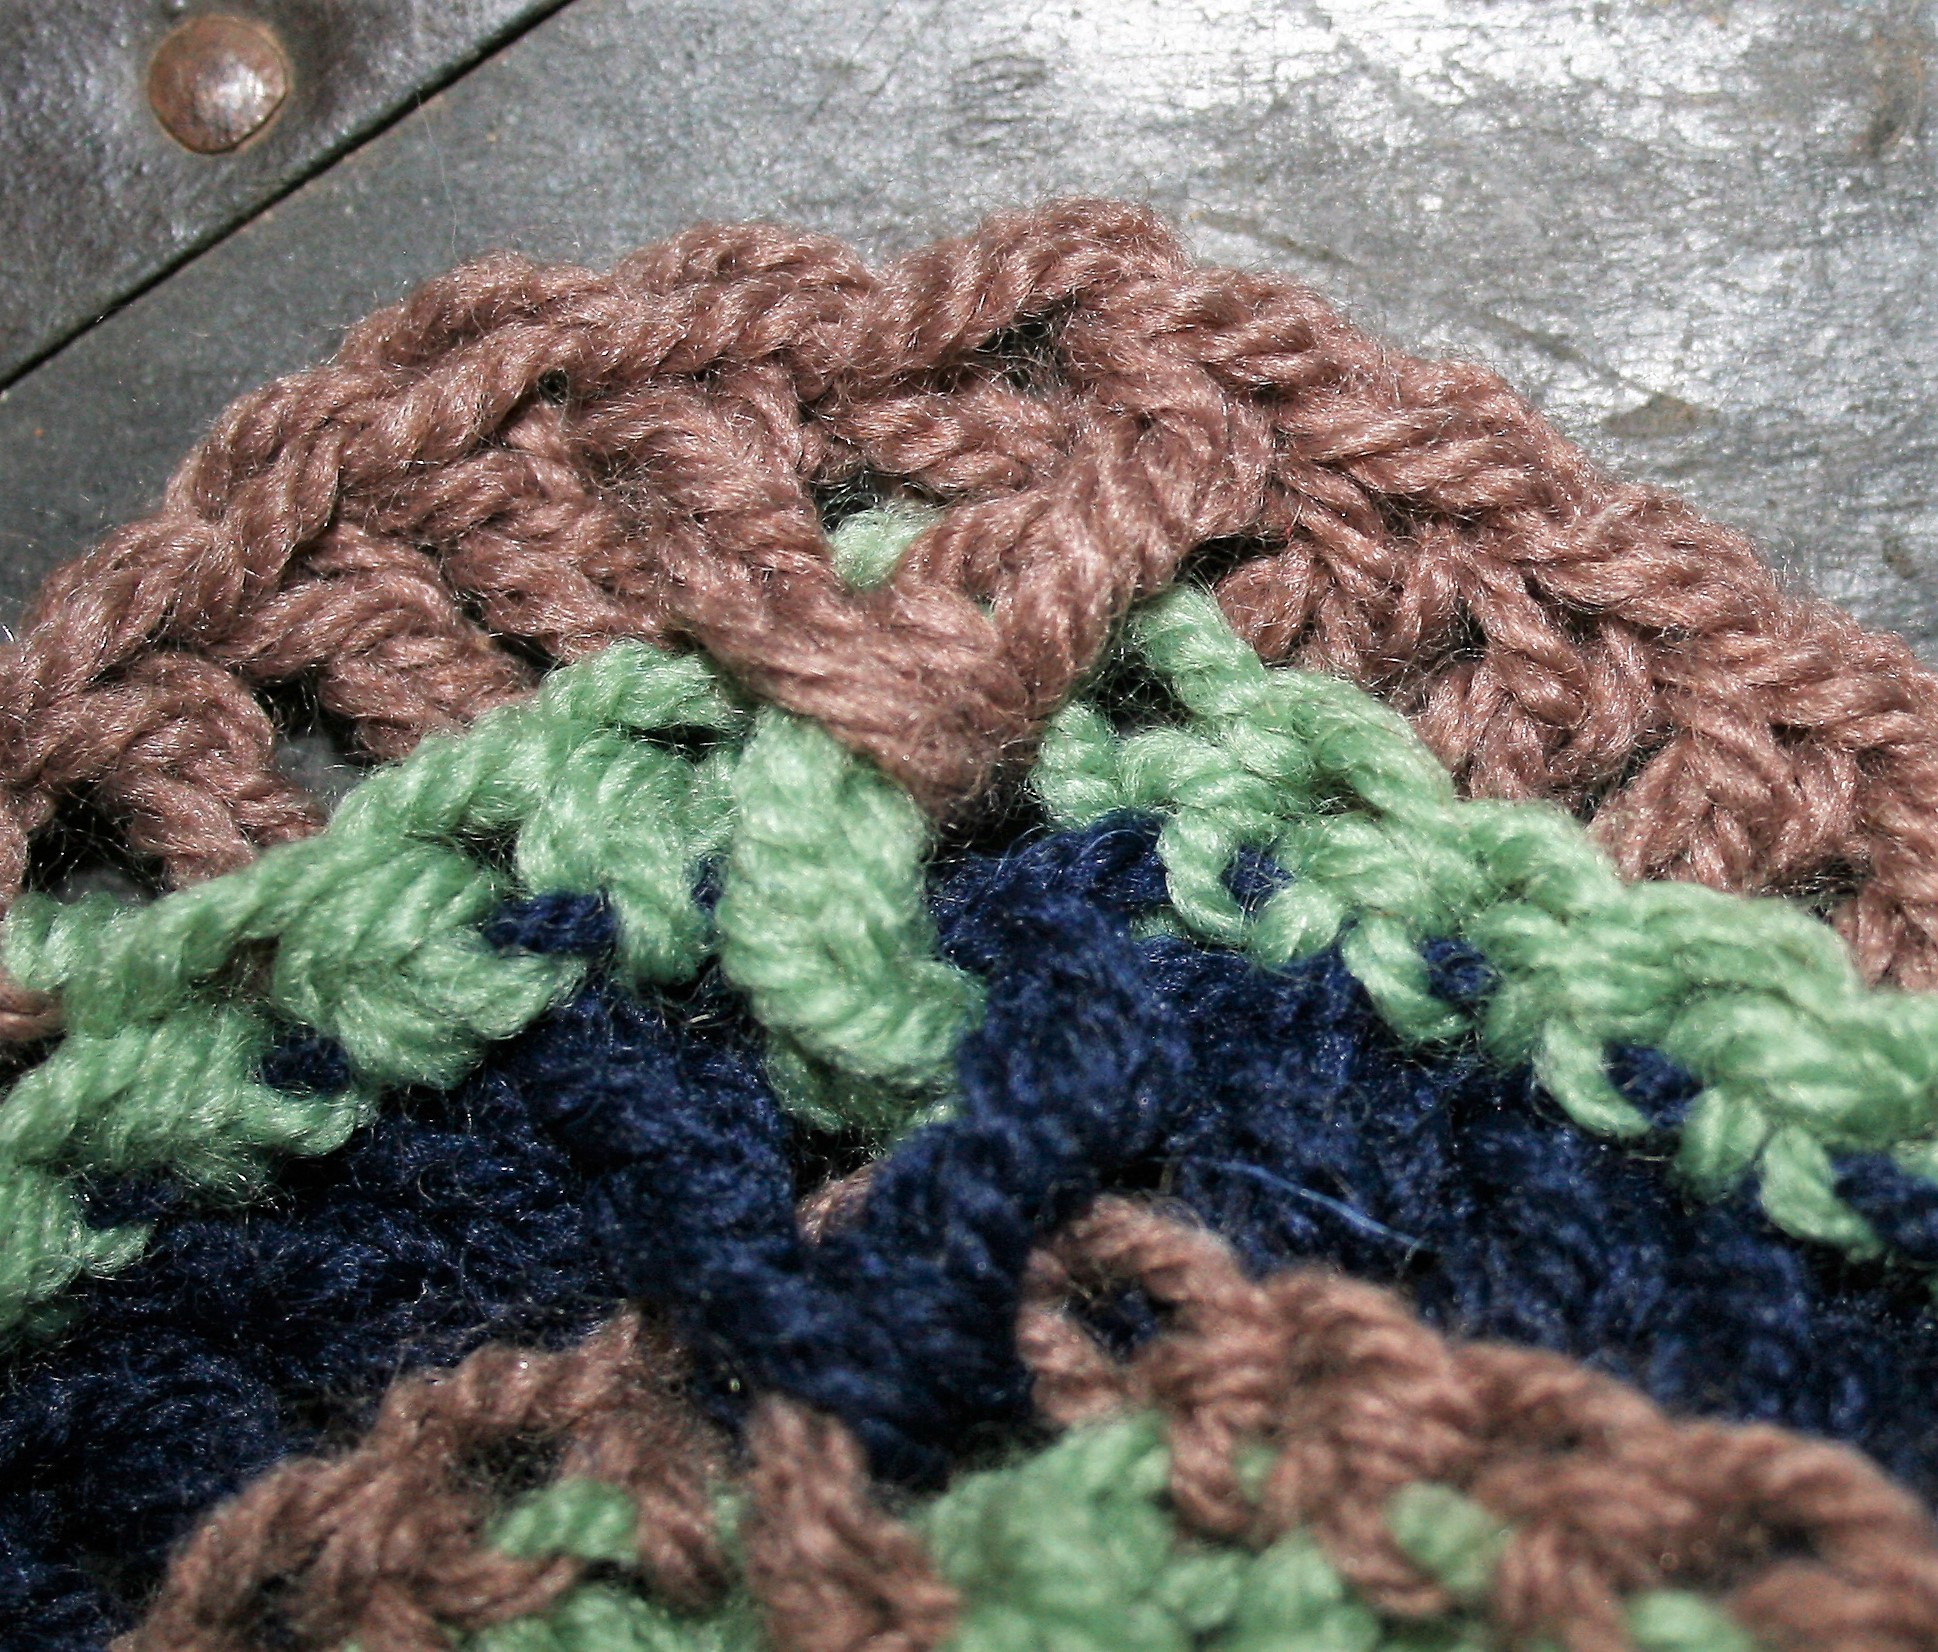
Crochet Unspoken Words, the free pattern. Often I find that crochet can speak emotions when I cannot, and it really does speak from the heart. At times when I am overwhelmed emotionally I can easily find my fingers and hands nimbly moving a hook with yarn to work through my feeling and sharing them with others.
I know that I am not alone in this feeling. Many use crochet for charity and gift giving, however I recently found myself crocheting due to natural disaster.
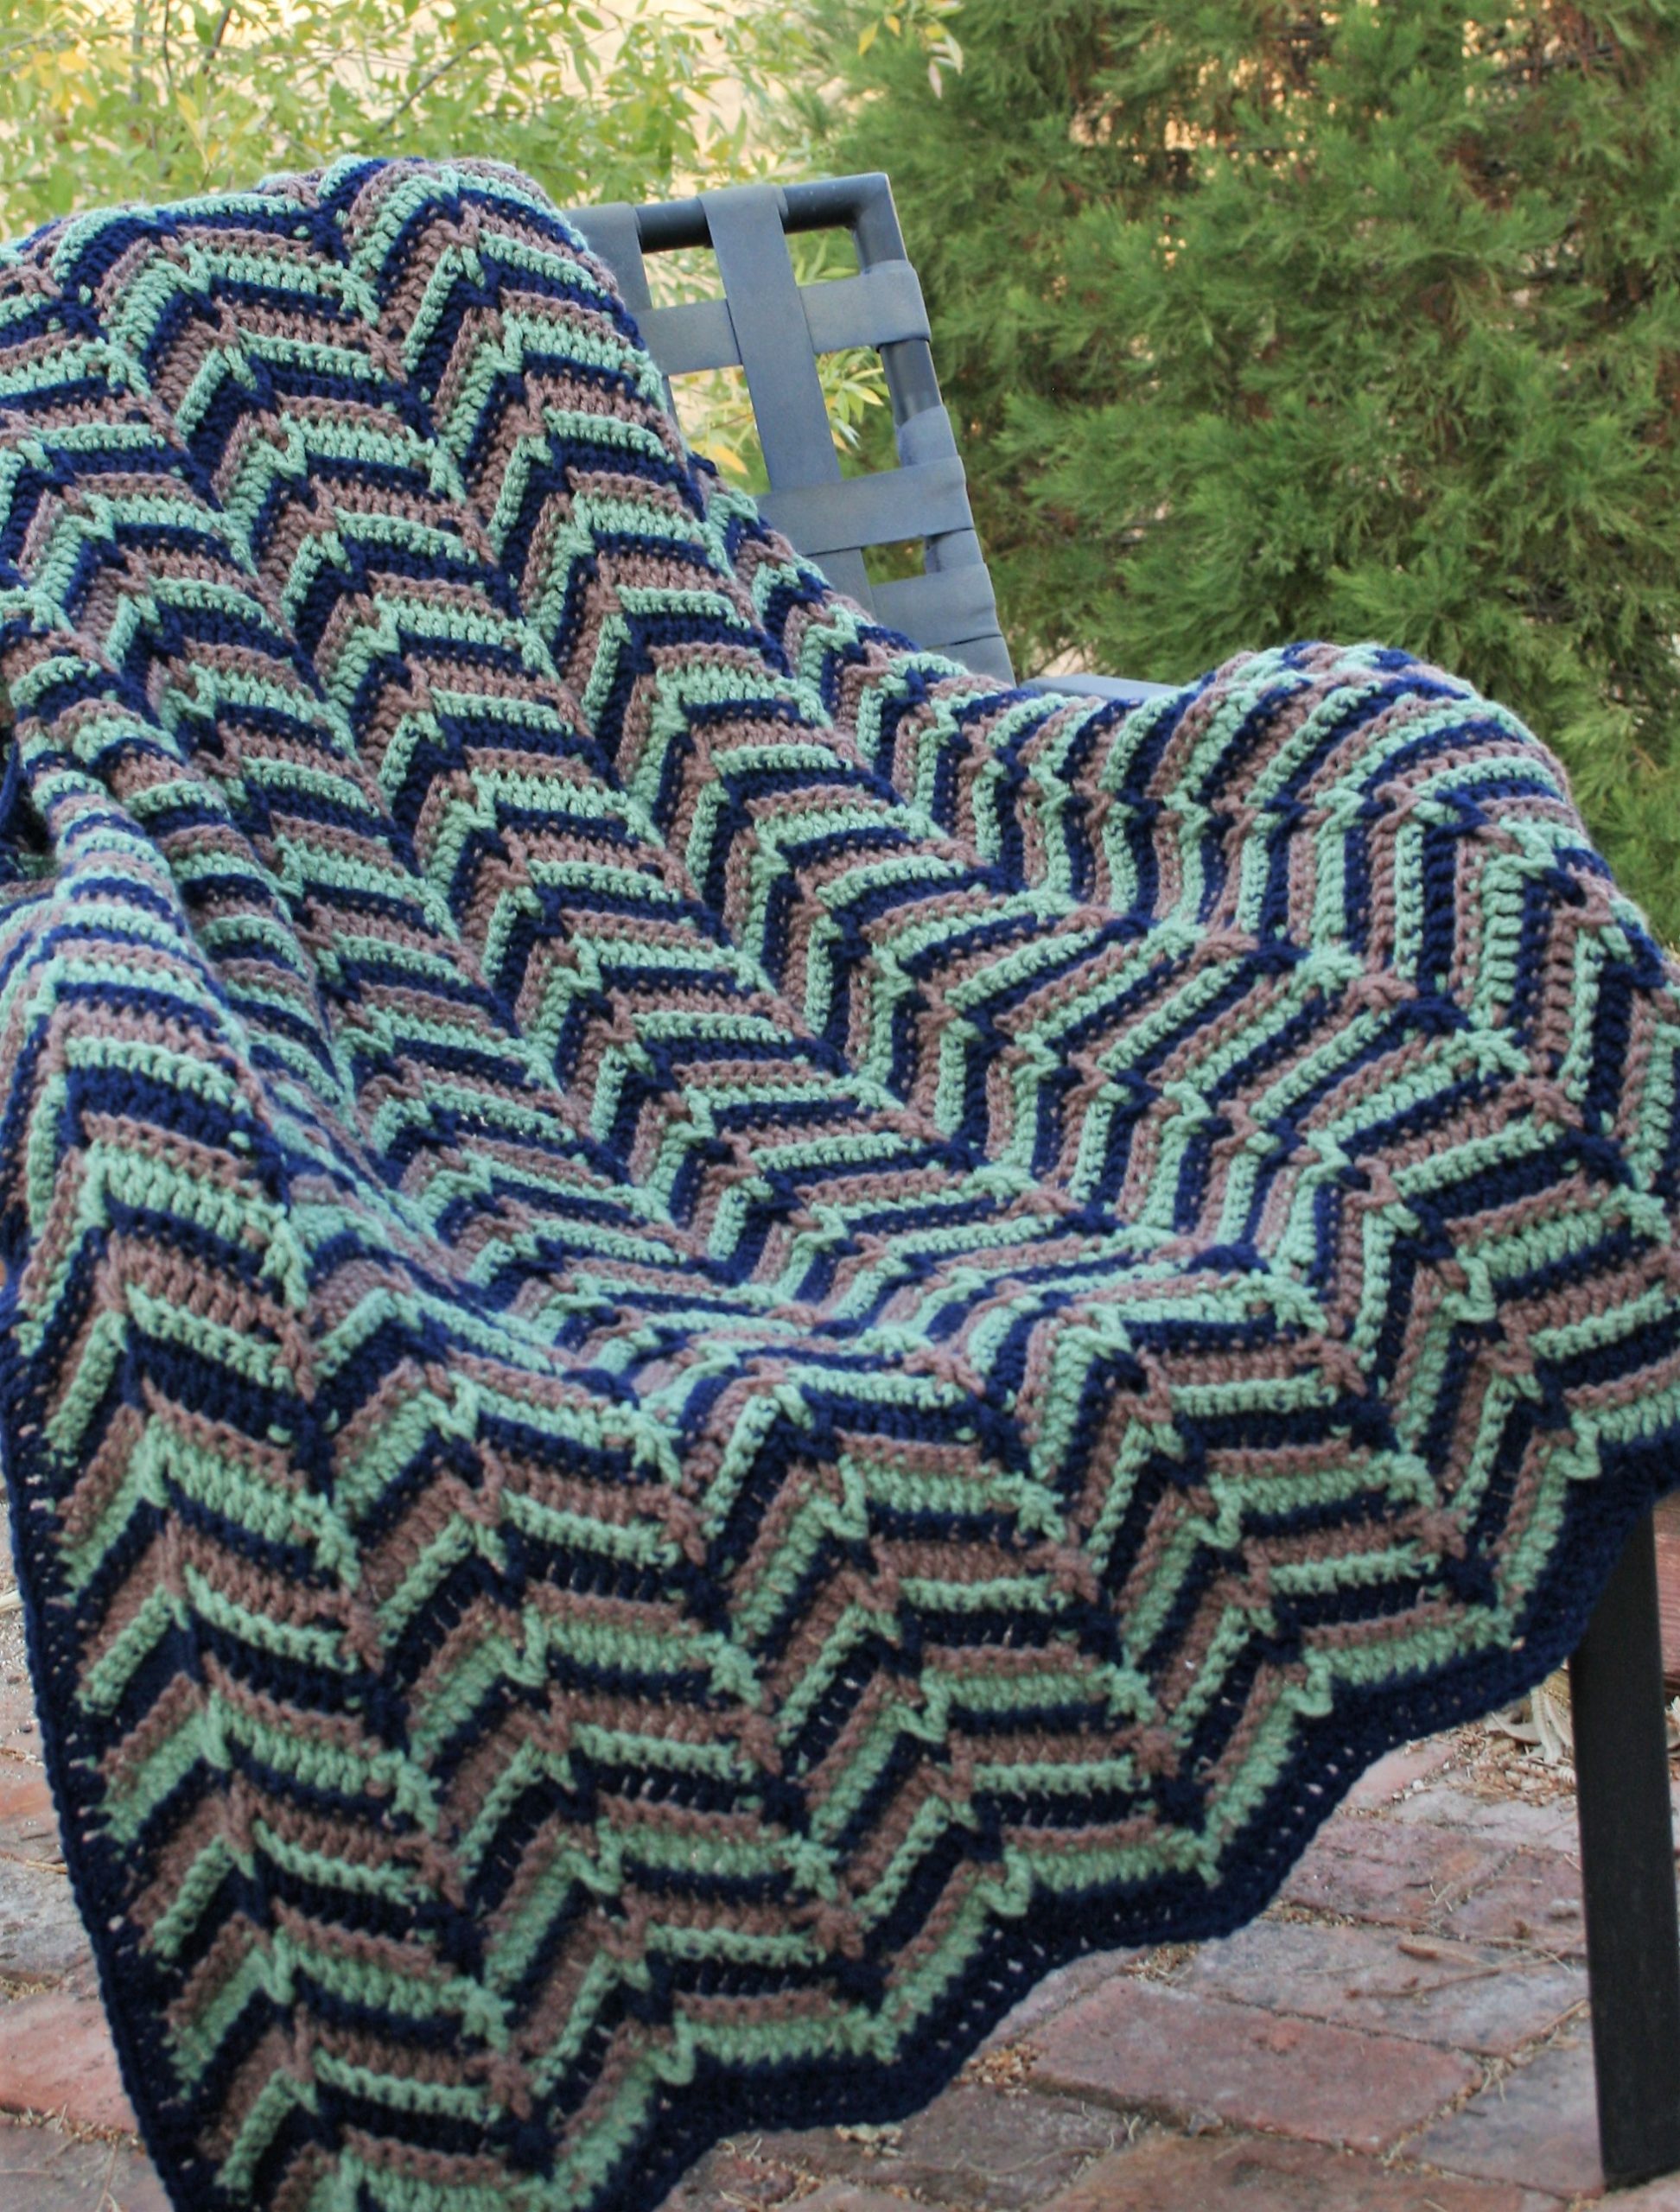
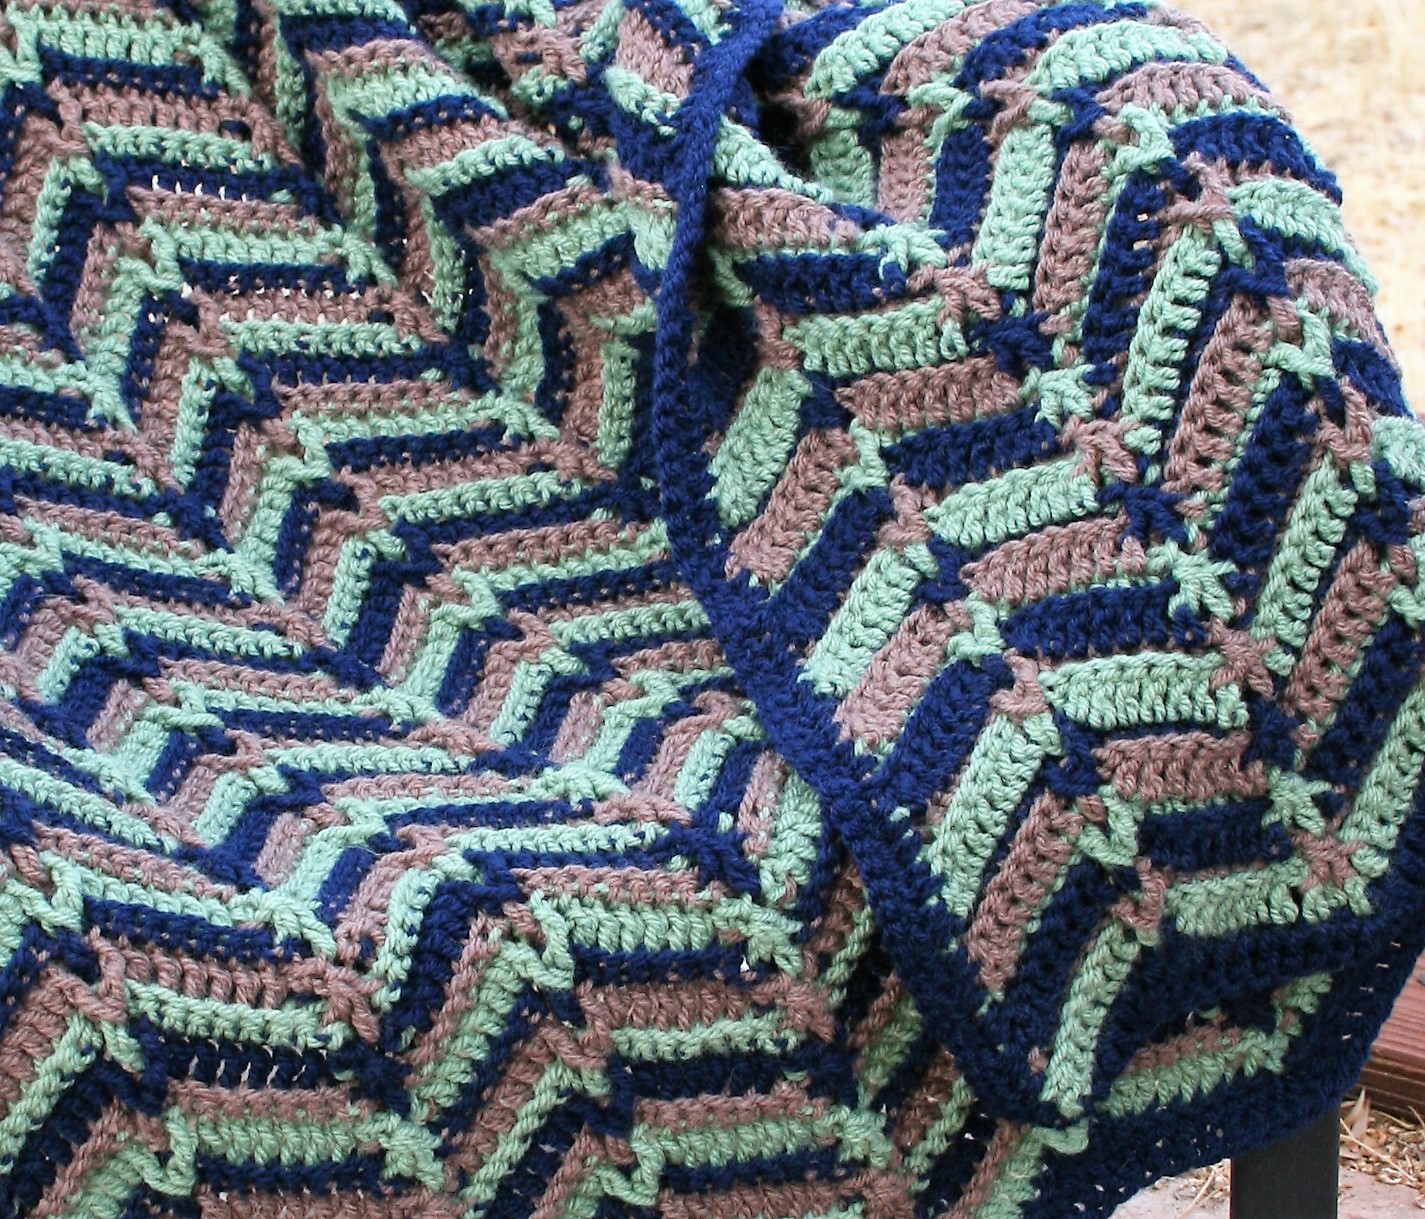
When I learned my friend lost her home during the Northern California Caldor fire this last August I felt at a loss. My heart was heavy for the undertaking she was facing, so I created an afghan to wrap an eternal hug.
Unspoken Words Throw
Just some pattern insight
I know that many find themselves in similar situations, so I thought I would share the pattern. It is a 2 row repeat just changing the straight edge stitches from single to double crochet, while having the same stitches used at the “valleys” and “peaks” of this ripple pattern. The colors are alternated between three colors, there is no need to cut the yarn, just carry it up the side (learn how here).
Unspoken Words Throw
Finished size: approximately 55”x55”
Materials
K/10 1/2 /6.5mm crochet hook
Medium Weight yarn in 3 colors, 600 yrds of each color. (Sample created in Plymouth Encore 75% acrylic, 25% wool (100g/3.5oz/200yd) yarn, 3 skeins each of color #848, 1204, 1232)
Special Stitches
Back Loop 3 double crochet together over center (blodc3togcenter)– yo, insert hook into back loop of next st, yo, pull up a loop, yo pull through 2 loops, yo insert hook into top of decrease worked 2 rows below, yo pull up a loop, yo pull through 2, yo, insert hook into back loop of next st, yo, pull up a loop, yo, pull up 2 loop, yo, pull through all 4 loops on hook.
Step One: yarn over, insert hook into first back loopYarn over, insert hook into top of decrease 2 rows belowYarn over, insert hook in last back loopCompleted Back Loop 3 double crochet together over center stitch
Abbreviations
ch(s)=chain(s)
sc= single crochet
blodc= back loop double crochet
blosc= back loop single crochet
blsc2tog= back loop 2 single crochet together
bpdc= back post double crochet
fpdc= front post double crochet
sk= skip
st(s)= stitch(es)
rep=repeat
Crochet Unspoken Words -the Free Pattern
Row 1: Ch 160, sc in 2nd ch from hook, sc in next 6 chs, 3 dc in next ch, sc in next 7 chs, [sk 3 chs, sc in 7 sts, 3 dc in next ch, sc in next 7 sts] rep 8 times, change color, turn.
The (fpdc, bpdc, fpdc) around the next stitch….
The Repeat Begins
Row 2: Ch 2, working back loops, blodc in next st, blodc in next 6 sts, (fpdc, bpdc, fpdc) around next st, blodc in next 7 sts, [blodc3togcenter, blodc in next 7 sts, (fpdc, bpdc, fpdc) around next st, blodc in next 7 sts] rep 8 times, dc2tog, change color, turn.
Row 3: Ch 1, blsc2tog, blosc next 6 sts, (fpdc, bpdc, fpdc) around next st, blsc in next 7 sts, [blodc3togcenter, blosc in next 7, (fpdc, bpdc, fpdc) around next st, blsc in next 7 sts] rep 8 times, sc2tog, change color, turn.
Repeat Rows 2 and 3, changing colors every row, alternating between three colors, until desired length.
Crochet Unspoken Words, the free pattern
Edging for Crochet Unspoken Words free pattern
Worked sc evenly around entire afghan. Fasten off, weave in ends.