The Easygoing Tank, found in the August issue, is worked as one piece, side to side. It has a simple stitch pattern and is shaped on one edge of the fabric. By using a few join-as-you-go techniques that are explained in the pattern, you can even avoid seaming the tank at all, and finish the entire top with just your hook!
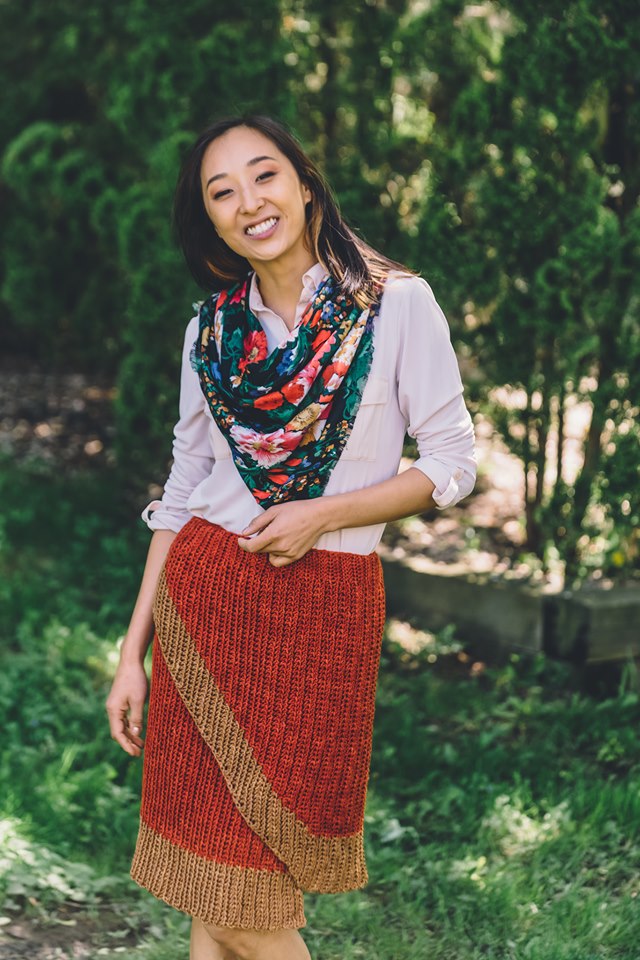
Serene Wrap Skirt- photo courtesy Prime Publishing
The weather is changing and I want to crochet with cotton,
but not all cotton is created equally.
When going through the craft store aisle of yarn, finding a cotton yarn for you project can be a bit challenging. The mainstream market seems to only have room for cotton crochet thread and a medium weight cotton that is often associated with dish towels. (Need to know more about yarn weight? Here is some info)
As I venture into my small local yarn store I do find a
finer weight yarn of cotton, but it states “Mercerized”. It has a nice sheen,
but is this what I need for my project?
Knowing a bit about cotton, can really help you to avoid any
mistakes with projects in the future.
What is Cotton?
Cotton is a plant based fiber, well it is actually a cellulous
based fiber that protects a plants seeds in what is referred to as a boll. The
fiber has a short staple, meaning a short length. Due to the short nature of
the fiber it is spun together more times than might be necessary for a wool
yarn. This is strictly due to its length.
When long fibers are twisted together they have more points
of contact when lying next to each other, so just a few twists can hold them
together. With cotton being short, however, the fibers do not have as many
points of contact, and thus have to be twisted together more times to ensure that
they stay twisted together.
It is this high amount of twist that can cause cotton to shrink
on its first wash. When water finally makes contact with the spun cotton, the cotton
actually relaxes and while it softens up, it also can be less stretched and
thus “shrink”. Unlike wool this reaction will only occur once, and for any use
forward the cotton will remain completely stable.
What is Mercerized?
Many like to use cotton yarns for dish clothes, however this
is where you need to understand the term “mercerized”. Cotton when spun can
have a soft, fuzzy, halo around it. You find this in most medium weight cotton
yarns available on the market today. The term mercerized is a process in which
the cotton yarn is essentially singed and the fuzzy halo is removed, leaving in
its place a sleek shiny yarn.
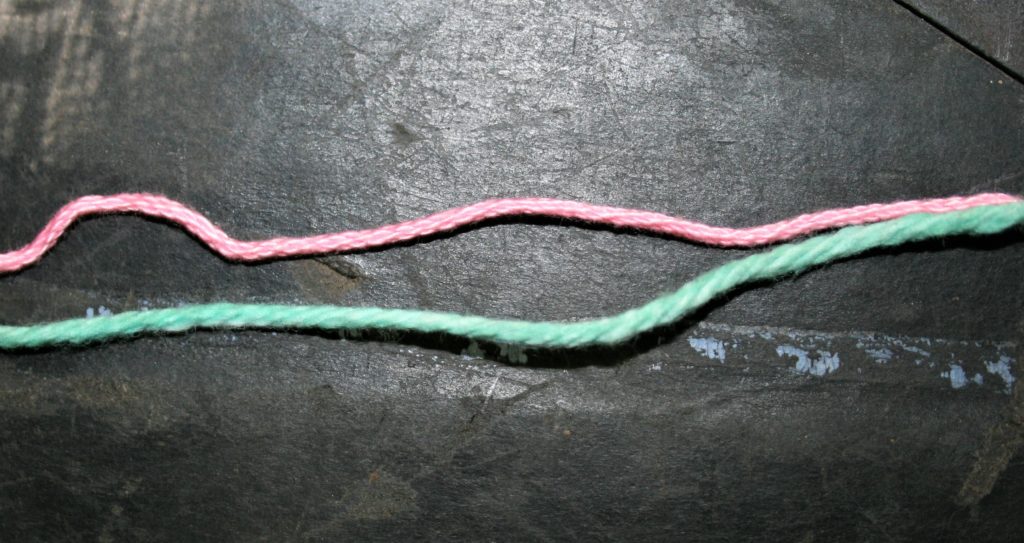
Note the top yarn (pink) has a shine, this yarn is mercerized. The bottom yarn (green) has a softer, slightly fuzzy look, it is not mercerized.
So why is it important to know about mercerized? Well, for
started mercerized cotton does not absorb water like un-mercerized yarn. Meaning
if you wanted to make a dish towel mercerized cotton will not behave in a
manner that you desire. This is a pretty important distinction, and one worth
repeating. If you want to make household items that will absorb liquids, do not
use mercerized cotton.
Mercerized cotton I find to be lovely in garments and
shawls. It has a nice sheen and feels like cotton, but unlike my T-shirt, if
you hit me with a water balloon it will not pull dramatically down with the
weight as it will not be absorbing the water.
Where Can I Find Cotton Yarn?
You might have to do a bit of looking to find cotton yarns for you project, but it is worth the trouble. Here are a few suggestions:
There essentially are 3 ways to begin a circle in crochet,
and in most cases they can be used interchangeably. Each has its pros and cons,
and everyone has a method they prefer.
Creating A Ring Method
In this method you create a chain, usually I find that many chain 4, and then you slip stitch to the first change created to form a ring. Then all the stitches of the first round are worked into this newly created ring, working over the chain.
This method is pretty straight forward, creating a stable
base for the stitches to be worked. Yet, it can leave a pretty striking hole in
the center of the fabric. It can be tightened up a bit when the ends are woven
in, but it adds a bit of bulk, even more then the chain being worked over.
Forming a ring by slip stitching to the beginning of a length of chain.
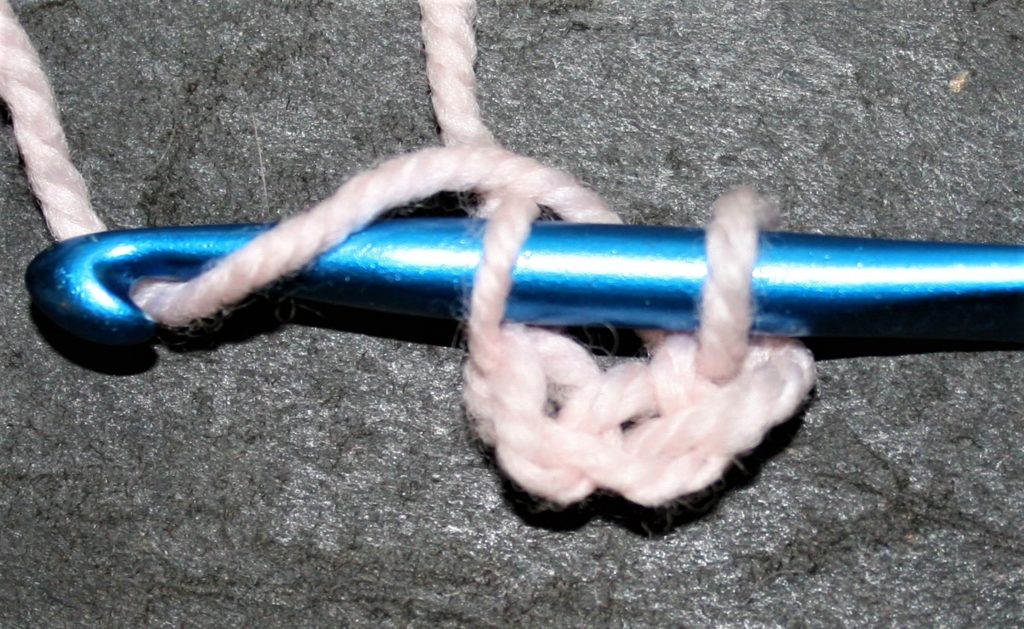
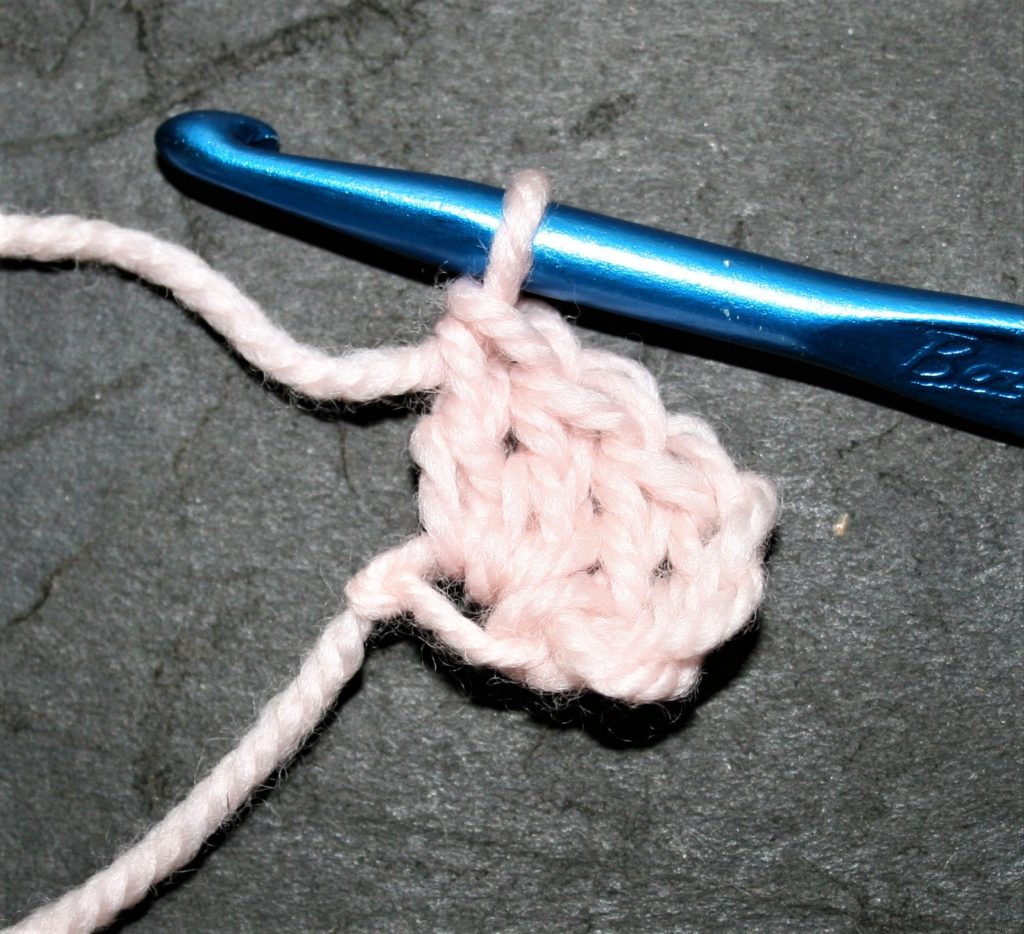
Working in the Beginning Chain
I admit this is my usual go to method. To begin this method you determine what the first stitch of the first round is, in most cases it is double crochets (UK-treble crochet). You then chain the number that is typically used when turning rows with this stitch, in double crochet’s case that is a chain 3. Then you add 1 more chain, now all the stitches are worked in the first chain created.
I find this method pretty easy and fast, with a minimal hole in the center, but in reality the base for the stitches is not as stable, because I am placing a lot of stitches into just one chain. It places a lot of pressure on the yarn that creates this one chain.
Work all the stitches of Round 1 in the first chain.
Magic Ring, Magic Circle, Magic Loop…Method
There tends to be many names to describe this technique that
creates a very tight closure. The best way to describe this approach to someone
new to it is “fiddly”. Granted it creates a very nice join point that does not
have, really any, hole at all in the center, but it takes a bit of practice to
feel comfortable with it.
To work this method there are couple of different approaches, yet the outcome is the same, you work over a loop of yarn. All stitches in the first round are worked over this loop of yarn, and then the end of the loop is pulled to close the loop bringing all the stitches to a tight closure.
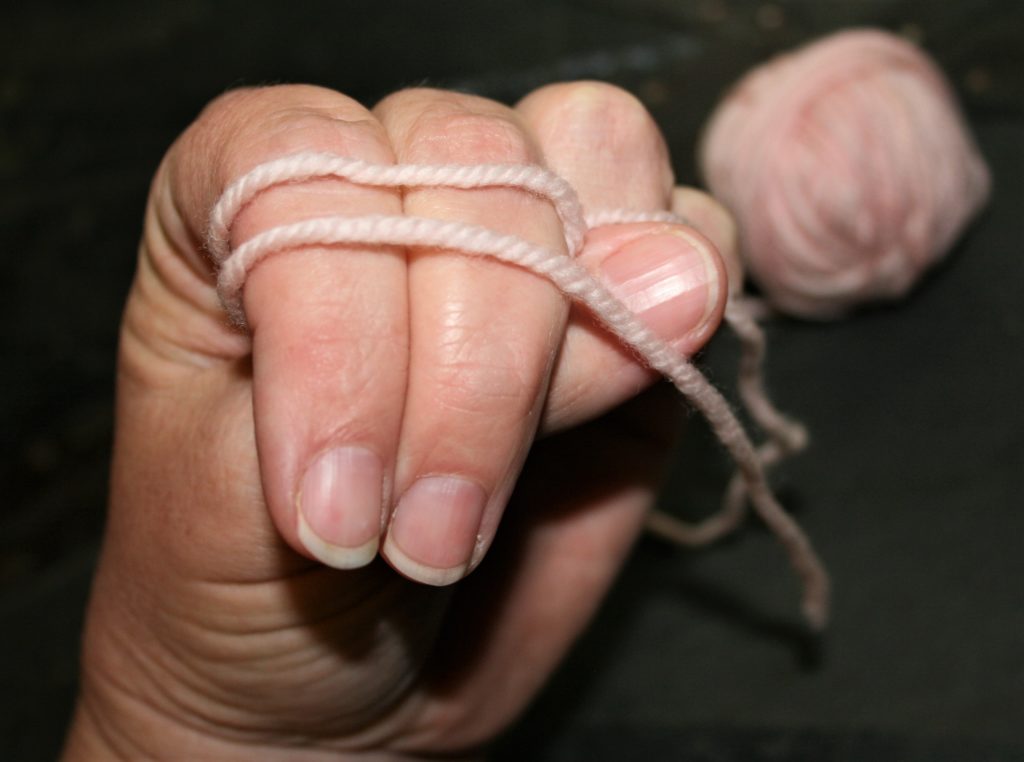
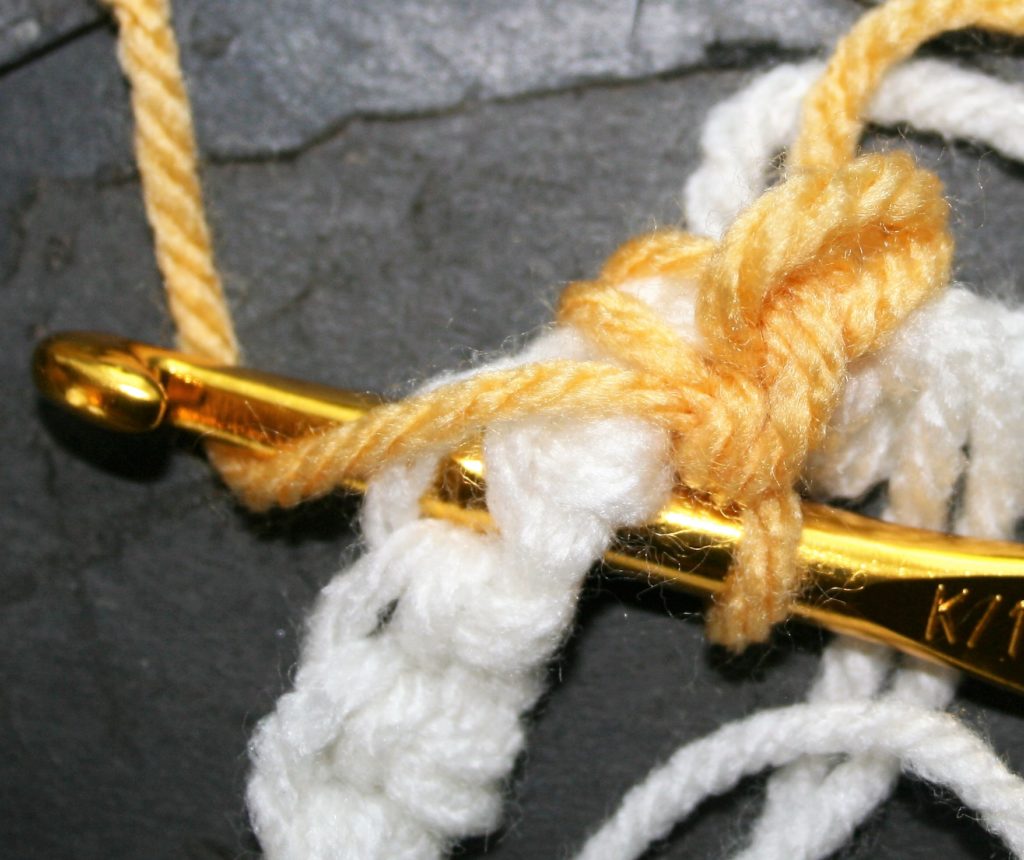
Make the Loop
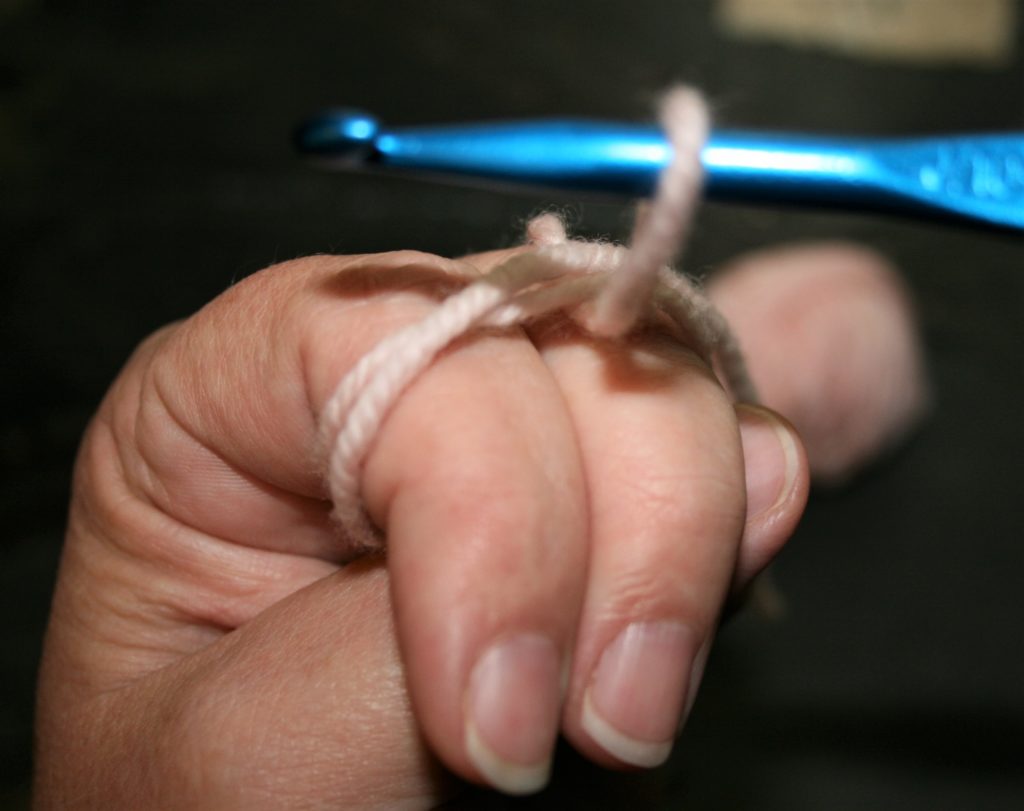
The approach that I find to be the easiest to do for this
method is to wrap yarn around my pointer and middle finger of my yarn tension
hand. When wrapping I ensure that the end of the yarn nearest the skein is
nearest my palm, with the tail of the yarn nearest my nails. I wrap at least
twice around my fingers.
Wrap yarn around fingers twice, with tail of yarn closest to the nails.
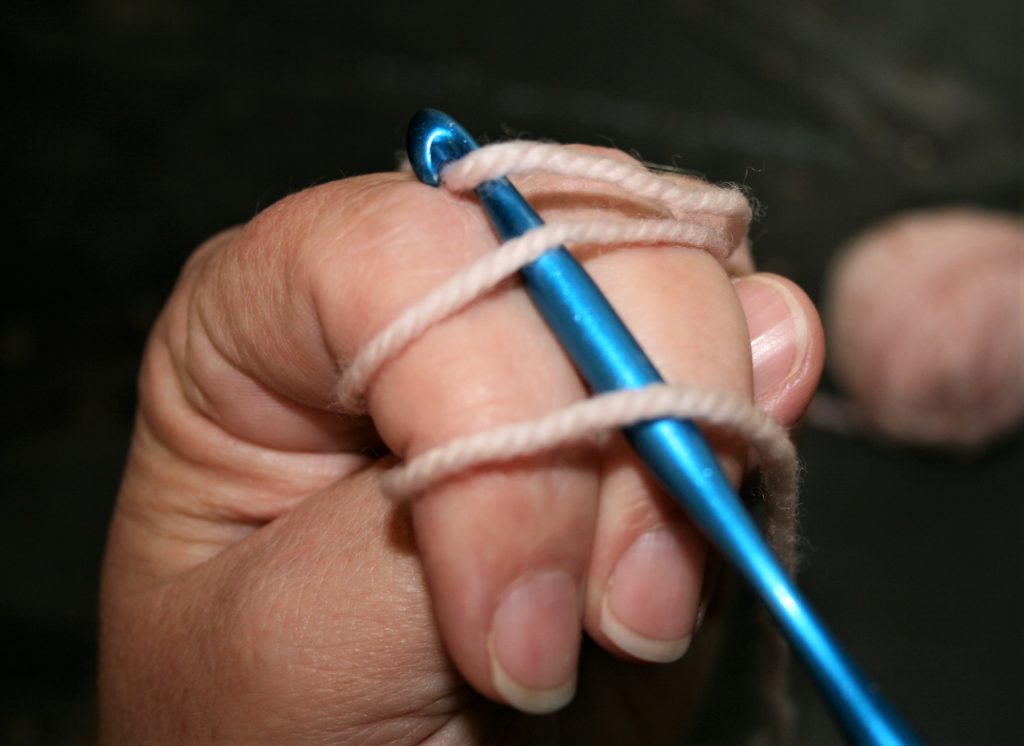
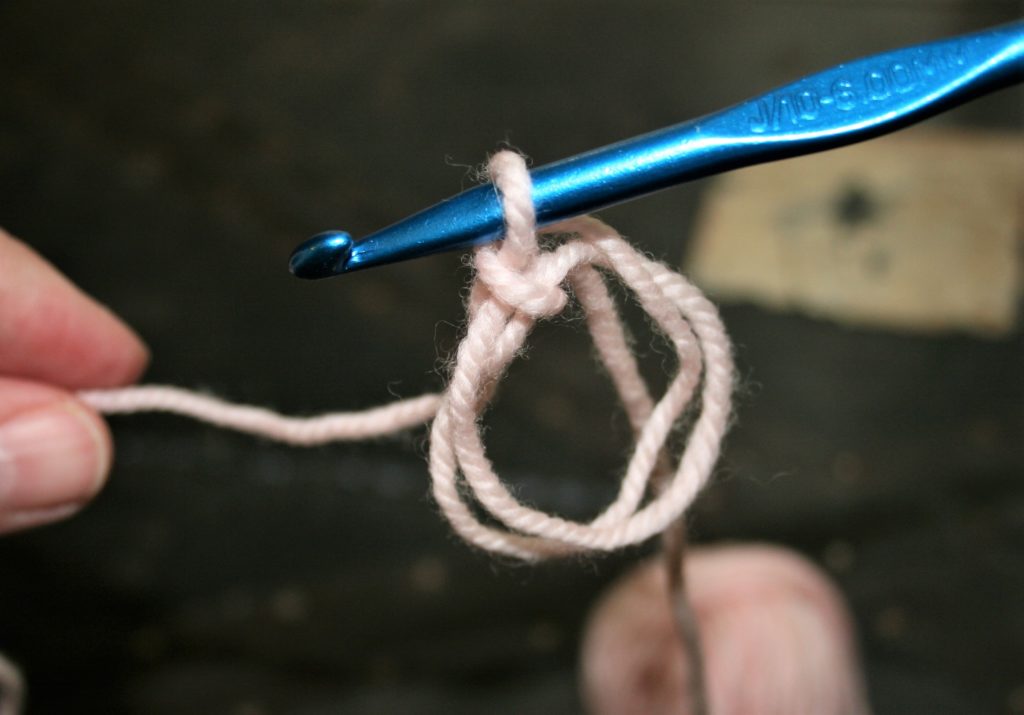
Work the Loop
Then I insert the hook over my fingers and under the yarn, yarn over the yarn from the skein and pull through the yarn on the fingers. At this point I usually remove my fingers, keeping the loop of yarn in at loop state, then chain 1. The chain secures the loop, so now you chain to the height of the stitches being worked in round one, and work all the stitches over loops of yarn.
Insert the hook, yarn over.Pull through a loopRemove from fingers and chain 1 to secure the loops
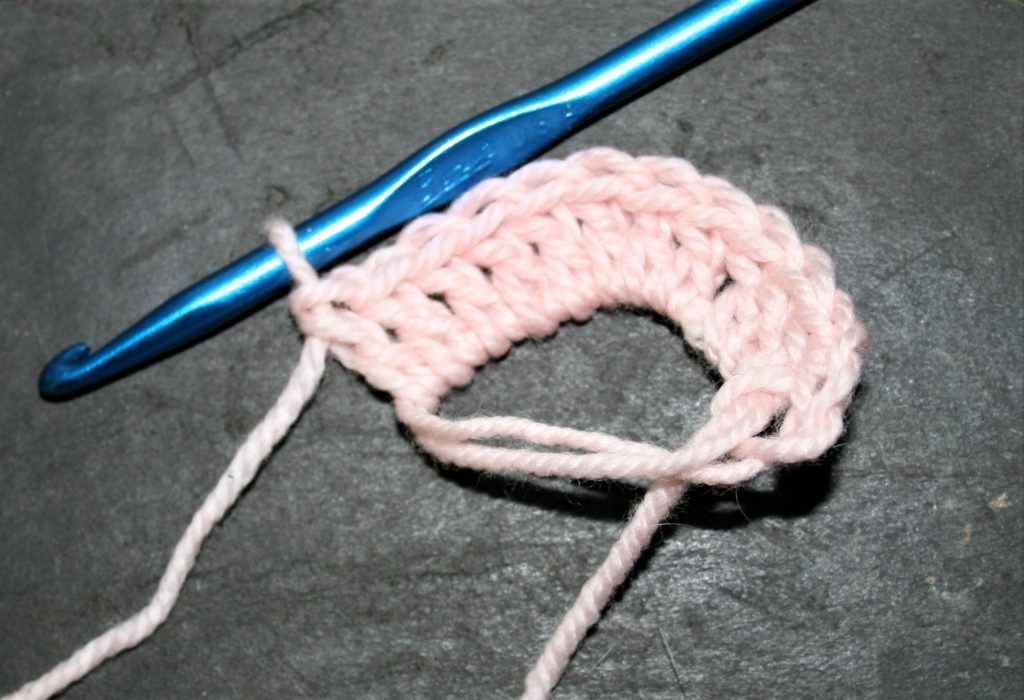
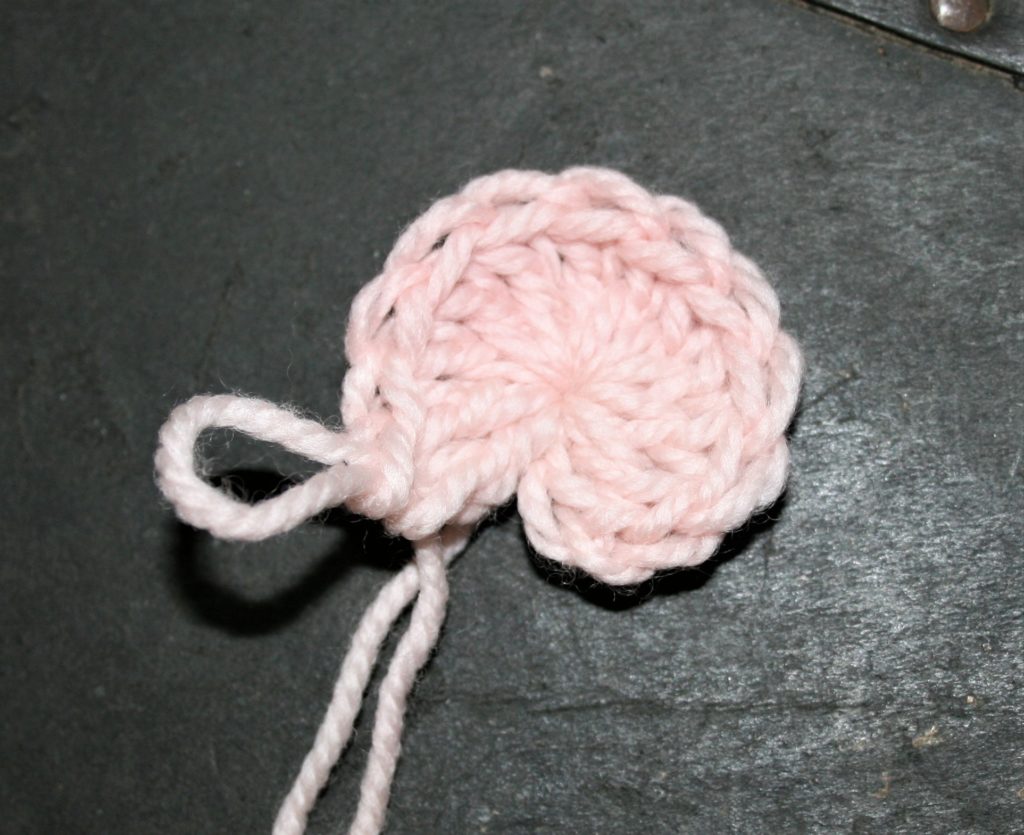
Close the Loop
When all the stitches of the round are worked, I then pull the tail of the yarn. Since I work over more than one loop, when pulling the tail it might leave a loop hanging out of the stitches. To remove this loop is simple, I simply begin pulling the hanging loop to tight. It is a bit of juggling to pull the yarn tight when it is wrapped more than once, but I find it gives a bit more of a secure base for the stitches to rest on. Since really, no one wants this loop to become unworked.
Work stitches around loops.Pull the tail of the yarn to close the loop
Check out some of my free patterns that begin in the round and practice using these techniques.
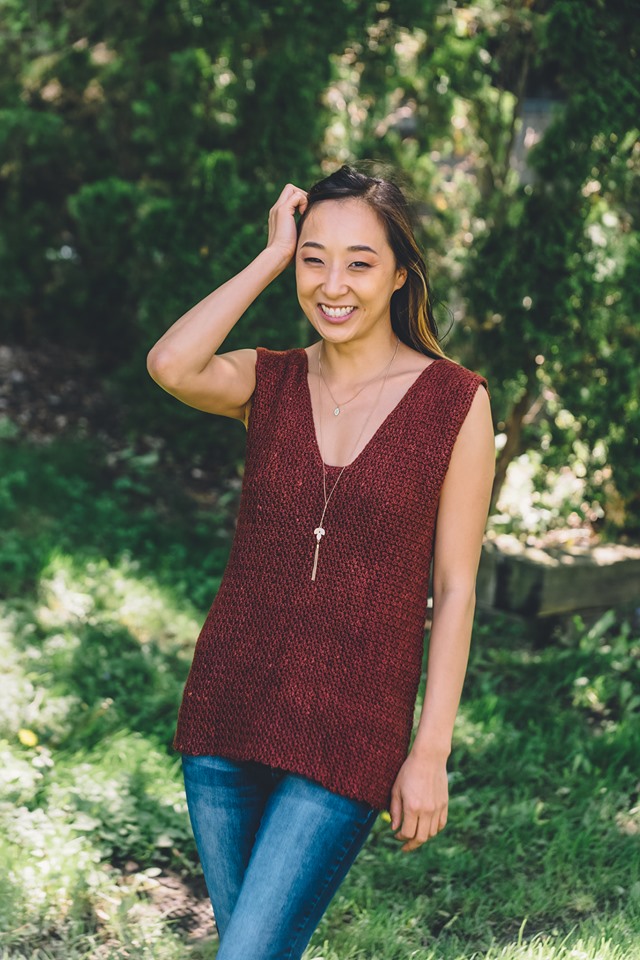
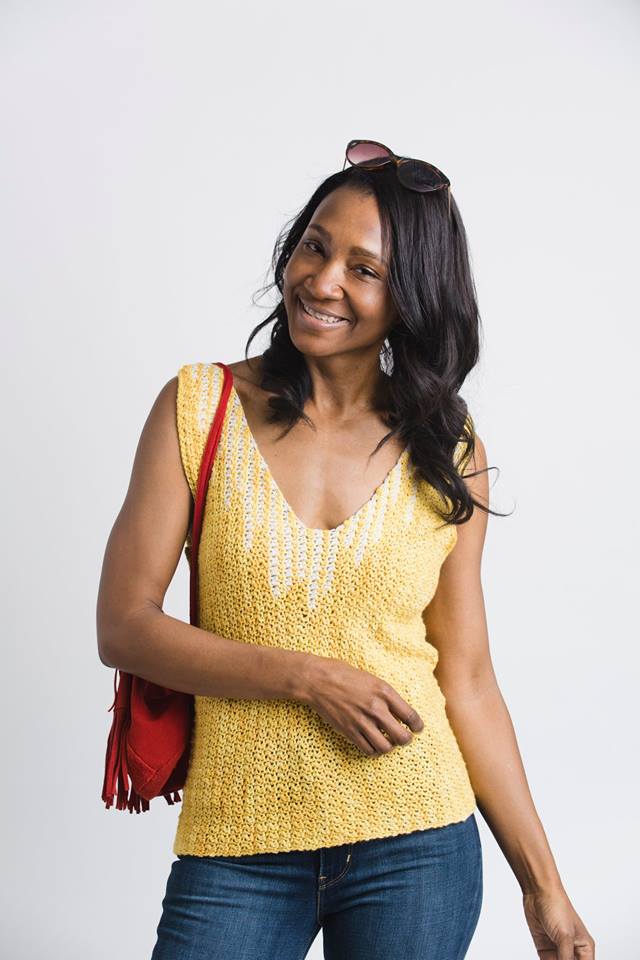
I have heard this design explained as, “Eye catching with a total style, this tank offers flattering
partial stripes that demands attention”. I cannot say that I disagree, but I
should add that it works up quicker than you might expect.
Soleil Stripes Tank, Photo courtesy of Prime Publishing
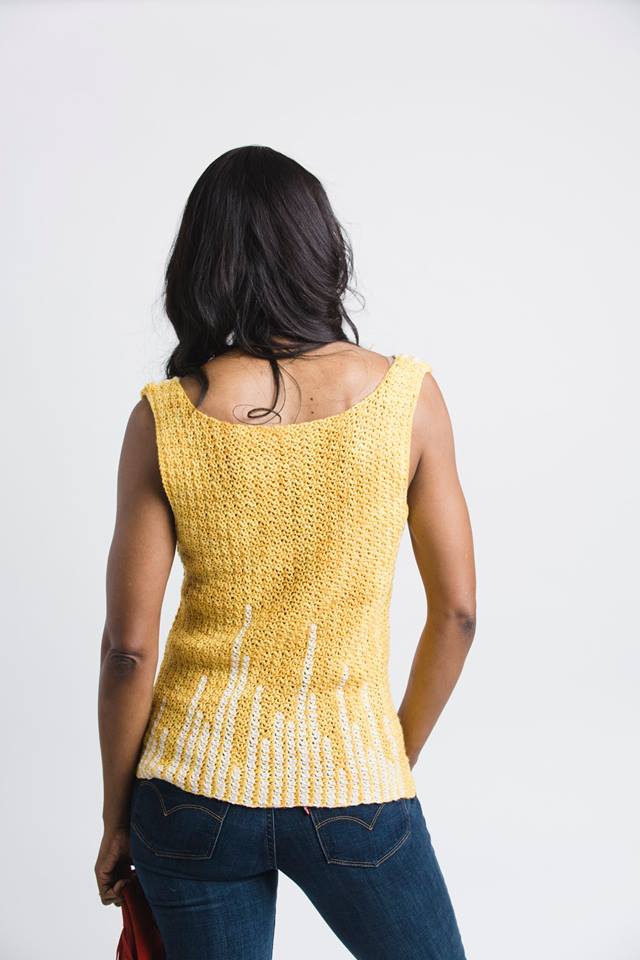
Since it is worked vertically this
tank is worked with yarn carries, so there are few ends to weave and simple
success is easy to achieve. In addition the stripes are only located at the
front edge of the neck and the lower edge of the back, so it is not
overwhelming with various points to keep straight.
The stitch pattern is a simple
combination of single and double crochets, so that the focus really is the
color changes.
Soleil Stripes Tank, photo courtesy of Prime Publishing
I was inspired to create this design
from the simple image that rested in my mind during some travel. I was walking
down a busy city street and the way that the light was playing off the windows
and reflecting the adjacent buildings. It created this staggered uneven stripes
that stuck in my mind.
So when I was playing with Anzula yarns I was drawn to place this image into a fabric, and hence this tank was created.
I am pretty happy with the results, I
hope you are too.
I pick up this stitch again recently and begun playing with
it in the round. This stitch is typically worked at only half the row height
increase of the single crochet stitch, working in both its on row stitch and
the one adjacent. As a result of this one, stitch stacked upon one stitch approach
it takes a bit of thinking to work the flat circular increases.
The first hurdle is to actually begin the round. You really
need to work 2 rows of fabric in the same beginning stitches to ensure an even
fabric consistency throughout. I have found two approaches to this in the
round.
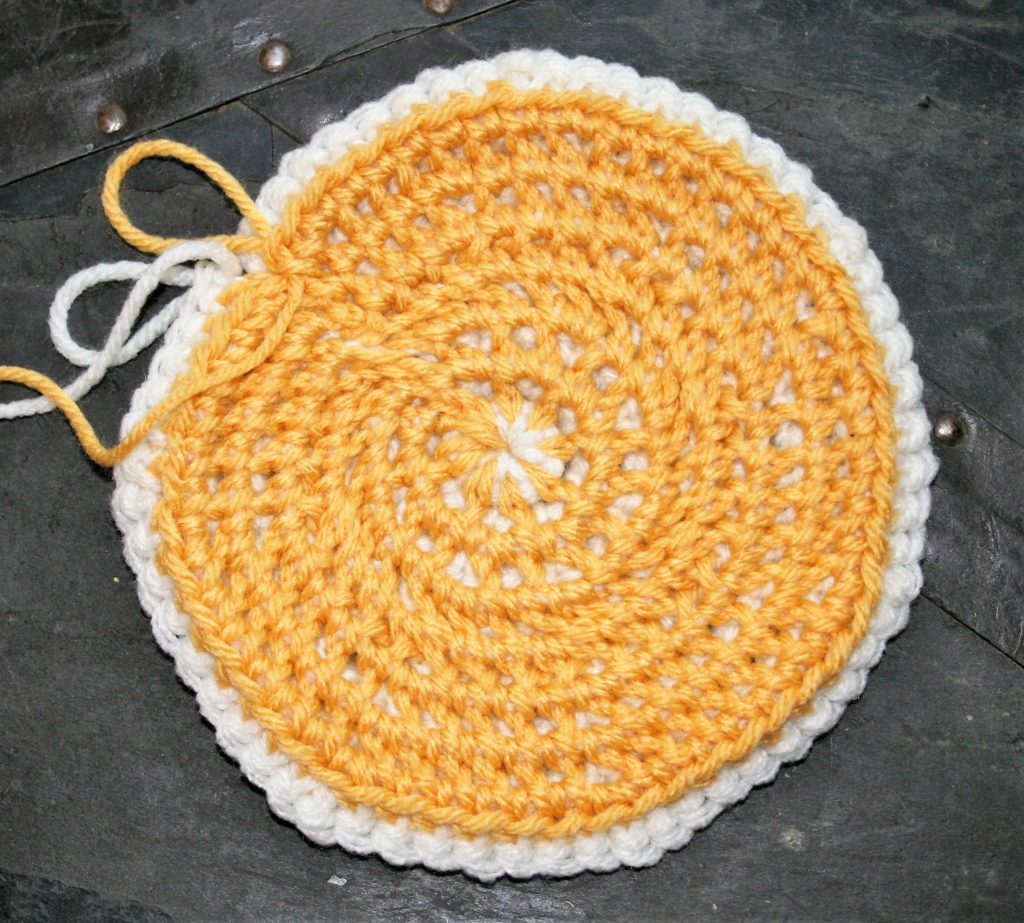
Please note that I worked this fabric as a different color
on each side, as it really helped me to keep the process understandable. In
doing such I would drop the color, leaving the working loop for the color live
and pick up the new color, switching like this between every Round. In addition,
I worked the entire fabric in a spiral method, meaning I did not join the
rounds when completed, I simply began the next stitches in the next round. This
was also so ease of keeping track of my location in the work. I have to play a
bit more with the end of the Rounds, as even working in a spiral they appear to
easily as the stitches become a bit clustered and dense, but it does allow for
the thermal stitch to be created.
Beginning:
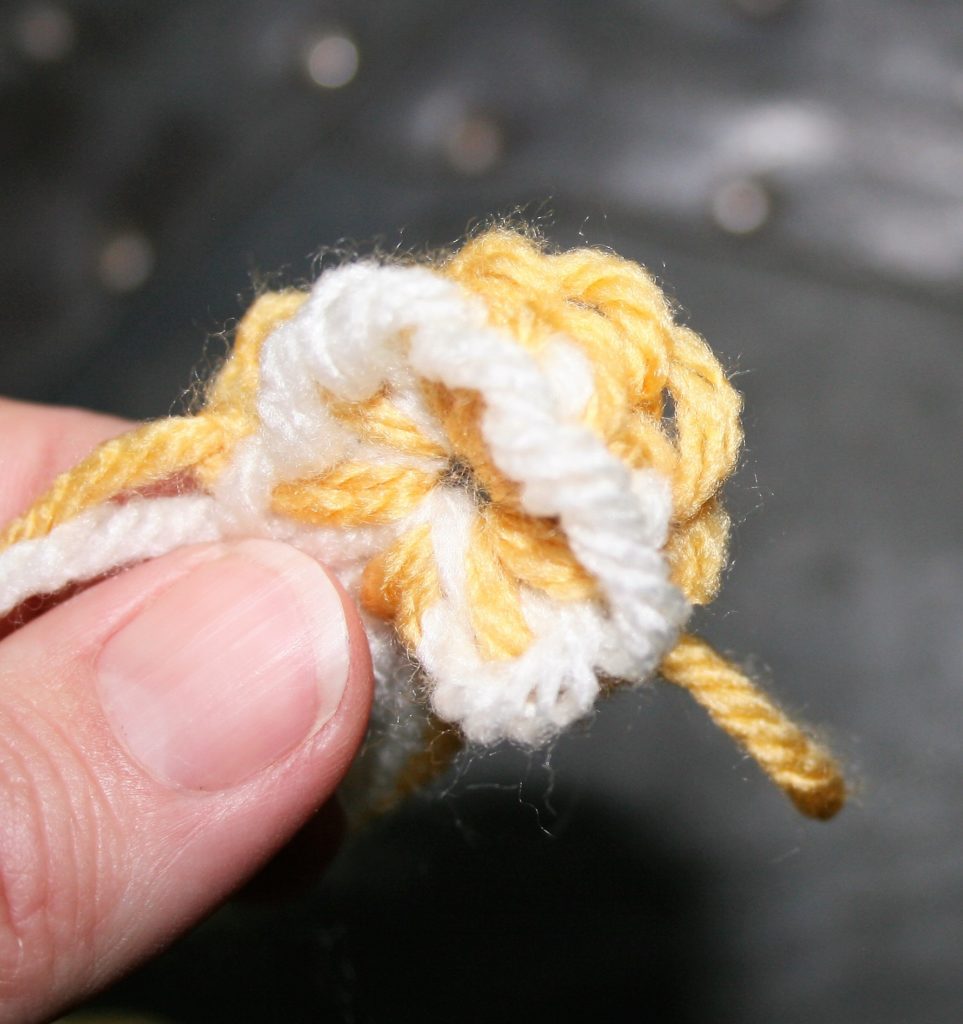
Method one: The magic loop/ring/circle. Essentially this technique involves making a loop of yarn and crocheting in this loop, like when crocheting over item (like the demonstration here making holiday wreaths).
Round 1: Work 8 single crochets into the loop (color cream),
turn.
Round 2: Drop color
from round one, join new color (color yellow). Working between stitches in between
the stitches of Round 1, [insert your from behind the magic ring, and through
the top loop closest to you in Round 1….this feels a bit awkward, but
essentially what you are doing is inserting your hook into the bottom ring and
the loop of the stitch in round 1, yo, pull through a loop, yo, pull through 2
loops] repeat 8 times, turn. -8 sts
Pull ring closed.
Working Round 2 of Magic Circle method, inserting hook behind ring and through top loop closest to you,Working Round 2 of Magic Circle Method as viewed from the Wrong SideThermal in the Round, Completed Round 1 & 2
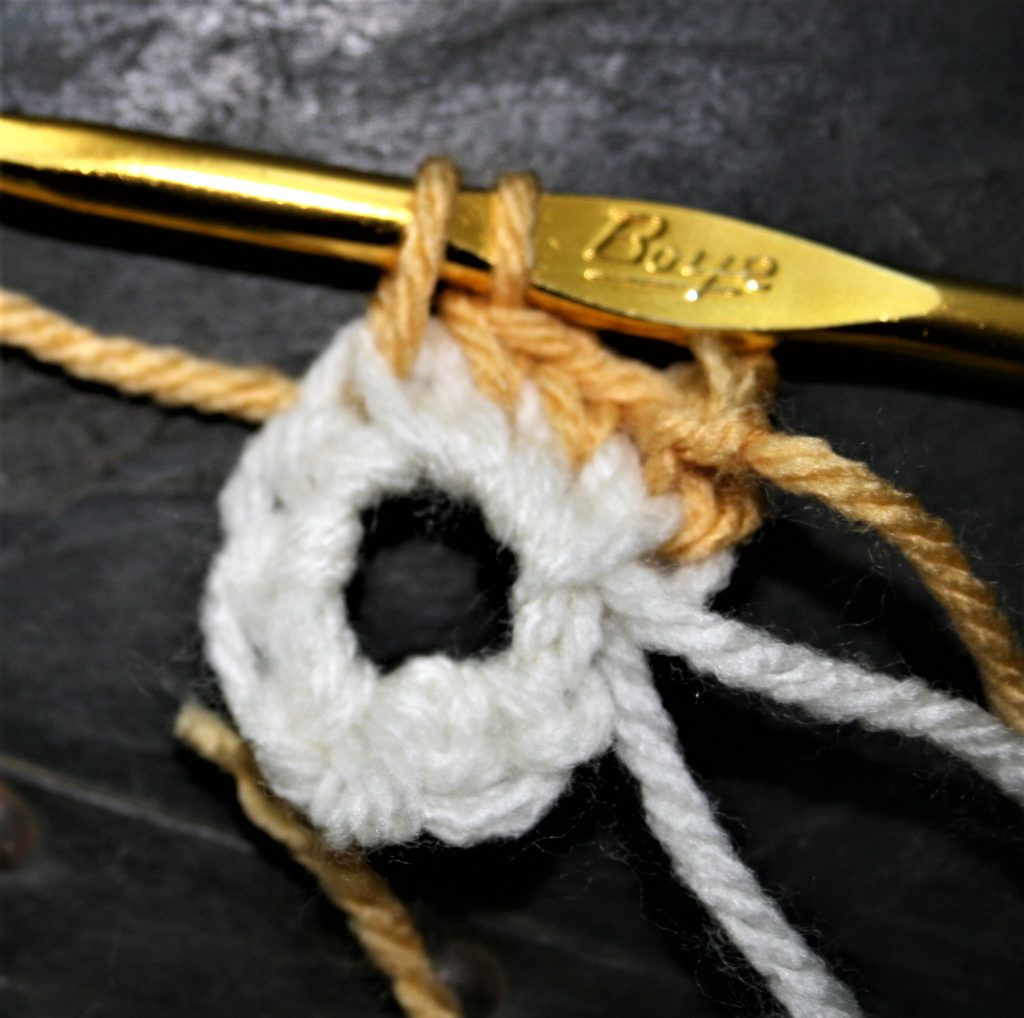
Method two: Working into a ring. Chain 4, and slip stitching to the first chain to form a ring.
Round 1: Ch 1, 8 sc in ring (color white), turn. -8 sts
Round 2: Drop color from Round 1, join new color (color
yellow) to one “leg” of the single crochet stitch, insert hook through same
point as join and the top loop closes to you of Round 1, yo, pull through a
loop, yo, pull through 2 loops, [insert hook into one “leg” of next single crochet
and the top loop of next stitch, yo, pull through a loop, yo, pull through 2
loops] 7 times, turn. -8 sts
Thermal in the Round, Round 2 working in the “through the stitch leg” method. Insert hook through one “leg” of the stitch and the top loop closest to you.
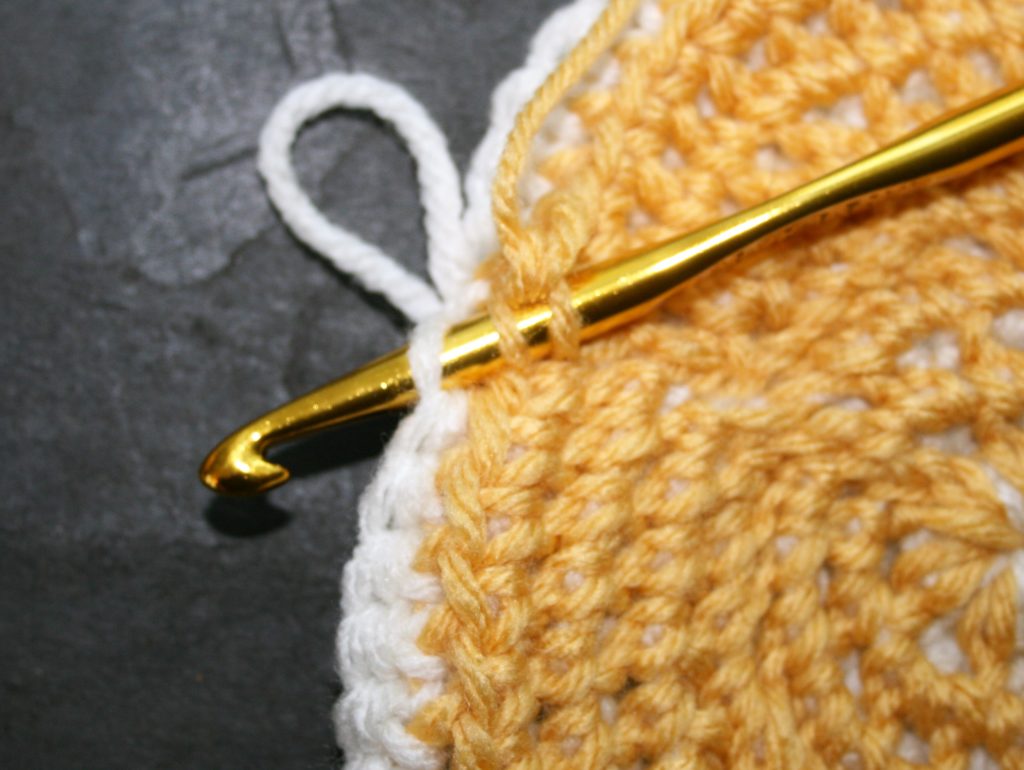
All Subsequent Rounds….Working the Increases
Increases need to happen in each Round, but you are
essentially working the same increase for 2 rounds. Meaning that the stitch
count for Rounds 3 and 4 will be in same, the same number of stitches are
worked in the white, the same number in the yellow….like working two separate fabrics
at once. However the increases are slightly different in approach.
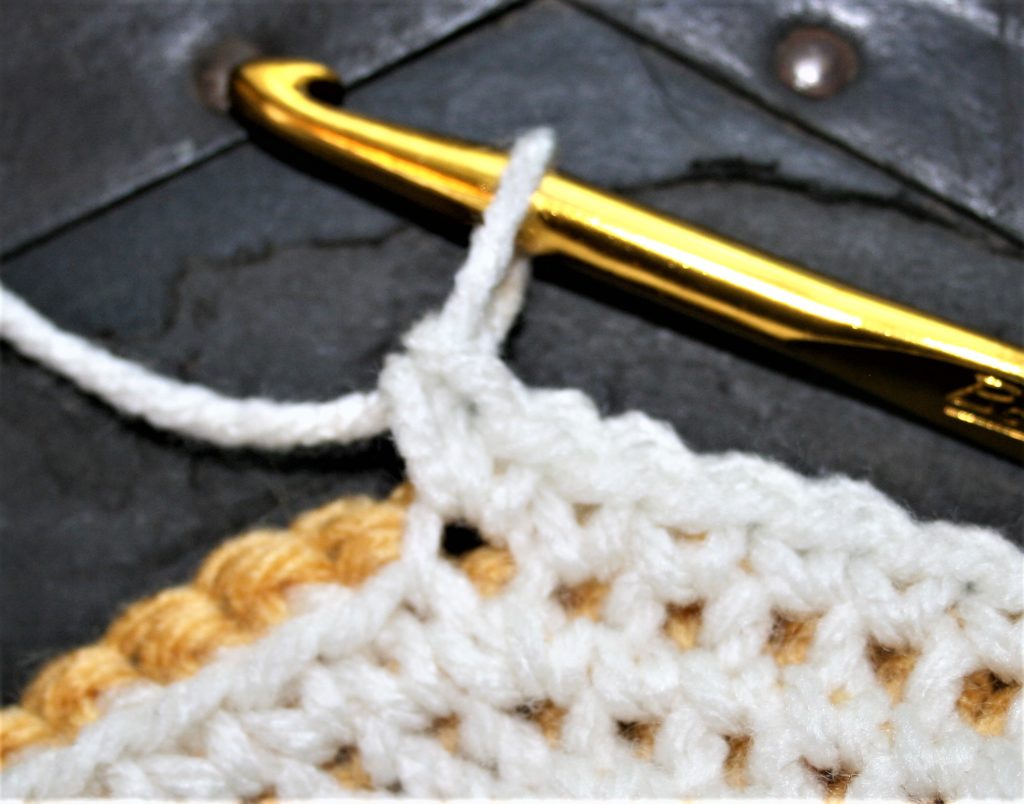
Round 3: Dropping yellow and picking up white, insert hook
through the front loop of Round 1, and the top loop closest to you in Round 2, yo,
pull through, yo, pull through 2 loops, insert hook into same location as
stitch just made and rework stitch, this is your increase. Work 2 thermal
stitches in each stitch around, turn. -16 sts
Thermal in the Round, Odd Round increase
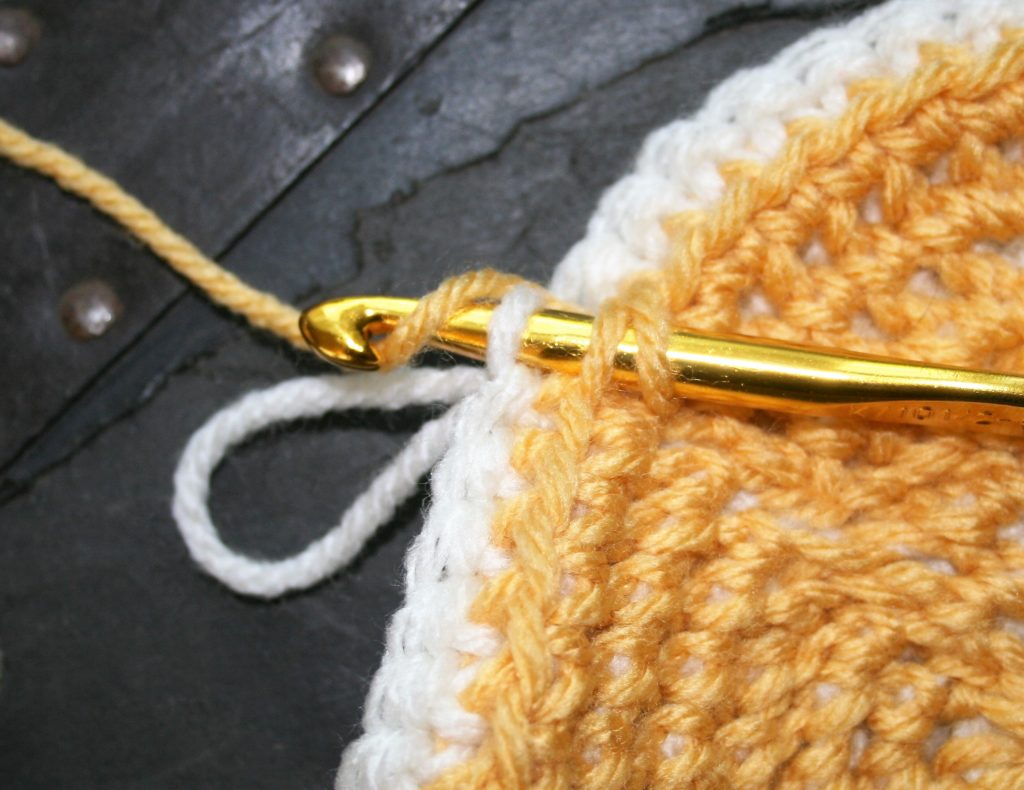
Round 4: Dropping white and picking up yellow, [insert hook
through the front loop of Round 2 and the top loop closest to you in Round 3,
yo, pull through, yo, pull through 2 loops, insert hook into the same front
loop of Round 2, and next top loop closest to you in Round 3 (note there are
already twice as many stitches in Round 3 as there are in Round 2…so there are
less front loops to work into then there are completed stitches, as a result
you need to increase Round 4 by working 2 stiches in the same Front loop, but
do not in the top loop closest to you)] repeat 7 times, turn. -16 sts
Thermal in the Round, Even Round Increase, first stitchThermal in the Round, Even Round Increase, second stitch
You work the same formula for a flat circle (you can find that here), in all the rounds going forward. I tend to think of the rounds in sets, a pair of one odd round and one even round (Round 1 & 2, Round 3 & 4, Round 5 & 6, etc.) Working all increases in Odd number rounds by working into the same front loop and the same top loop closest to you. Working all Even Round increases as the same front loop but different top loop closest to you. All non-increase stitches are worked as traditional Thermal Stitch (see tutorial for basic stitch)
This subtle difference in the increases between the rounds
is one reason the different colors helped me. I could remember that every time
I used the yellow yarn I was doing an even number Round increase.
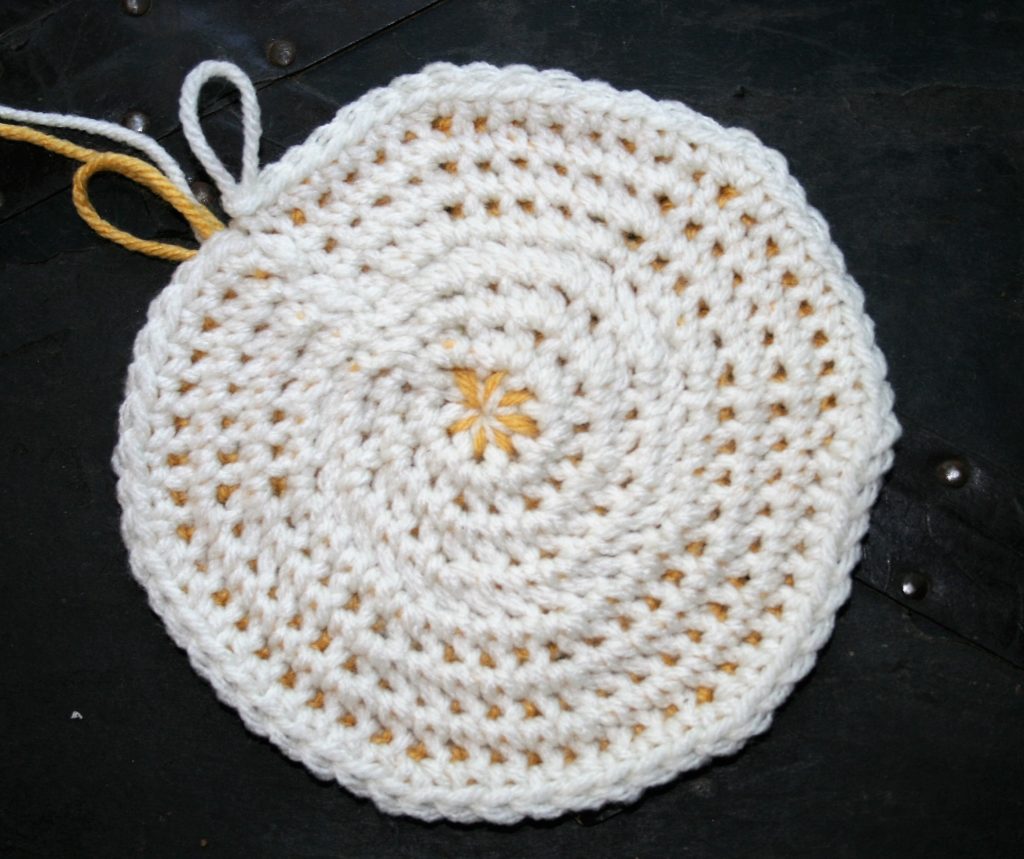
Thermal in the Round view from Odd Rounds
This process takes a bit of practice, but the resulting
fabric has a nice textured look, and the dense nature lends itself nicely to
pot holders, trivets, wash scrubby, I could even see a nice warm hat in the
future.