I have become a fan of using standing stitches when joining
a new yarn to an existing row, especially when joining with a single crochet.
This technique removes the slip stitch to join and the chain
for stitch height. It just works the stitch.
Working a Standing Single Crochet
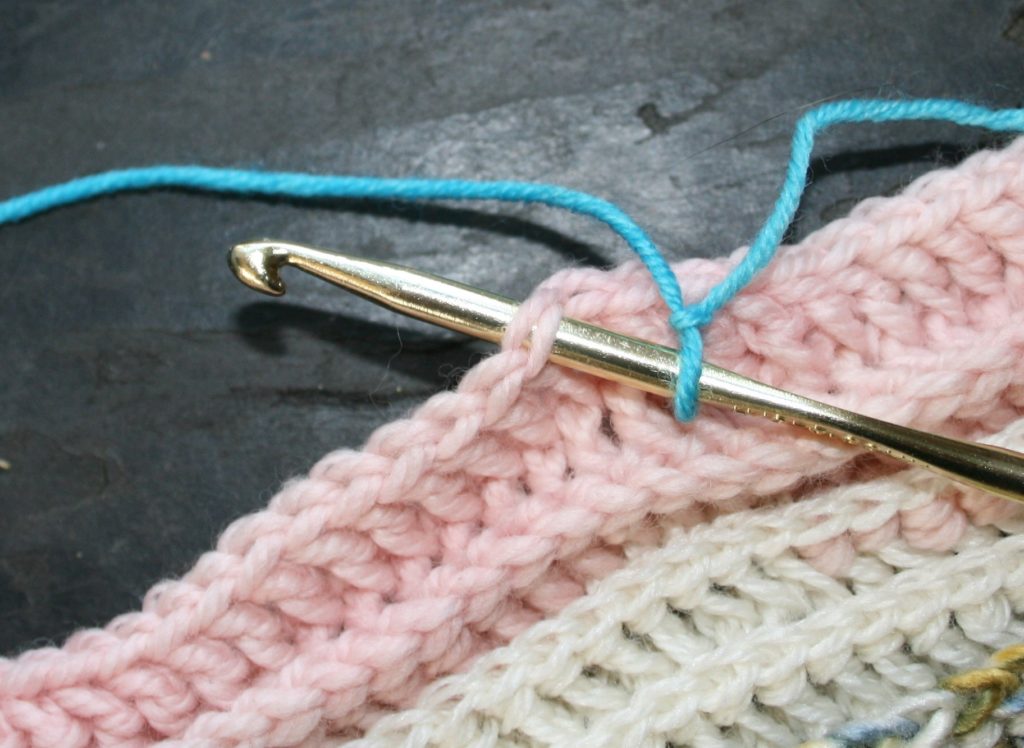
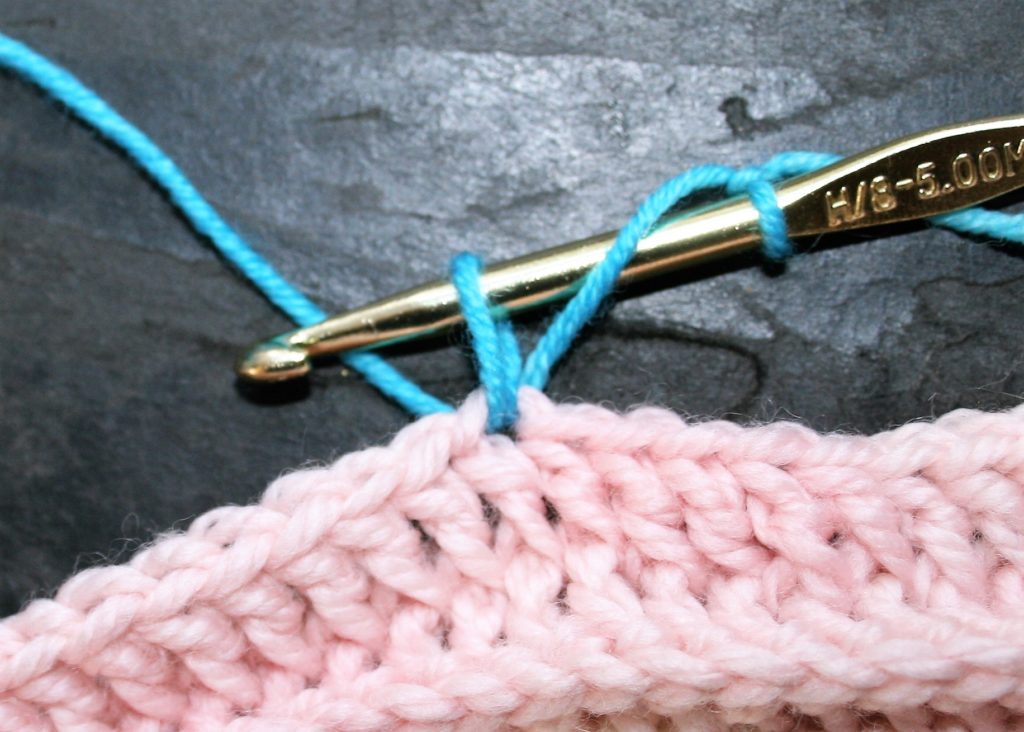
So to work a standing single crochet is worked by creating a
loop on your hook, just as if you were going to being a project. Insert your
hook into the stitch to be joined to, yarn over and pull up a loop.
Working a Standing Single Crochet, with a beginning loop on the hook, insert hook into stitch to join. Continue to work Standing Single Crochet, by pulling up a loop.
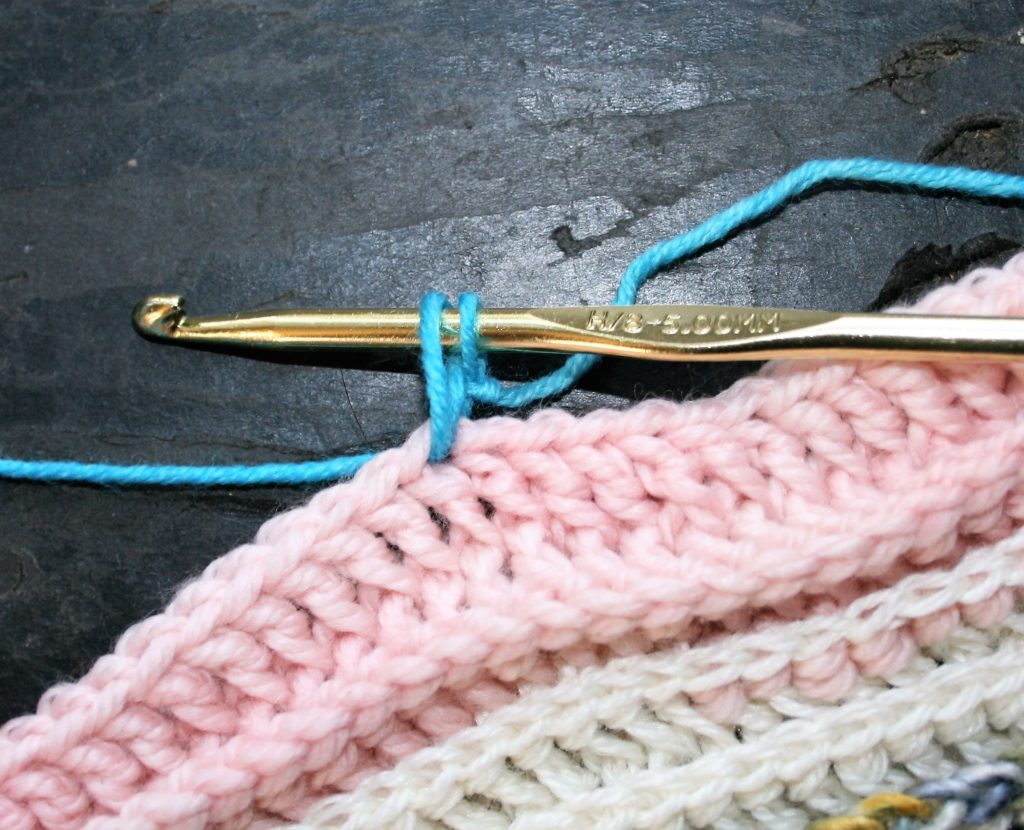
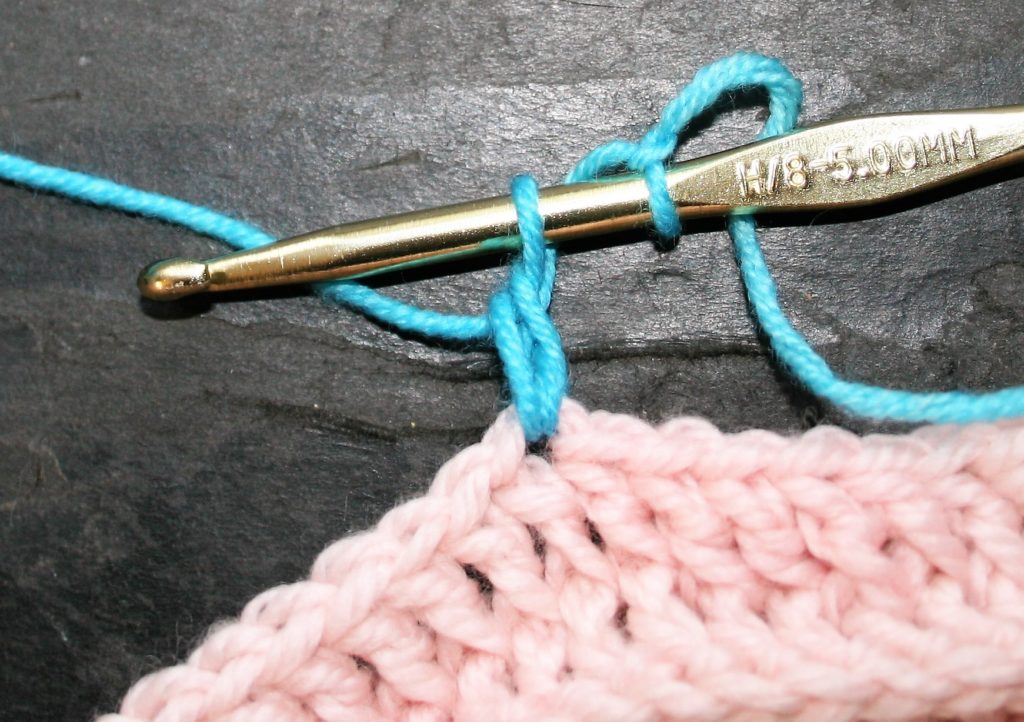
Now yarn over and pull through both the loops on the hook. Basically
you just work a single crochet, because there is already a loop on the hook to
finish the stitch just as you always have.
Finish a Standing Single Crochet by working a yarn over, and pull through both loops on the hook.
If you want to work this with other stitches that have a
yarn over before inserting the hook, it can be a bit trickier, but with a
little attention to detail is can be readily done.
Work a Standing Double Crochet
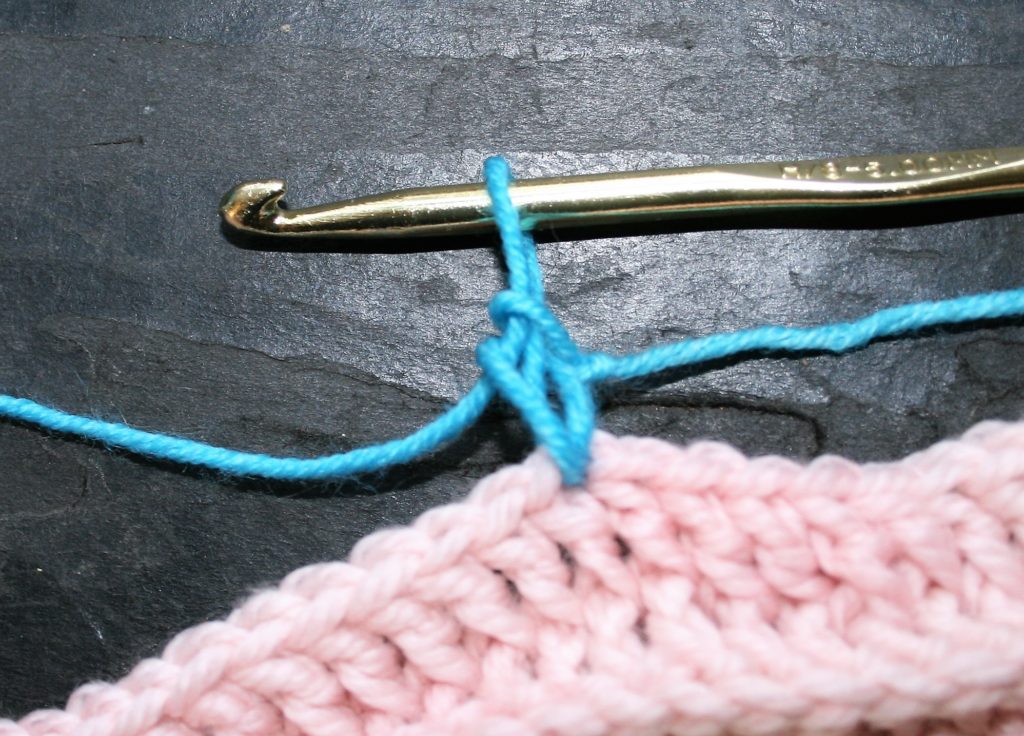
To work a standing double crochet for instance, place a loop
on you work just as if you your beginning a crochet project, now yarn over you
hook. This will feel very awkward as there is nothing to help keep the yarn
over in place, so you may want to slide this up you hook and pinch it with the
loop under your fingers while holding the hook.
Beginning a Standing Double Crochet, by yarning over the hook before inserting it into the stitch to join. Be careful to hold the yarn over on your hook as it can easily slip off.
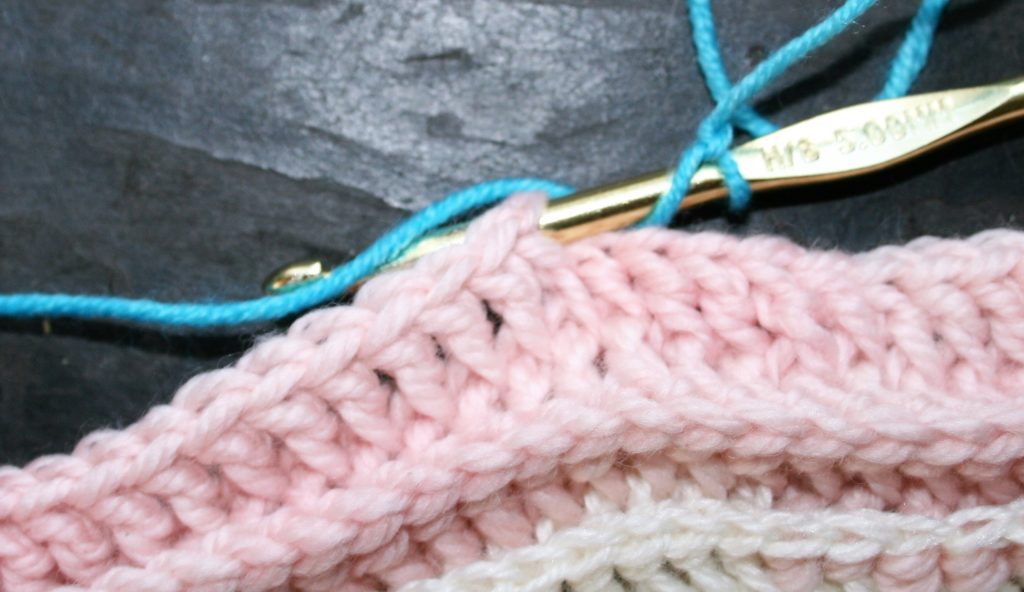
Now insert the hook into the joining location, yarn over and
pull up a loop, yarn over and pull through the loop and the yarn over you have
been pinching on the hook. Then yarn over and pull through the last two loops.
The next step of the Standing Double Crochet is to pull up a loop, still being careful not to lose that added yarn over, as it is still able to twist itself off the hook.The third step of a Standing Double Crochet lets you breath a little easier ass you pull through both the loop and the yarn off that has been on the hook. Finish the Standing Double Crochet by pulling through the last two loops on the hook.
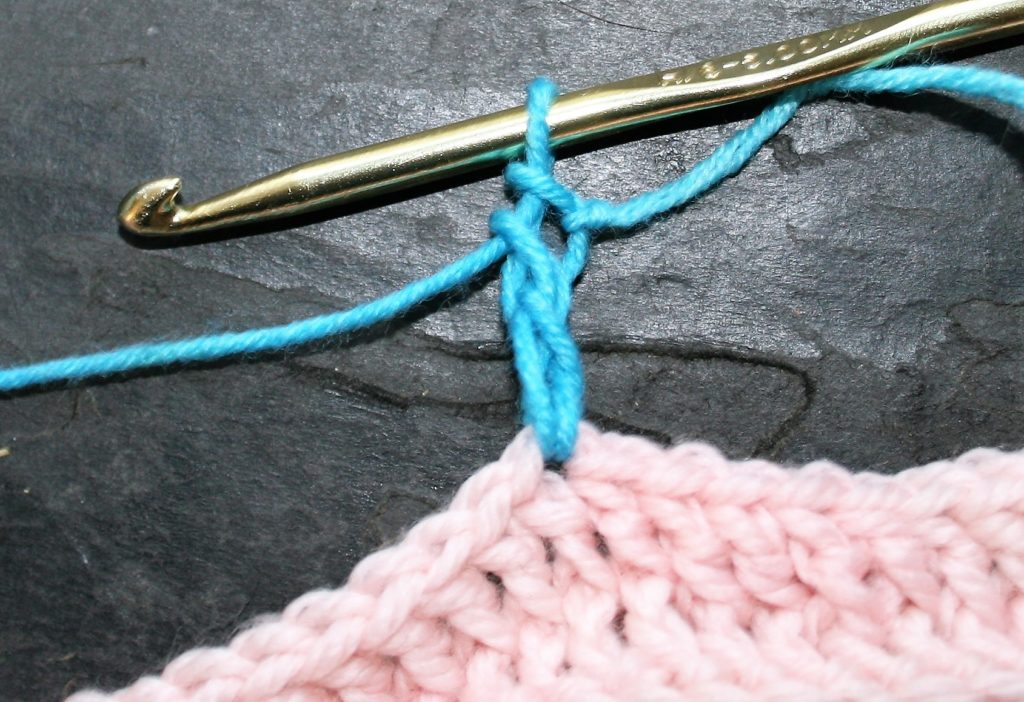
You will notice that with all standing stitches the “tail”
of the yarn is at the top of the stitch, not at the bottom as is where it is
found in traditional joins.
One nice thing about this type of join is that it looks like
all the other stitches, and it saves a bit of yarn.
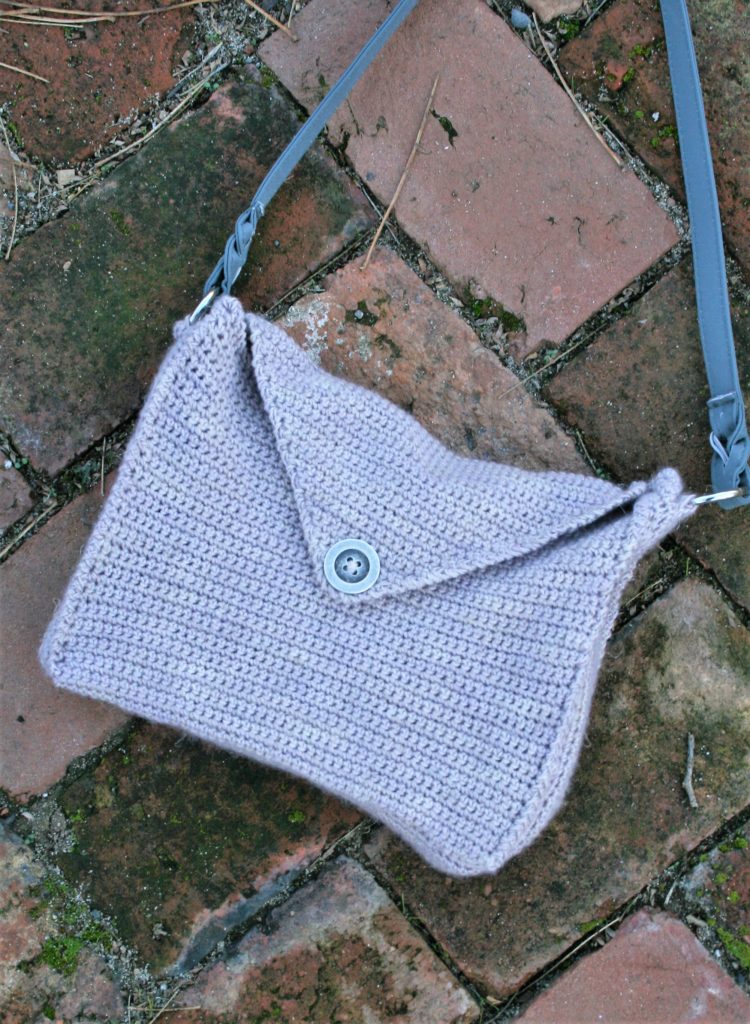
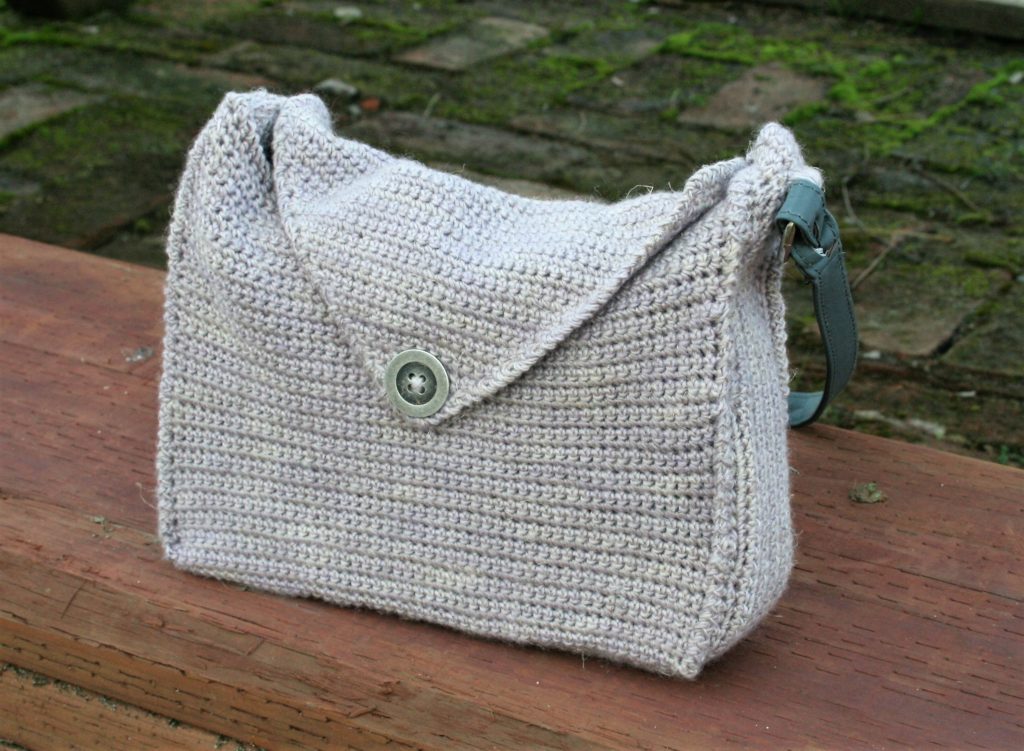
I am so excited to be participating in the Make it for Me with ELK Studio (for all the designs check it out here!). This year I have been inspired to create the Italian Spy Handbag as a Free pattern.
This handbag was inspired by a conversation with a friend that happens to be a fashion designer. She was discussing a crochet fabric with me, and I was discussing shapes with her. The further we went along in the discussion, I had a vision of the perfect small handbag I needed for day trips to the city.
Italian Spy Handbag
For me, a day in the city is San Francisco. I always want to travel with only the essentials, as there is a lot of walking….much more then I typically do in an average day.
So, I want a handbag that can carry the essentials, not weigh a lot, and one that I can comfortably keep close. The Italian Spy fits that build.
It is a simple pattern that uses less then one skein, and utilizes a simple tight stitch. But, just because it is worked in single crochet do not under estimate the overall effect of the fabric, or how it can easily show your mistakes. The pattern is worked in one piece, and then folded and seamed. There is an option to stiffen the sides and bottom, and options for the finishing edge.
I hope you give it a try for you prefect day out handbag. Enjoy.
Row 1: sc in 2nd ch from hook, sc in each ch
across, turn. -49sc
Row 2-42: Ch 1, sc in each st across, turn.
Row 43: Ch 1, sc in each st across, ch 42, fasten off.
Sides Worked with Body
Row 44: Join with slip stitch to Row 43 at first st of row
(opposite end of end just fastened off), ch 43, turn, sc in 2nd ch
from hook, sc in each ch across, sc in each sc across, and sc in each ch, turn.
-133sc
Row 45-55: Ch 1, sc in each st across, turn. Fasten off at
the end of Row 55.
Back
Row 56: Skipping 42 sts, join to next st, ch 1, sc in same
st, sc in next 48 sts, turn. -49sc
Row 57-100: Ch 1, sc in each st across, turn.
Flap
Row 101: DO NOT CH, sc2tog, sc until 2 sts rem, sc2tog over
last 2 sts, turn. -47sc, (2) sc2tog
Row 102-120: Rep Row 101. -7sc, (2) sc2tog
Row 121: Buttonhole Row, DO NOT CH, sc2tog, sc in next st,
ch 3, sk 3 sts, sc in next st, sc2tog over last 2 sts, turn. –(1) ch-3 sp, 2sc,
(2) sc2tog
Row 122-123: Rep row 101. Fasten off at the end of Row 123.
-1sc, (2) sc2tog
Optional Insert (to create more stiffness)
Ch 132
Row 1: Sc in 2nd ch from hook, sc in each ch
across, turn. -131sc
Row 2-10: Ch 1, sc in each st across, turn. Fasten off at
the end of Row 10.
Optional Assembly of Insert
Lay Insert section over the Sides Worked with Body Portion, Seam the insert to the Sides over Body in any preferred method, such as whip stitch with a needle or slip stitch with a crochet hook. For even more stiffening, you can place a strip of plastic or cardboard that measure 1” x 25”, and place it between the Insert and Side worked with Body
Assembly
Fold Front and Back toward each other, and Fold Sides toward
Front and Back, seam side of Side to Front, and seam side of Side to Back, on
each side of the handbag.
Help me help local communities by creating blocks for Warm Up America,
by making a block for yourself and one for a community project with this free
pattern. I will be creating a new block every few weeks and sharing it with
you, I just ask that make one for donation.
Warm Up America is a nationwide organization that
encourages local donations, but will also except donations to be sent to their
office so that blocks can be assembled and then blankets can be donated through
the United States.
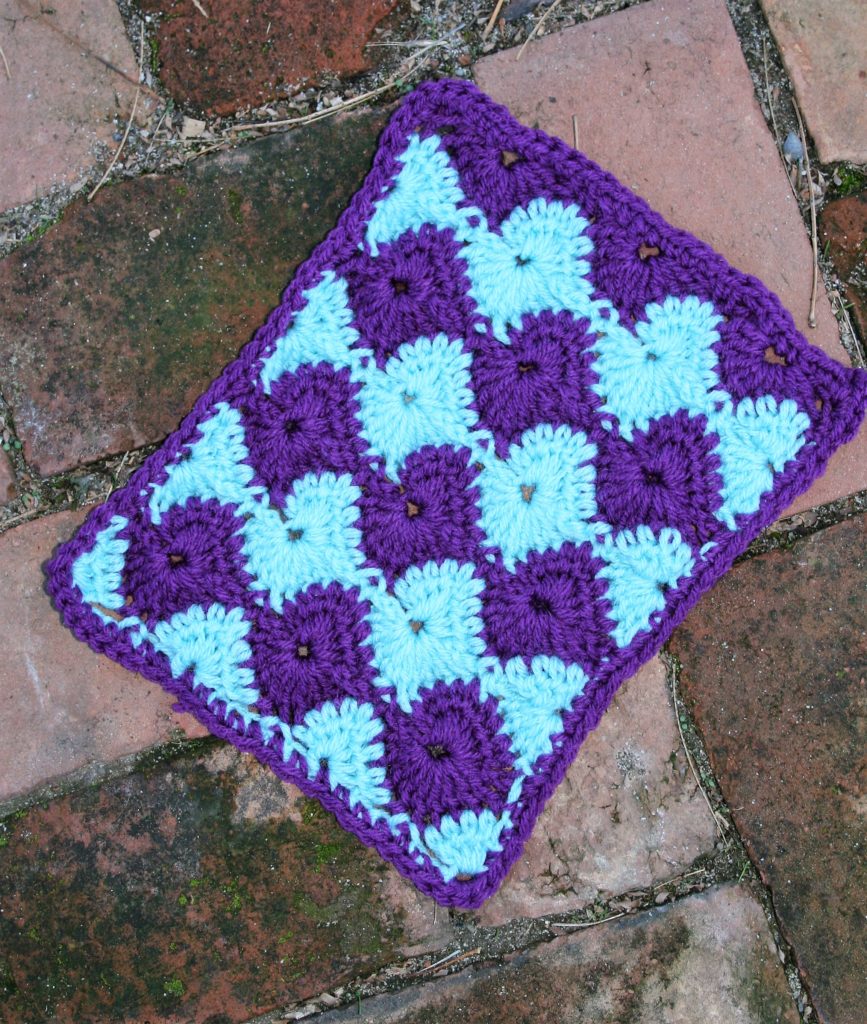
Rolling Along Block
Even if you do not want
to participate with Warm Up America, please consider creating blocks, or blankets
for your local community. There are various places in every community that
accept donations.
Rolling Along Block
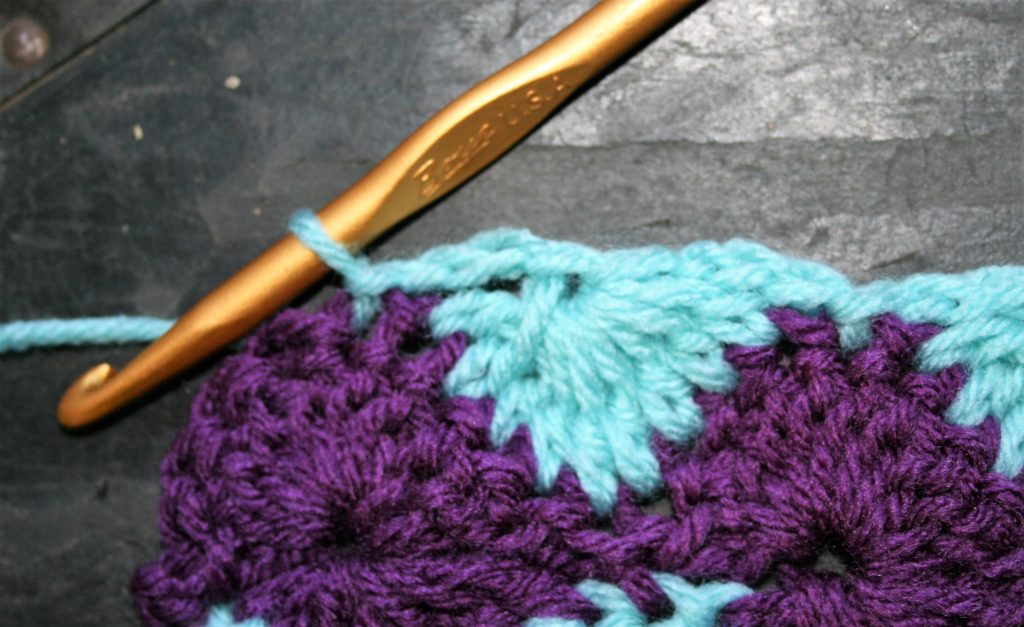
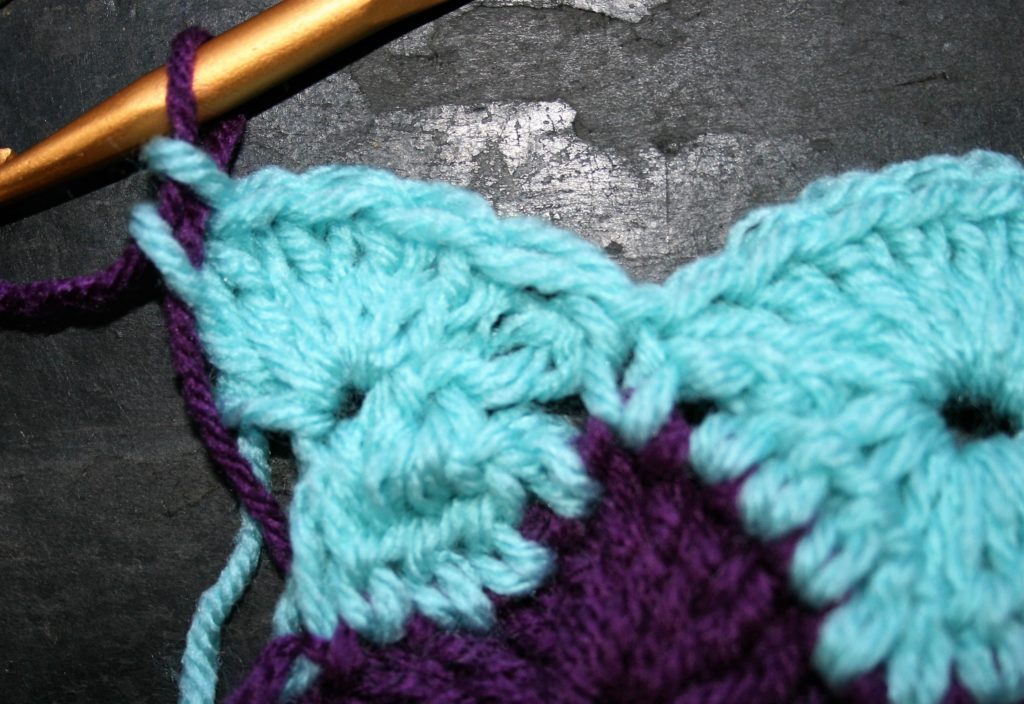
Working the Catherine’s Wheel
Catherine’s Wheel is a
classic crochet stitch that works one row of shells over a row of decreases to
create a circle or wheel look. I have made a couple of changes to the classic
pattern. For starters instead of working a single crochet after completing the
shell or decrease, I work a slip stitch. I find that this help prevent
“gapping” that occurs in the chain 3 area.
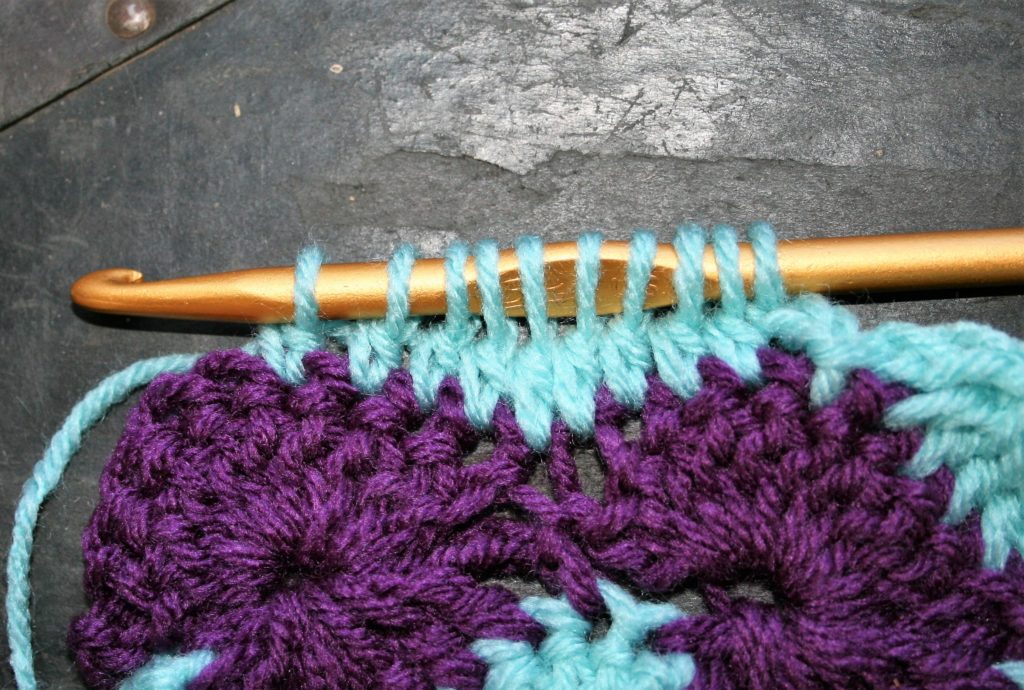
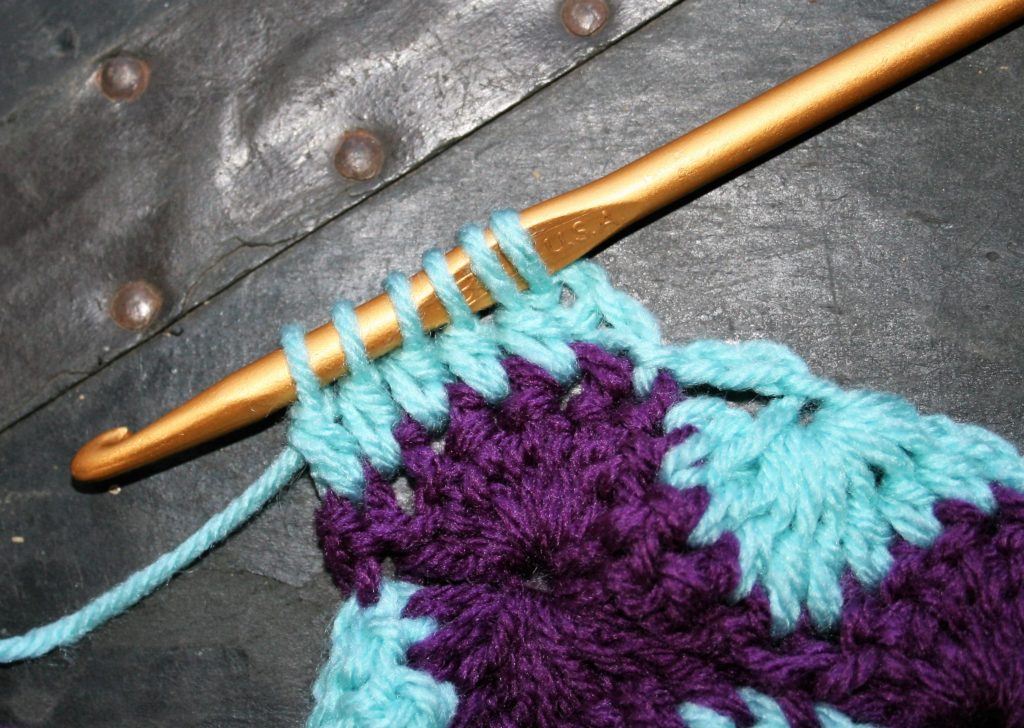
Working a dc9tog, you will have 10 loops on the hook.Yarn over and pull through all the loops on the hook.Slip stitch worked after the chain 3, to secure the decrease.Working a decrease on the corner, dc5tog.
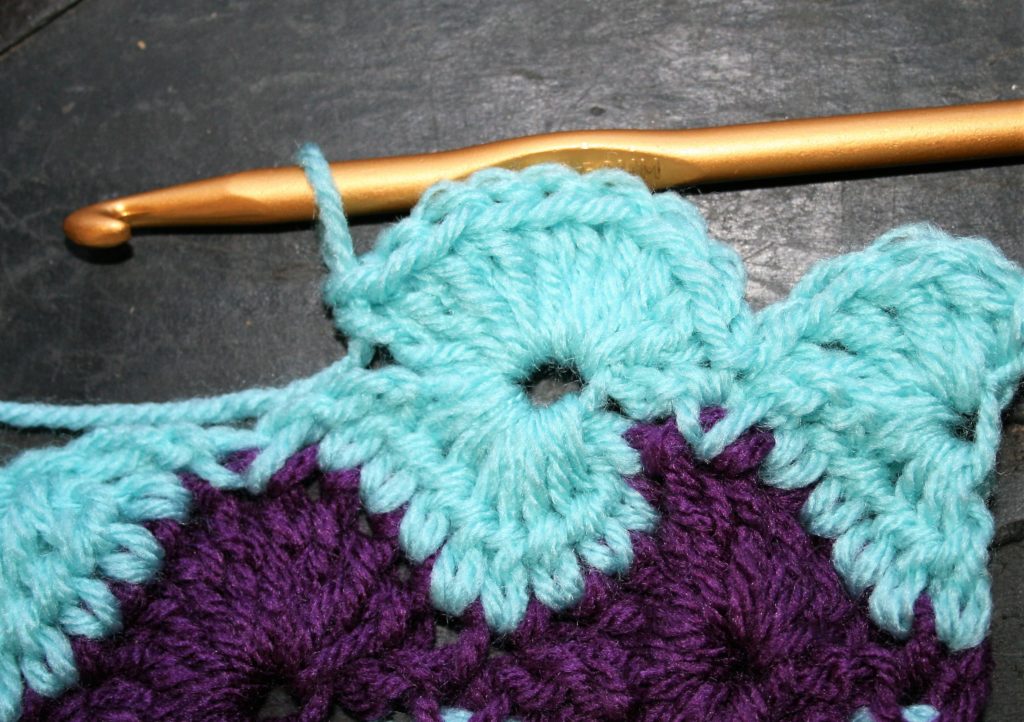
I should also point out
that I work the shells in “the center of the decrease”, this is the biggest
opening. However it is really not the completion of the decrease stitch, but
the third chain. I feel that working here emphasizes the “center”, when working
in the actual point of completion just looks a bit wonky.
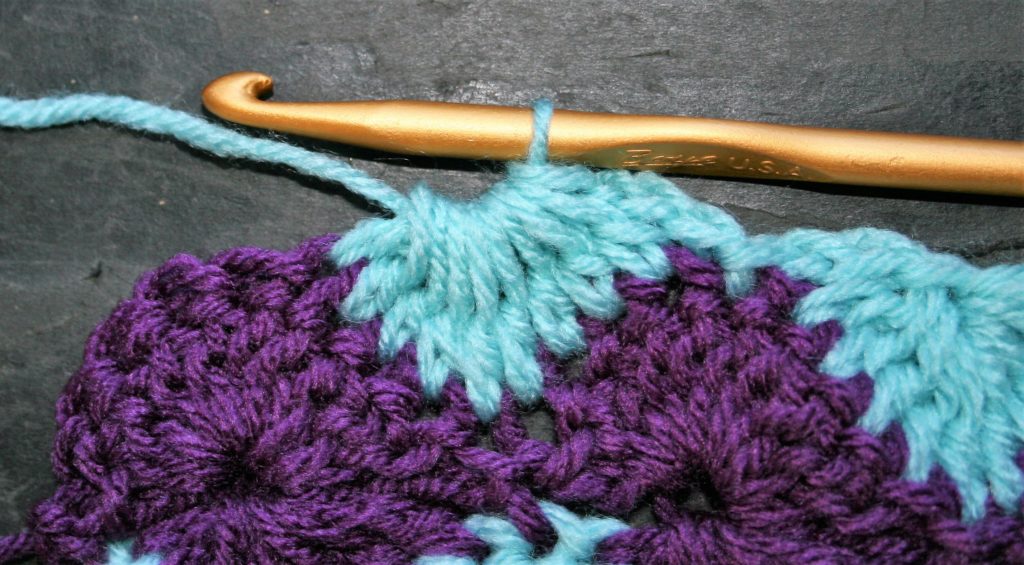
Work the Shell in the center of the decrease, it creates a “hole”.Working a shell at the beginning of a row means working in the center of the decrease.
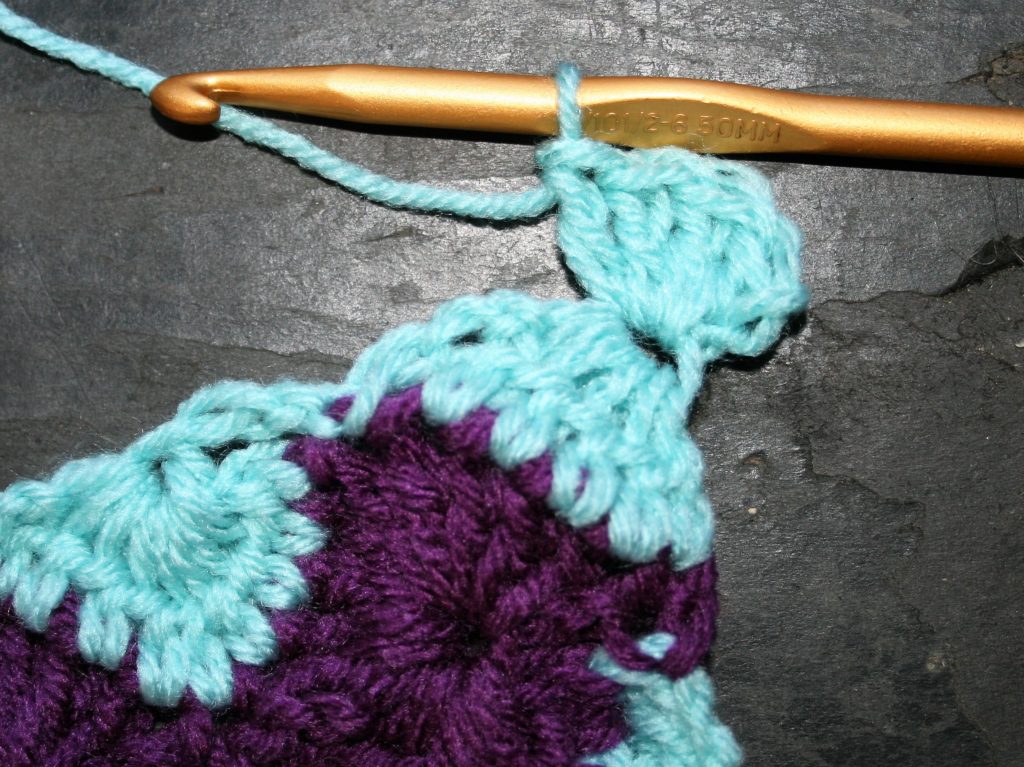
I do have an exception
to this, and that is when finishing a row with a shell it needs to be worked in
the top of the turning chain to keep the edge straight. This will be just over
from the “center”.
The “exception” the last shell is worked in the top of the turning chain, this helps to keep a straight edge.
Gauge
7”x9” rectangle
Materials
Medium weight yarn, in
2 colors MC (main color), CC1
K/10 ½/6.5mm crochet
hook
Special Stitches
Double crochet 4 together
(dc4tog): Working over the
next 4 sts, [yo, insert hook into next st, yo, pull up a loop, yo, pull through
2 loops] six times, yo, pull through all 5 loops on hook.
Double crochet 5 together
(dc5tog): Working over the
next 5 sts, [yo, insert hook into next st, yo, pull up a loop, yo, pull through
2 loops] six times, yo, pull through all 6 loops on hook.
Double crochet 9 together
(dc9tog): Working over the
next 9 sts, [yo, insert hook into next st, yo, pull up a loop, yo, pull through
2 loops] six times, yo, pull through all 10 loops on hook.
Note:
Change colors without fastening off the yarn. Instead carry the yarn along the edge, and it will be hidden in the edging round. Here are some tips for do it.
The Pattern
With MC Chain 25
Row 1: Sc in 2nd ch from hook, [sk 3 chs,
9 dc in next ch, sk 3 chs, sc in next ch] three times, change to CC1, turn. –(3)
9 dc shells, 5 sc
Row 2: Ch 3, dc4tog, ch 3, sl st in next st, ch 3,
dc9tog, ch 3, sl st in next st, ch 3, dc9tog, ch 3, sl st in next st, ch 3,
dc5tog, turn. – (2) dc9tog, (1) dc4tog, (1) dcs5tog
Row 3: Ch 3, 4 dc in same st, sl st in next sl
st, 9 dc in center of dc9tog, sl st in next sl st, 9 dc in center of dc9tog, sl
st in next sl st, 5 dc in top of turning ch-3, change to MC, turn. (2) 9 dc
shells, (2) 5 dc shells
Row 4: Ch 1, sl st in same st, ch 3, dc9tog, ch
3, sl st in next st, ch 3, dc9tog, ch 3, sl st in next st, ch 3, dc9tog, ch 3,
sl st in last st, turn.
Row 5: Ch 1, sl st in same st, 9 dc in center of
dc9tog, sl st in next sl st, 9 dc in center of dc9tog, sl st in next sl st, 9
dc in center of dc9tog, sl st in last st, change to CC1, turn.
Row 6-13: Rep Rows 2-5 twice.
Row 14: Rep Row 2. Fasten off.
Edging
With color MC, sc in
each st across, 3 sc in corner, work evenly sc around block working 3 sc in
each corner. Finish off.
This is always the time of year that I take stock of what
the last year has brought. Honestly, it helps me realize that I am not just spinning
my wheels, I really am doing things!
Teaching
For example, this year I have taught 53 classes at my local yarn store (not including private lessons), I have taught 16 classes at 5 different national events. Four classes at DFW Fiber Fest in April (find me there this year teaching the CGOA Masters Day), four classes at the Jimmy Beans Wool annual retreat in June, two classes for the Northern Illinois Chapter of CGOA in May, five classes at the Crochet Guild of America annual Chainlink Conference, and a class for a unique on-line conference, Stitch Markers Live.
This is part of the contributing factors of my 10 trips in
26 weeks that really kept me on my toes. Some were business networking, some
were educational, and some were teaching. But all were really enjoyable.
Retreats
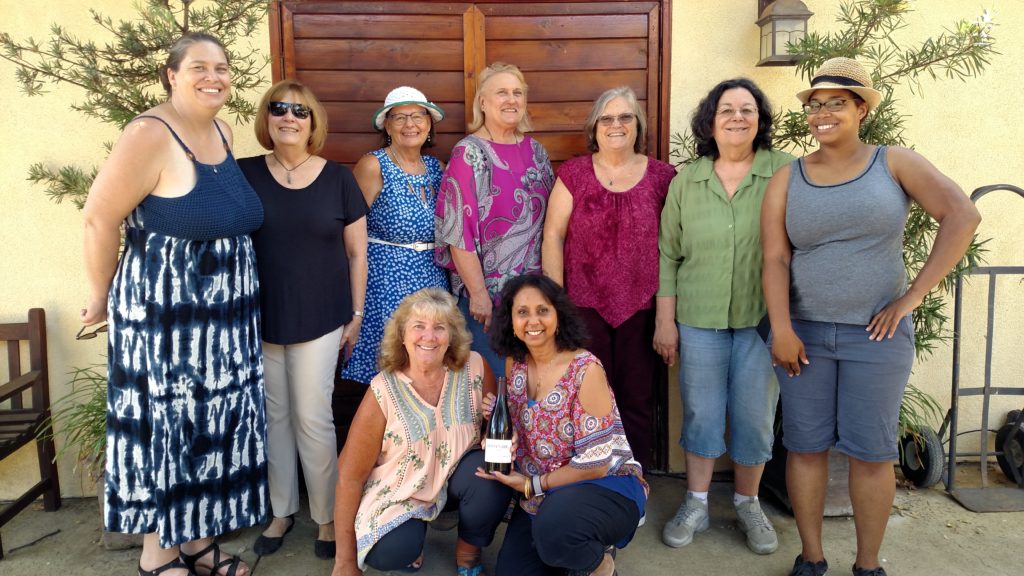
I also started day long crochet retreats. Celebrating my first event at a local winery; getting a tour, enjoying learning about wine and crocheting, a grat day was had by all. I have the second event is already on the calendar for the end of January this time at a chocolate shop. Find information to join me here.
Crochet with Linda at the Winery, August 2019
Designs
I didn’t just sit back when it came to designing. I only had 8 designs in freelance publications, but I created 15 designs, 4 for sale in my pattern line, the rest are either free patterns on my website or available for purchase in kits with various retailers.
Charity
I also started an afghan block pattern line to encourage people to learn a crochet stitch and help a national non-profit, Warm Up America. Warm Up America utilizes volunteers to put these blocks together and donate afghans to those in need. I have created 7 blocks this year, and continue to strive to create a new block design every few weeks.
Newsletter
Another large event for me, was actually pulling it together and creating a monthly newsletter. I highlight what has been happening in the month prior and what I am excited about in the month to come. This has really helped me to stay focused and reflective. If you haven’t already, sign up to receive it here.
Volunteering
Then in the midst of all this teaching and creating, I have continued to lead the Crochet Guild of America, as its President. That means monthly Board meetings, and keeping volunteers moving forward with various initiatives and undertakings. Working with 6 other Board members to help spread the word of crochet, preserve its heritage, and encourage more learning.
Home Life
I have juggled this with scheduled power outages to prevent
forest fires. With the busy calendars of my two kids, be it sports, band or 4H
there is never a dull moment. In addition I have juggled all the running of a
household as my husband has had to work increasingly demanding work hours. I know
that this is nothing new for women, but it is worth remembering that it takes
time and has value.
The Decade
I was considering taking a look at where life has taken me
in the last 10 years, but really a decade ago to now, is almost not recognizable.
I made new friends, I lost people I care about. I was working in the field of
Social Work for the older adults. My children were just starting school, my husband
had human being work hours, and I was not in a position to even imagine that I would
be self-employed in working in crochet. It is like a completely different world,
and leaves me really wondering where the next ten years will take me.
Help me help local communities by creating blocks
for Warm Up America, by making a block for yourself and one for a community project
with this free pattern. I will be creating a new block every few weeks and
sharing it with you, I just ask that make one for donation.
Warm Up America is a nationwide organization that encourages local
donations, but will also except donations to be sent to their office so that
blocks can be assembled and then blankets can be donated through the United
States.
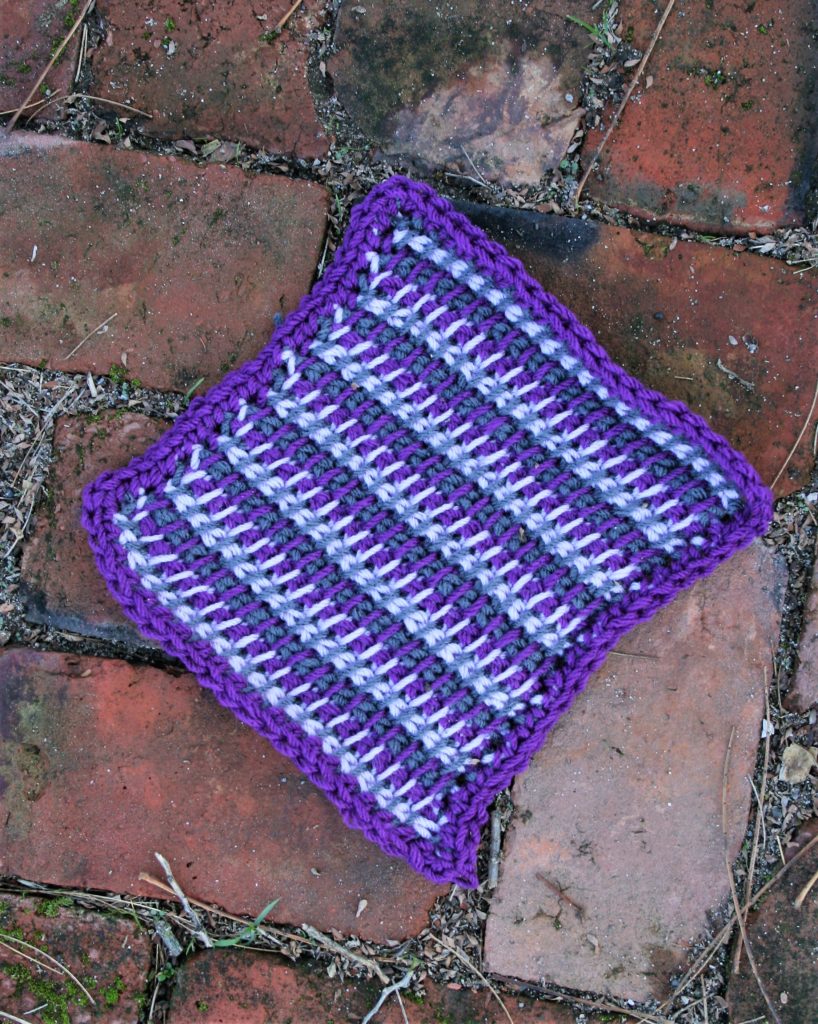
Dancing Stripes Block
Even if you do not want to
participate with Warm Up America, please consider
creating blocks, or blankets for your local community. There are various places
in every community that accept donations.
Tunisian Crochet
This block is used working Tunisian Crochet. Tunisian Crochet is essentially inserting your hook through your fabric and pulling up a loop, and leaving the loop on the hook, pulling up loops across the row. Then a “return pass” is worked to work each loop off the hook. This creates a fabric that has a similar look to weaving, yet has the same structural characteristics as crochet. There are many different stitches in this technique, but in this block I only use one stitch, the Tunisian Simple stitch. Learn the stitch here.
Changing color on every forward and return pass, creates a
dramatic effect. Utilizing only three colors means that I have a color waiting
for me when I finish a row and I know exactly which yarn to work next.
Gauge: 7”x9” rectangle
Materials
Medium weight yarn, in 3 colors MC (main color), CC1, CC2
9 mm Tunisian Crochet hook
Special Stitches
Tunisian
Simple Stitch (tss): Insert
hook from right to left under next vertical bar, YO, pull up a loop.
Return
Pass (RP) : YO and pull through 1 loop, [YO and pull
through 2 loops] across, until 2 loops remain on hook, using new color for next
row’s FP, YO and pull through last 2
loops.
The Pattern
With
MC Chain 19
Row
1: With color MC, pull up a loop in second ch from the hook and in
each ch across. Switch to color CC1, RP. 19 sts
Row
2: With color CC2, tss across, switch to color MC, RP.
Row
3: With color CC1, tss across, switch to color CC2, RP.
Row
4: With color MC, tss across, switch to color CC1, RP.
Row
5-19: Rep Rows 2-4 five times.
Edging
Rnd: With color CC2, sc in each vertical bar across, 3 sc in corner,
work evenly sc
around block working 3 sc in each corner. Finish off.