A free pattern means that it is that time again, the New York Sheep and Wool Festival (a.k.a Rhinebeck)! Just like most everything else this year, it will be done a bit differently…as in virtually (find out information here).
This means that you do not have to live in or travel to Duchess County New York. You can be anywhere in the world and take classes, visit booths, and get a little hint of the New England turning leaves.
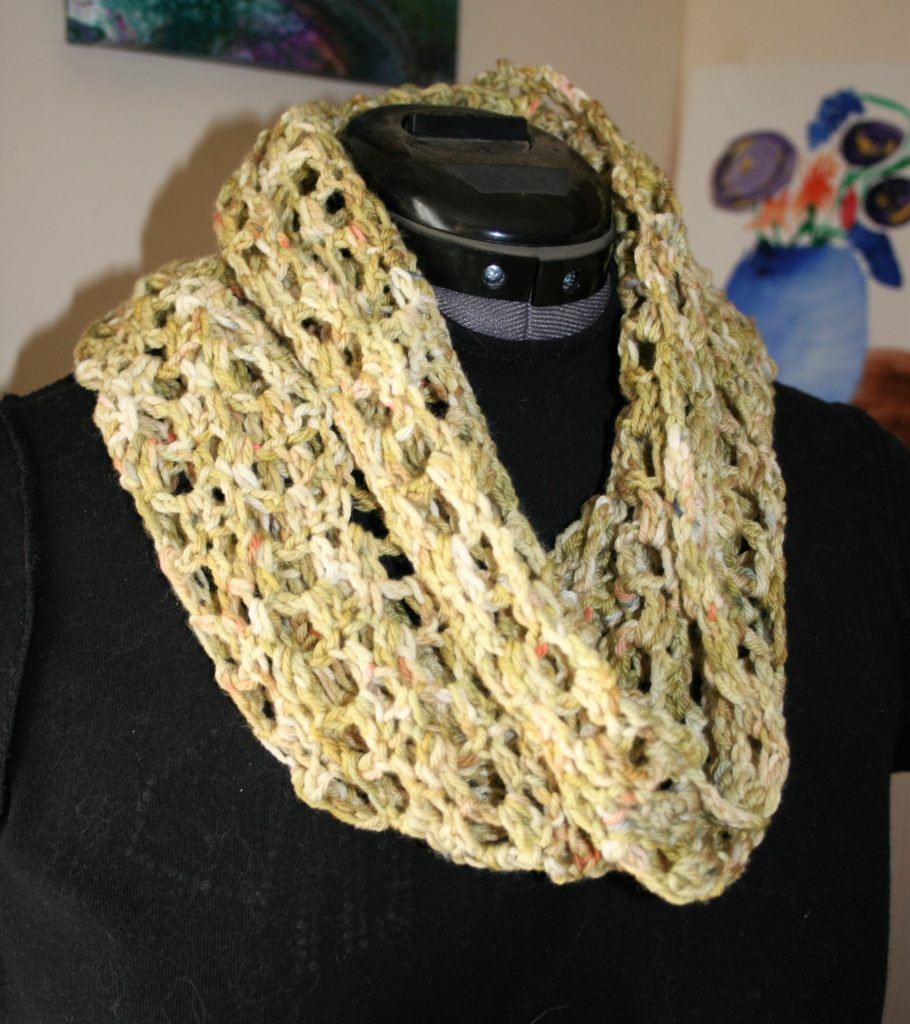
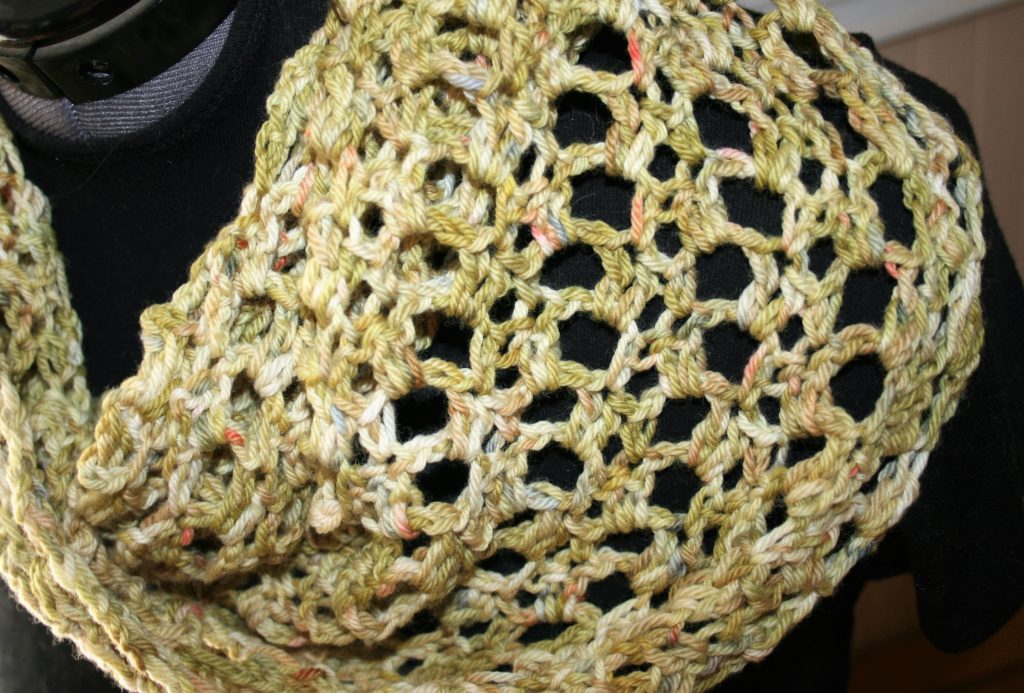
Lisa’s Ladder Cowl
For the last several years I have been teaming up with Lisa Souza Dyeworks and providing a free pattern to accompany her limited addition colorway for the week. This year is no different.
There are points in your life that you can reflect back on and realize that was where everything went in a different direction. For me one such point is the CGOA Masters Advanced Stitches & Techniques Program. Some may recognize my name as a teacher or designer or even past president of CGOA, but none of that would be true if not for that portfolio.
I remember when I first learned of the program, when Advanced Stiches & Techniques was first released in May of 2010. A group of fiber artists were discussing how they were getting master certification in weaving and yarn spinning. I was in awe that such certifications even existed, as I had never heard about it before. Then I get my first newsletter from CGOA and was thrilled to learn that they offered just such a program.
Getting started
I purchased it the day it was released, and waited patiently for it to arrive in the mail. As soon as I open the envelope I was enthralled and captivated by the 29 page document. Picking up a skein of yarn I began working each swatch as it was listed.
I will admit I was a bit apprehensive. There were times I came across stitches I had never worked. There were patterns that had no description or picture of what it should look like. However, I continued on. In honesty, I was so excited that I completed the entire 48 swatches and 13 questions in a matter of days. Not wanting to appear too eager, or speedy in my work I waited a week or so before contacting the CGOA office to set up a review. Unbeknownst to me, the course was so popular, that by the time I had requested a review it already had a four week backlog.
Over the next four weeks waiting to be assigned a reviewer, I anxiously looked over my work, practiced a few of the new stitches, and tried to stay calm. There was no point in second guessing myself.
The wait
Then the time came to send of my portfolio. I was a complete mixture of feelings. Essentially taking a test from a professor I had never met, and they were going to tell me if I could actually crochet. I am self-taught, and even though I had been crocheting for 25 years at this point I had never had someone scrutinize my work. What if they told me I was joke? What if I was only making mistakes? Then I remembered those fiber artists, and how in their discussions they had talked about how much they learned about themselves and their work through the review process for their certifications. How it improved their weaving, their spinning.
After finally passing the review process, I realized I did learn a lot about myself, and improved my crochet. The program forced me to consider things, stitches and techniques that I had just taken for granted. By understanding more about my stitching I have improved my work.
Moving Forward
The rest of my adventure grew from this. Now that I had actually completed this recognition program I had friends and family ask me to teach them to crochet. It is a bit mind boggling that people that have known me as a crocheter only now think I can actually successfully crochet because I received a certificate, but it is what it is.
Then being invited by CGOA to be recognized as a Master at a graduate ceremony at their next annual conference took me into the world of design and further professional growth. I also made lifelong friends whose diverse backgrounds create a unique tapestry in my life, it is always amazing how crochet can unite. I found another family one that understands and embraces me in an entirely different way than I had ever experienced before.
Help me help local communities by creating blocks for Warm Up America, by making a block for yourself and one for a community project with this free pattern. I will be creating a new block every two weeks and sharing it with you, I just ask that make one for donation.
Warm Up America is a nation wide organization that encourages local donations, but will also except donations to be sent to their office so that blocks can be assembled and then blankets can be donated through the United States.
Even if you do not want to participate with Warm Up America, please consider creating blocks, or blankets for your local community. There are various places in every community that accept donations.
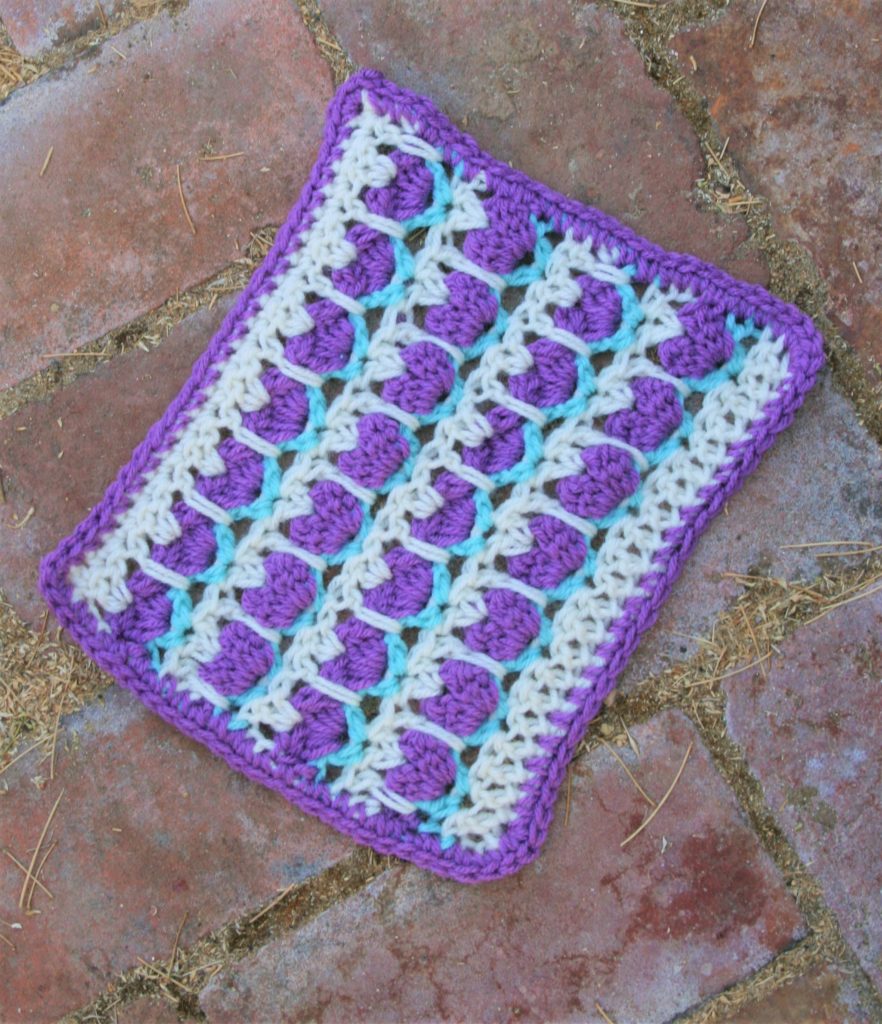
Garden Block
This block features color change, that does not require you to break the yarn. You can carry the yarn up the edge, as the color changes every row, and then finish the sides with edging.
I was inspired to create this block due to my lack of a green thumb. I try, and I think this season will be different. Yet it always ends the same…with a bunch of brown where I was expecting green.
This block lets me enjoy a little row of crocheted flowers.
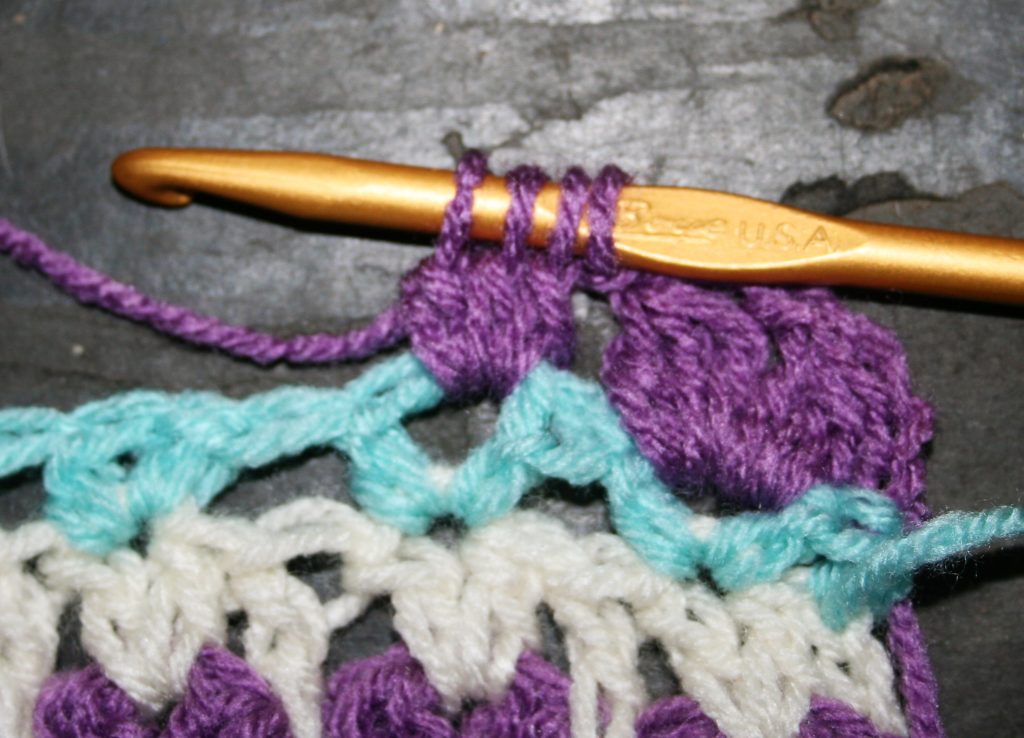
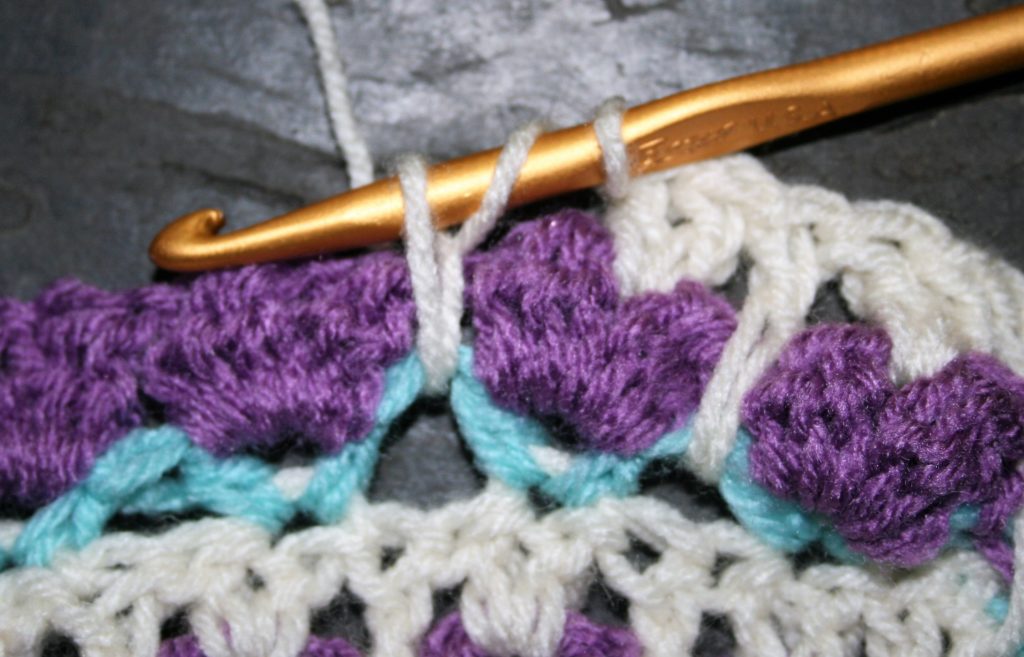
Flower Bobble (FB): [Yo, insert hook in indicated stitch, yo, pull up a loop, yo pull through 2 loops] 3 times, pull through all 4 loops on hook, ch 1, [Yo, insert hook in indicated stitch, yo, pull up a loop, yo pull through 2 loops] 3 times, pull through all 4 loops on hook.
First half of a Flower Bobble
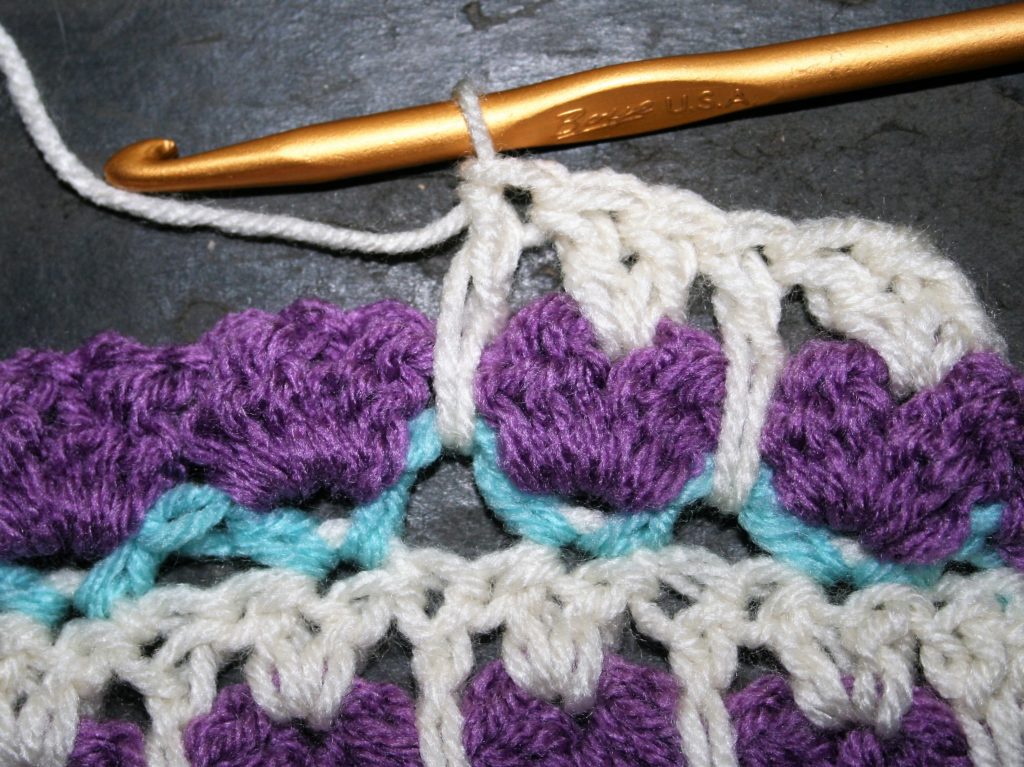
Long Loop Double Crochet (LLdc): Work as a regular double crochet, however the placement if the first Yo and insert hook is worked two rows below working row, Yo, pull loop up to height o working row, and complete double crochet.
Yo, insert hook, pull up a long loopFinish double crochet stitch
Block Pattern
Ch 25
Row 1: With (A), dc in fourth ch from hook, dc in each ch across, change to (B), turn. -23dc
Row 2: Ch 2, sk 1, (hdc, ch 1, hdc) in next st, [sk 2, (hdc, ch 1, hdc) in next st] rep 6 times, sk 1, hdc in last st, change to (C) turn. -7 (hdc, ch 1, hdc)
Row 3: Ch 2, FB in each ch-1 sp across, hdc in last st, change to (A) turn. -7FB
Row 4: Ch 3, [2 dc in ch-1 sp in center of FB, LLdc between hdc stitch 2 rows below] 7 times, dc in last st, change to (B) turn.
Row 5-13: Rep Rows 2-4, do not change color at the end of Row 13.
Row 14: Ch 1, sc in each st across. Fasten off.
Rnd 1: Join with B to any corner, orking around edges of block, sc evenly working 3 sc in each corner. Fasten off. Weave in ends.
It is always interesting to see how different events can present themselves from contact made years earlier. This last week I was approached to help on a Sheep to Shawl team.
What is a Sheep to Shawl?
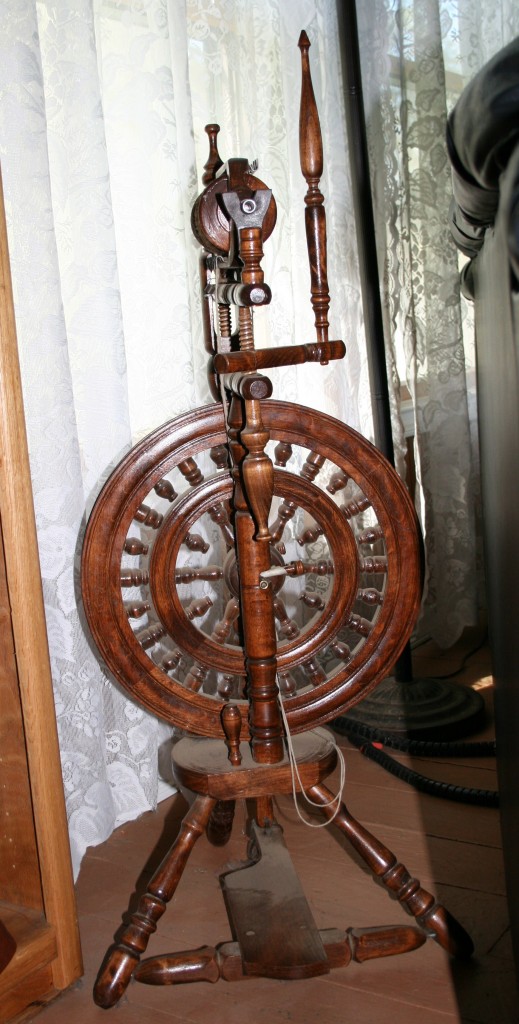
A Sheep to Shawl is an age old competition that I have seen several times at many Fiber Festivals. Each competition has slightly different rules, but only slightly. Essentially it is a team of people (usually seven) that work in a set time limit. In this time limit they prep a sheep fleece, teasing the wool and carding it. They then spin it into “singles”, then ply these “singles” together to create yarn. The yarn is then woven on a loom to create a shawl of set dimensions by the competition.
I dusted off my spinning wheel…
This is usually entirely completed in 4 hours.
A Virtual event…
With the current situation of the world most Fiber Festivals have been canceled or re-imagined. The Lambtown Festival in Dixon, California has re-imagined this competition in a virtual setting.
Teams are allowed a total of 28 hours to complete this process, but need to provide all these hours on a Zoom presentation. The 28 hours essentially creates this shawl in the same time setting as in-person, as the hours are counted from every participant.
This means that everyone is working quickly, in their own home setting,. Then figuring out how to get need supplies to the next participants to complete the steps. It is an interesting undertaking.
Where I am Invited
So in this new setting a couple of ambitious woman decided to challenge the notion of this being a woven shawl, and see if one can be crocheted instead. I honestly am not aware of any competition that has ever worked up a crochet shawl, and we are hoping to set a new level of encouragement and interest in crochet.
This is where I was brought in. I learned to spin yarn several years ago, but I haven’t put it to practice much in the last 9 years. So, I dusted off my wheel last weekend and spun up some singles.
I see a lot of fingerless glove patterns, however not a lot of actual gloves. I have had some people tell me that they think that gloves are just too hard, well to this I disagree.
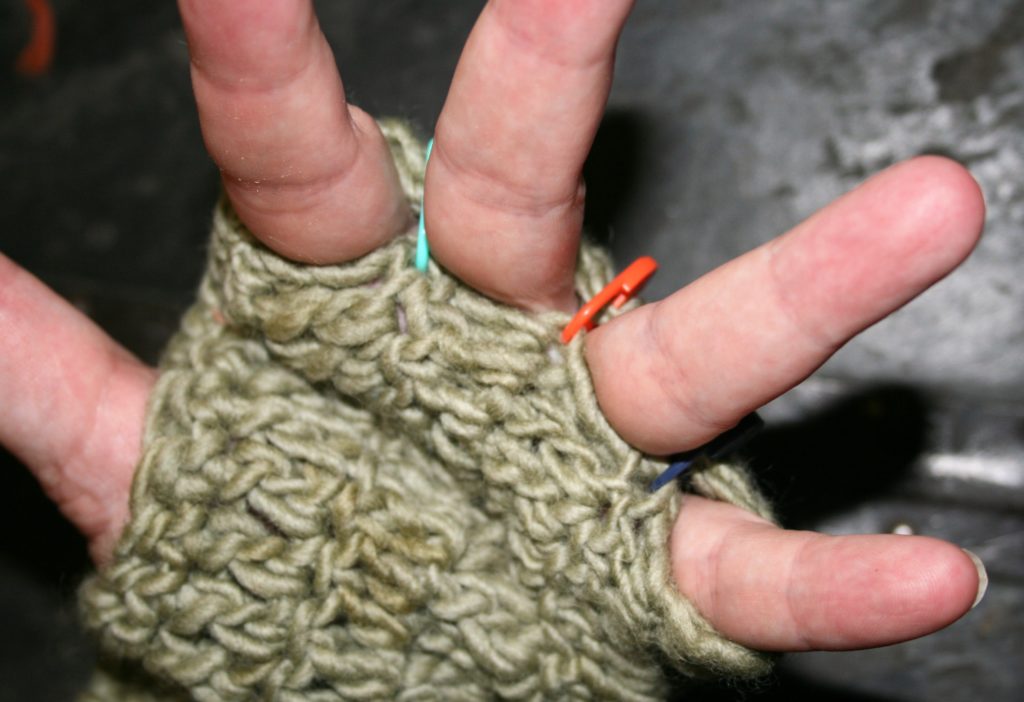
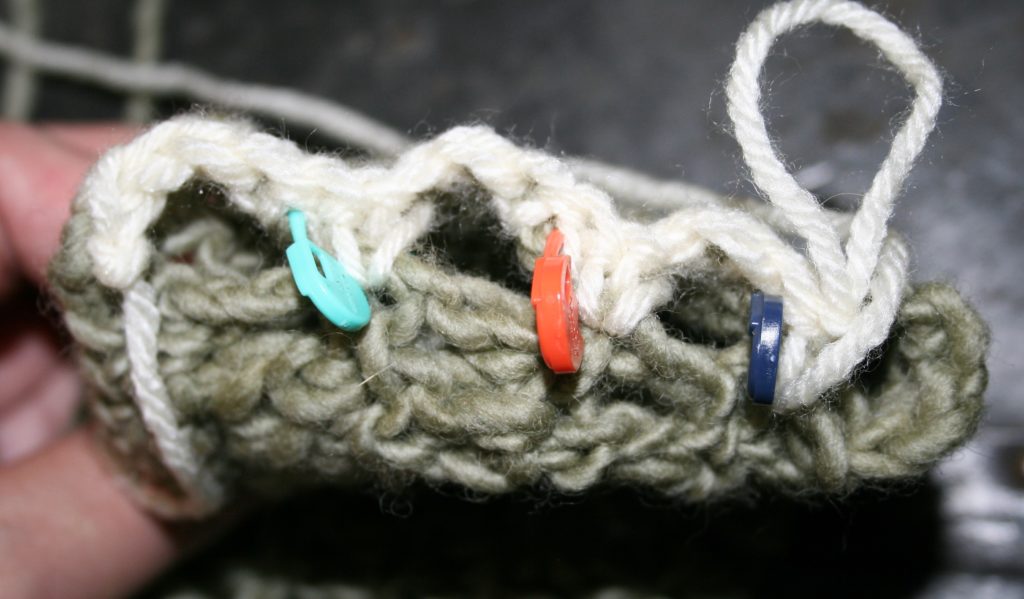
Once you have your fingerless glove made, the next set is to put it one. Take 3 removable stitch markers (or safety pins), insert them between your fingers through both the front and back of the glove fabric.
Insert stitch markers of safety pins between the fingers.
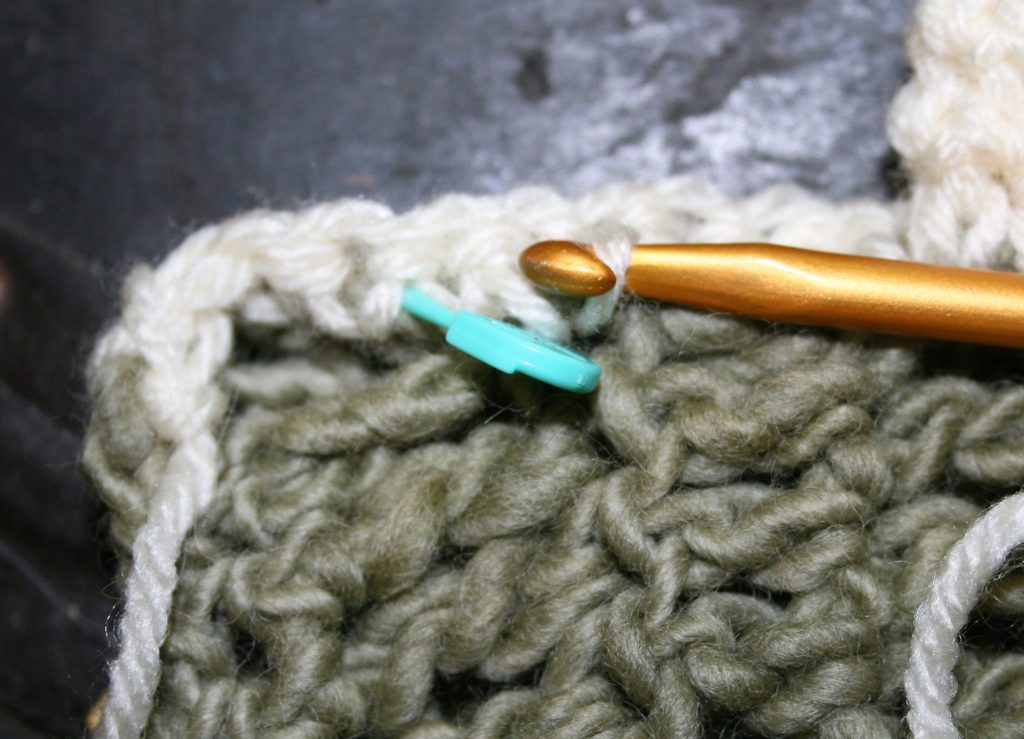
Join yarn anywhere along the finger edge of the fabric. If you were working a pattern that was stitched wrist to fingers, you can simply keep working the yarn from the last round without finishing off.
Start crocheting the “separations”
Work stitches, I recommend single crochet, evenly along edge. Work a slip stitch to the adjacent stitch (the one on the fabric on the other side of the hand) whenever you come to a stitch marker. This will create the “separation” between the fingers. I even just work this technique when I am still just creating fingerless gloves. I feel like it helps them stay in place and not twist around my hand.
When working the single crochets, slip stitch across the fabric on the opposite side of the glove to create the finger “separations”.
Spiral your fingers
When you begin to work on the opposite side of the hand, and come to a slip stitch, work a single crochet in the one leg of the slip stitch that is closest to the last single crochet worked. Single crochet in a spiral by working on the fabric side previously worked, and work a tube the length of your finger.
Finish off your yarn, and join to fabric right next to the finger just made. Make the next finger working a stitch in the “one leg” of the slip stitch, of each side of the finger, and continue with the spiral method until the length meets your need. Repeat this of the remaining two fingers.
Work a single crochet in “one leg” of the slip stitch.
Make a thumb
Work the thumb in the same manner, joining to the edge of the thumbing opening and crocheting around it. However this opening may be much larger than the end of your thumb. Work two single crochet together (sc2tog) once in the first and second round. Then continue until the desired length is reached.
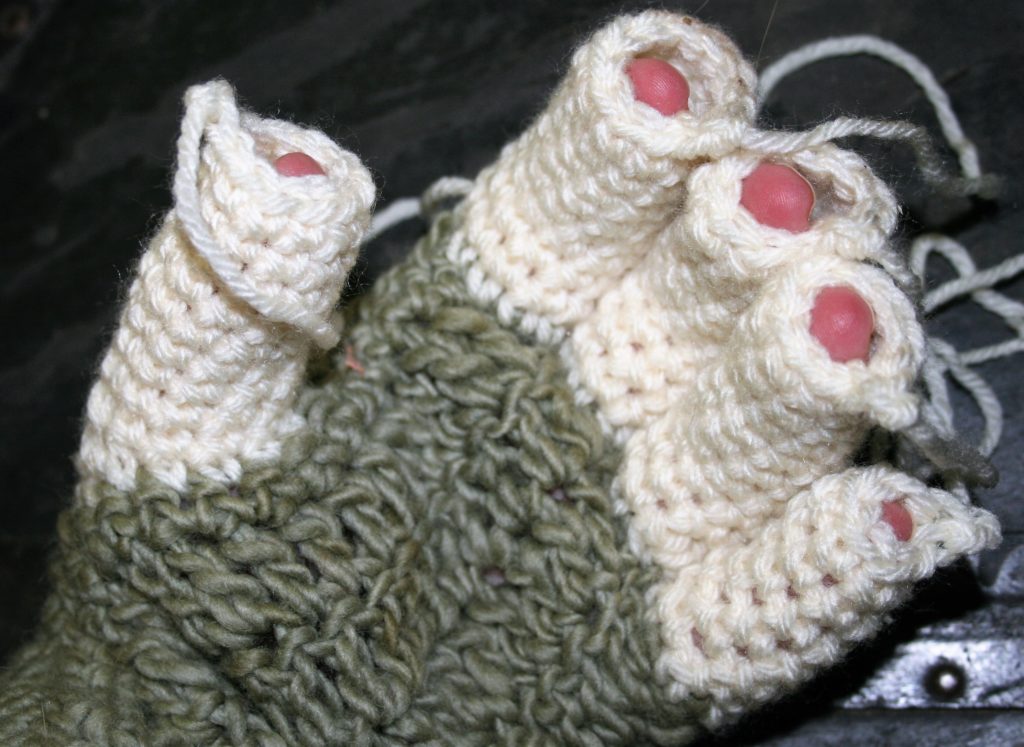
Work the spirals until each finger is the desired length.
Cinch them closed
Prepare to weave in the ends. Thread the tails at the ends of the fingers through the stitches in the last round of each finger and pull tight to cinch closed.
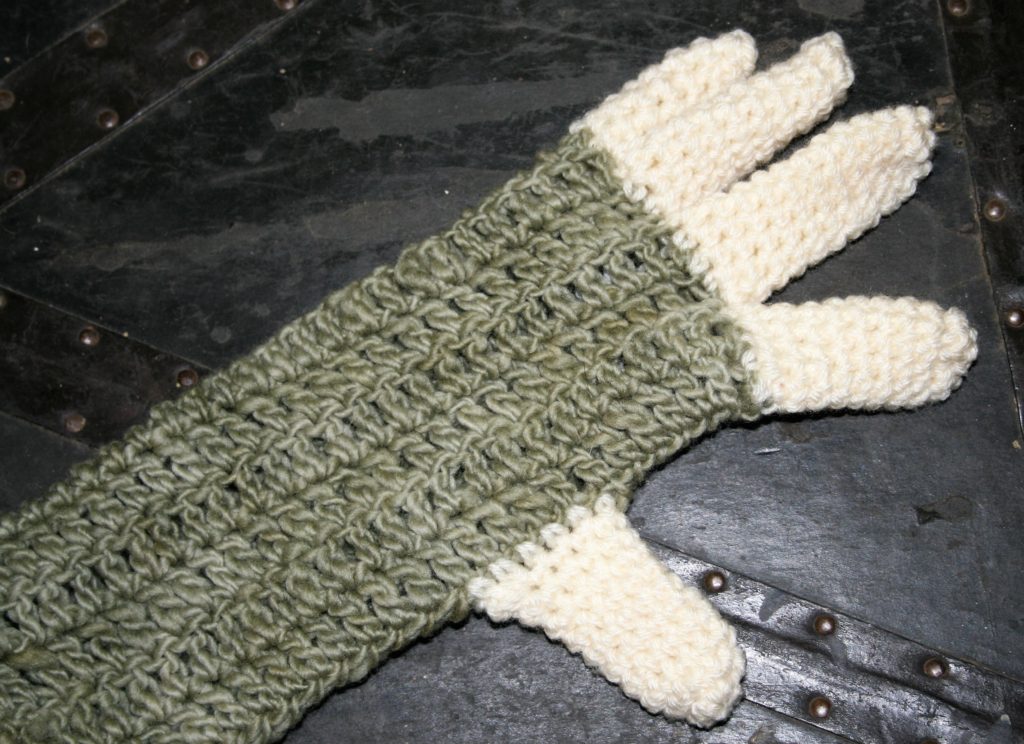
Glove
I do recommend that working fingers, it is best to use thinner weight yarn, nothing above a sport weigh (number 3). I usually work most of my gloves, and even fingerless gloves out of wool blended yarns that are either a fine or medium weigh (number 2 or 3). This is because anything heavier just becomes too bulky and feel clumsy on my hands. The nice thing about gloves is that you can complete a pair with only one hank of yarn, and feel really accomplished in your skills.