Knit It! Crochet It! The Dialog Shawl

Creating a design that is both knit and crochet has its own set of challenges, one mainly being that I am not an expert knitter. However I have created a design with the help of a couple of friends that I think is pretty impressive.

Dialog Crochet Shawl by Linda Dean www.lindadeancrochet.com

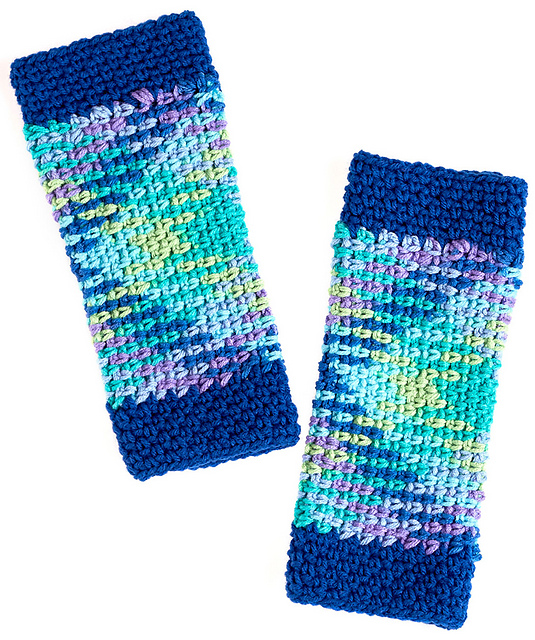
Dialog Shawl, Crochet version

The Dialog Shawl is created with short rows with alternating panels of a solid and lace fabric. It is a fun pattern to work up as it uses basic stitches but still keeps you mentally engaged, but not so much as to cause stress. The only difference between the knit and crochet version is that the panels of the crochet version are bigger and thus there are only 4 triangles instead of the 6 that are found in the knit version.

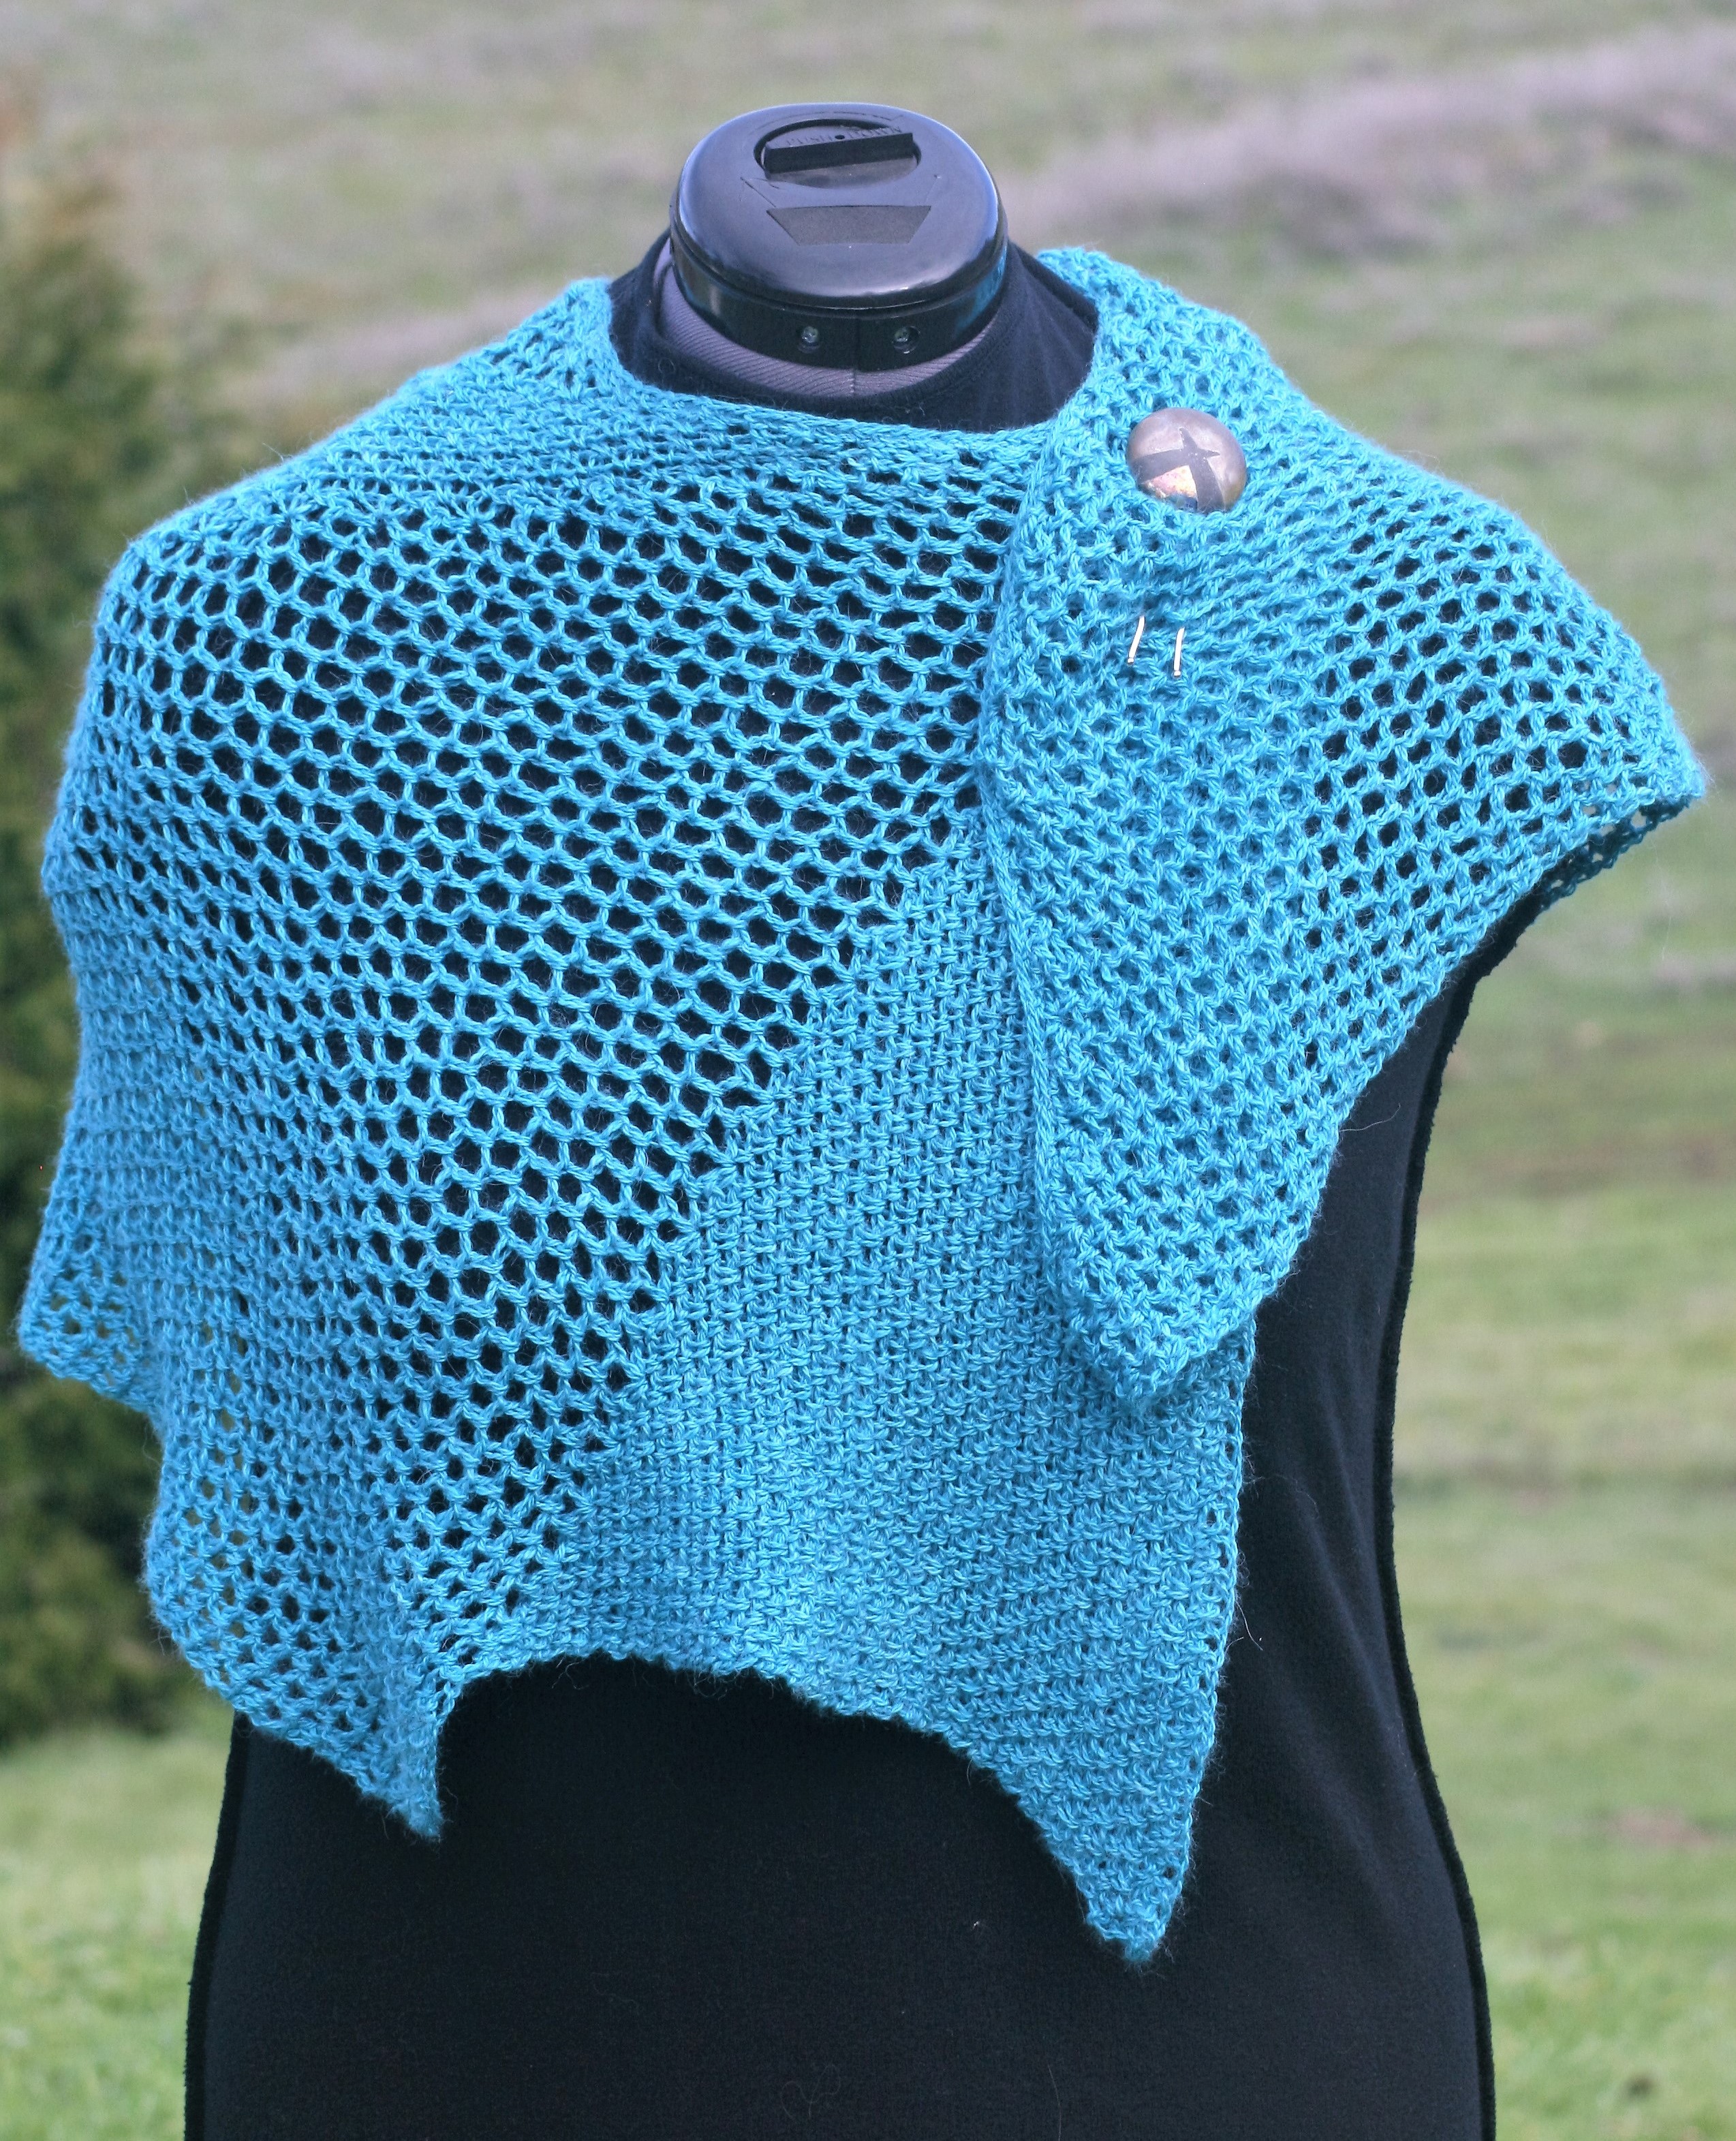
I love that this is a one skein project. It is featured in Baby Alpaca Silk Petite Yarn from Lisa Souza Dyeworks, and I definitely draw to the color of Peacock, but I think this design can easily worked up in various colors, and may look distinctly different and fabulous in a variegated yarn. This yarn is really awesome, and I have used it for several projects over the years. It is a light/fine weight yarn that has a beautiful hand and is a pleasure to work. I also feature a shawl pin with this design, it was after all part of the inspiration for the design, and it is actually a Shawl Button from Lickin Flames. Each Shawl Button is handmade, beautiful, and completely unique. The one that inspired me was a Raku button in Bronze with a shiny black accent.

Dialog Knit Shawl by Linda Dean wwww.lindadeancrochet.com

Dialog Shawl, Knit version

I cannot say that I have ever been particularly inspired to create a design from a pin or button before, usually I attempt to create a design that can be worn independently of such items. However, recently I have come to see how this piece of art can really had to the overall effect of my crochet (or in part of this design, knit). It is like a subtle accent point that helps add to the overall effect, bringing everything to a new level.

Overall I am completely thrilled with this design, and I hope you enjoy it too. As is the case with all of my knit/crochet designs one pattern contains both versions, so if you are bi-stitchual you can work both versions, and if you prefer one craft over the other you have it right before you.

Timaru- Yarn Fun with Bamboo

In the world of yarn there can be many really exotic fibers, but at the end of the day we all usually fall back to the most affordable and common. That is why it is a treat to come across a yarn that offers so much to a design, and can take the basic to extraordinary.

One of these extraordinary yarns is Timaru from Lisa Souza Dyeworks. It is a fingering weight yarn that is comprised of 65% Superwash Merino and 35% Rayon of Bamboo. It has a very generous 500 yards per 100 gram hanks, so it goes a long way.

Timaru....www.lindadeancrochet.com

Timaru by Lisa Souza Dyeworks Merino with Bamboo yarn

The Superwash Merino ensures that this yarn is going to be soft, and can have some warmth, as well as being treated so that it does not felt or shrink. Merino is a great wool, but it is not what makes this yarn so special, in this case it is the Bamboo.

The bamboo in this yarn indicates that it is a Rayon, this means that the bamboo is made into a pulp, using the leaves, and some stem. It is ground down and added to a chemical bath to create “goo”. If you ever made homemade paper, it is a little similar. This pulp is then extruded through small holes to create a long filament. Another name you can find for bamboo processed this way is Viscose.

The way it comes together in Timaru with the Superwash Merino lends itself to a yarn with a great drape. Bamboo gives a cool touch to this yarn, so it makes it very warm weather friendly. It also does not take the dye the same as the wool (a protein fiber, whereas the bamboo is a cellulous fiber), this causes a really beautiful lustrous sheen.

I can easily see this yarn worked up as a shawl, a wrap, a tank top…I even know people that love it as a sock yarn. It has a great amount of versatility without sacrificing its integrity in any project. It might actually be difficult to find a project that this yarn will not shine in.

Yes, I did get Something Done!

It is a little crazy how time goes by, and you never really take stock of it. There are many days when I feel that I have not accomplished much, if anything at all. Then there are days when I do a little reflecting and stumble upon, or at least look at the documents I use every day, that provide a listing of the works I have completed.
These listings might be staring me in the face, and I am not really looking at them. I keep a spread sheet of all the contracts I am working on and completed. I began this spread sheet when I sold my first design at the end of 2011, and I have currently filled 129 lines. I then have a listing of my self-published designs (that are not included on my contracted list) that I began in mid-2013, and find I have 29 completed with another 6 in progress.
When I actually think about the fact that I really have been on this adventure as a designer for less than 5 years, and I have completed 158 designs, I will be honest…in my mind it doesn’t sound like enough. For some reason I think that I have to have completed so much more. I still average 2.6 designs a month or .6 designs a week, but my mind wants me to finish more. (If you would like to see a majority of these, check out my Ravelry.com designer page….the number of designs listed is lower, but that gives you an idea of how things are constantly in the process).


Clean my desk...www.lindadeancrochet.com

I should give myself credit when I clean my desk. It catches all my ideas in various stages.

The only way I get my mind to find a little balance is to also place in this weekly schedule that I teach 2 days a week, nearly 20 students every week. That takes prep time, which takes knowledge of my skill, which takes time.
I then have to remember that I am mom to two very active kids. Active enough that one has me volunteered to lead a 4H sewing project every week. Both have me playing chauffer in running to various sports and activities (fortunately my husband does more than his fair share of this running around as well). So, I really only get work done when they are in school.
Then I usually overlook the many hours a week I donate to various organizations, mostly supporting crochet. These hours add up faster then I may think in the beginning of saying “yes” when asked to help.
Only when I finally spell it all out, do I feel like I have accomplished something. It may not be as readily tangible as would work for my mind, but this focus helps “rebalance” me in a sense, so thank you for following along my self-talk of taking stock.
Hopefully this taking “taking stock” will inspire the newest rounds of designs…hopefully it will keep me from beating myself up for a bit…I really do get more done then I think.

Love This Spa Mat!

I love it when beauty, practicality, and comfort all come together in a design. The Home Spa Bath Mat definitely fits this build.

It is created with Red Heart Strata Yarn, which is a pretty interesting yarn in itself…I talk more about it here. However what surprised me the most was how such a simple stitch pattern can create a fabric with such dimension. Not only is it visually appealing, the stitch pattern added a bounciness to the mat, which I love to have under my feet. This combination of the yarn and the stitch makes it a sturdy yet soft mat.

Home Spa Bath Mat Photo courtesy Coats & Clark

This design is easy to make a customize size to fit any room in your home, by simply ensuring that the rows and stitches remain in even or odd stitch counts, if it currently ends odd, then add or subtract to an odd number, and the same is true for even numbers. That is one of the great things about two stitch repeats, they are easily adaptable.

Personally I think that wide banded boarder really sets this design off. This is another simple two stitch repeat that adds a nice contrast to the main fabric while still complimenting it.

It might sound a little funny but this design inspired me. Working it up brought me to a little simpler, and more in depth knowledge of my craft, kind of like an awe ha moment. It may have just been timing or the Zen like nature of the stitches, but this design and yarn, are imprinted in my mind and have created a list of other items I hope to create with this same technique, stitch pattern, and yarn. If only there was enough time in the day to get to everything I want to do. I think that this is a design that you can feel good about too. It really will make a lovely addition to any room in your home.

A Really Fun Technique- Planned Pooling Argyle Wristers

Sometimes you have a design where the yarn does all the work, this means that the stitches may be fairly easy, but since the yarn has character the item really looks more difficult than it is. This is true with color pooling projects, like my latest design Planned Pooling Argyle Wristers from Red Heart Yarns.

Planned Pooling Argyle Wristers www.lindadeancrochet.com

Planned Pooling Argyle Wristers Photo courtesy, Red Heart

Planned Pooling is when you plan your stitches to have the colors of variegated yarns stack up in a desired way. I might be exaggerating slightly about it being completely easy, you do have to pay attention to your tension so that you place the correct color in the correct stitch (Marly Bird has a great video about it here).

So these wristers look great and keep your arms warm, and only take two skeins (one for the argyle, one for the trim). The argyle is worked in what is referred to as a “Moss” or “Linen” stitch, which is simply a single crochet and a chain 1, worked into a chain-1 space. This stitch has a benefit to planned pooling as it is very forgiving with a change in tension. It is necessary to change your tension (either make a stitch tighter or looser) to ensure that the correct color is worked in the correct location.

Planned Pooling Argyle Wristers www.lindadeancrochet.com

Planned Pooling Argyle Wristers Photo courtesy Red Heart Yarn

It may take a little practice to get the hang of this technique, but then you might become addicted…I have talked to several people that once they finally discovered how to make the planned pooling work, had to try it with every color variegated yarn they could find, just to see if they could get that yarn to pool too.

The wristers are worked as a rectangle then seemed, then the trim is added. If you need the wristers to fit a wider arm you simply work the rectangle longer, if you want the wristers to fit your arm longer then you work the trim wider. Making it an easy to customize pattern. The added bonus to this pattern, besides it being free, is that it is available in a free e-book with 9 planned pooling patterns….and did you notice that my design is gracing the cover? Yes, I think that is kind of cool.