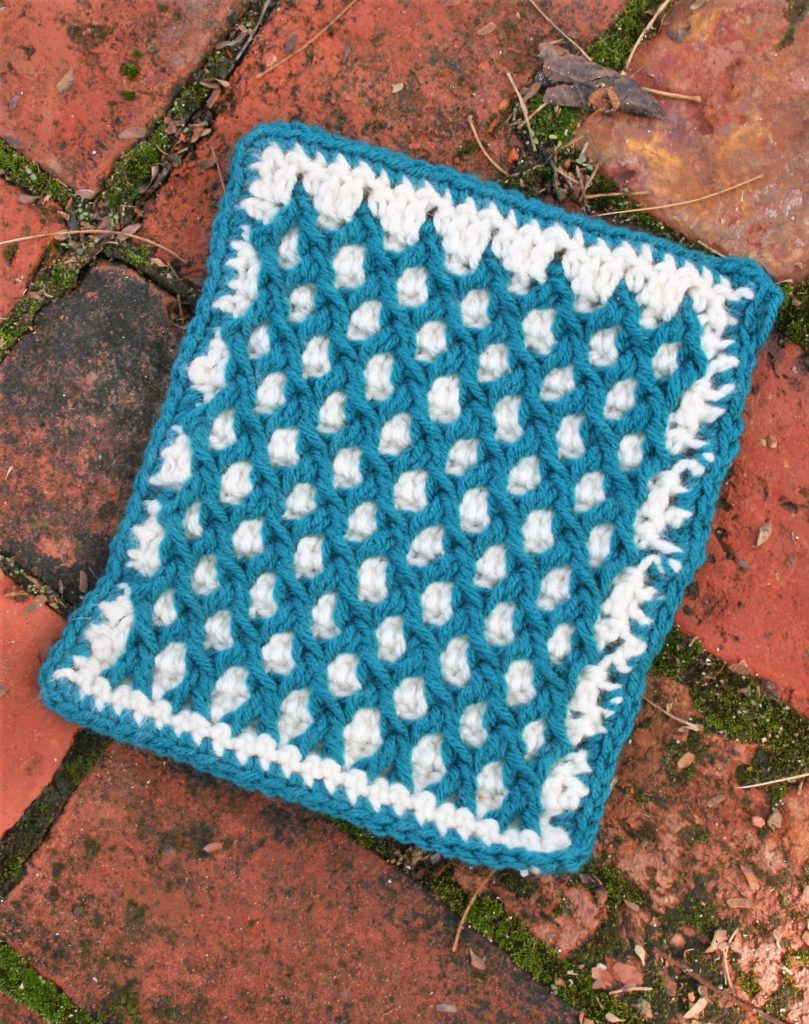
I feel really honored to be beginning the year by joining the Moogly CAL and I am sharing my Quilt Ladies Block! This is a great way to learn new skills and make an afghan over the year. Check out all the squares here.
This year my square was inspired by a couple of my students, “The Quilt Ladies”. Kim and Sandy, took up crochet a couple of years ago and have added it to their fiber arts tool box. Both avid quilters, they are active in their local quilt guild. With this background they bring their eye for color and detail to the skill of crochet.
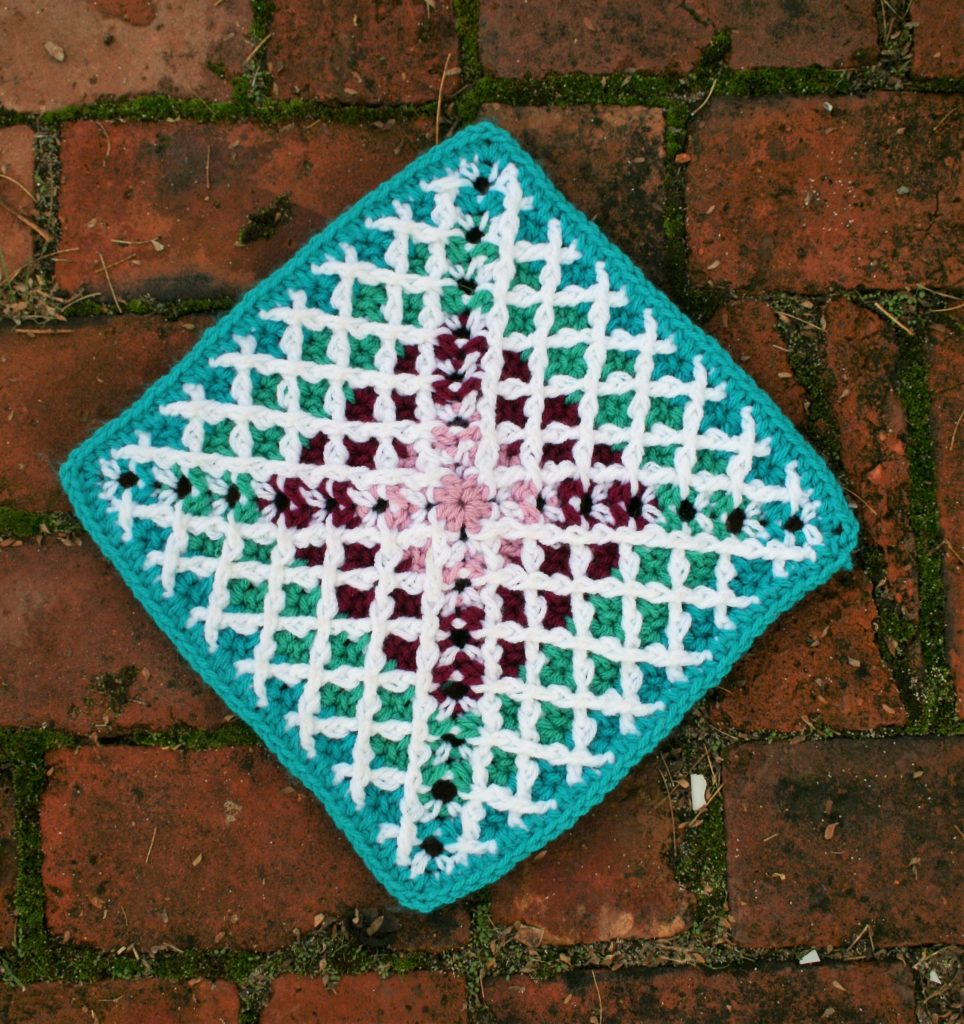
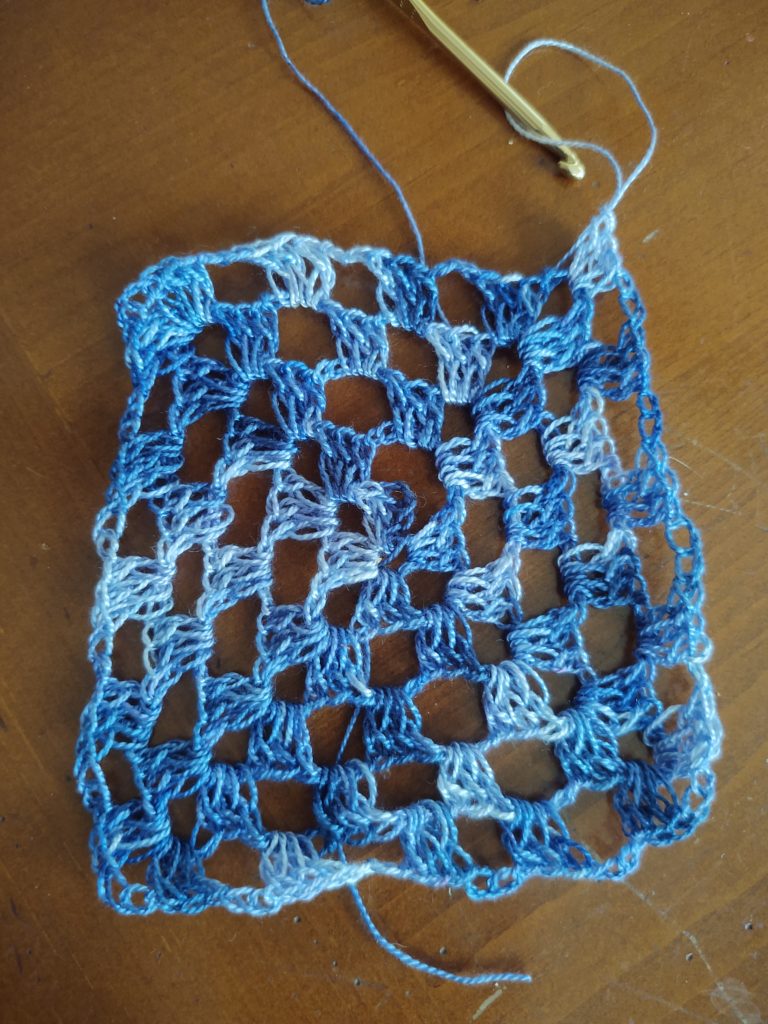
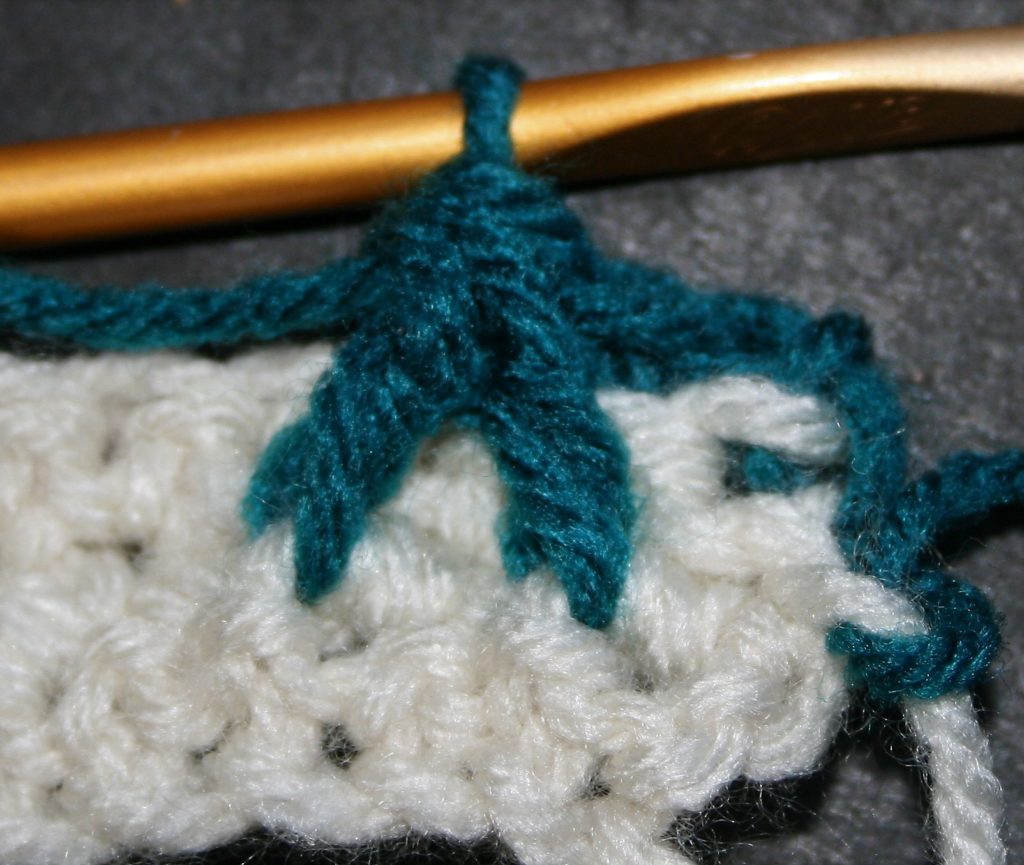
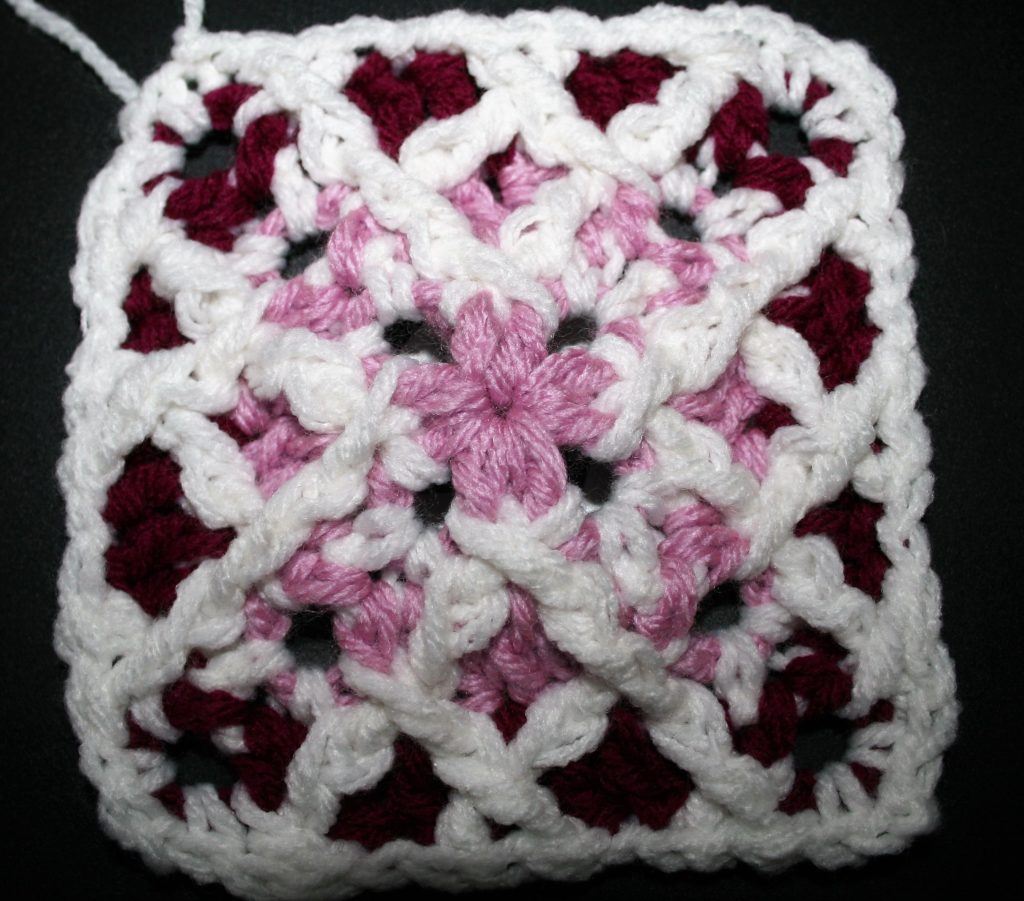
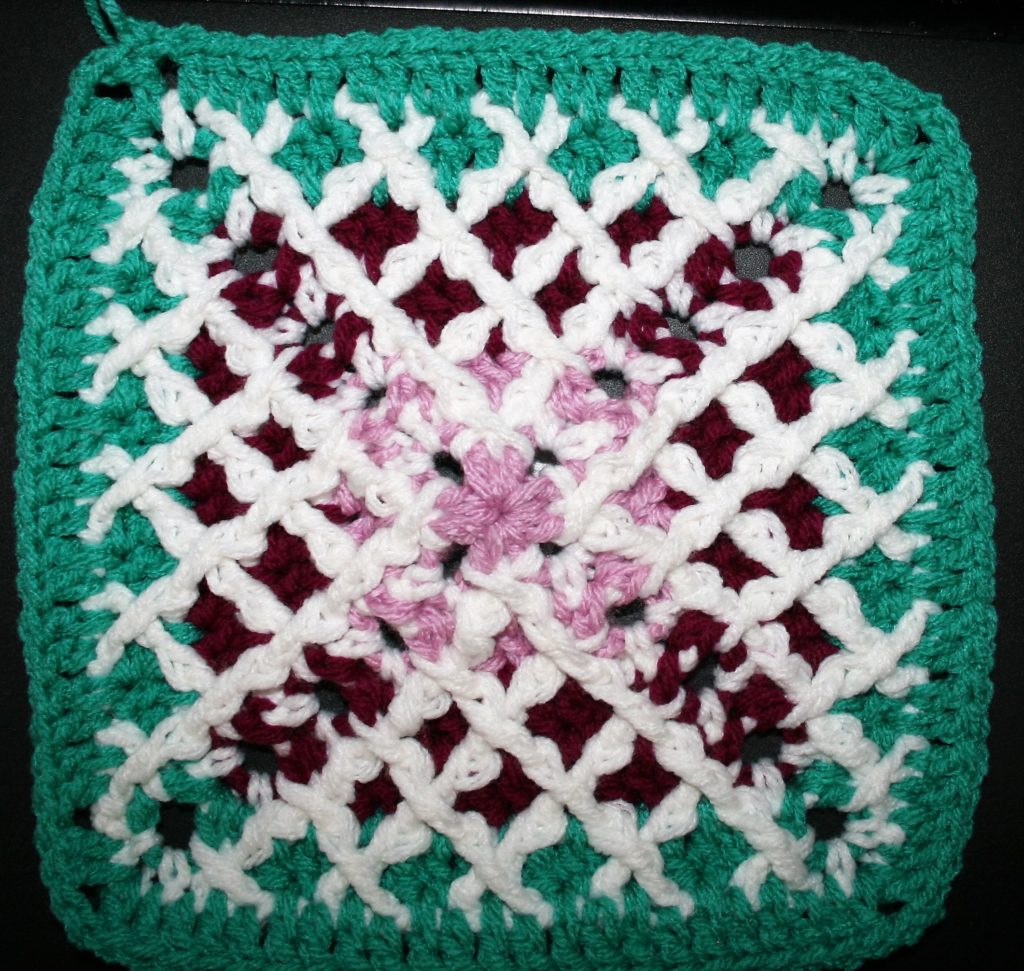
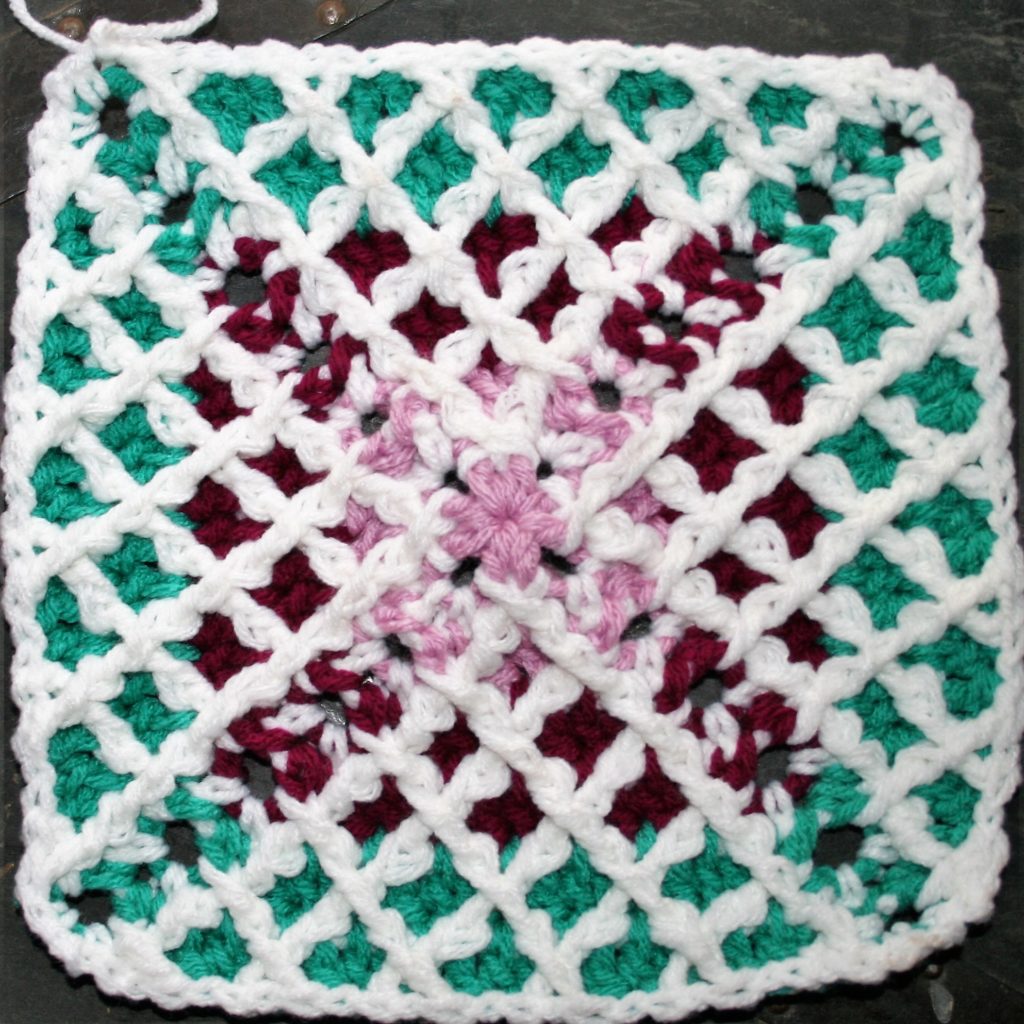
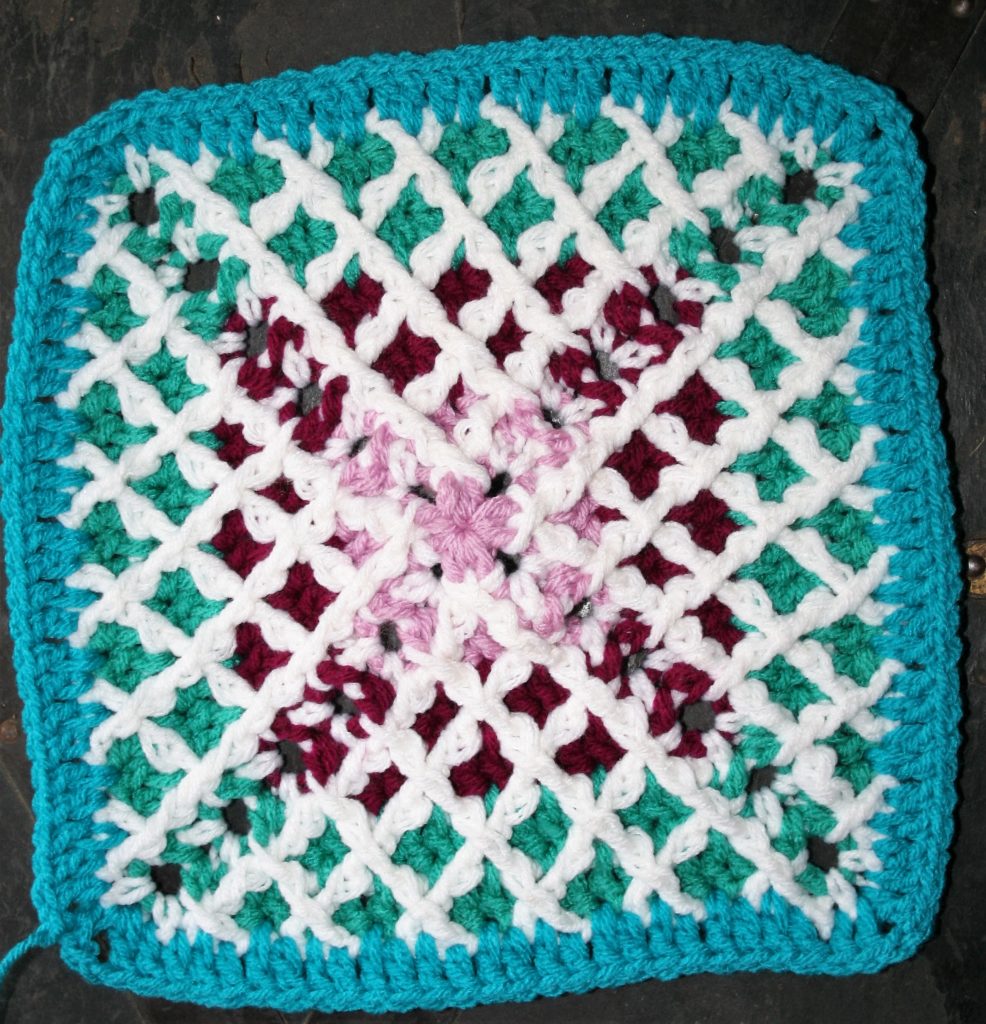
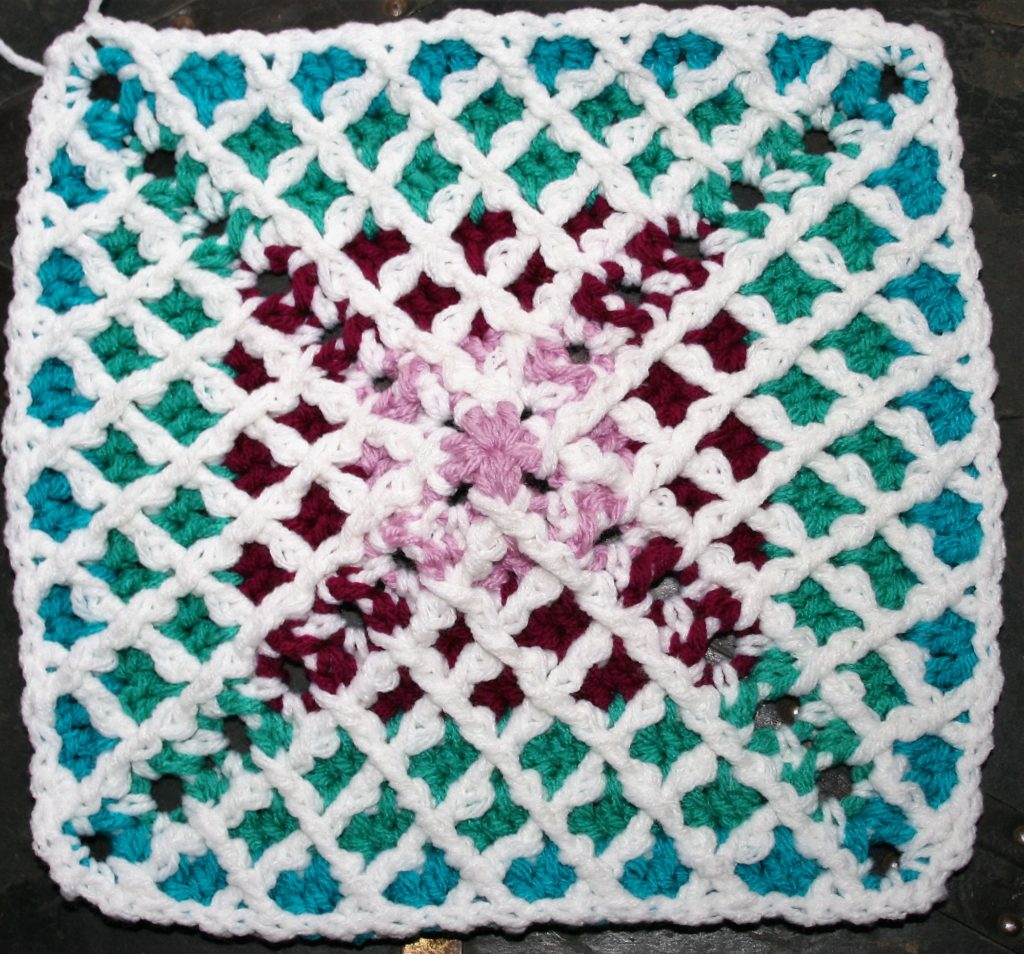
The detail of crochet can really shine with these crossed post stitches that are dramatically set off by a rainbow of colors behind really create a quilted effect, and memorable design.
Materials
- Red Heart With Love medium weight 100% acrylic yarn
- #1720 Blush(A),
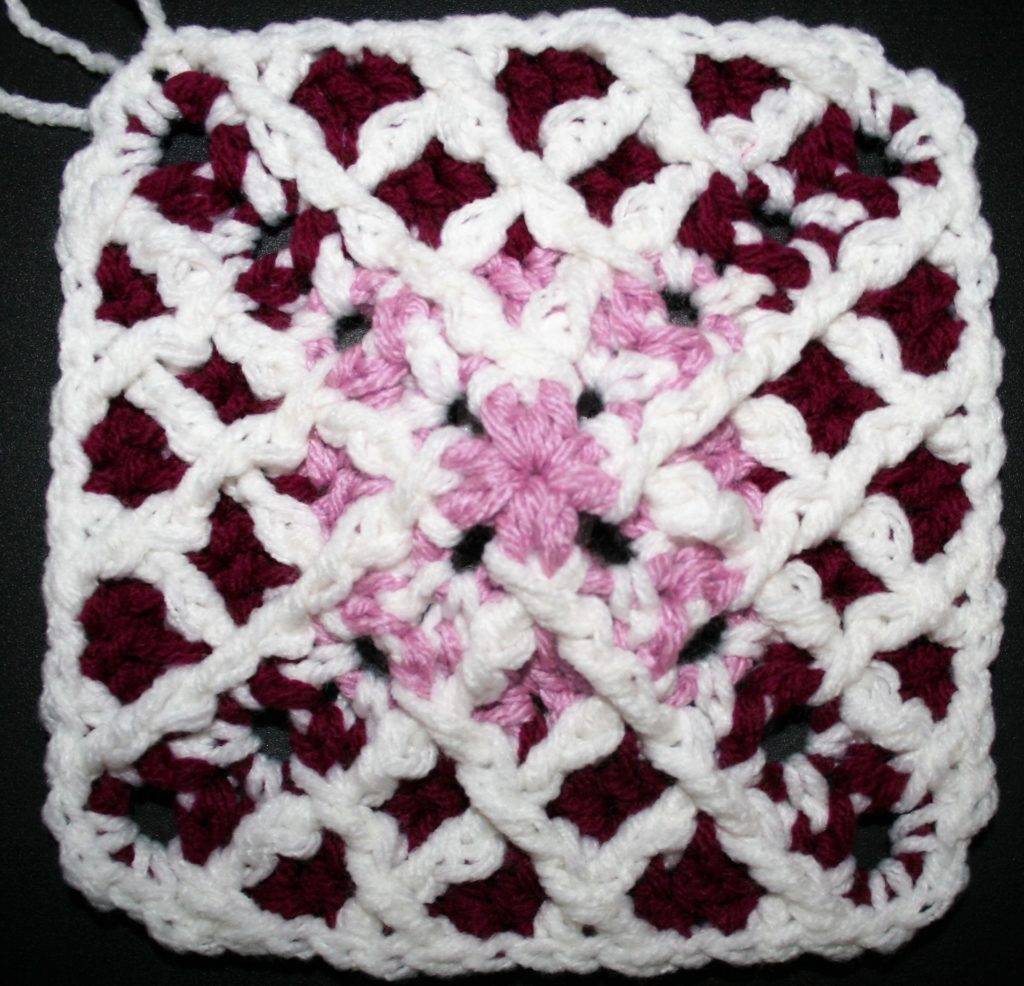
- #1001 White (B),
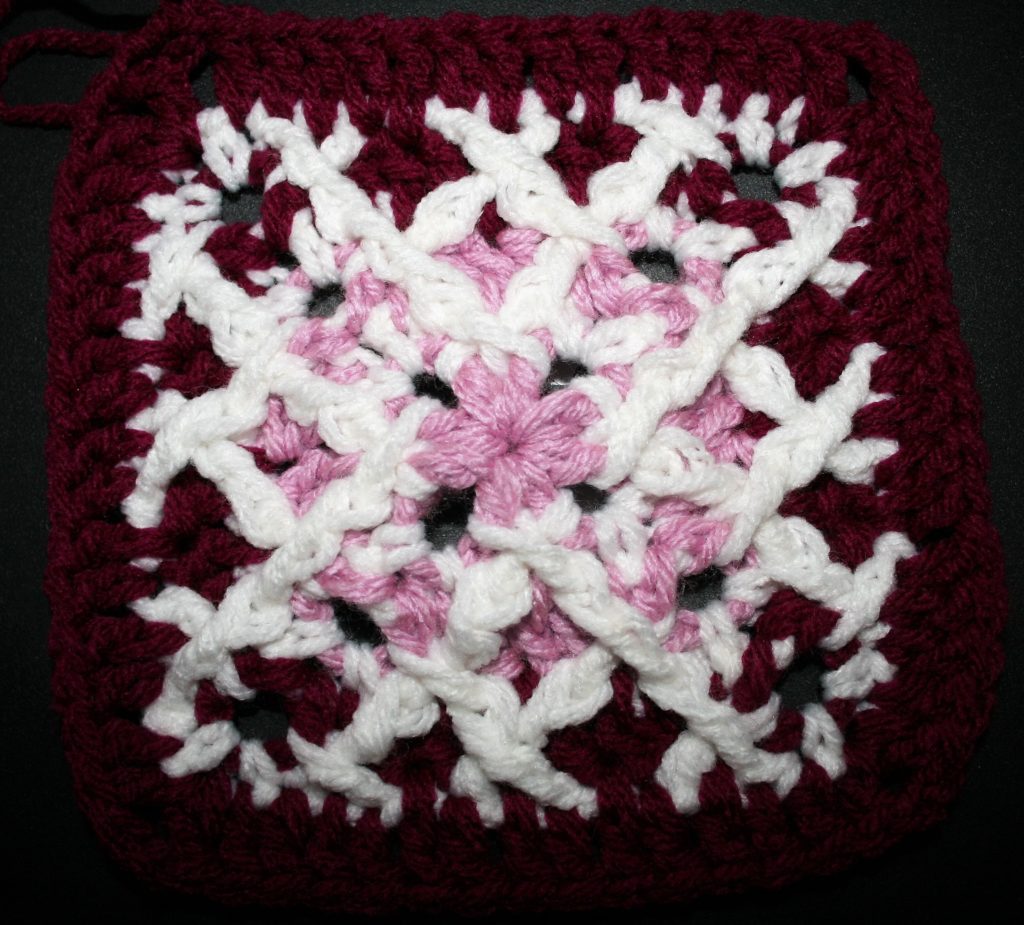
- #1907 Boysenberry (C),
- #1562 Jadeite (D),
- #1304 Santorini (E)
- Hook J/10/6.00mm
Gauge: 12”x 12” square (30.5 x 30.5cm)
Notes
All even number rows have crossed front post stitches.
All front post stitches that are worked in rows below current working row, are worked around other post stitches of the same color.
Slip stitches are worked between all post stitches.
To work over slip stitches in odd number rows, insert hook into same stitch location as slip stitch is worked. To keep even stitch height pull yarn loop up just slightly higher.
Count rows on the wrong side of work to aid in keeping track of location.
Weave in ends as you go.
Lets Get Started
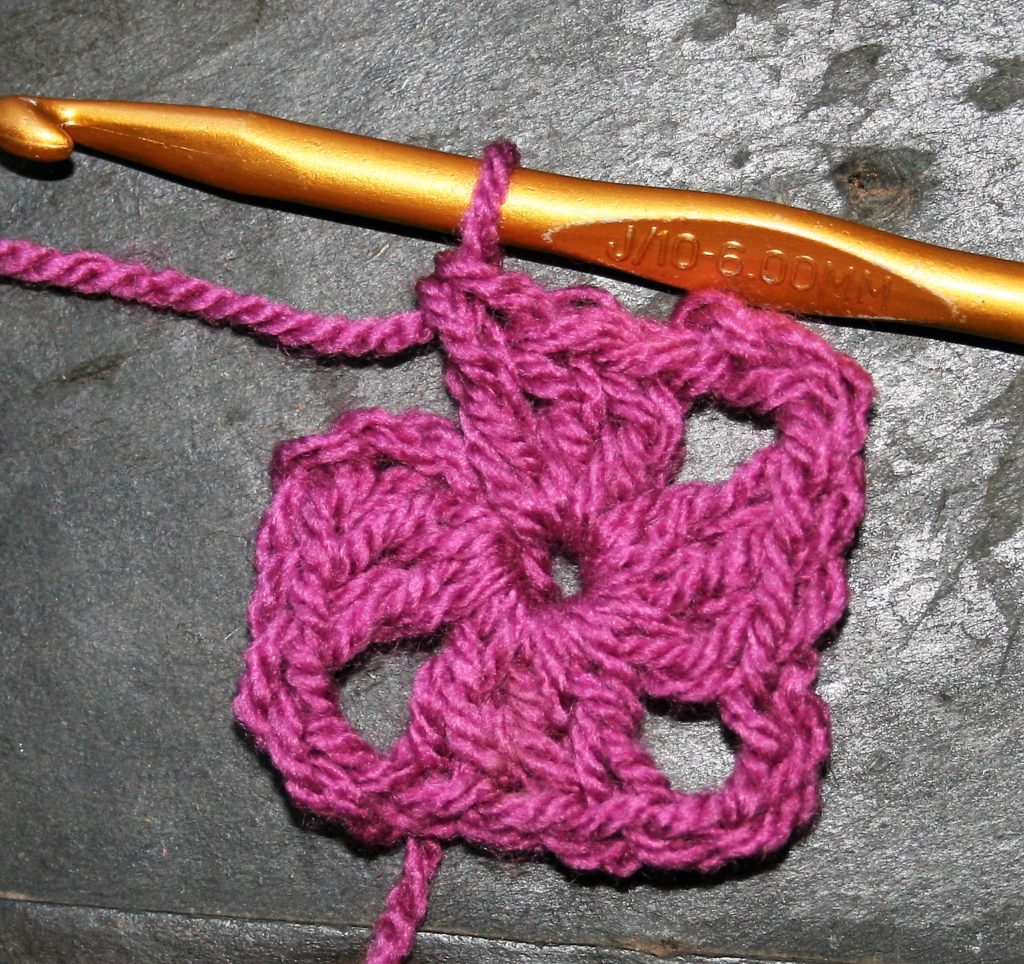
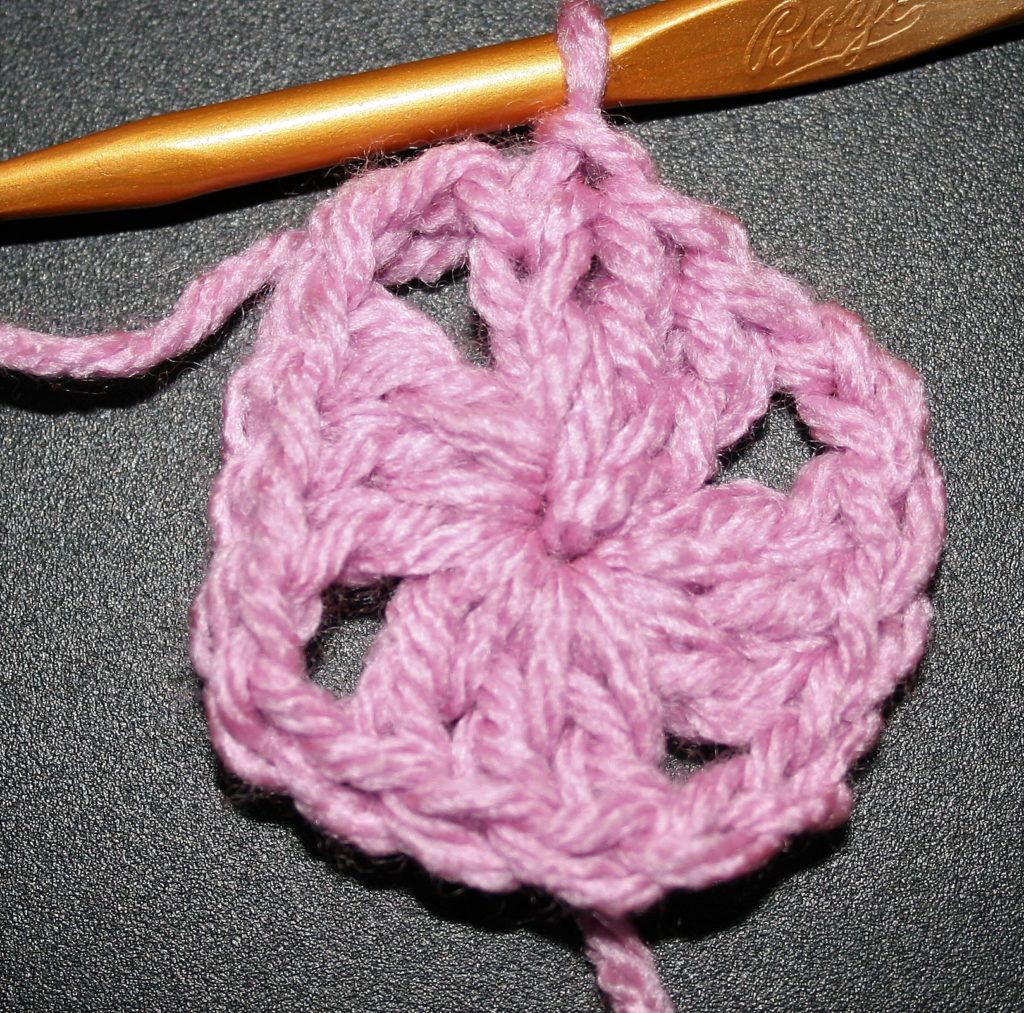
Rnd 1: With A, ch 6, 3 dc in 6th ch from hook, [ch 2, 3 dc in same beg ch] 2 times, ch 2, 2 dc in same beg ch, sl st to join. Fasten off. -4 ch-2 sps (corners) -12dc
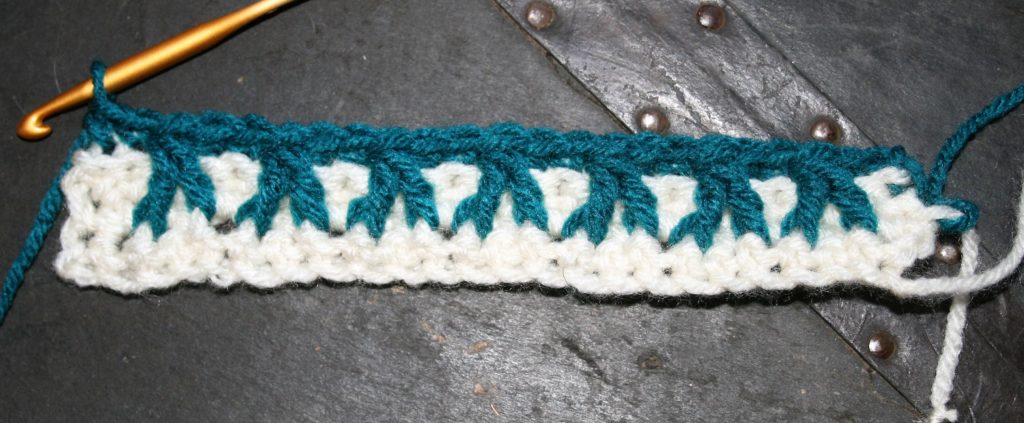
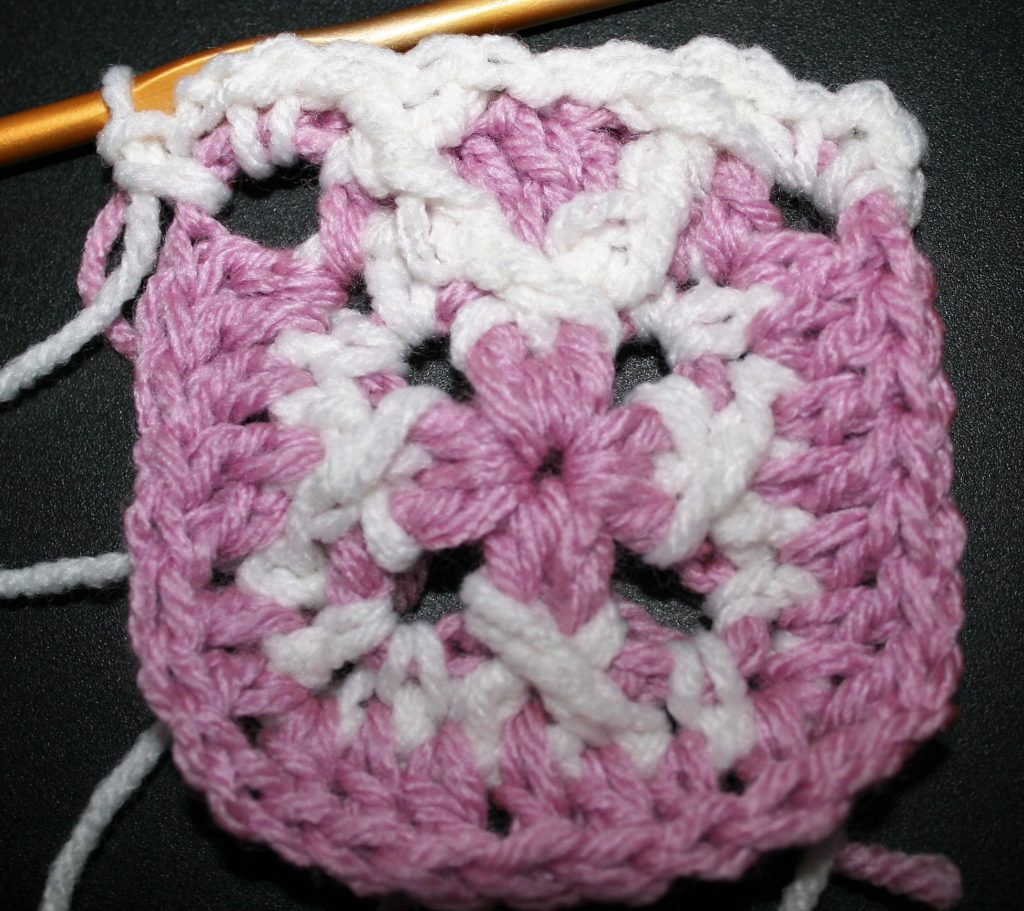
Rnd 2: With B, join with a standing sc in any ch-2 sp, ch 2, sc in same sp, sk next 2 dc, fpdc around next st, sl st in st just before st worked, fpdc in 1st sk st, [(sc, ch 2, sc) in ch-2 sp, sk next 2 dc, fpdc around next st, sl st in st just before st worked, fpdc in 1st sk st] 3 times, sl st to join. Fasten off. – 4 crossed fptr/fpdc sts, 4 sl st, 8 sc
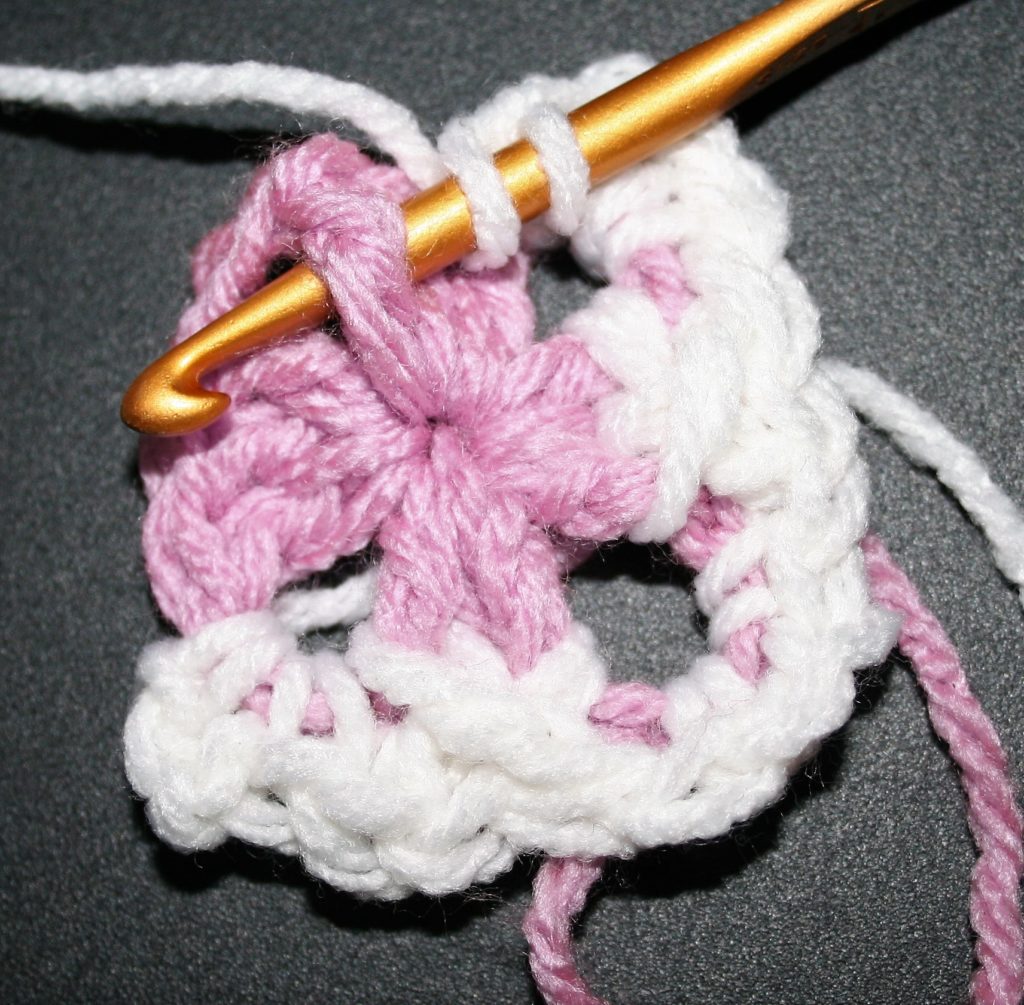
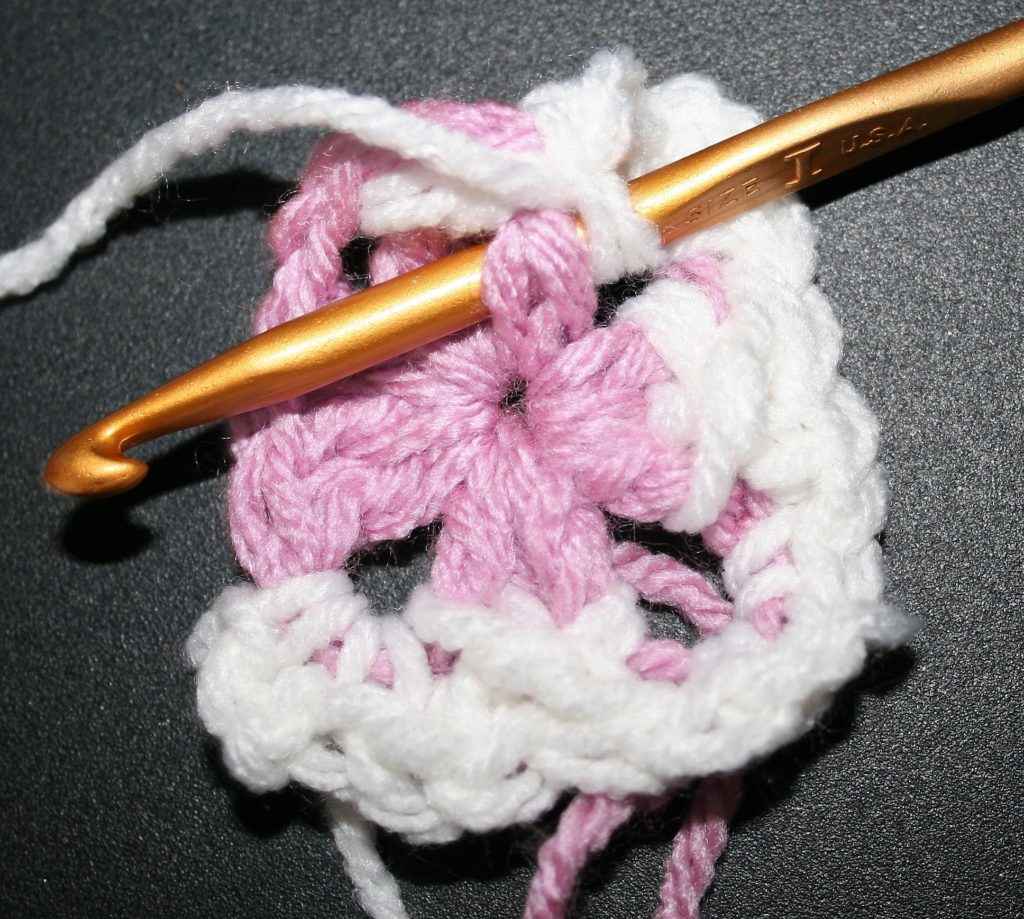
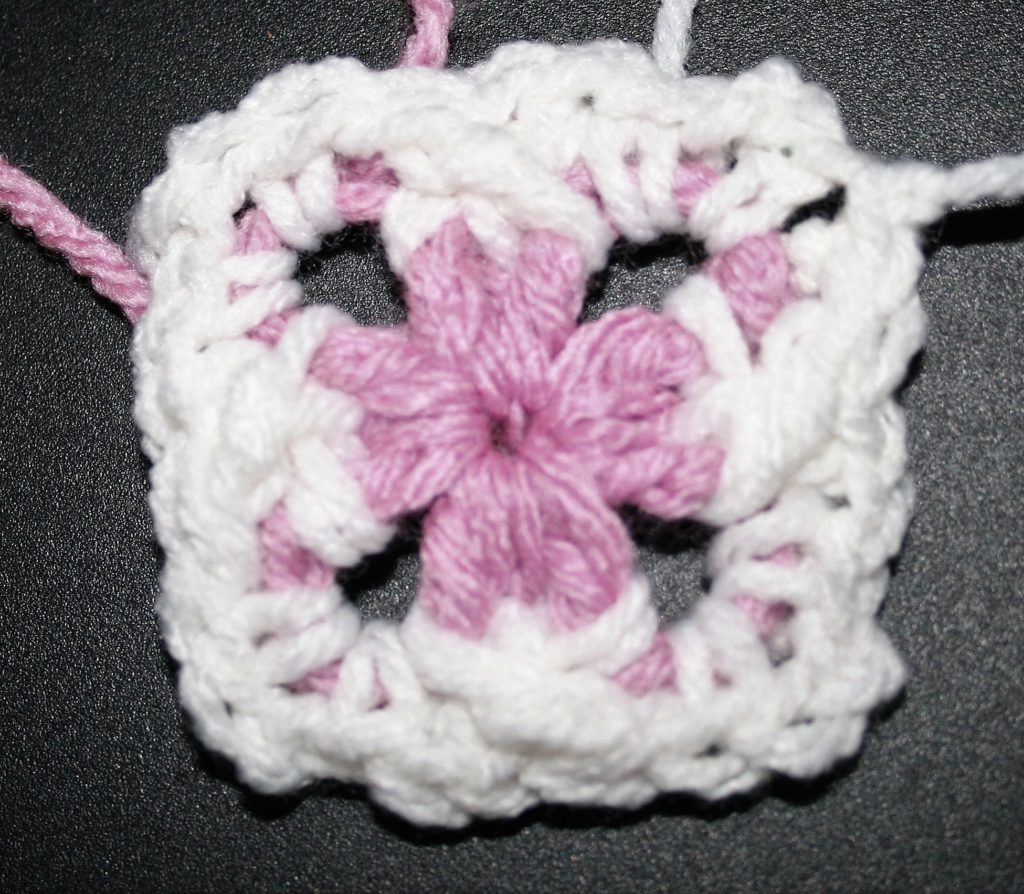
Notice we are back to the first color of the Quilt Ladies Block
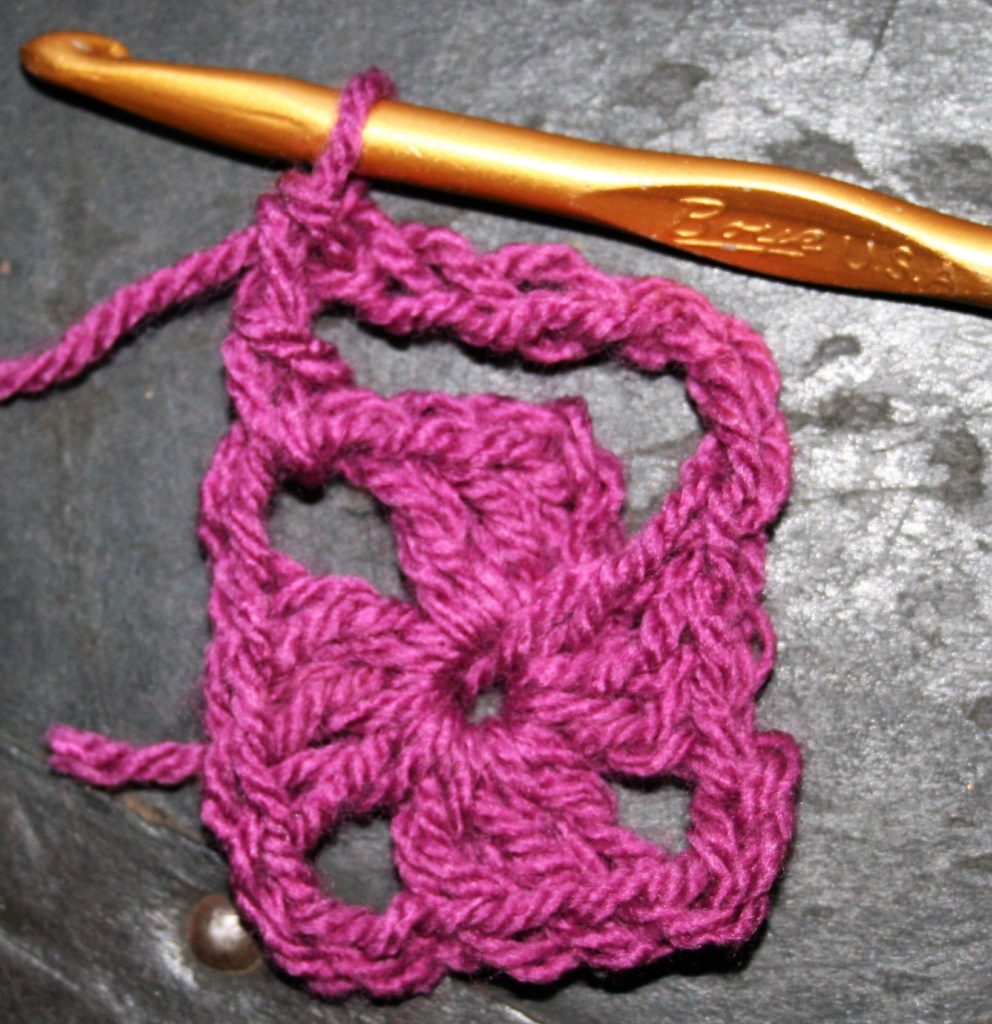
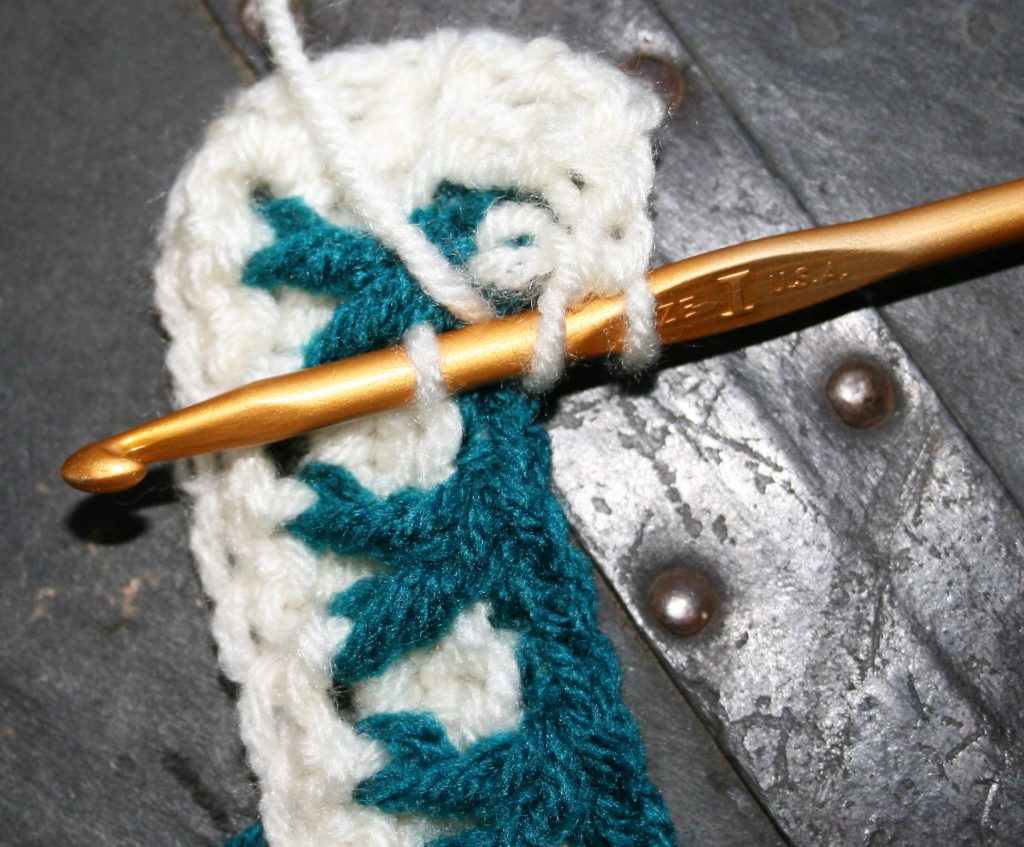
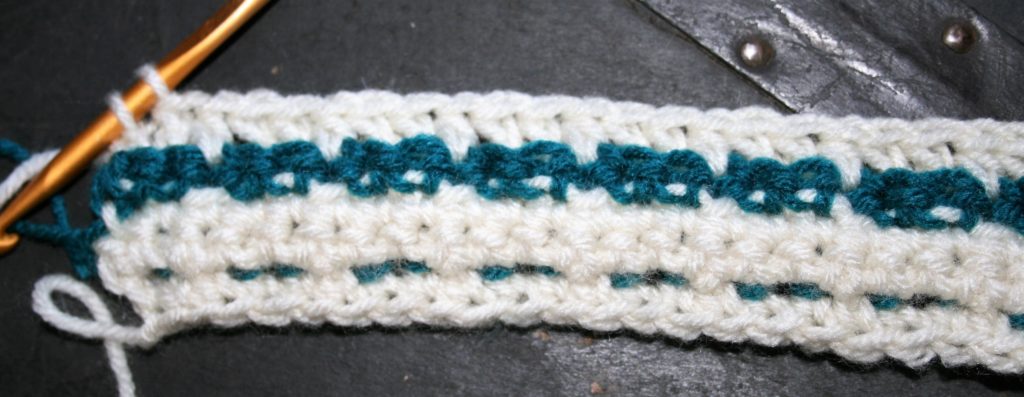
Rnd 3: With A, join with standing dc in any ch-2 corner sp, ch 2, dc in same sp, dc in next 2 sts, working over sl st dc in next st, dc in next 2 sts, [(dc, ch 2, dc) in ch-2 sp, dc in next 2 sts, working over sl st dc in next st, dc in next 2 sts] 3 times, sl st to join. Fasten off. -28dc
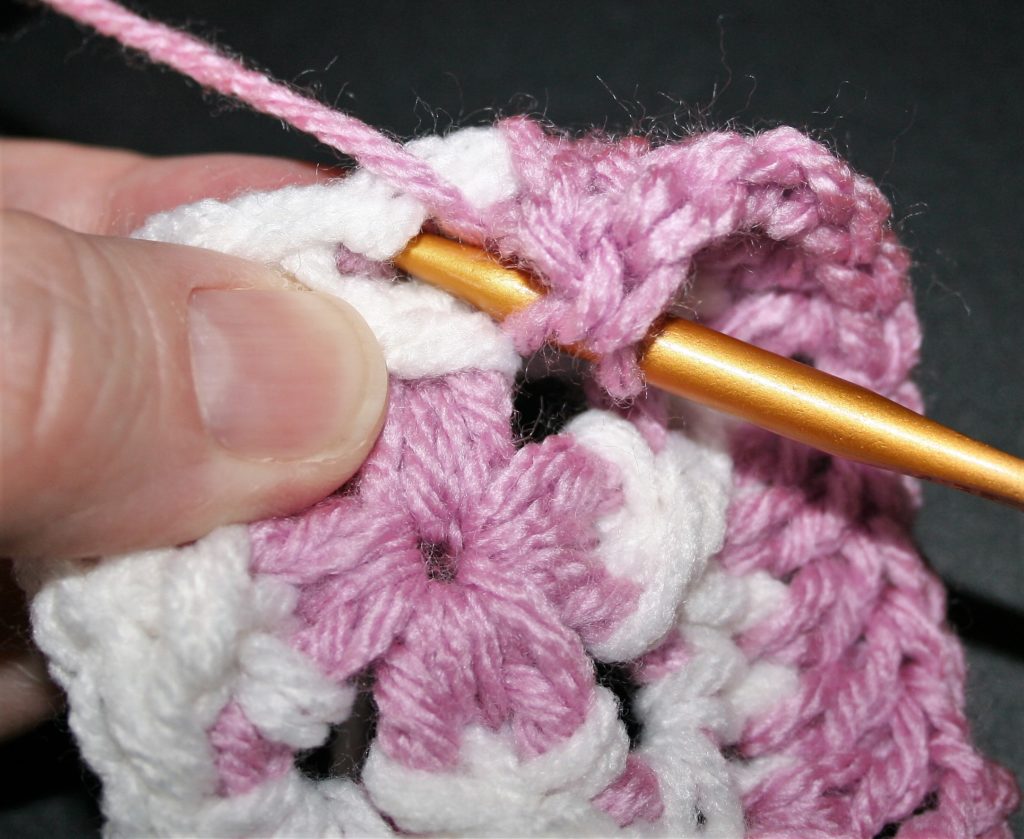

Changing to the Main Color…
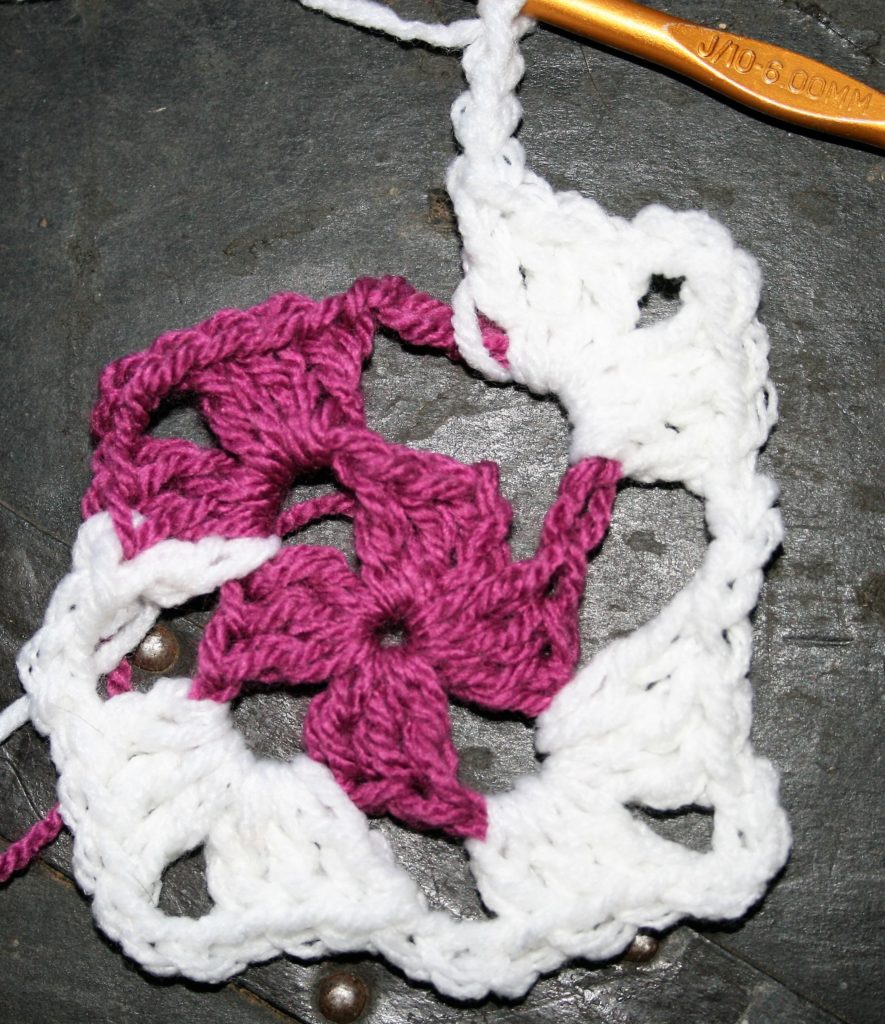
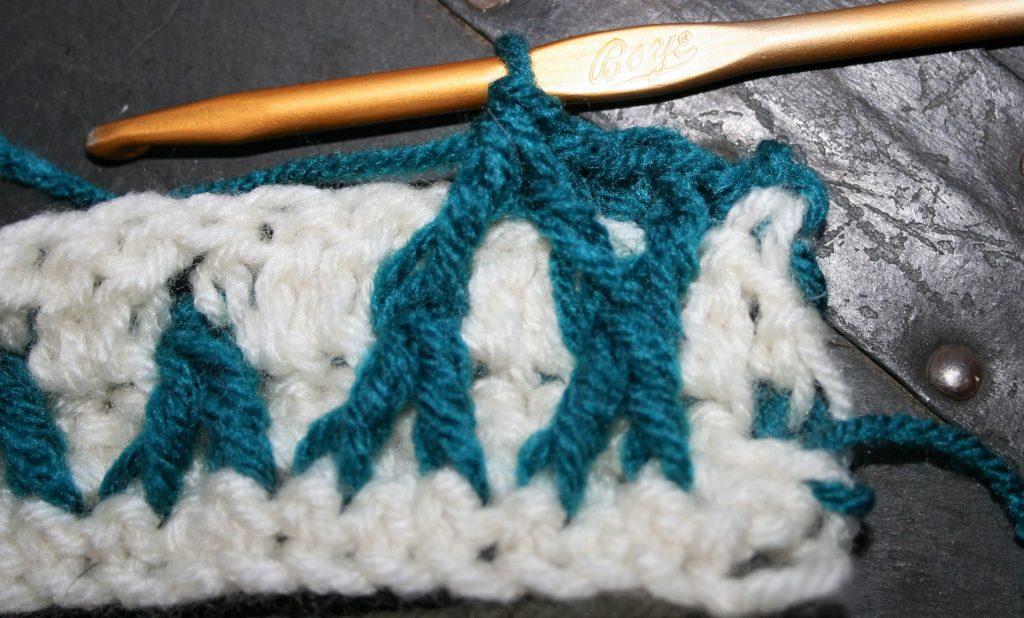
Rnd 4: With B, join with a standing sc in any ch-2 sp, ch 2, sc in same sp, sk next 2 dc, fptr around post st 2 rows below, sl st in st just before st worked, fpdc in 1st sk st, sl st in next unworked st, sk next 2 dc, fpdc around next st, sl st in st just before st worked, fptr around post st 2 rows below and behind current st,[(sc, ch 2, sc) in ch-2 sp, sk next 2 dc, fptr around post st 2 rows below, sl st in st just before st worked, fpdc in 1st sk st, sl st in next unworked st, sk next 2 dc, fpdc around next st, sl st in st just before st worked, fptr around post st 2 rows below and behind current st] 3 times, sl st to join. Fasten off. – 8 crossed fptr/fpdc sts, 12 sl st, 8 sc
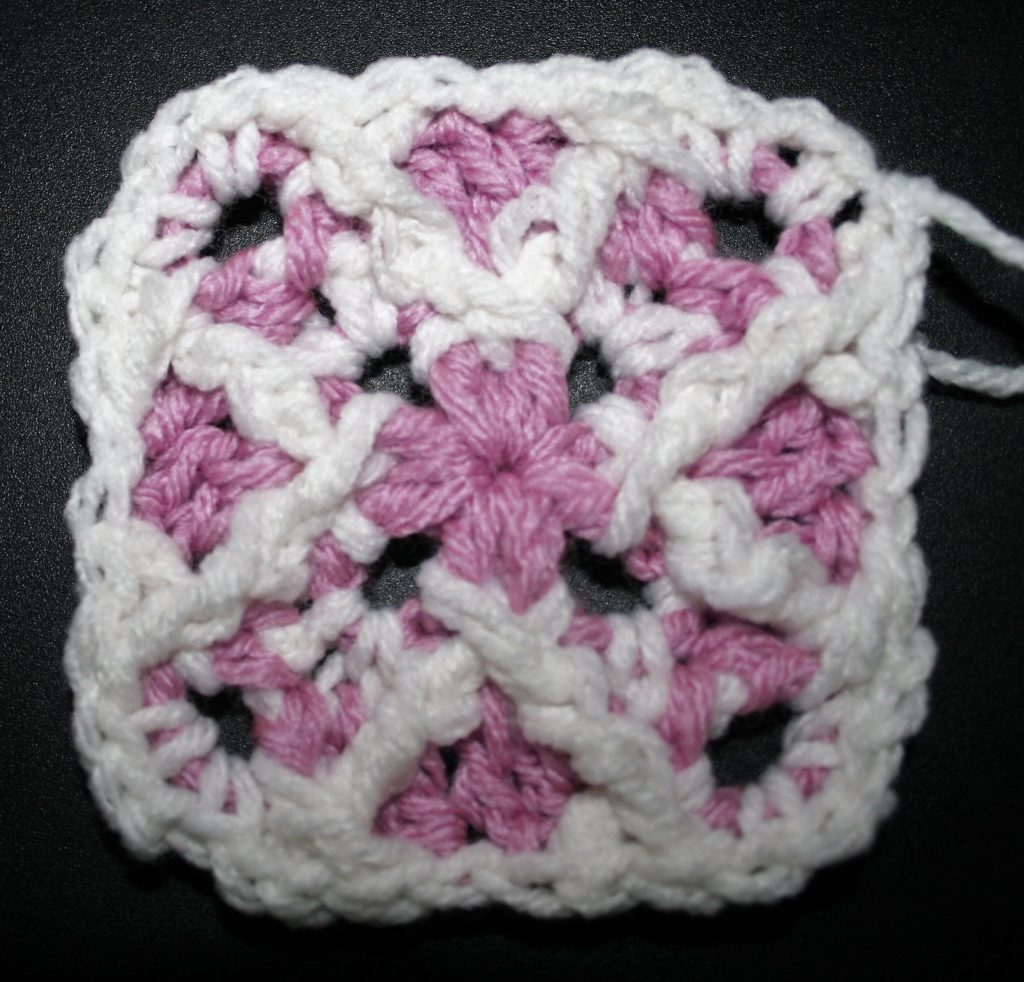
We are working on the background
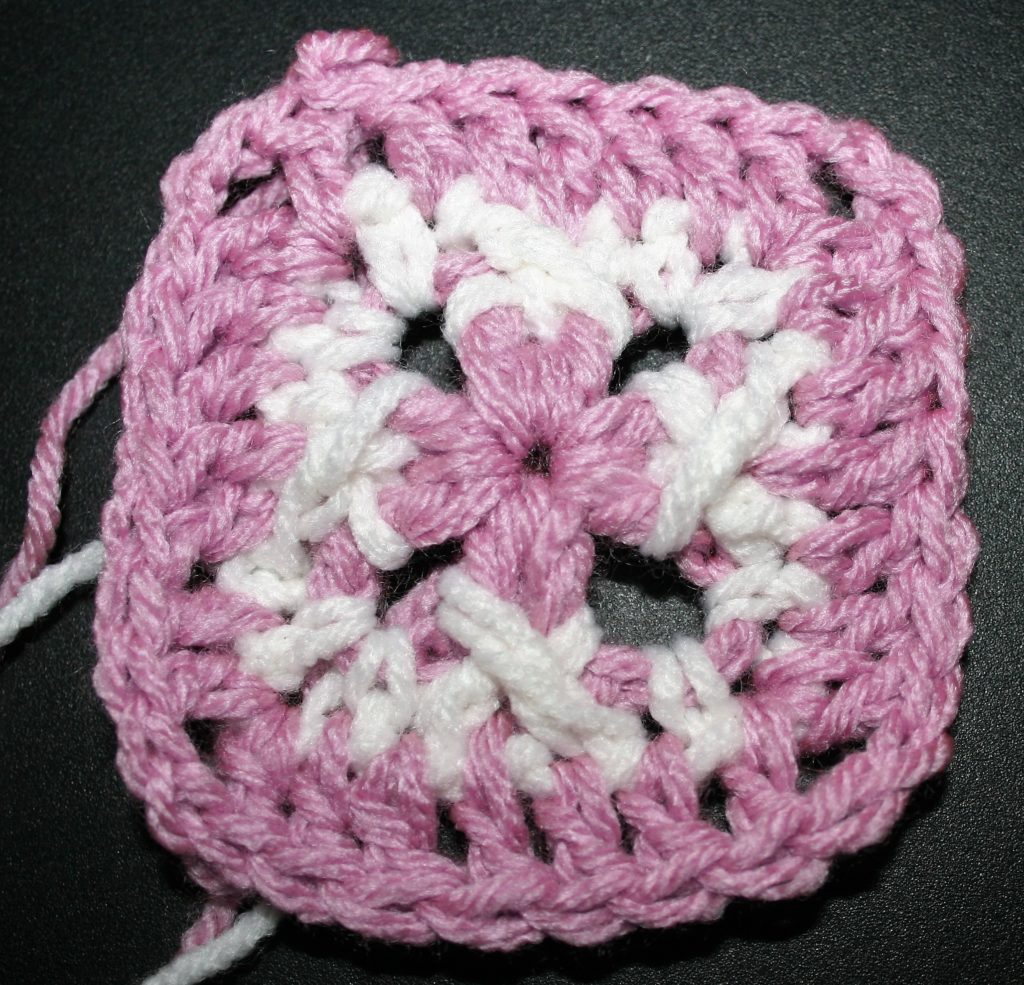
Rnd 5: With C, join with standing dc in any ch-2 corner sp, ch 2, dc in same sp, dc in next 2 sts, [working over sl st dc in next st, dc in next st,] 3 times, dc in next st , {(dc, ch 2, dc) in ch-2 sp, dc in next 2 sts, [working over sl st dc in next st] 3 times, dc in next st} 3 times, sl st to join. Fasten off. -44dc
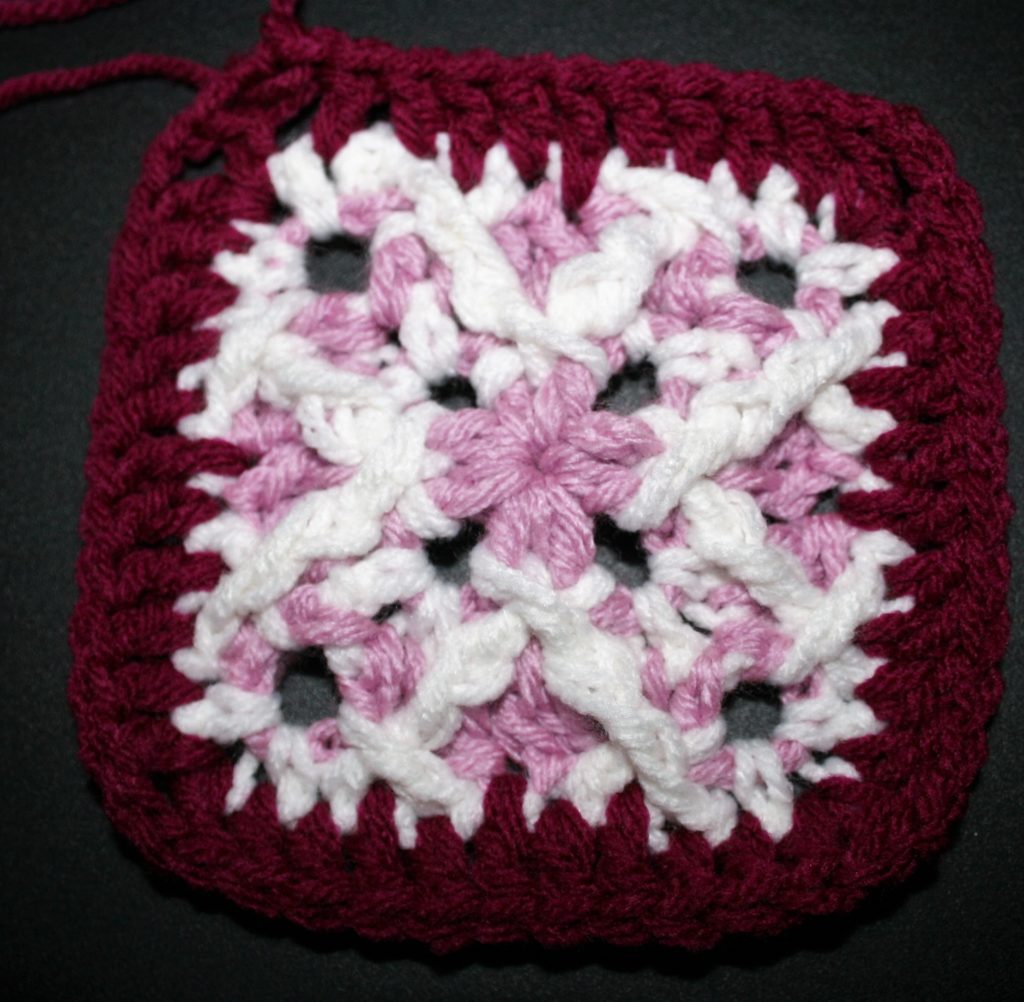
NOTE…here is a slightly different way to explain how to skip stitches…but with the same concept
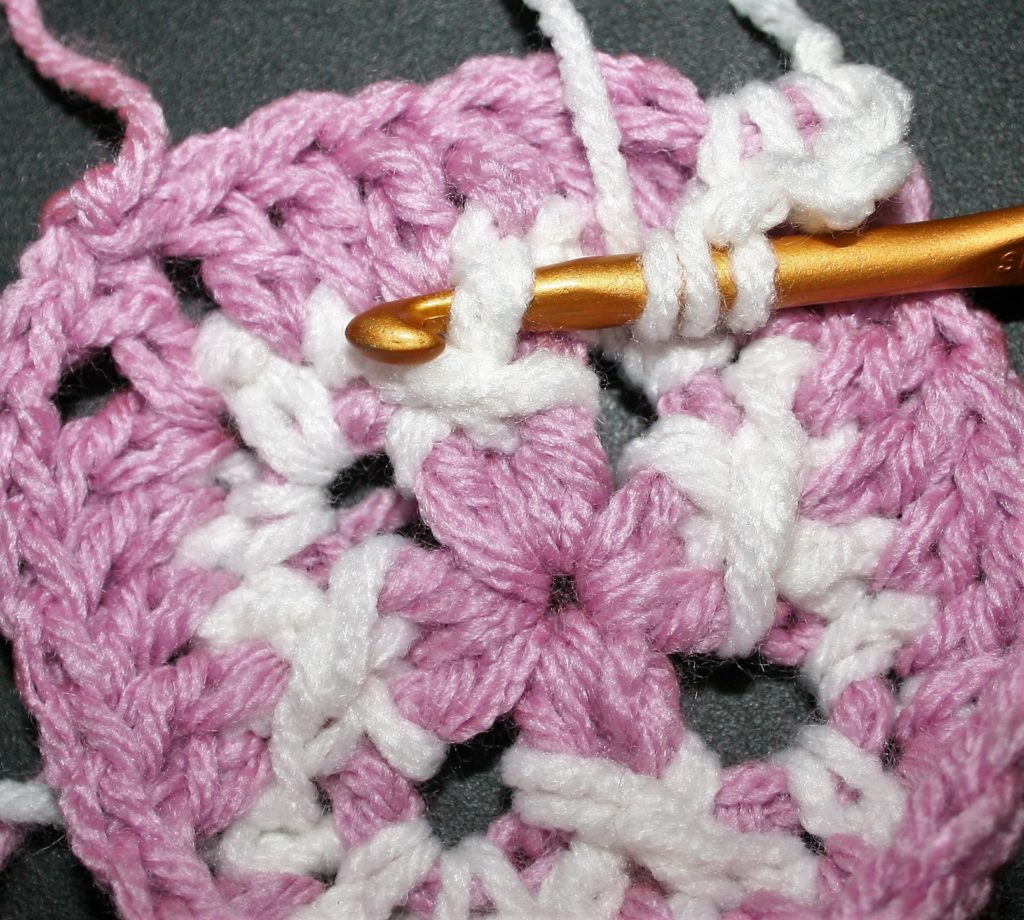
Rnd 6: With B, join with a standing sc in any ch-2 sp, ch 2, sc in same sp, sk next 2 dc, fptr around post st 2 rows below, sl st in 2nd skpd dc, fpdc in 1st sk st, sk 1 dc, sl st in next unworked st, sk next 2 dc, fptr around next post st 2 rows below, sk 1 dc, sl st in next dc, fptr around post st 2 rows below and behind current st, sk next dc, sl st in next unworked st, sk 2 sts, fpdc around last dc, sl st in st just before st worked, fptr around post 2 rows below and behind current st, [(sc, ch 2, sc) in ch-2 sp, sk next 2 dc, fptr around post st 2 rows below, sl st in 2nd skpd st, fpdc in 1st sk st, sk 1 dc, sl st in next unworked st, sk next 2 dc, fptr around next post st 2 rows below, sk 1 dc, sl st in next dc, fptr around post st 2 rows below and behind current st, sk next dc, sl st in next unworked st, sk 2 sts, fpdc around last dc, sl st in st just before st worked, fptr around post 2 rows below and behind current st,] 3 times, sl st to join. Fasten off. -4 crossed fptr sts, 8 crossed fptr/fpdc sts, 20 sl st, 8 sc
Working on the background again
Rnd 7: With C, join with standing dc in any ch-2 corner sp, ch 2, dc in same sp, dc in next 2 sts, [working over sl st dc in next st, dc in next st,] 5 times, dc in next st , {(dc, ch 2, dc) in ch-2 sp, dc in next 2 sts, [working over sl st dc in next st, dc in next st] 5 times, dc in next st} 3 times, sl st to join. Fasten off. -60dc
Back to the row of crossed stitches
Rnd 8: With B, join with a standing sc in any ch-2 sp, ch 2, sc in same sp, sk next 2 dc, fptr around post st 2 rows below, sl st in 2nd skpd dc, fpdc in 1st sk st, sk 1 dc, sl st in next unworked st, sk next 2 dc, [fptr around next post st 2 rows below, sk 1 dc, sl st in next dc, fptr around post st 2 rows below and behind current st, sk next dc, sl st in next unworked st, sk 2 sts] 2 times, fpdc around last dc, sl st in st just before st worked, fptr around post 2 rows below and behind current st, {(sc, ch 2, sc) in ch-2 sp, sk next 2 dc, fptr around post st 2 rows below, sl st in 2nd skpd st, fpdc in 1st sk st, sk 1 dc, sl st in next unworked st, sk next 2 dc, [fptr around next post st 2 rows below, sk 1 dc, sl st in next dc, fptr around post st 2 rows below and behind current st, sk next dc, sl st in next unworked st, sk 2 sts] 2 times, fpdc around last dc, sl st in st just before st worked, fptr around post 2 rows below and behind current st,} 3 times, sl st to join. Fasten off. -8 crossed fptr sts, 8 crossed fptr/fpdc sts, 28 sl st, 8 sc
A New Color
Rnd 9: With D, join with standing dc in any ch-2 corner sp, ch 2, dc in same sp, dc in next 2 sts, [working over sl st dc in next st, dc in next st,] 7 times, dc in next st , {(dc, ch 2, dc) in ch-2 sp, dc in next 2 sts, [working over sl st dc in next st, dc in next st] 7 times, dc in next st} 3 times, sl st to join. Fasten off. -76dc
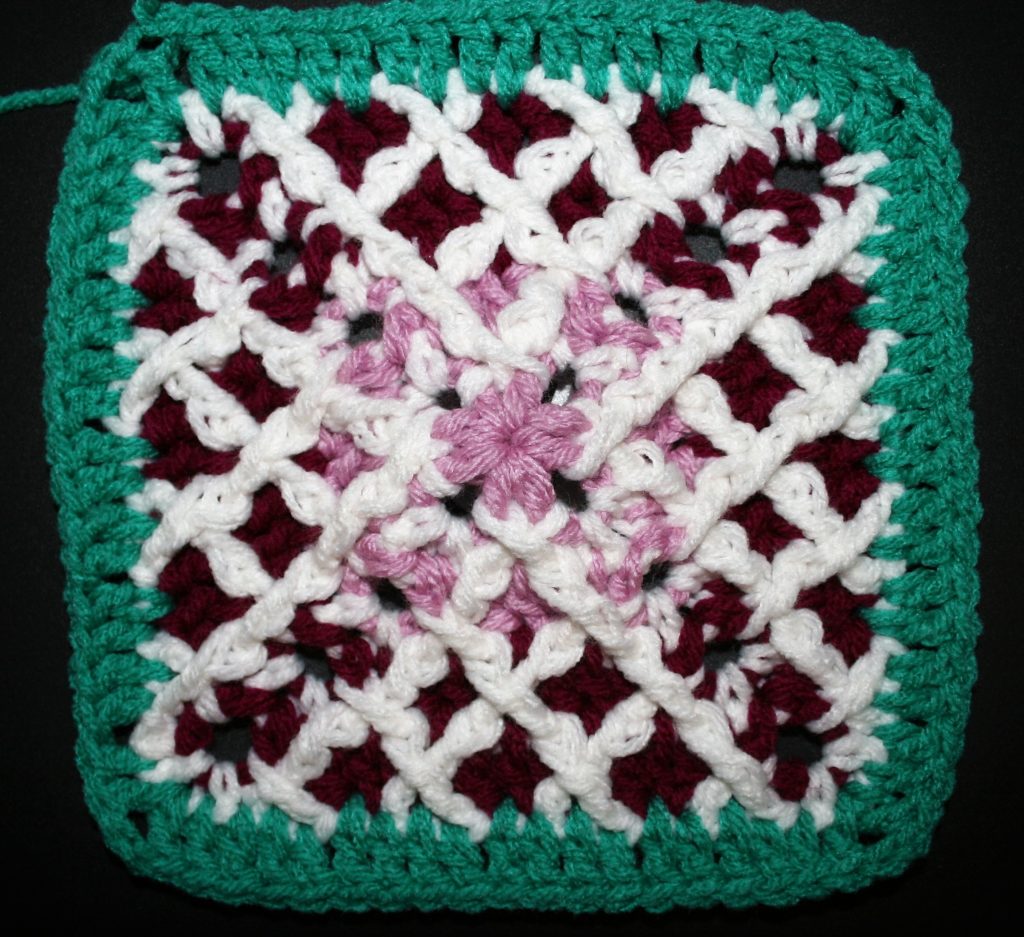
We return to the same pattern of crossed stitches
Rnd 10: With B, join with a standing sc in any ch-2 sp, ch 2, sc in same sp, sk next 2 dc, fptr around post st 2 rows below, sl st in 2nd skpd dc, fpdc in 1st sk st, sk 1 dc, sl st in next unworked st, sk next 2 dc, [fptr around next post st 2 rows below, sk 1 dc, sl st in next dc, fptr around post st 2 rows below and behind current st, sk next dc, sl st in next unworked st, sk 2 sts] 3 times, fpdc around last dc, sl st in st just before st worked, fptr around post 2 rows below and behind current st, {(sc, ch 2, sc) in ch-2 sp, sk next 2 dc, fptr around post st 2 rows below, sl st in 2nd skpd st, fpdc in 1st sk st, sk 1 dc, sl st in next unworked st, sk next 2 dc, [fptr around next post st 2 rows below, sk 1 dc, sl st in next dc, fptr around post st 2 rows below and behind current st, sk next dc, sl st in next unworked st, sk 2 sts] 3 times, fpdc around last dc, sl st in st just before st worked, fptr around post 2 rows below and behind current st,} 3 times, sl st to join. Fasten off. -12 crossed fptr sts, 8 crossed fptr/fpdc sts, 36 sl st, 8 sc
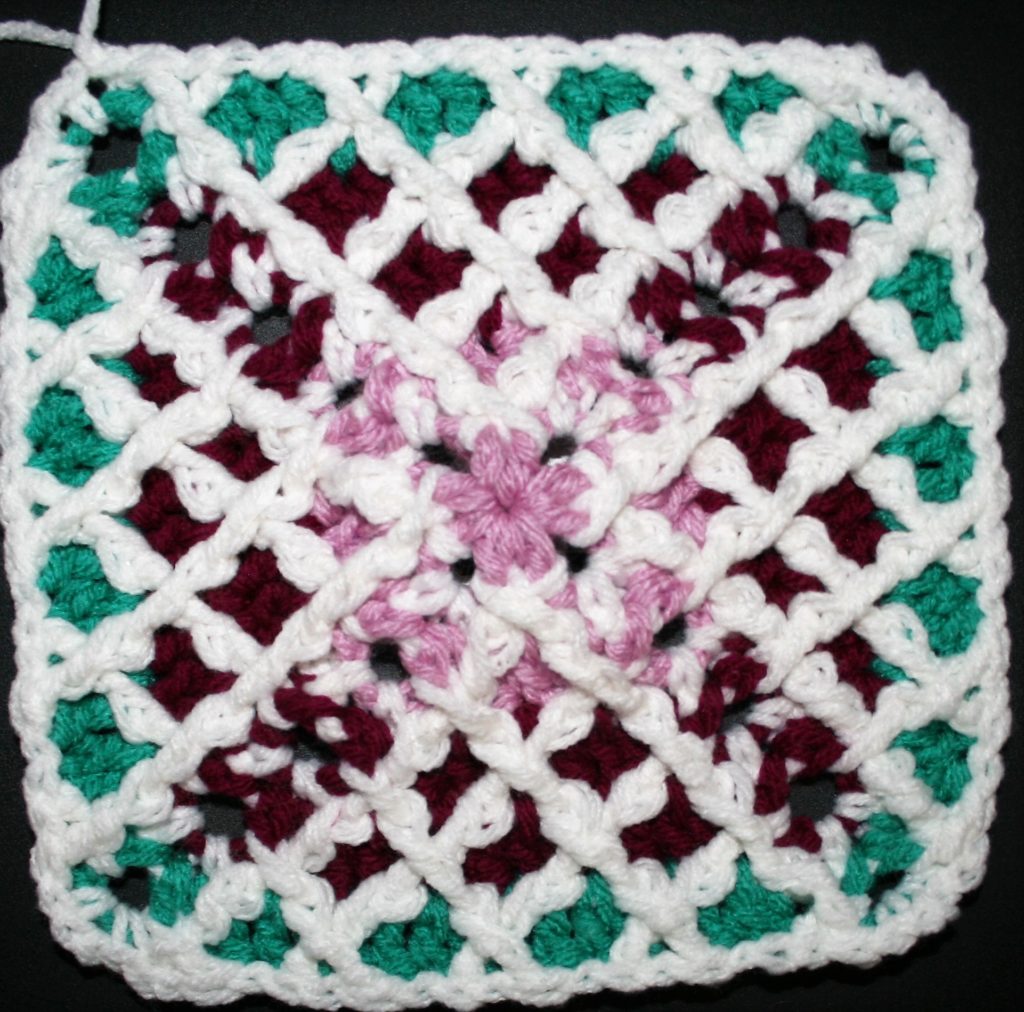
Setting more background
Rnd 11: With D, join with standing dc in any ch-2 corner sp, ch 2, dc in same sp, dc in next 2 sts, [working over sl st dc in next st, dc in next st,] 9 times, dc in next st , {(dc, ch 2, dc) in ch-2 sp, dc in next 2 sts, [working over sl st dc in next st, dc in next st] 9 times, dc in next st} 3 times, sl st to join. Fasten off. -92dc
Are you seeing a pattern…
Row 12: With B, join with a standing sc in any ch-2 sp, ch 2, sc in same sp, sk next 2 dc, fptr around post st 2 rows below, sl st in 2nd skpd dc, fpdc in 1st sk st, sk 1 dc, sl st in next unworked st, sk next 2 dc, [fptr around next post st 2 rows below, sk 1 dc, sl st in next dc, fptr around post st 2 rows below and behind current st, sk next dc, sl st in next unworked st, sk 2 sts] 4 times, fpdc around last dc, sl st in st just before st worked, fptr around post 2 rows below and behind current st, {(sc, ch 2, sc) in ch-2 sp, sk next 2 dc, fptr around post st 2 rows below, sl st in 2nd skpd st, fpdc in 1st sk st, sk 1 dc, sl st in next unworked st, sk next 2 dc, [fptr around next post st 2 rows below, sk 1 dc, sl st in next dc, fptr around post st 2 rows below and behind current st, sk next dc, sl st in next unworked st, sk 2 sts] 4 times, fpdc around last dc, sl st in st just before st worked, fptr around post 2 rows below and behind current st,} 3 times, sl st to join. Fasten off. -16 crossed fptr sts, 8 crossed fptr/fpdc sts, 44 sl st, 8 sc
Another new color
Row 13: With E, join with standing dc in any ch-2 corner sp, ch 2, dc in same sp, dc in next 2 sts, [working over sl st dc in next st, dc in next st,] 11 times, dc in next st , {(dc, ch 2, dc) in ch-2 sp, dc in next 2 sts, [working over sl st dc in next st, dc in next st] 11 times, dc in next st} 3 times, sl st to join. Fasten off. –108 dc
More main color crossed stitches
Row 14: With B, join with a standing sc in any ch-2 sp, ch 2, sc in same sp, sk next 2 dc, fptr around post st 2 rows below, sl st in 2nd skpd dc, fpdc in 1st sk st, sk 1 dc, sl st in next unworked st, sk next 2 dc, [fptr around next post st 2 rows below, sk 1 dc, sl st in next dc, fptr around post st 2 rows below and behind current st, sk next dc, sl st in next unworked st, sk 2 sts] 5 times, fpdc around last dc, sl st in st just before st worked, fptr around post 2 rows below and behind current st, {(sc, ch 2, sc) in ch-2 sp, sk next 2 dc, fptr around post st 2 rows below, sl st in 2nd skpd st, fpdc in 1st sk st, sk 1 dc, sl st in next unworked st, sk next 2 dc, [fptr around next post st 2 rows below, sk 1 dc, sl st in next dc, fptr around post st 2 rows below and behind current st, sk next dc, sl st in next unworked st, sk 2 sts] 5 times, fpdc around last dc, sl st in st just before st worked, fptr around post 2 rows below and behind current st,} 3 times, sl st to join. Fasten off. -20 crossed fptr sts, 8 crossed fptr/fpdc sts, 52 sl st, 8 sc
We finish up…
Row 15: With E, join with standing hdc in any ch-2 corner sp, ch 2, hdc in same sp, hdc in next 2 sts, [working over sl st hdc in next st, hdc in next st,] 13 times, hdc in next st , {(hdc, ch 2, hdc) in ch-2 sp, hdc in next 2 sts, [working over sl st hdc in next st, hdc in next st] 13 times, hdc in next st} 3 times, sl st to join. Fasten off. -124 hdc