Crochet Emergency- Shoelaces

It never seems to fail, my kids shoelaces fail at the most inopportune times; when we are just headed out the door to school, when we are off to a new event or sport obligation. As a result I have had to find some quick fixes and amazingly my kids have come to actually request them now as a fashion statement…I crochet shoelaces.

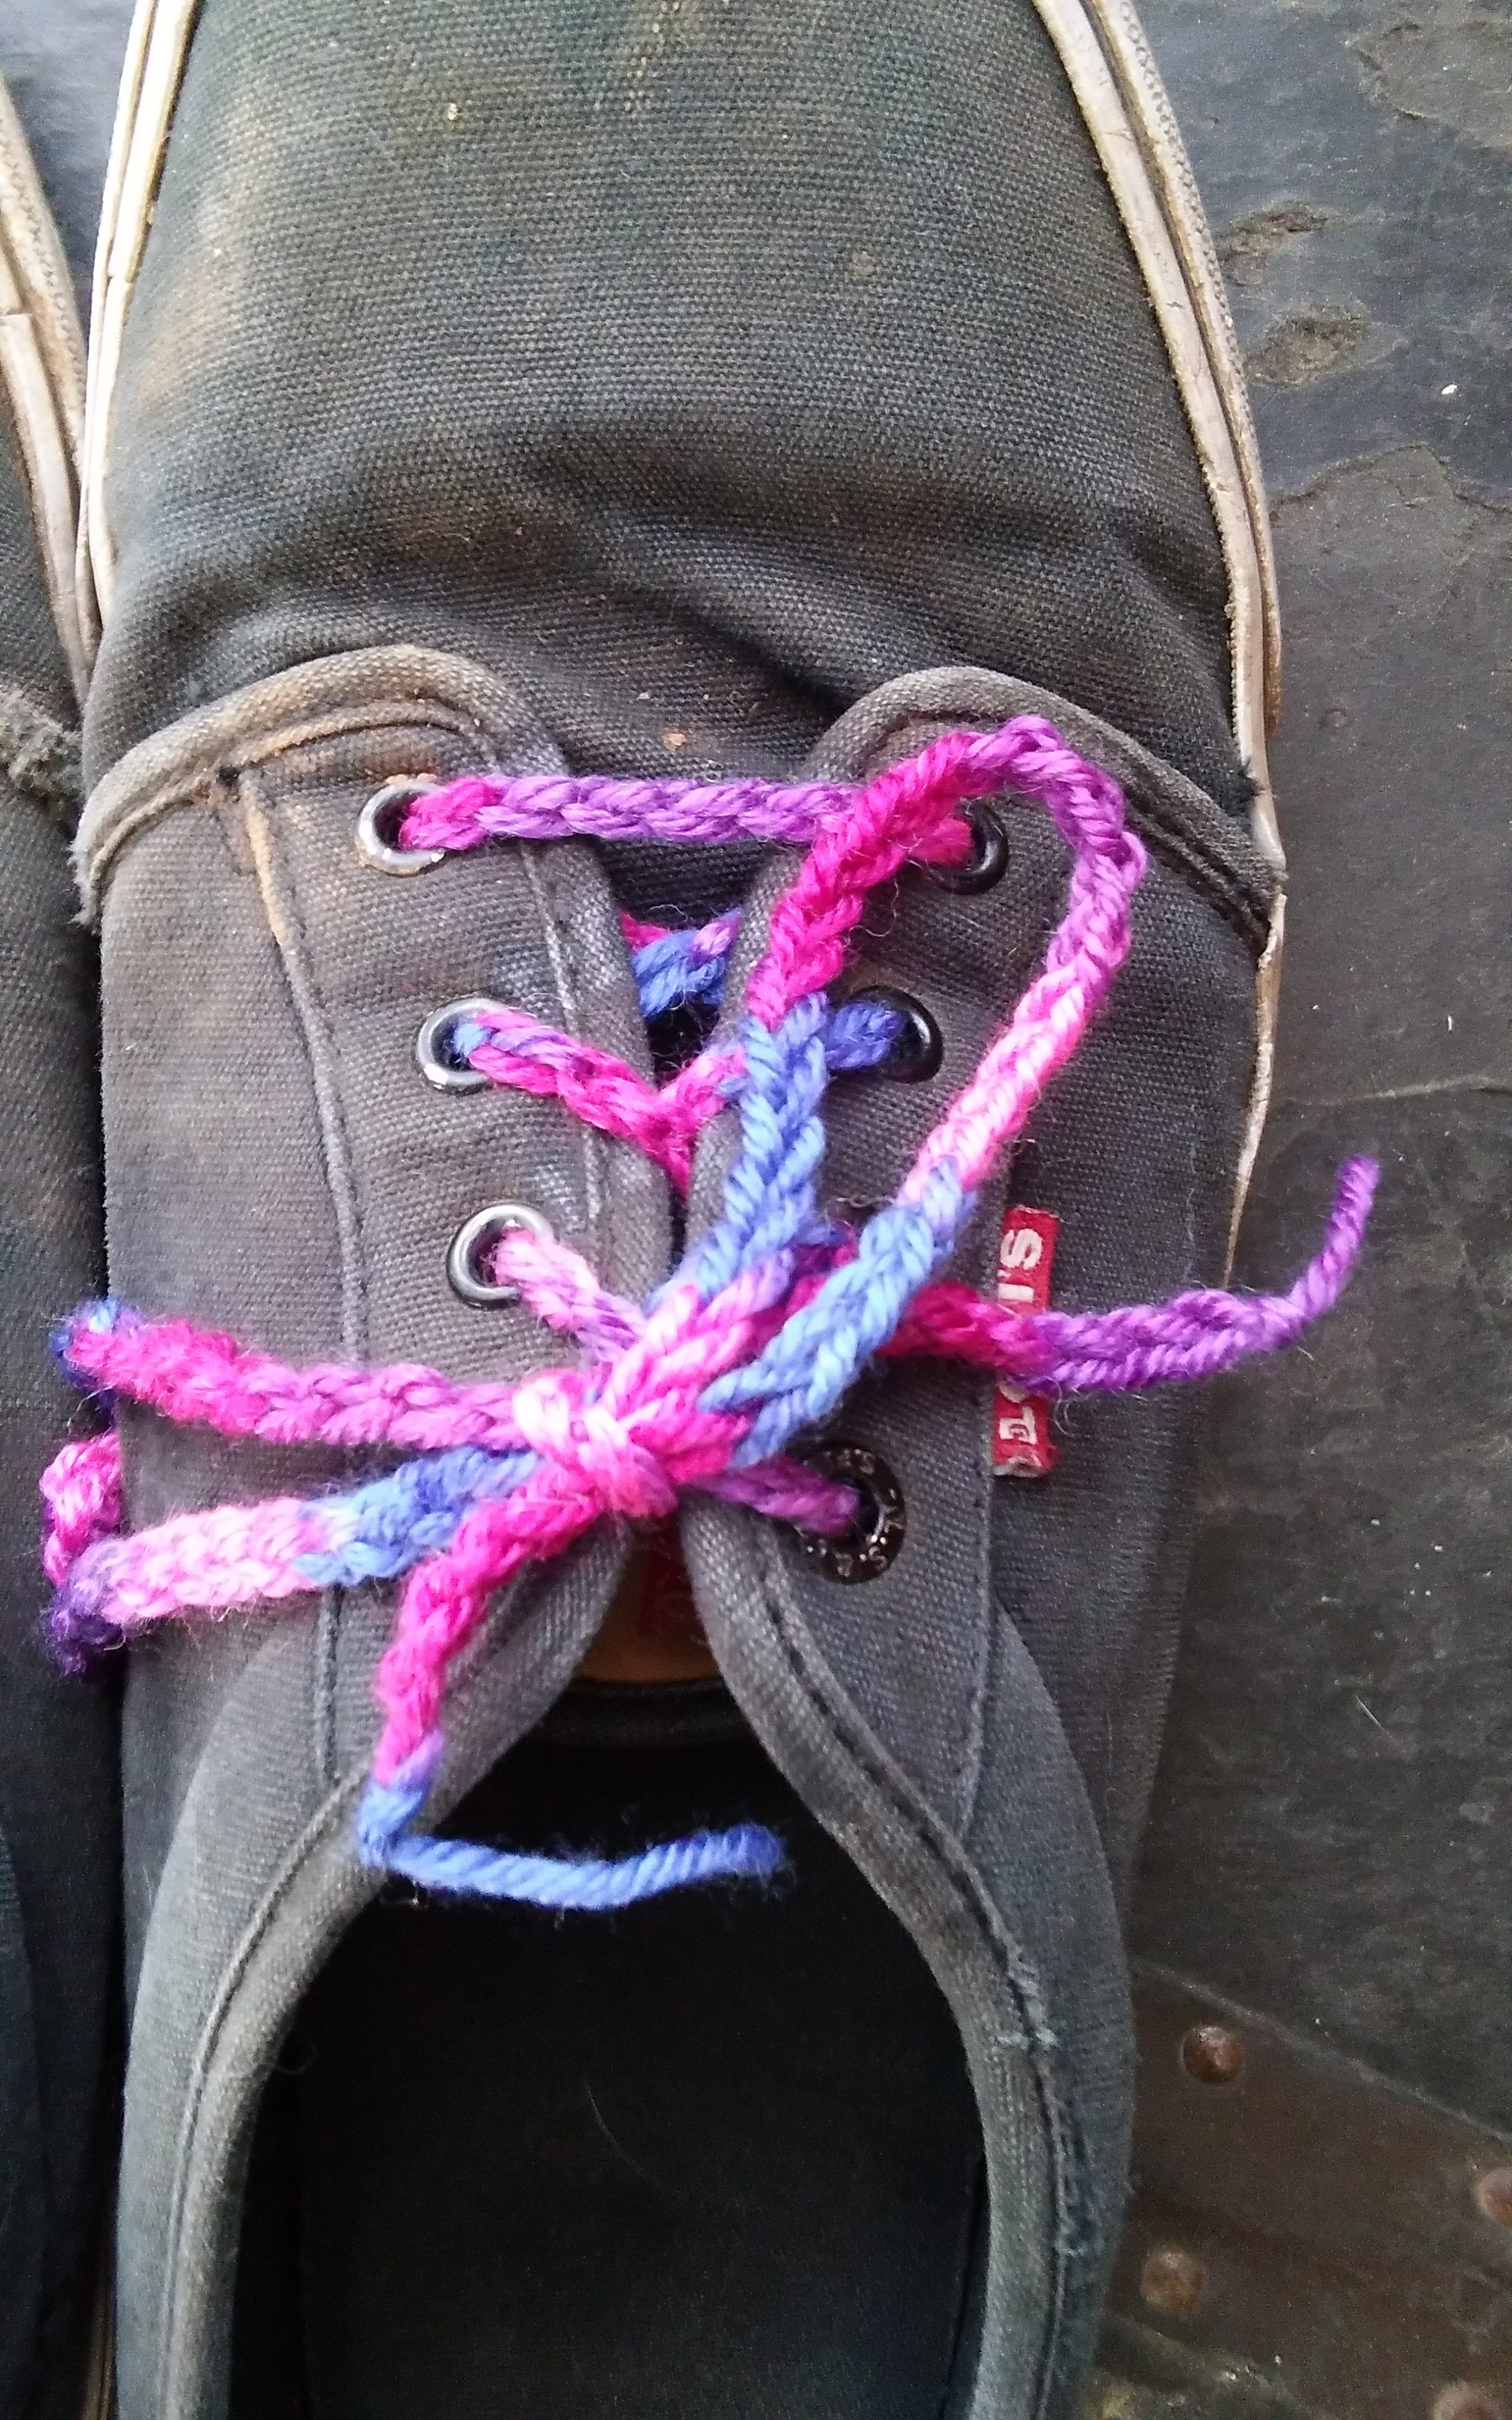
Granted when really looking at the shoes, they have seen better days, but the kids love them and have some that they will wear until they fall apart. I guess I shouldn’t be too surprised, I have a few myself. However dressing them up with a bit of yarn was never my initial intent, it was simply necessity. Yet as my kids get older they have found these bits of yarn helping them to find their own identity.

Crochet shoelaces www.lindadeancrochet.com

Crochet shoelaces

So why crochet a chain, why not just use a strand of yarn? Well the short story is that the chain actually holds better when tying a bow, and is stronger. When using just a stand of yarn, it is held together by the ply. The ply is part of the yarn construction, most yarns are made up of strands that are spun in one direction, then these strands are spun together in the opposite direction, this is the ply. Granted the tension of the ply does create a strong yarn, just not one that is quite strong enough to live up to a shoelace on my kids shoes.

Creating the yarn into a chain, creates three strands instead of just one. It also makes a little more heft in the diameter, so it is easier to tie and untie.

What I find the most interesting is how my kids have fun picking out new colors for the laces. My son even enjoys adding a bright pink to his laces, at least it helps them have some individual style.

Pinwheel Blanket- A Work of Many Ideas

The Pinwheel Blanket is one that takes a little different approach then I usually do; it is comprised of small motifs that make a larger motif, then joined together. I will admit, I usually think a little more simplistic, I have a motif and that motif gets joined to other motifs, so making a motif out of motifs…well that is like an ah ha moment.

Pinwheel Blanket www.lindadeancrochet.com

Pinwheel Blanket Crochet Now Issue 10

I did not make this realization on my own, I had help. I often believe the best designs come out of a collaboration, ideas always grow when you listen to others…sometimes for the better, like this one. I had worked the smaller motifs together, mostly to see how they looked joined together as I think the join point creates a really interesting effect. It was the editor of Crochet Now that mentioned that the block created looked great just as they were and should be treated like motifs, this allows the join point to become a highlight.

This collaboration has opened my eyes to many different attachment and joining, sometimes it just takes a different view to open up a new world.

So about Pinwheel Blanket, the initial small motif is only comprised of three rounds, so it works up quickly. It grew from a flower, and I feel it has a floral feel. It is at the join point that I see the pinwheel, with a feeling of the whirly-gigs I have seen in the garden. So I guess in a sense this throw has a garden feel for me. With flowers and whirly-gigs it does have an outdoor feel, and even the colors are bright like flowers.

Each small motif is joined to create a square that is the bordered with a main color and joined to other squares, this creates a patchwork and rustic charm while in keeping with garden feel. This is a great project that can be worked as a portable, take on the go and create a fabulous blanket. Check this design in Issue 10 of Crochet Now.

Crochet For a Difference- Stacked Clusters

Crocheters often have a desire, or a need to help others…at least in my experiences, and there are so many ways to Crochet for a Difference. I have found various local opportunities that can benefit from the handiwork skills of crochet and am sharing some stitch ideas and some organizations for you to make a difference in your local community.

I don’t really buy into the “crochet stitch names” kind of thing, meaning, unlike knitting that has an understanding that “garter stitch” is nothing but knitting every stitch, I don’t feel that there is anything that really fits this in crochet. If I call something a “popcorn”, all I am essentially saying is that it is a group of stitches that are joined at the top and bottom of the stitch…I am not telling you how many, or where the stitch is worked, there are just to many variables to be consistent over all the possibilities. So with that said, I have to have some way to differentiate from the stitches I want to share, thus they will have names, but keep in mind my names may not match what another designer may refer to the set of stitch patterns.

So I will refer to this stitch pattern as the Stacked Clusters.

A Cluster stitch is basically where the base of many stitches are worked into the same point, but are finished together as one stitch, in a manner of speaking, like a decrease worked in the same location.

For this stitch pattern the Cluster (Cl) stitch will be worked as follows: [Yarn over, insert hook into indicated stitch, Yarn over, pull through a loop, Yarn over pull through 2 loops] three times, there will be 4 loops on hook, yarn over and pull through all 4 loops.

Stacked Clusters www.lindadeancrochet.com

Stacked Clusters

Row 1: Create a chain that is a multiple of two, single crochet in the second chain from hook, [chain 1, skip 1 chain, single crochet in next chain] repeat across, turn.

Row 2: Chain 3, [Cl in chain-1 space, chain 1] repeat across, double crochet in last stitch, turn.

Row 3: Chain 1, single crochet in same stitch, [chain 1, skip 1 stitch, single crochet in next stitch] repeat across, turn.

Repeat Rows 2 & 3 until desired length.

For some more fun with this stitch, use two colors and change colors every row. Leave long tails when changing yarn and create fringe as you work.

Consider creating a lap size blanket and donating it to a local dialysis center. People receiving medical treatments such as dialysis, sit for an extended period of time, and often this alone can make anyone feel cold. Find a dialysis center near you…here.

The Book Club Afghan- A Twist On an Old Classic

ScannedImageClassic Aran Fisherman afghans are ones that I have long admired. They are solid colors with panels of great textures like basket weave, cables, and popcorns, they always remind me of an almost formal bedroom type style, finished in fringe…well this could be the influence of the 1970’s on my childhood.

I have made one of these traditional style throws several years ago. I remember being frustrated with the tension of my first panel with the rest of the afghan, as it was looser than the rest, resulting in one side being taller than the other. And since it is worked the length, there were to many stitches for me to justify ripping it back and starting again.

Book Club Afghan, I like Crochet, February 2017 www.lindadeancrochet.com

Book Club Afghan I Like Crochet, February 2017 Photo courtesy Prime Publishing

I decided to recreate a more modern feel of this classic style with my latest design, found in the February 2017 issue of I Like Crochet, the Book Club Afghan. This blanket is worked the length of the afghan, with “panels” of different texture, different textures of lace. There are three differing types of lace separated by simple stitches, and creating a classic feel. When it is finished it is finished with fringe creating a feel for the classic while being lighter and airier.

This blanket can still dress up any bedroom, but since it does not feel as weighted down with heavy texture it has a more contemporary instead of classic feel allowing for a wider range of uses. This blanket is great for kids, or a throw on the sofa, or even kept in the car for an impromptu picnic.

If you wanted to deviate from the solid colors, consider creating the “traditional” crochet stitches separating the lace in one color, and working the lace stitches in another. This would offer a dramatic appearance as color would embolden this already distinct design.

Book Club Afghan, I Like Crochet, February 2017 www.lindadeancrochet.com

Book Club Afghan I Like Crochet, February 2017

The lace stitches also help correct the problem of tension I had in my classic experience, as the lace is a bit more forgiving, allowing more stretch in the stitches and reducing “accidental growth”.

I hope you enjoy working it as much as I did.

Doily Snowflakes

ScannedImageOne of the saddest things is walking into a thrift store and finding a crochet item. Some feel it is a great find, but I have to say, it leaves me a little disheartened to see all this hard, handmade work, mixed in with second clothes, puzzles that may be missing pieces, and worn toys. So how about a second life for some items.

Doilies are items that I do not usually make for myself. I long discovered that the length of time it takes to make a doily is about the same it takes for me to make an afghan, and I feel like I can see greater process in working an afghan. So when I see doilies I make sure and give them a new purpose.

Snowflake Doilies www.lindadeancrochet.com

Just above my office bulletin board, right beside my banner of encouragement, are 2 “snowflake dollies”.

Now I do not actually have them placed on tables or adorning my dining area, but I get a little creative. One of my favorites is Snowflakes.

I have found that doilies make a great decoration for winter, I actually keep a few up in my office area year round. It is a simple enough process.

A mixture of white glue and water usually does the job of stiffening a doily. Typically you create a mixture of equal parts white glue and water, however if you want only a little stiffness (basically just making things a bit firmer) add more water, and if you want things even more firm decrease the water. Now dip the doily in the solution ensuring that it is completely covered in the mixture. Remove any solution excess so that there is no liquid puddling. Place the doily on either a piece of wax paper, aluminum foil, or other non-stick surface, and block the doily. Make sure that it is placed in the manner you wish for its final appearance and let dry.

Now simply tack you snowflake up in the window or wall, a mirror or frame. I find this as a great way to highlight the beautiful art and craftsmanship that has gone into its creation without relegating these pieces of art to a drawer.