Adding Stitch Extentions

ScannedImage
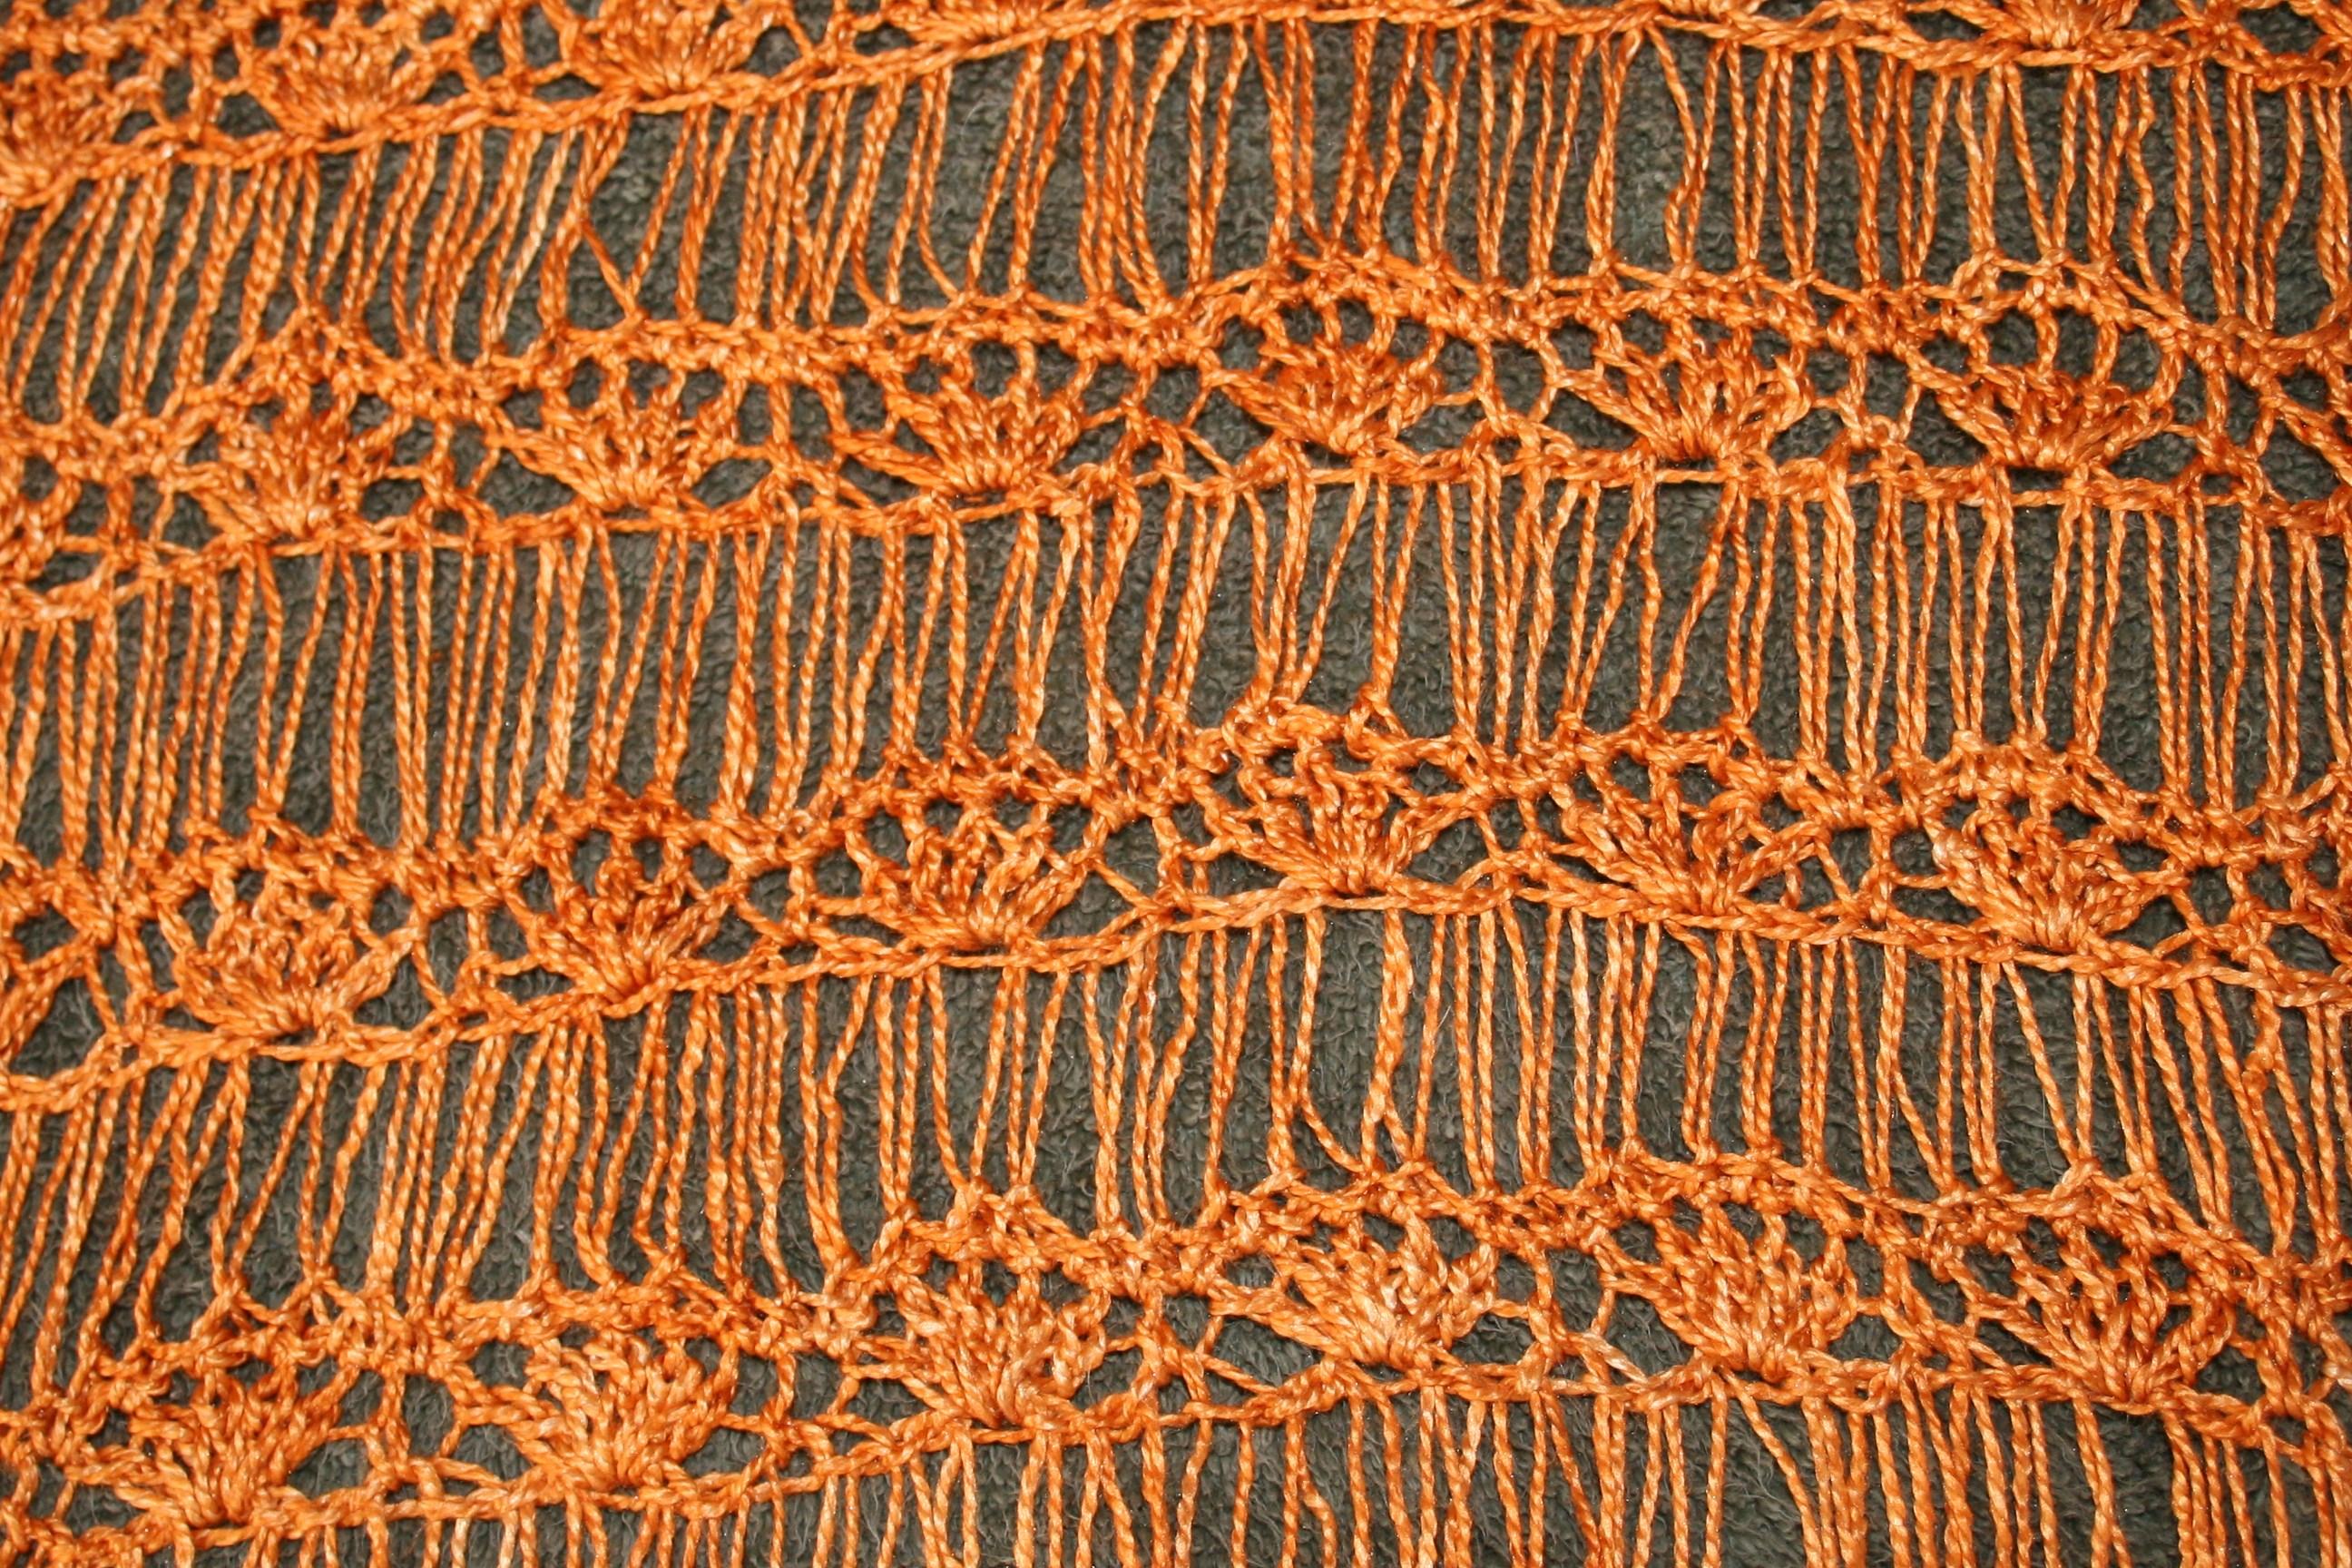
The world of crochet seems to be ever evolving, and one technique that I have seen recent renewed interest in is the “extended stitches”. Extended stitches are essentially the same stitches as are regularly used, single, half double, double, treble, etc. however they have an extra pull through making them slightly taller.

IMG_6325.1

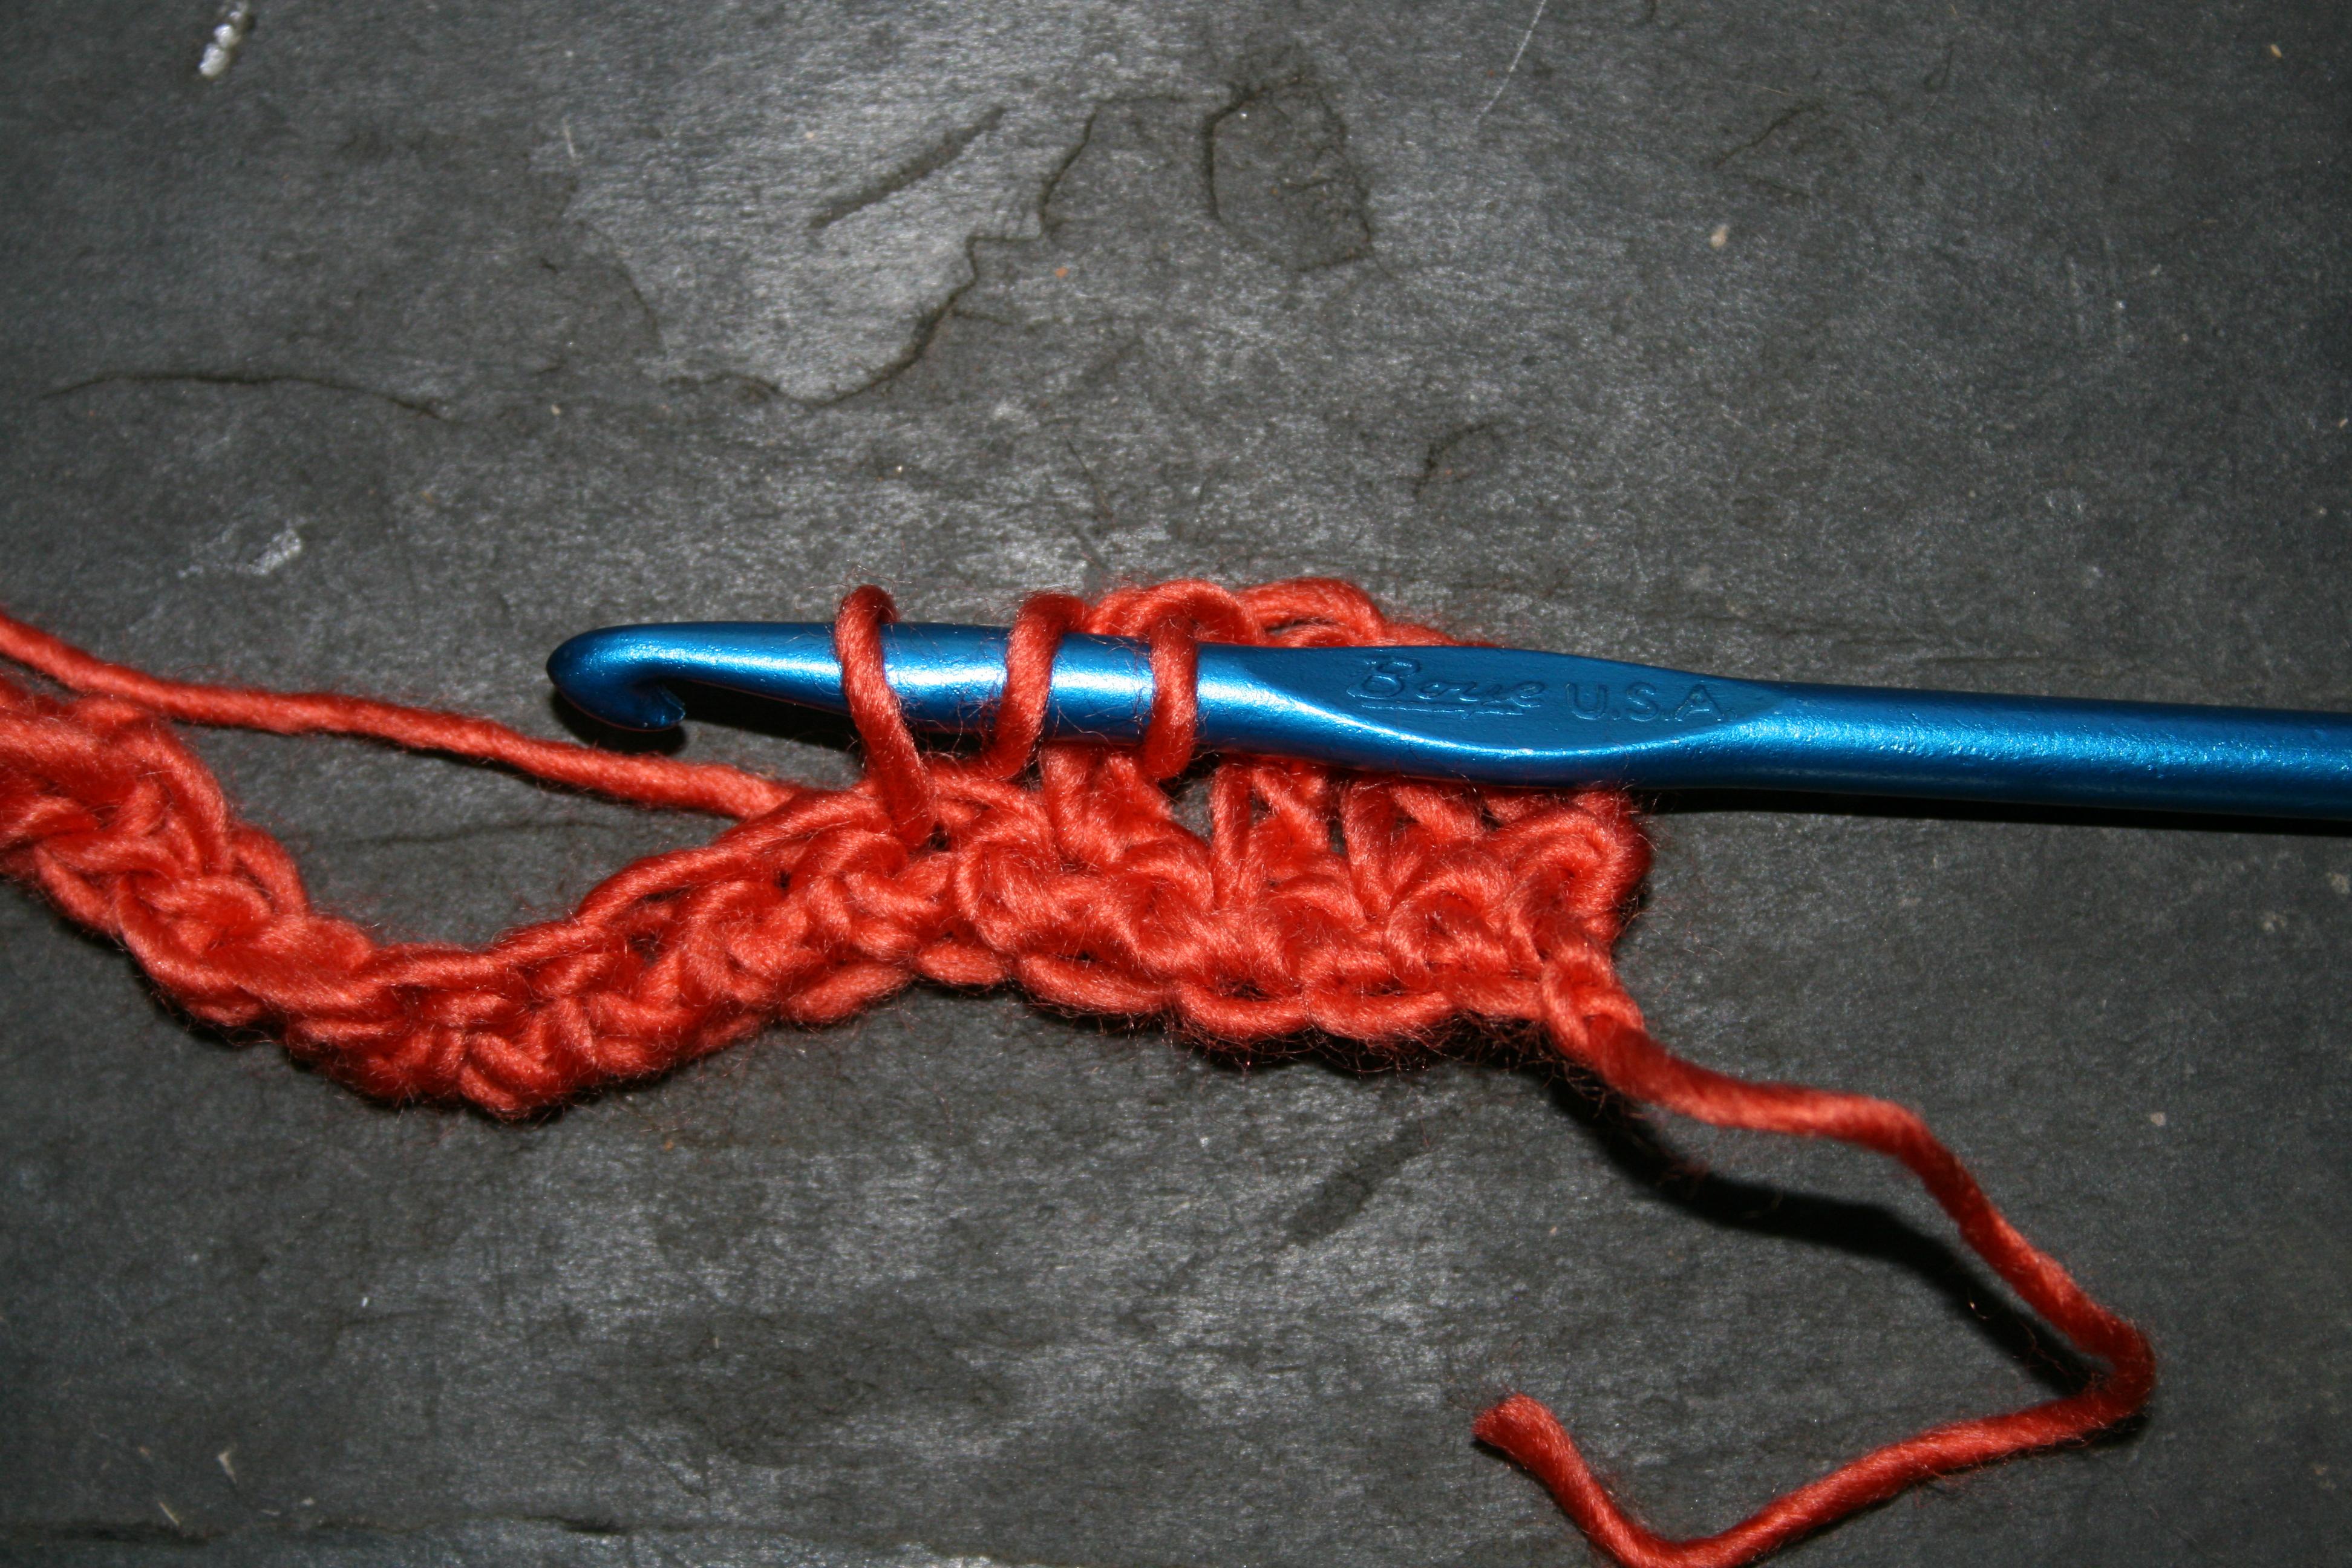
Begin an extended double crochet just as you would a typical double crochet; yarn over, insert hook in indicated space, yarn over, pull up a loop

This stitch type is really nice is you are created a fabric that has gradual height changes as an extended single crochet is slightly taller than a single crochet, yet slightly shorter than a half double crochet, creating a very nice gradient of height by using the three stitches together.
To create an extended stitch, you begin as you do for the standard stitch, for example for a double crochet and an extended double crochet you; yarn over, insert hook in indicated stitch, yarn over, pull through up loop. Now, this is where the only difference now takes place, for an extended stitch, you chain 1, then continue as you would with the remainder of the stitch, yarn over pull through 2, twice.

IMG_6326.1

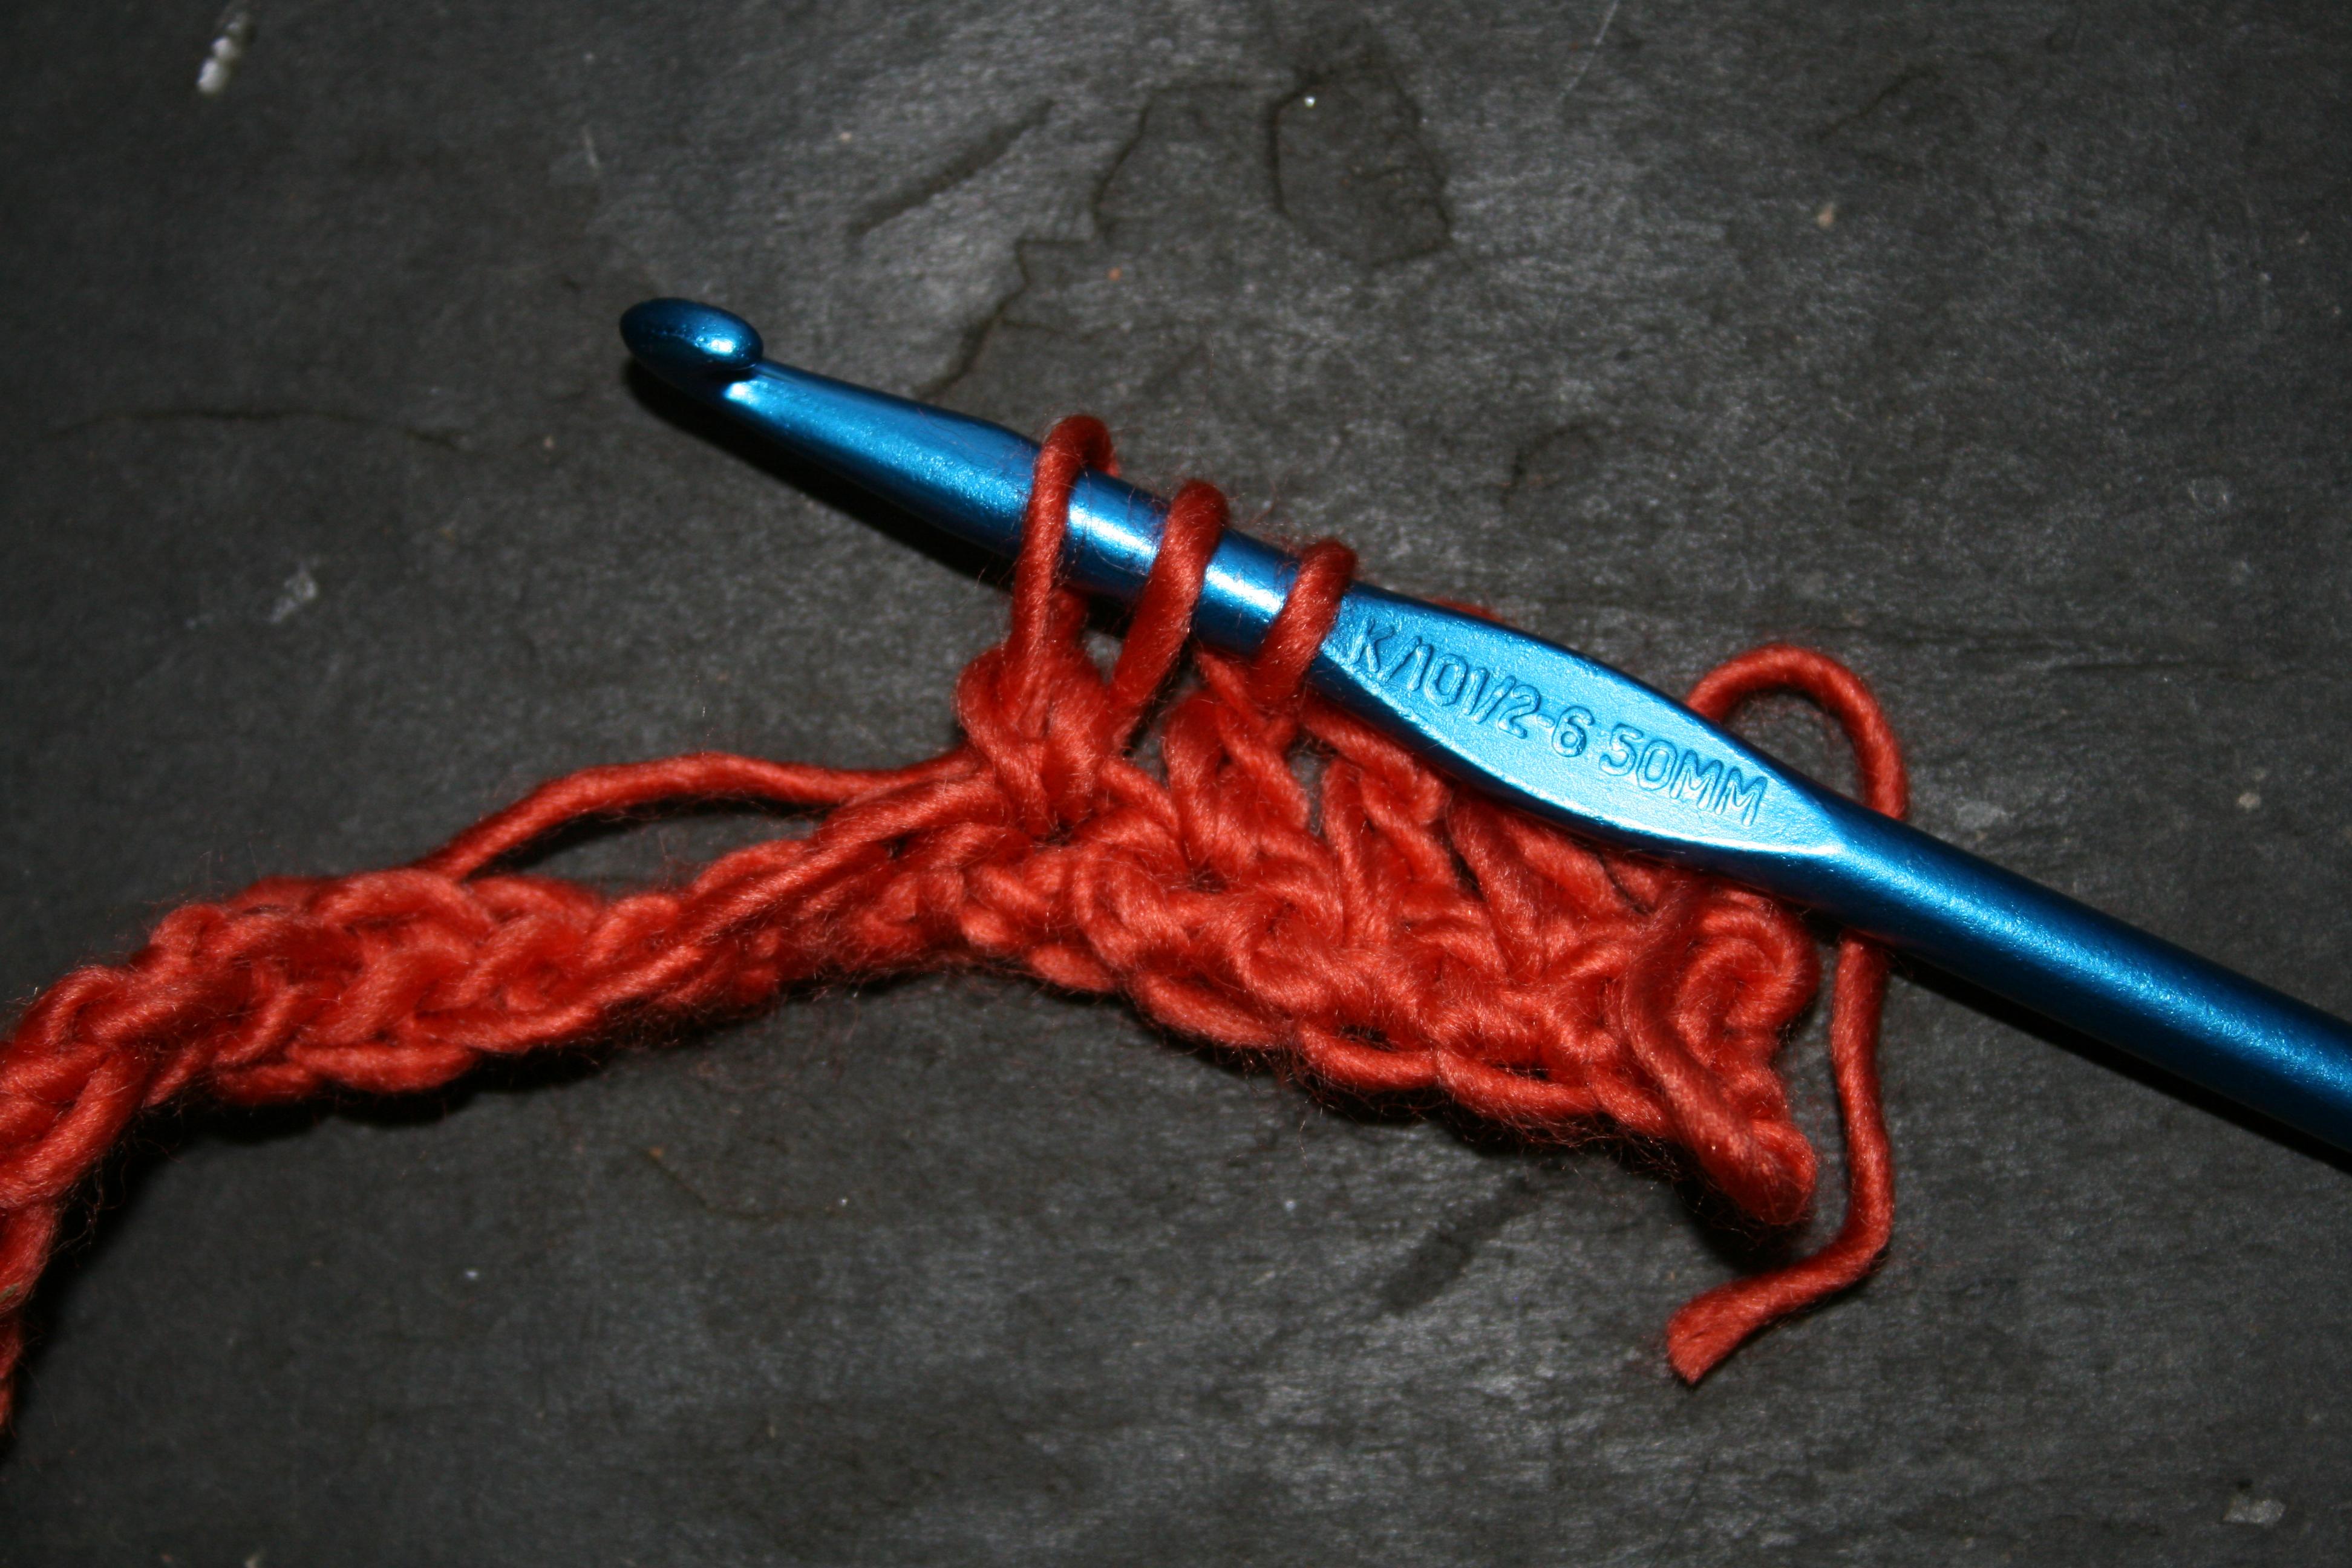
Next, Chain 1, then complete the stitch as normal, Yarn over, pull through 2, twice

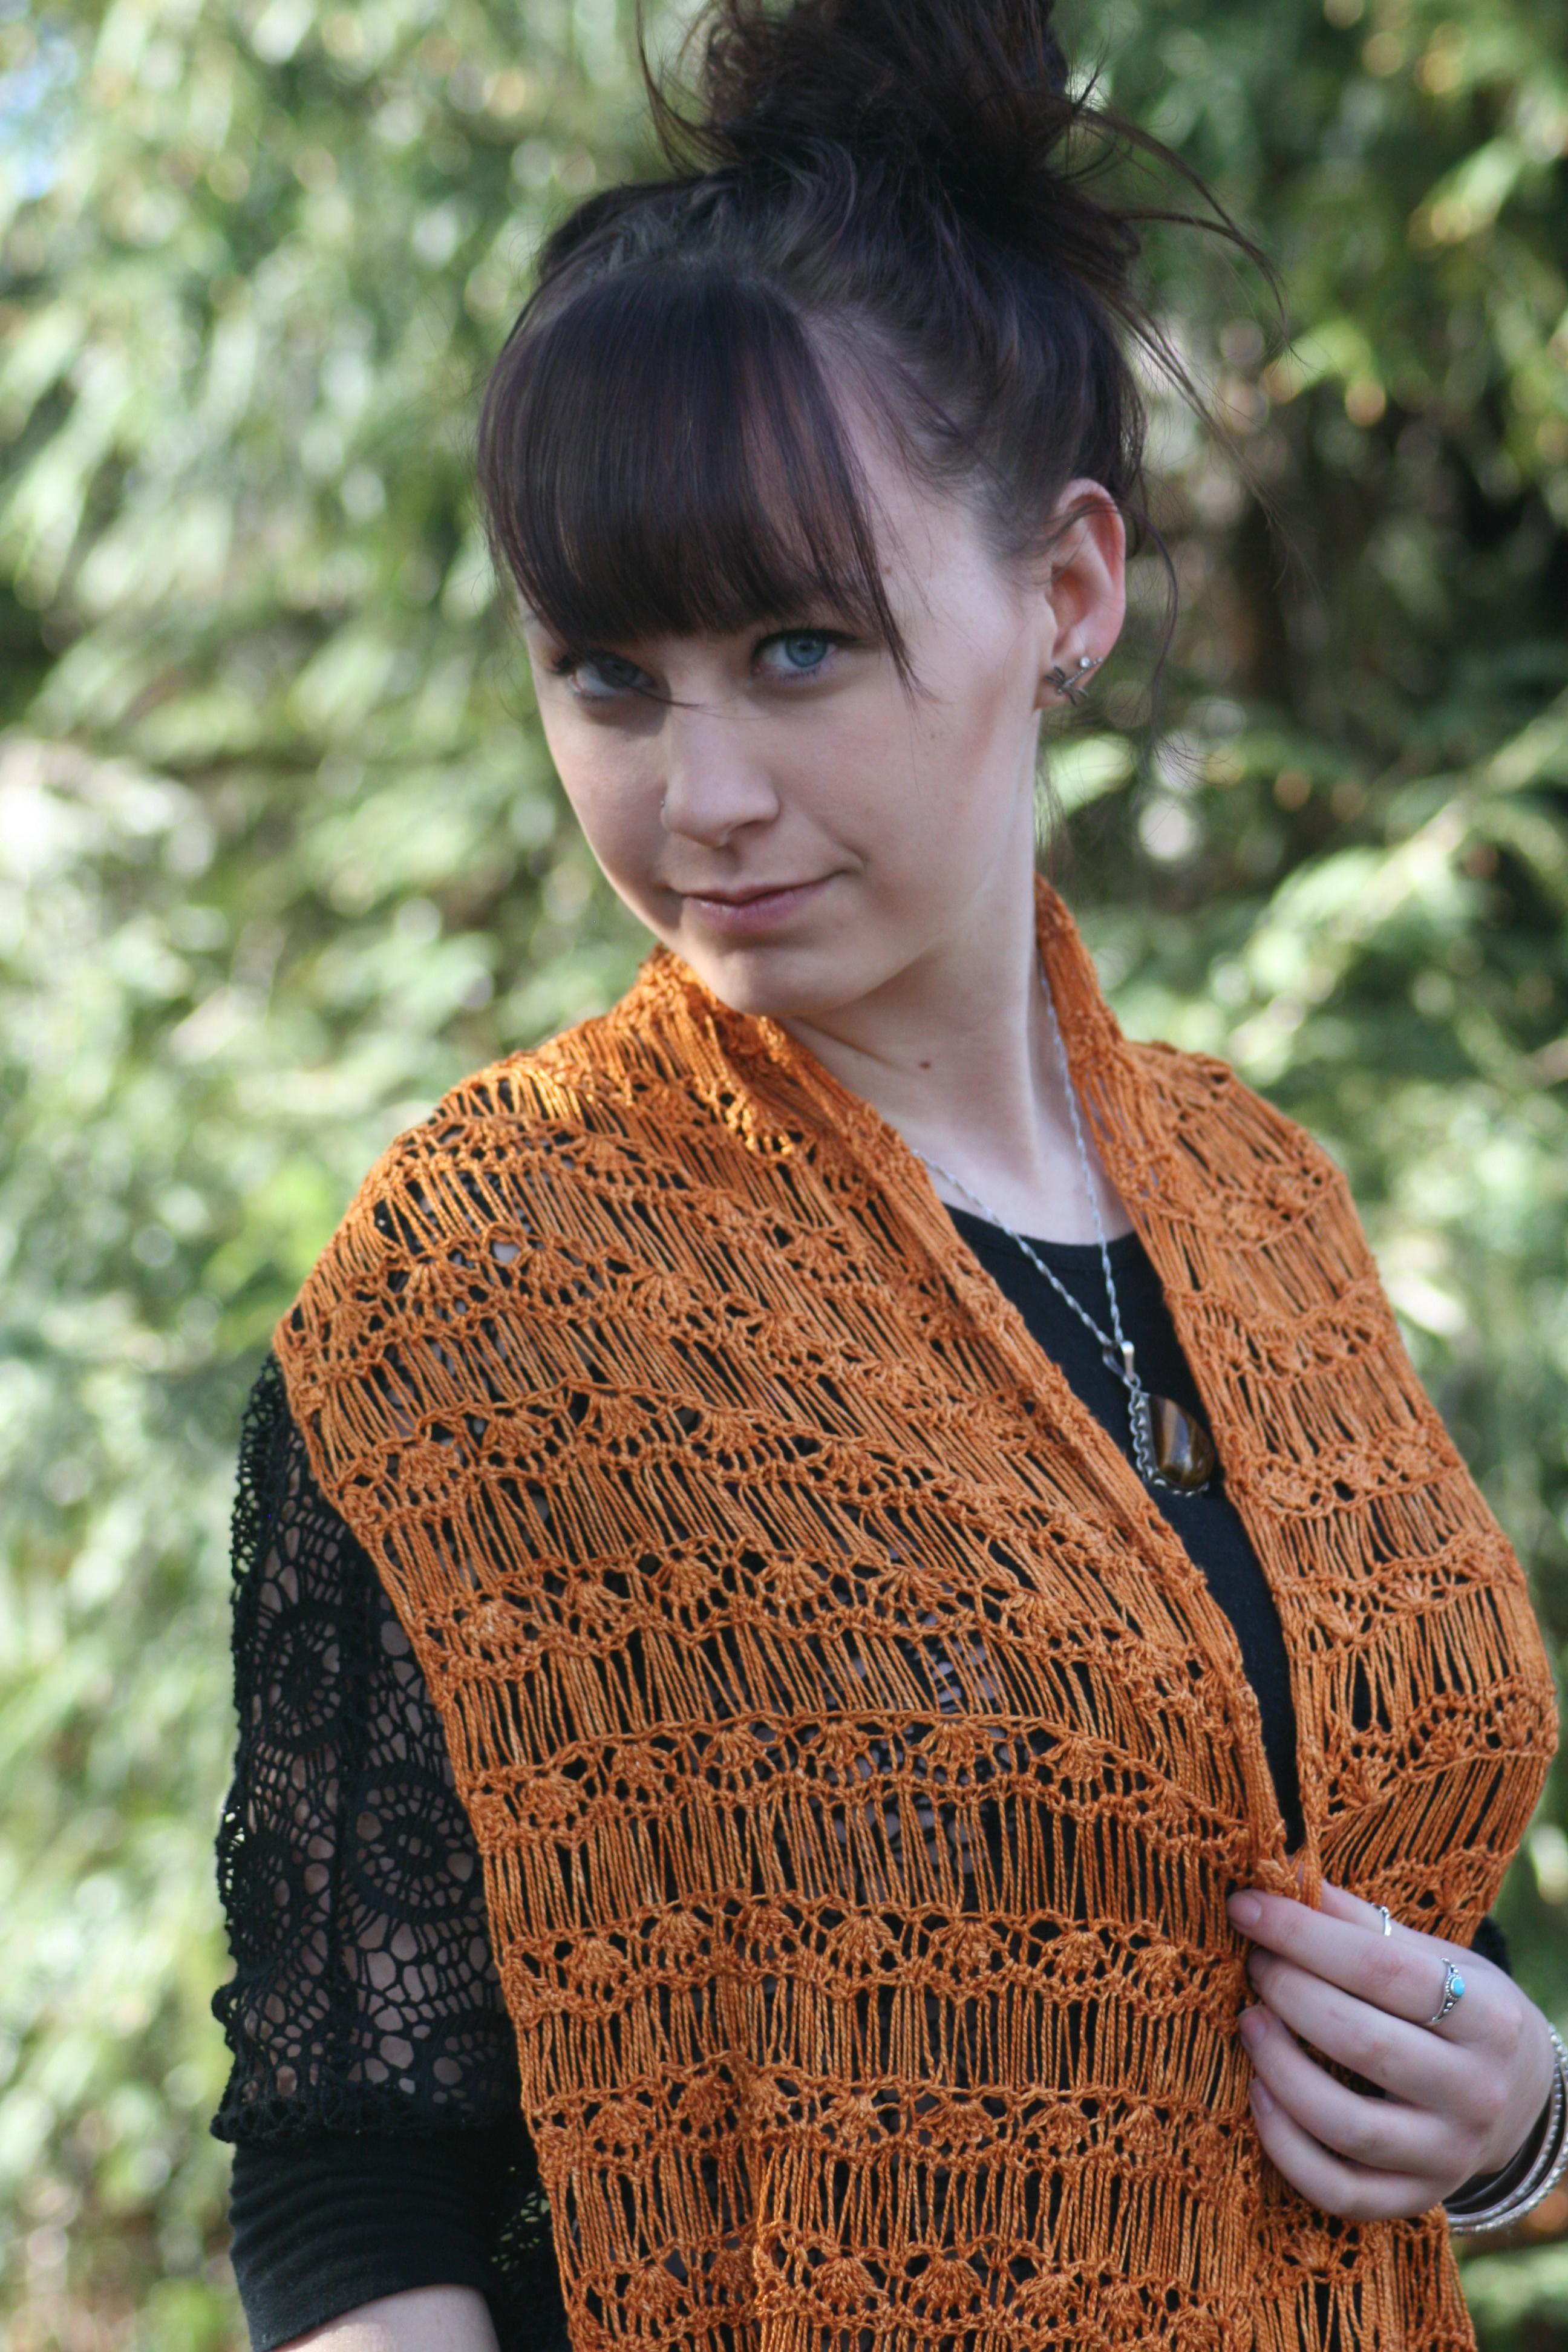
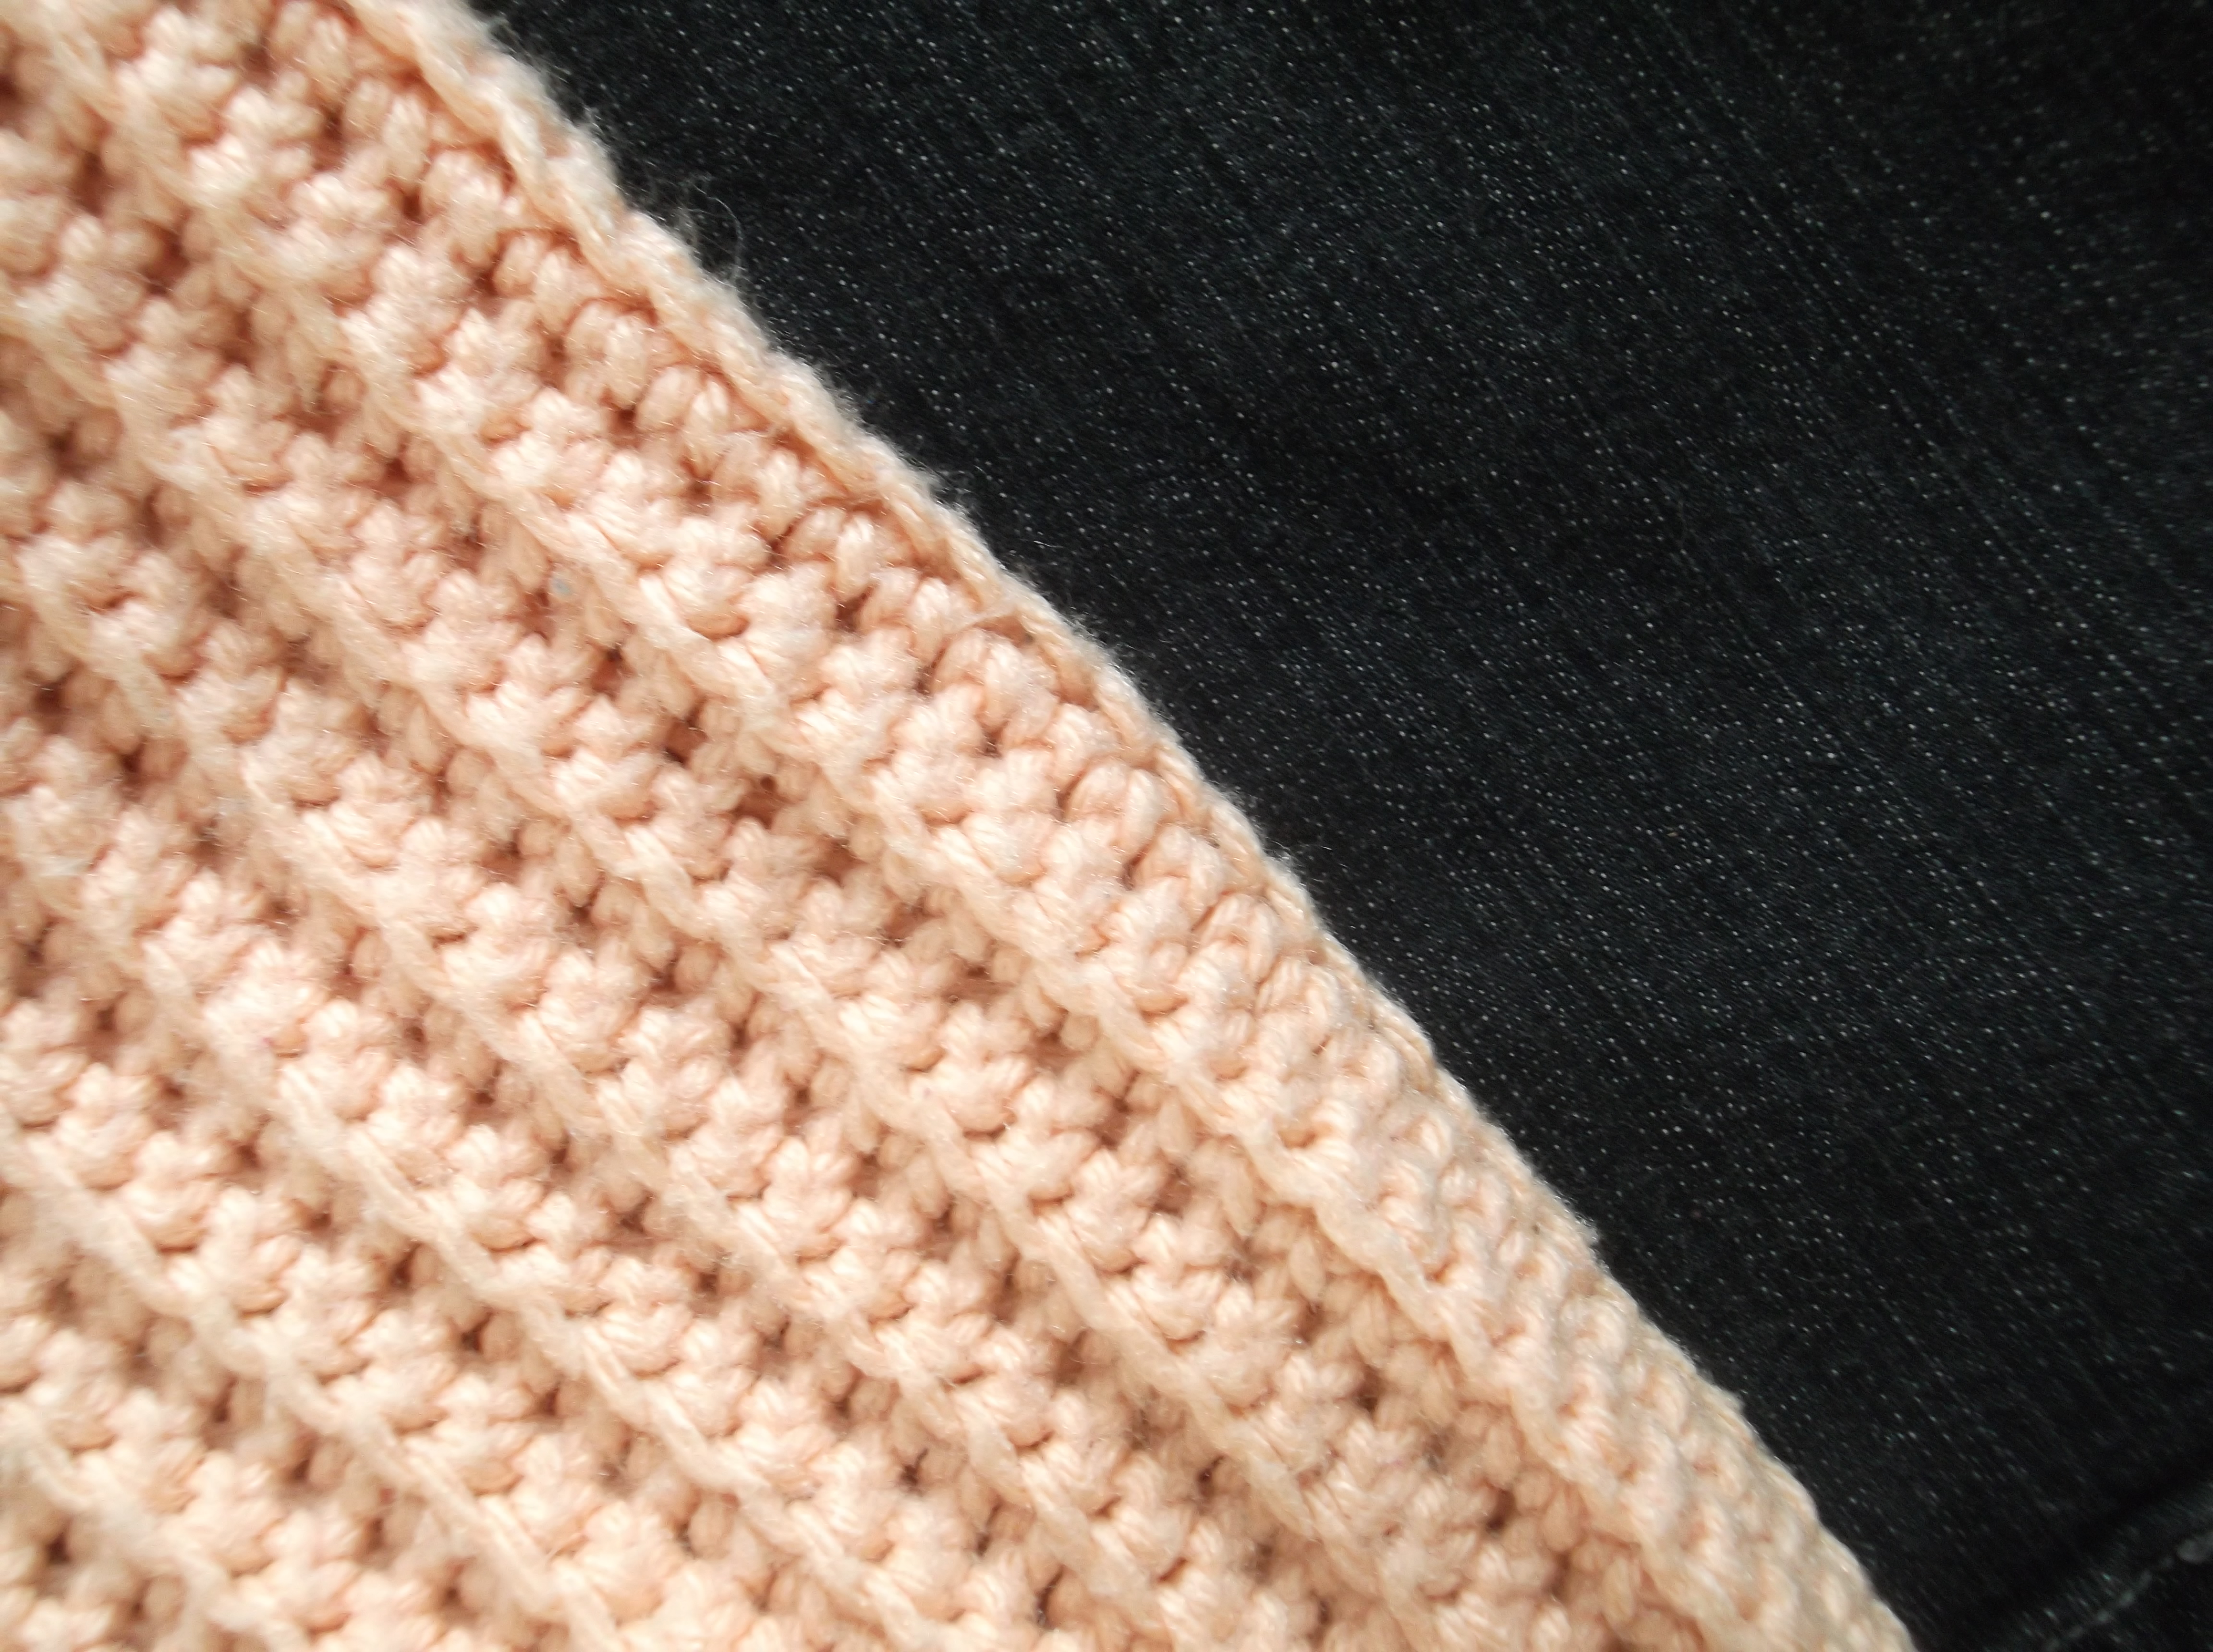
By simply creating a chain stitch at the very base of the typical stitch you create this extra height. Another interesting creation with this stitch is that it creates a fabric that is a little more “stretchy” than the traditional stitch, while giving a very similar appearance. I often mix this stitches in items that I create in a free form style to allow for smoother transition of styles, and I also use then mixed with more traditional stitches to create fabrics with subtle texture changes.

IMG_6328.1

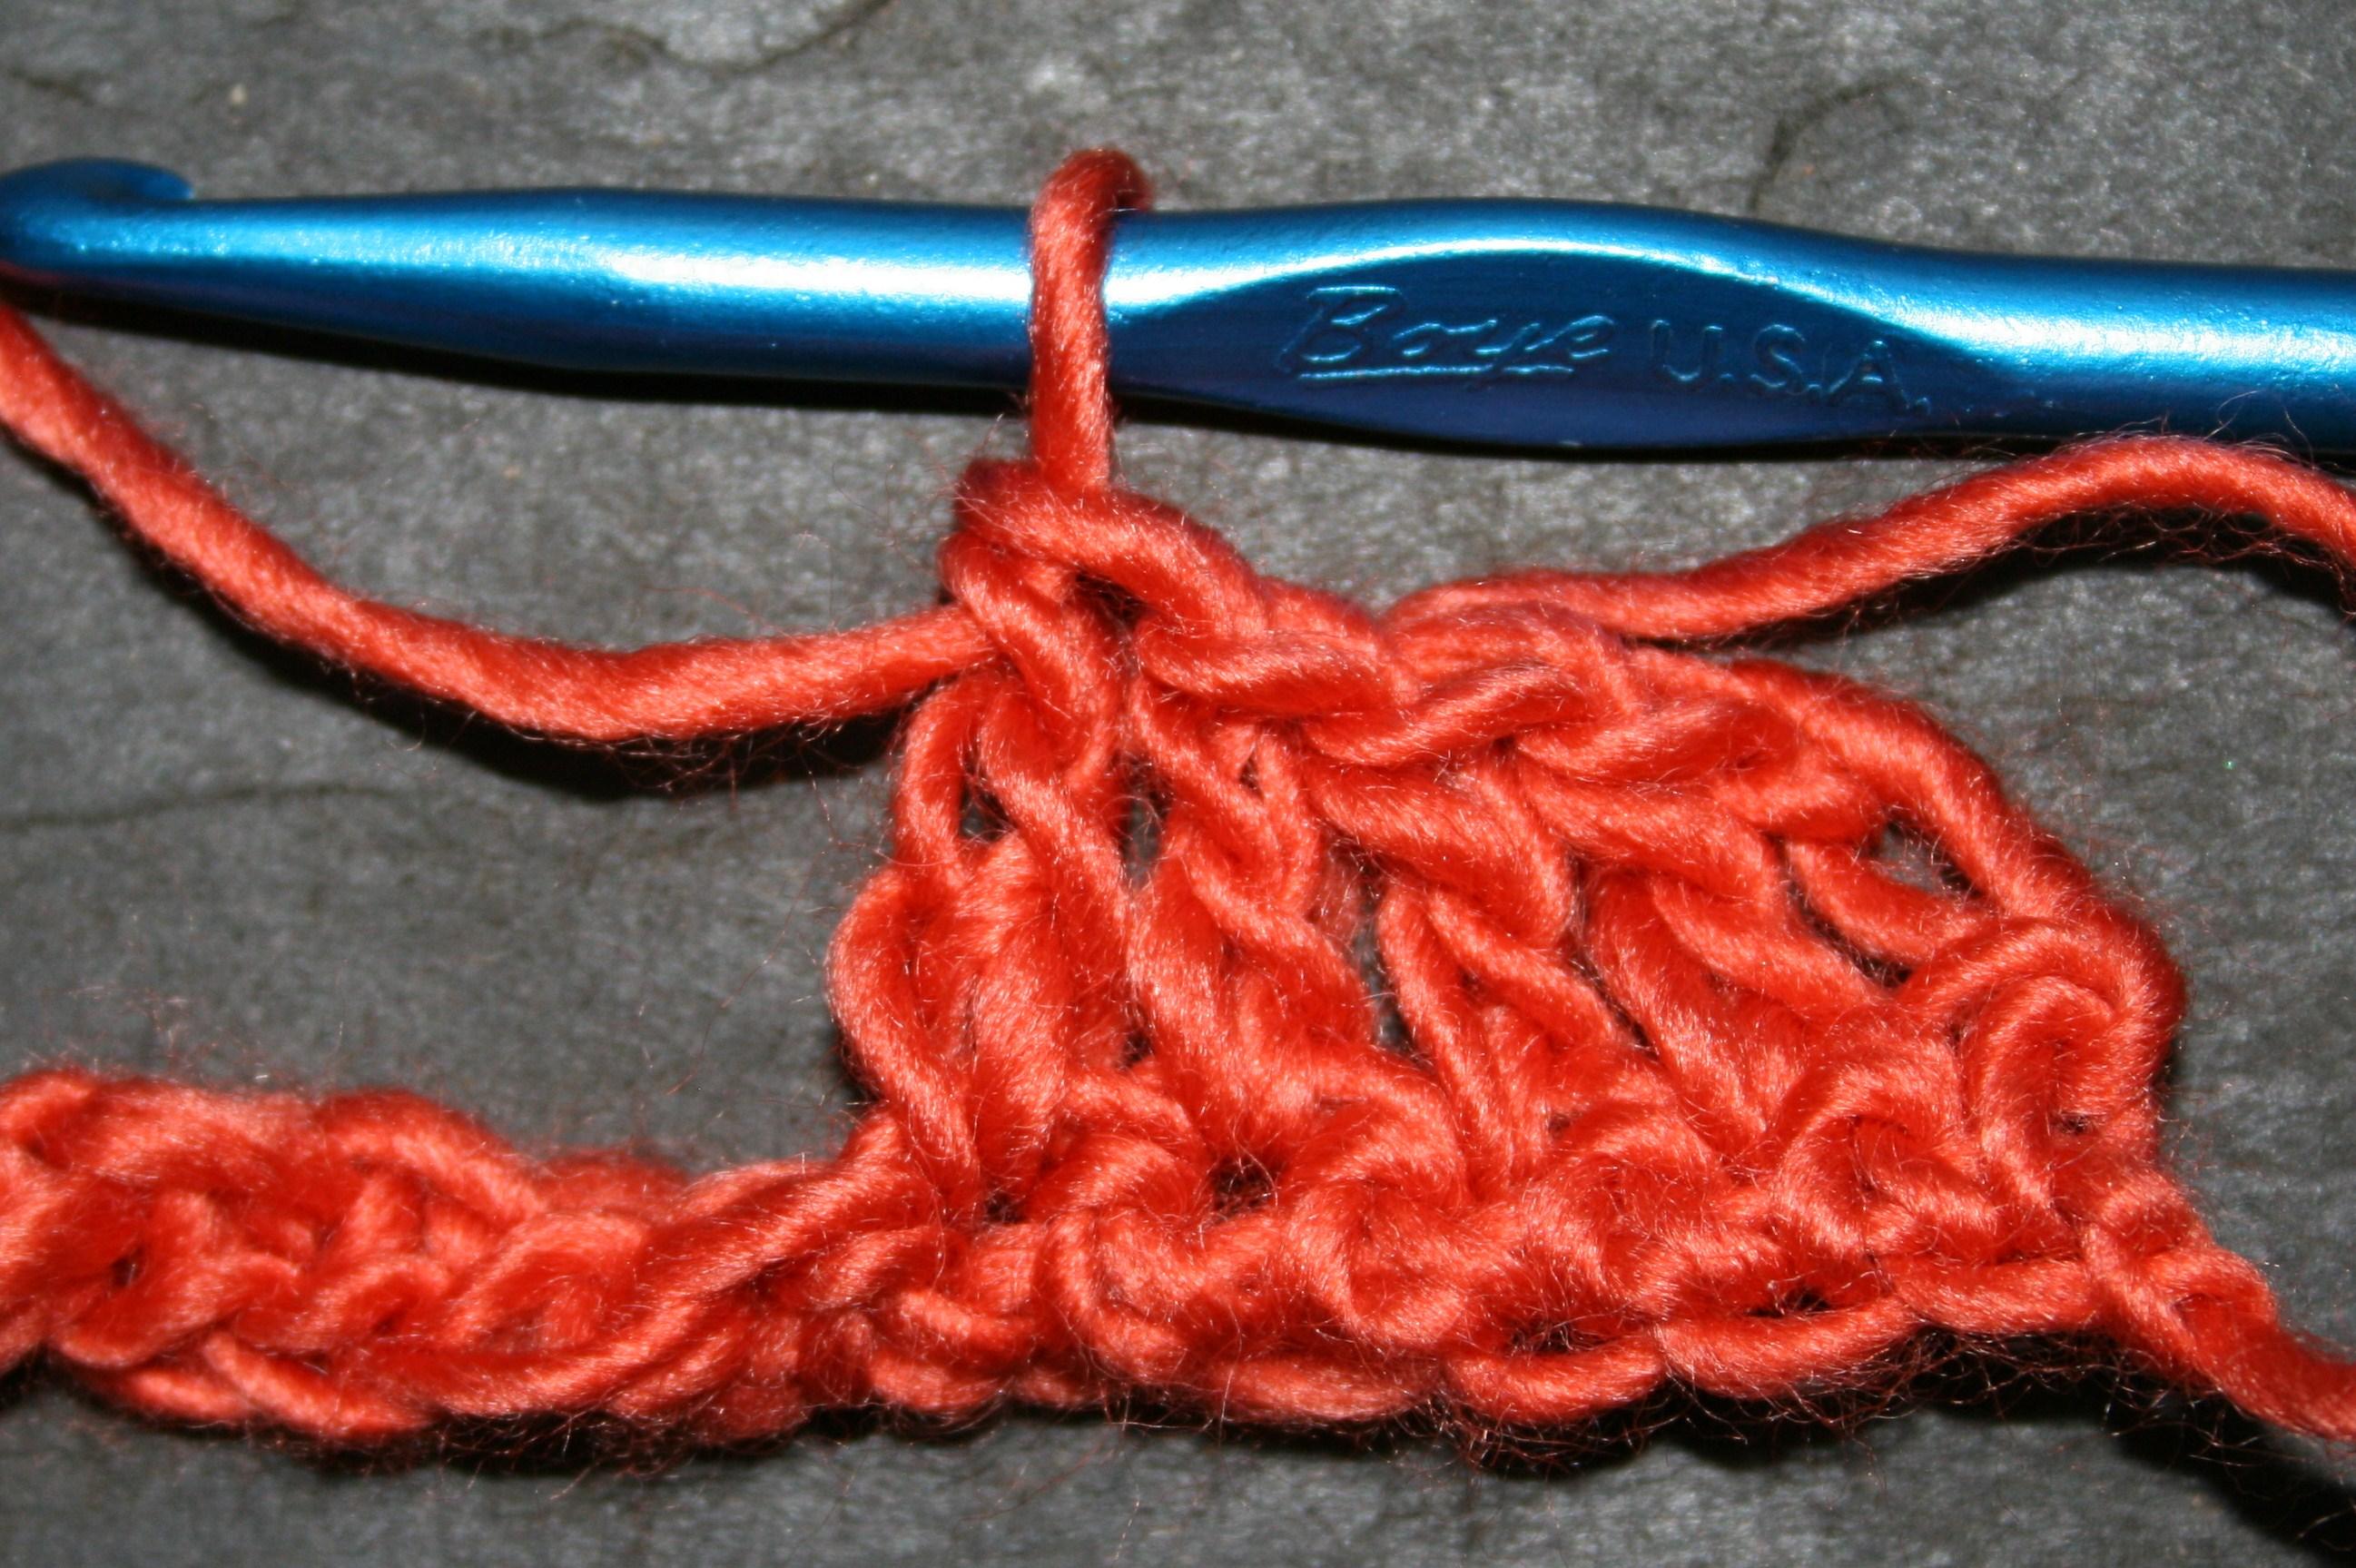
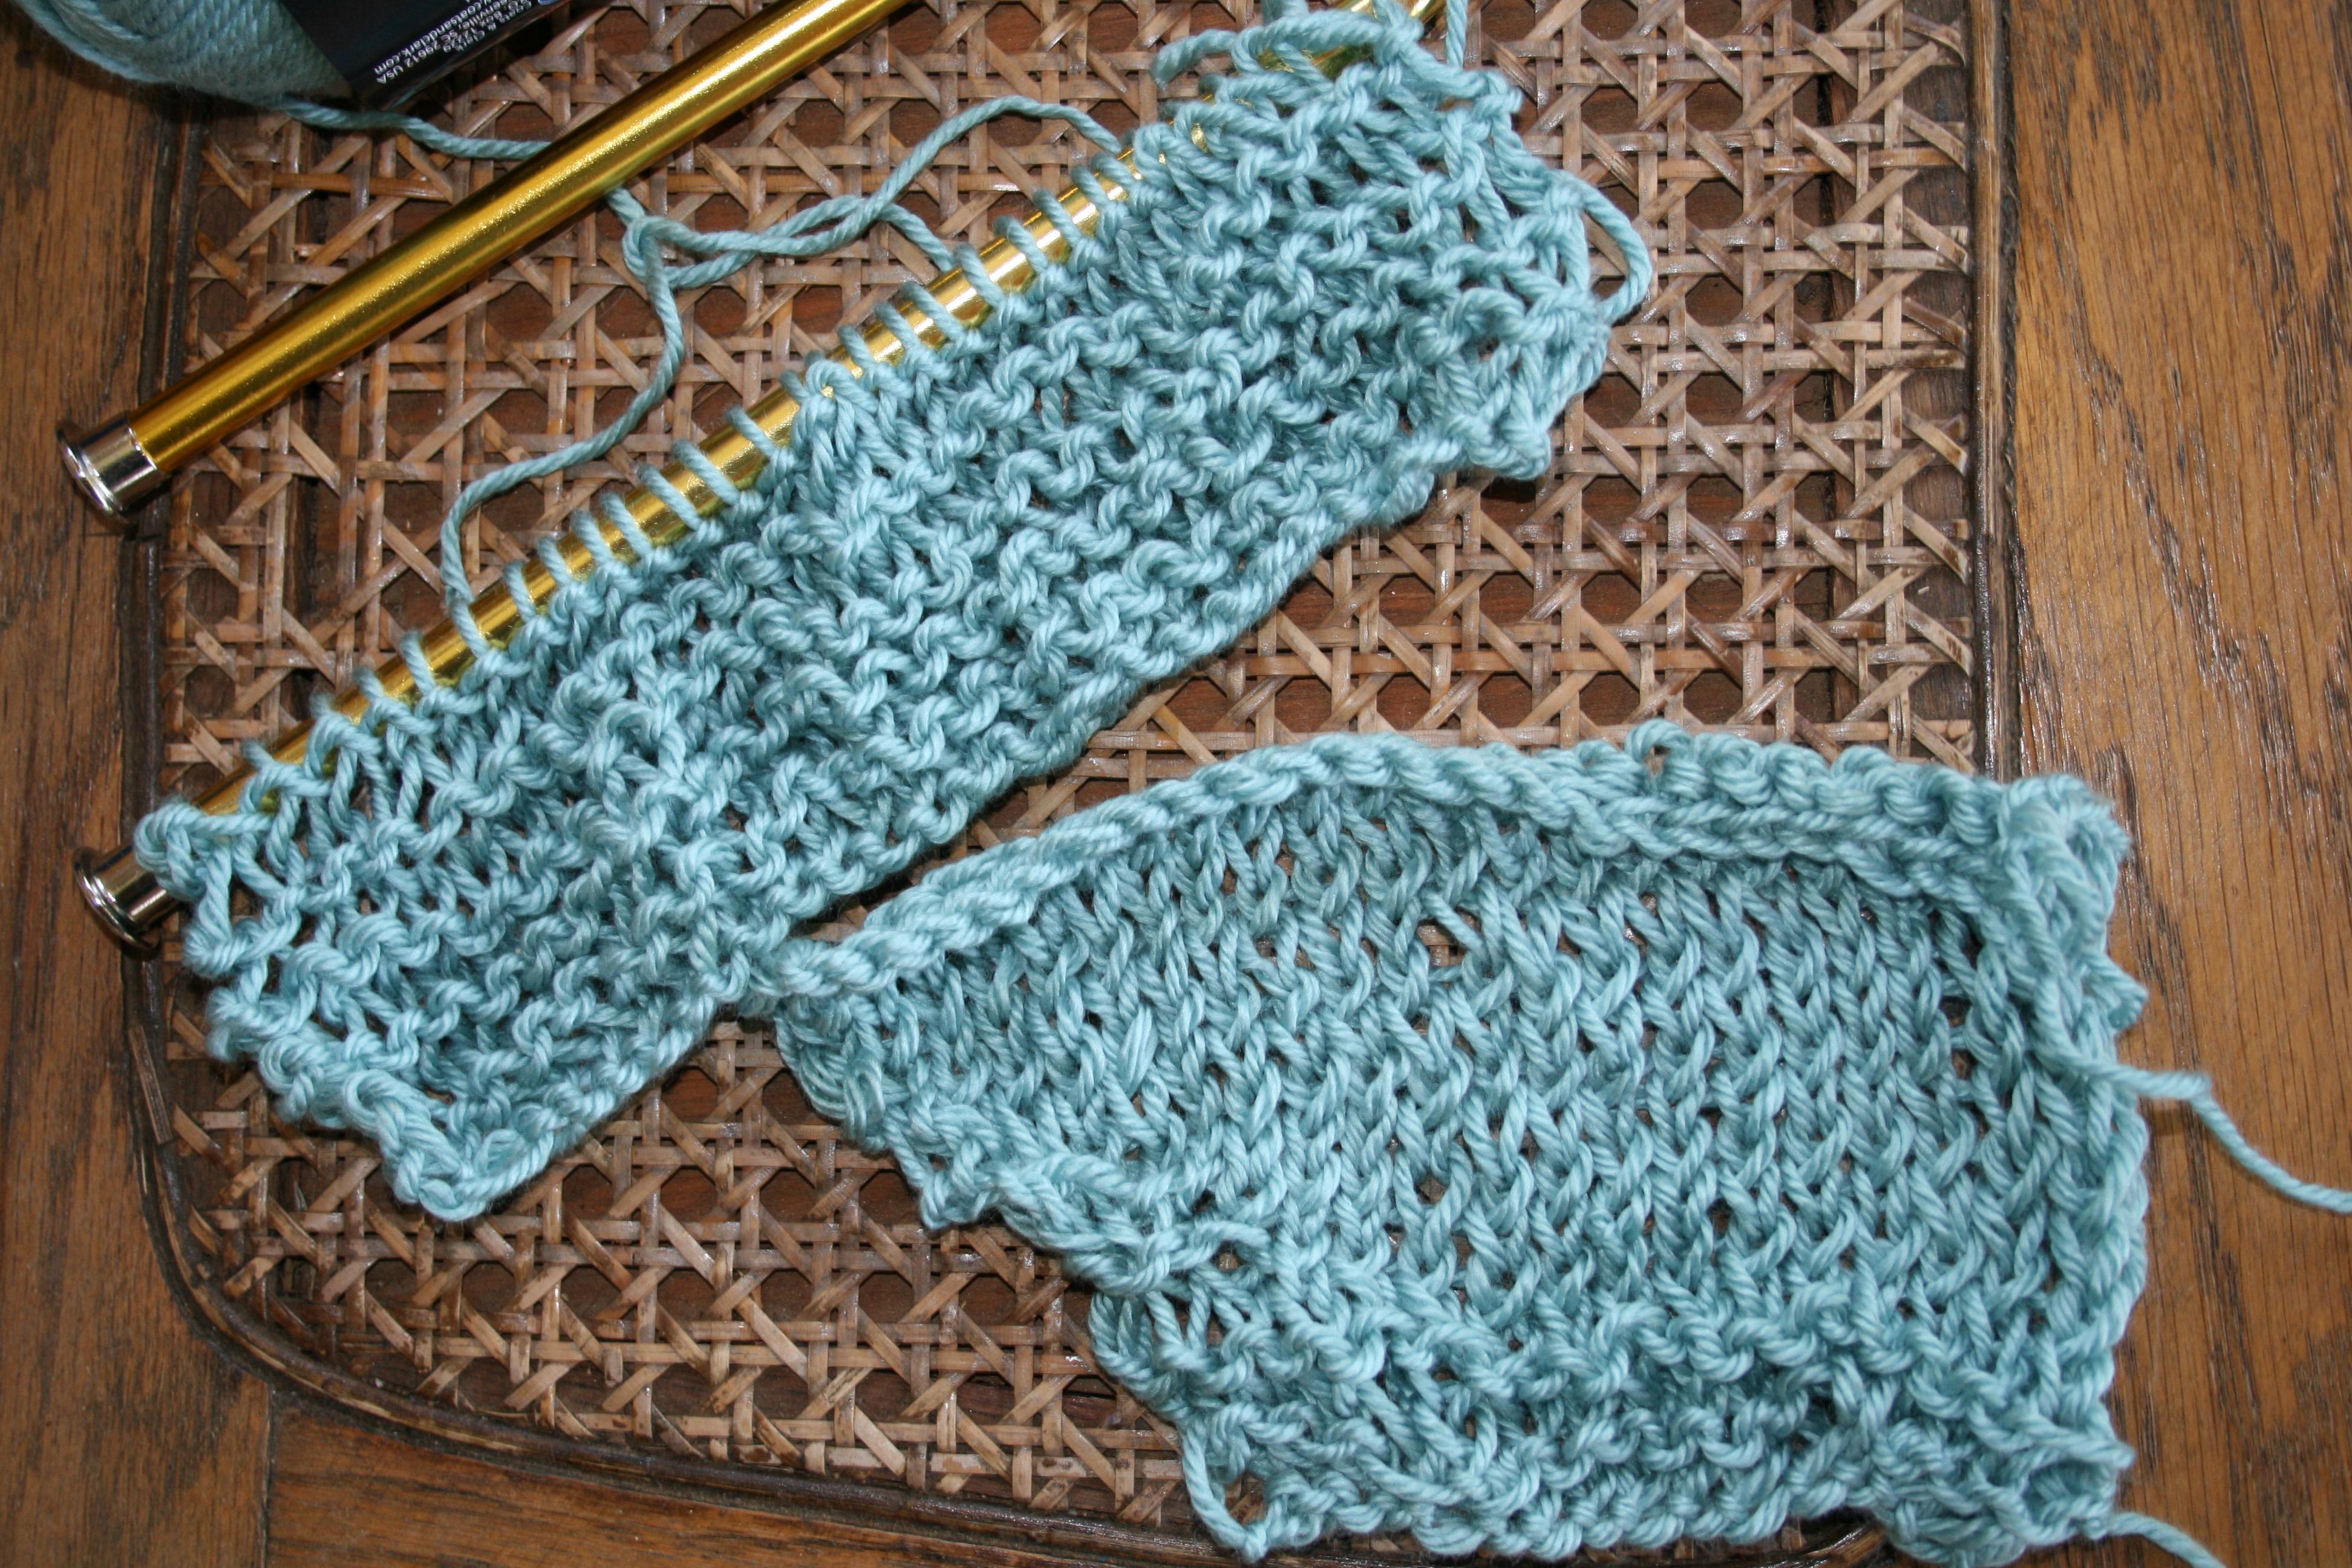
See the subtle difference between the stitch on the left and the one adjacent, the bottom of the stitch as a little more height before the first bar in the post

I hope this clears up any mysteries about this simple adjustments to everyday stitches, that can easily be added to you foundation of stitch knowledge.

My Drop Stitch Journey

ScannedImageAs any long time crochet has realized “fancier” crochet stitches really do not have a single name. The term Popcorn, or Cable give you the basic idea, but a Cluster can have a few different interpretations. So it is important to pay close attention to the “Special Stitches” selections of patterns, and if working up your own idea, remember to be consistent with the process or steps of your stitch.

IMG_6122.1 -copy

The Drop Stitch with Shells

With that being stated, I wanted to share how my version of the “Drop Stitch” came about.
Several years ago, I was attempting to find a way to create a round open loop within a row of fabric. I know you can create chain and skip spaces, but I have a vision that was a little different, almost like a “loopty loop” of a roller coaster. In my attempts to find this approach to fulfill my vision I began playing with some “long loops”. With these long loops I twisted, I stitched over, I stitched through and around, in various ways and found eventually found a way to make them secure in the fabric, and eventually began to see what resembled the effects of Hairpin Lace.

Summer Rays Drop Stitch Wrap- pattern.

Summer Rays Drop Stitch Wrap

I wrote up the process and created a short scarf for Crochet! Magazine in the Summer 2012 issue to explain what I found, and how to create it. Since then I have played with the stitch in a variety of ways in my personal crochet, even creating a self-published design earlier this year, Summer Rays Drop Stitch Wrap.(Available for $5 at Craftsy & Ravelry)
The principal behind the process is not the difficult; essentially you pull through a long loop in the indicated stitch. Then you remove your hook and dependent upon the design, insert the hook in either the same indicated stitch or into the adjacent stitch and pull through a loop, and slip stitch. This slip stitch secures the loop and you then move on to the next stitch. The fun in this fabric is that you can work across the ends of the loops to create a second row, and thus have a row of long open loops, similar to the drop stitch effects in knitting.
I have used this stitch in a wide arrange of yarns and am happy with the results of most. However the only ones I have not been as happy with are yarns that have a little “springiness” to them. They have a lot of stretch and easily return to their natural state (like some sock yarns). This did not allow for a very long loop, it caused the loop to pull back, creating a more 3D effect in the fabric, which I have not found a good use for yet.
I still have not found a way to create the circle of loopty loops that are in my head, but by playing with various techniques and concepts along the way, I hope to enjoy many more discoveries.

If you want to take another journey of a Drop Stitch, check out Kim Guzman’s new book Learn Drop Stitch Crochet, She works it a little different then I do, she uses a knitting needle to keep the loops more uniform.

Crochet Insights through Knitting

ScannedImageI have found that I need to keep my mind engaged with something new, and creating small challenges for myself is the best way for me to feel fulfilled and whole. When I focus this on my work in crochet it has usually been that challenge of “what can I create with this one skein of yarn”, or “how can I put this together differently”. However, this last week I took myself outside my comfort zone, it may seem a little sacrilegious, but I picked up a book and have begun teaching myself the basics of knitting. I know some out there are silently cheering that they have “converted me” and some are sighing that “I’ve gone to the dark side”, but neither could be further from the truth…this is just about a mental expansion.

IMG_6258.1

The books I learned to crochet and knit with. The knitting book has seen better days, but the house rabbit didn’t finish it off!

I have been crocheting for so much of my life, that I don’t know if I have a memory before I picked up a hook, but knitting was never something that I tried. When I learned to crochet, it was from a book, a Step-by-Step guide book printed by Golden Press in 1967. At the time I received this book, in a box of other books from a family member, there was a knitting book from the same publication (I think there may have been a macrame as well as some paper dolls and coloring books, it was quite a little assortment). I never really paid the knitting book much attention, I know my sister picked it up at one point years later and learned the basics of knitting (although I think her heart is into needle felting and sewing at this time in history).
So the book was just “around”, well I picked it up this week and gave it a go. The smallest needles I have in the house were 10mm, as I usually only use one and that is for broomstick lace. Well I managed to find a pair, and began to cast on. I have heard horror stories from knitters about casting on, but working different techniques in crochet made this feel natural (at least if I did it correctly, but it looks good so far). I believe the cast on I did would be referred to as the “long tail cast on”, and then I proceeded to work the knitting and purling stitches.
I will admit, I have found this to be a little awkward, I am not quite sure how to hold the needles so that they fell comfortable to me, the needle that I am working loops off of just isn’t sure where it should be. I am constantly fearful that those little loops will jump off the needle and then I will have a mess. But I will admit, it has been a good mental exercise for me.

IMG_6260.1

My first 2 knitting trials, I might have a little room for improvement.

I decided to give knitting a try for a couple of reasons, for one I have been teaching more often at knitting groups interested in learning some crochet skills such as Tunisian. By understanding the process they are use to it makes it easier to explain. Another reason was to better understand my crochet. So what I have managed to learn in the last week: That loops of either working method really adds the “bounce” to the fabric. These loops (the primary work of all stitches in knitting, but the loops that are pulled through on the crochet hook) are the essence of the yarn itself. If you begin with a yarn that is “springy” or is “stiff”, the loops are the parts of the stitch that highlight this quality. Granted, drape of a fabric can be affected by the hook or needle size being used, but the yarn will always shine through and these loops is where it happens.
Understanding the relationship of the stitch process and the yarn nature really helps to define and appreciate the techniques and the end fabric. This is an enlightening adventure…I wonder where it might take me next….

Crochet Cursing! Blocking?

ScannedImageI am going to use a curse word in the world of crochet…Blocking. Okay I said it, and I admit it is not my most favorite part of crocheting.
Over all my many years of crocheting, I never blocked my work, but I have a new understanding and appreciation for it in the more recent years.
So in my earlier years of crocheting I mostly created afghans made of acrylic yarn, really looking at it, blocking would not have made much of a difference in my work. But as I began using more natural fibers, I can really see the difference blocking has to offer. This is even true of some of the new synthetic yarns.
I began to thinks about blocking different when someone expressed it as “a way of setting the stitch”. This one phrase opened up a new line of thought about this process, and caused me to investigate how this technique affects my fabric.

IMG_6251.1

Unblocked, they look okay, but the detailing is not as evident.

So what is blocking? Blocking is the process of using moisture to open up the yarn fiber and set it into a desired shape. Yes, you may have already crocheted it into the shape you want, but the original structure of the yarn want s to pull it to itself. By adding moisture, (using a spray bottle of water, or steaming with an iron) the fiber in the yarn relaxes and opens up to the structure you have created. For best results, you should test the blocking on a swatch to determine what the best method of blocking is. Essentially this is a “lay flat to dry” kind of project.
This process is not only used in your finished fabric. The method of getting a fiber wet and setting it to a desired structure actually takes place in handspun yarns as well. It is referred to as “setting the twist”. After a yarn is plied (more than one strand spun together in the opposite direction of the single strands), it is submerged in water to remove the air. It is then snapped like a whip to remove the excess water, and hung to dry, sometimes even weighted (hanging weight at the end of the hank) to set the twists of the yarn. So setting a stitch by blocking is much like setting the twist in the yarn to begin with. It allows the fibers to “receive a new memory” of how to sit and where to belong.

IMG_6254.1

Blocked, you can see more of the open work, and everything is a little crisper and more defined.

I do not use blocking to attempt to create something other then what I stitched, I do not attempt to get an additional several inches to my project and become something it is not. I use it to open up my open stitch work, my lace, help set my edges straighter, help my yarn to know where its new home is.
I guess I really cannot call it a curse word any more; it is a functional tool in my bag of techniques…but still not one that I love…

Air Pockets…They make the Difference

DSCF0578 - Copy

Rugby in the rain. We received about 8″ with this storm, completely welcomed after nearly 2 months of dry and warm weather.

ScannedImageThe other day, while standing in the long overdue rain, watching my son’s Rugby game, I was thinking about what makes my crochet hat and gloves warmer then my denim jeans. The answer is simple, but also kind of surprising; air. The more little pockets of air that are trapped next to the skin, the warmer you can stay.

The process used in twisting the yarn and creating little knots, creates little pockets that trap air. Depending on the yarn and stitch combination, different levels of warmth can be created; this is why lace can be warmer than expected. The more things are compressed and made tight and dense, does not necessarily create a warmer fabric as it can press the air out of the work.

This is true with the yarn as well. Often it is realized that wool is warmer then bamboo, this is because of the fibers that are used. Bamboo, even though it is a plant fiber, is processed and extruded in factories creating a long smooth yarn that absorbs moisture, and thus in hot weather will keep you cooler by wicking away perspiration and allowing it to be evaporated. While the animal fibers that are utilized in wool yarns, are created naturally to keep the animal warm and dry. This is done by the crimp of the fiber itself.

DSCF0582

2 locks of wool, notice the crimp of the fiber

Wool fibers are not like hair, they are crimped (like the fashion in hairstyles from the 1980’s), it has stretch (like elastic) and it grows in clusters (a patch grows together and can be plucked out together as one group). This nature helps to create air pockets in the yarn that is being created (depending on the process used, more or less air can be trapped).

DSCF0584

My single crochet ribbed hat over my denim pants

So while my woven denim might be durable it does not offer as much warmth because the amount of trapped air is limited. But that hat, made only out of single crochet ribbing and my gloves made from back loop single crochet kept me quite toasty in comparison.