Crochet & Knit Pattern Bundles- JUST FOR ME!

When the year ends and I look to the next with eager eyes and a clean slate, I want to be inspired with some new crochet and knit projects. I want to make something JUST FOR ME! (and a crochet & knit pattern bundles are fabulous to get me started)

I am not alone in this sentiment. So I joined 40 of my crochet designer colleagues and created the Crochet for Me Bundle. Then I joined joined 15 of my knit designer colleagues and created the Knit for Me Bundle.

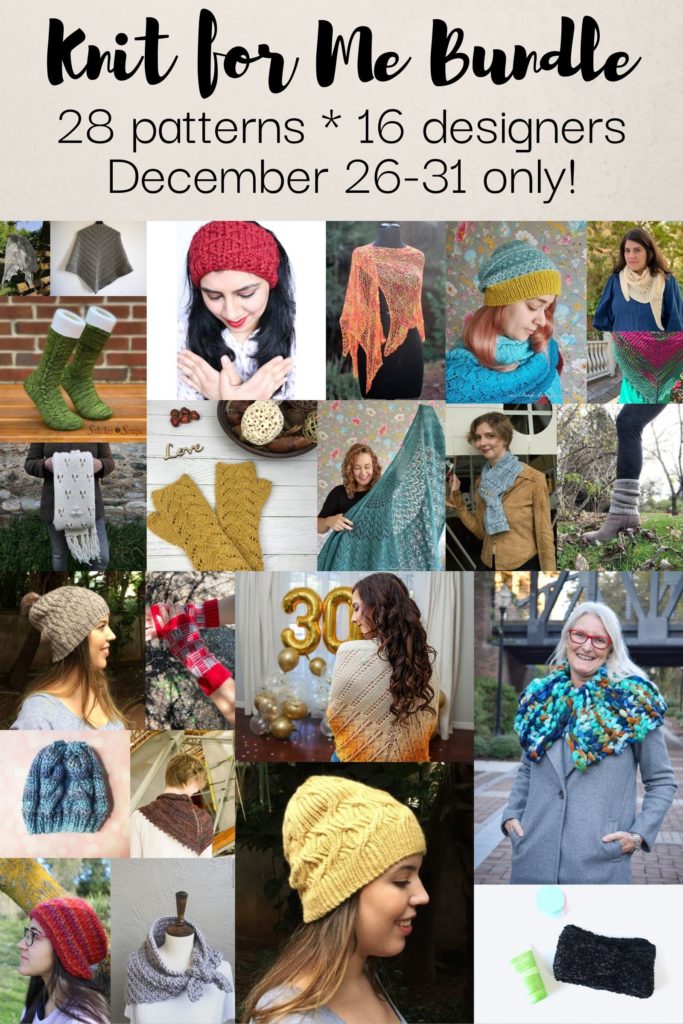
The Crochet for Me Bundle is chock full of 56 individual patterns (while the Knit for Me Bundle as 28 individual patterns). Never before offered in a bundle or for free, that will give you a wide range of patterns that will suit you from head to toe.

All sorts of patterns are included from hats and earwarmers, to sweaters and shawls, a skirt, socks and slippers, and even a pillow for your lounging pleasure. There is a ton of selections in these crochet & knit pattern bundles!

The Just for Me- Crochet for Me Bundle

I have 3 designs in this limited edition bundle.

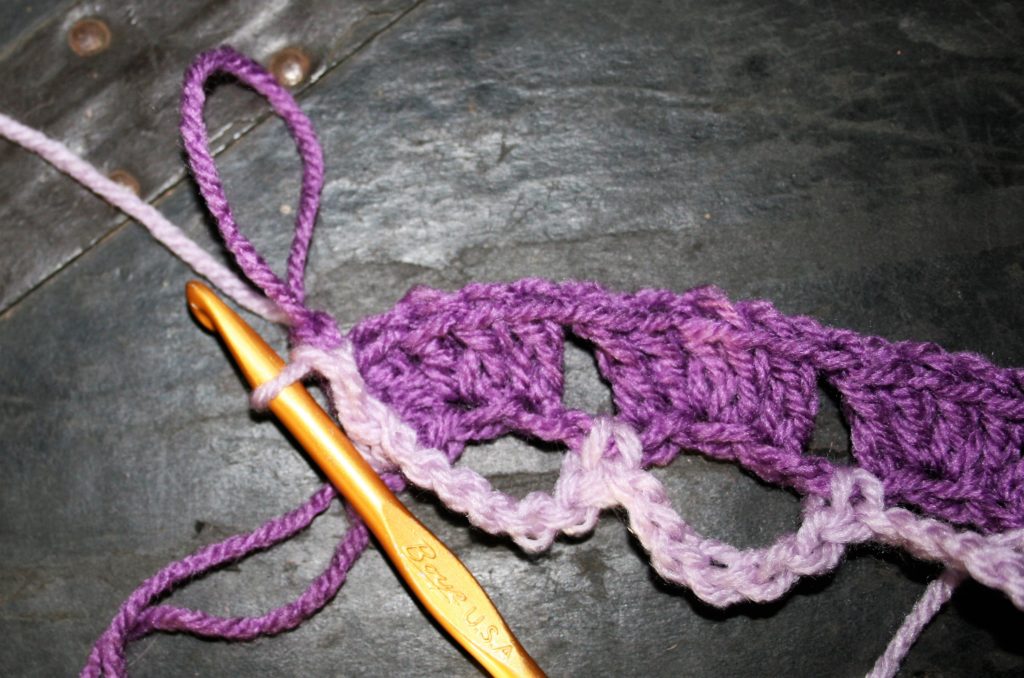
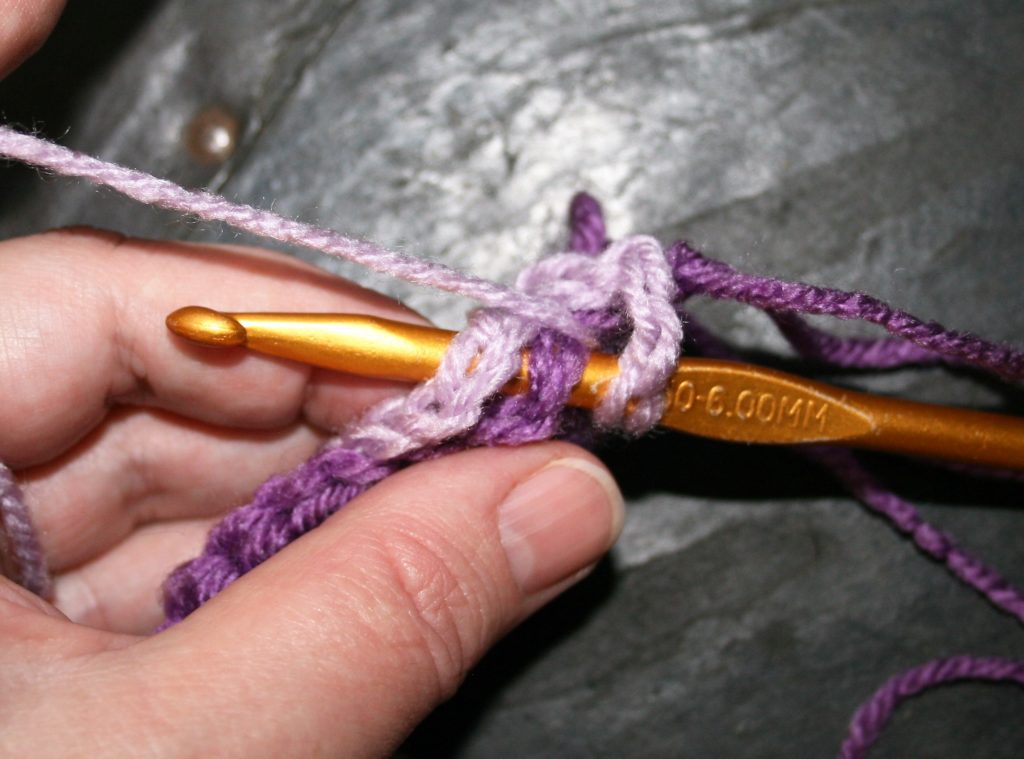
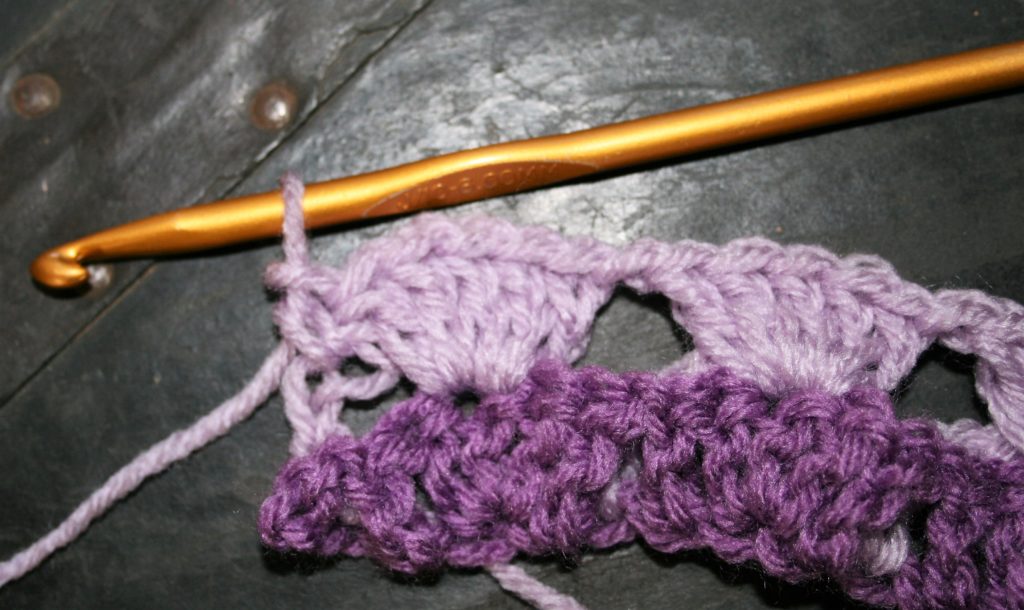
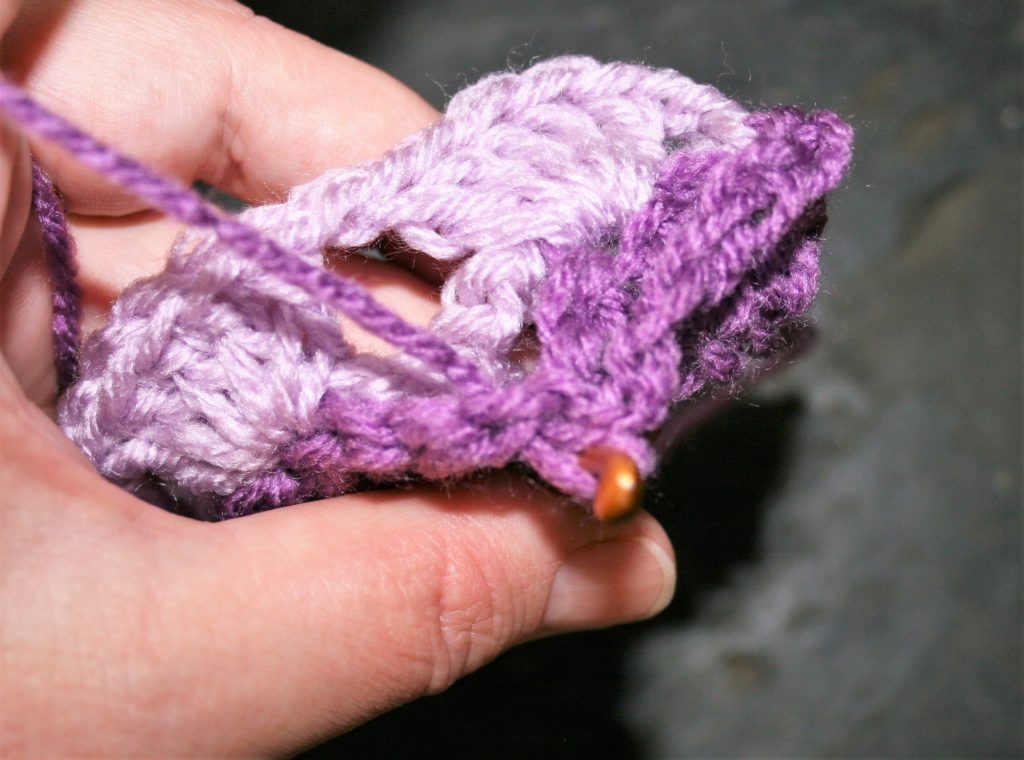
Dragon Scales Beaded Fingerless Gloves are a great project. Use only a bit of yarn, are adorned with beads to feel perfectly special.

Diamond Scales Fingerless Gloves

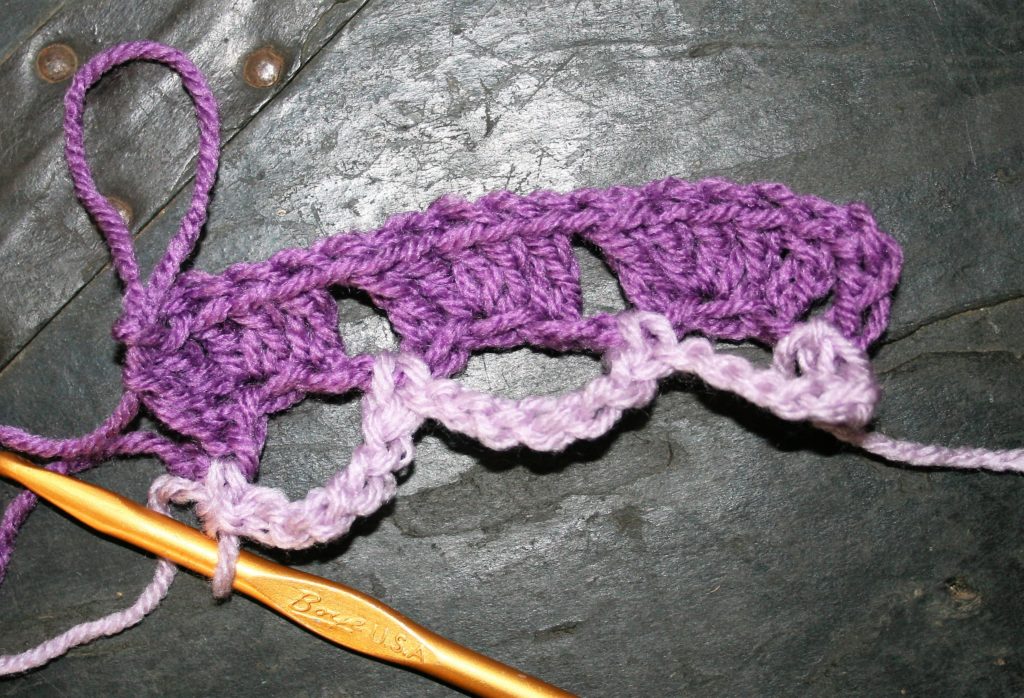
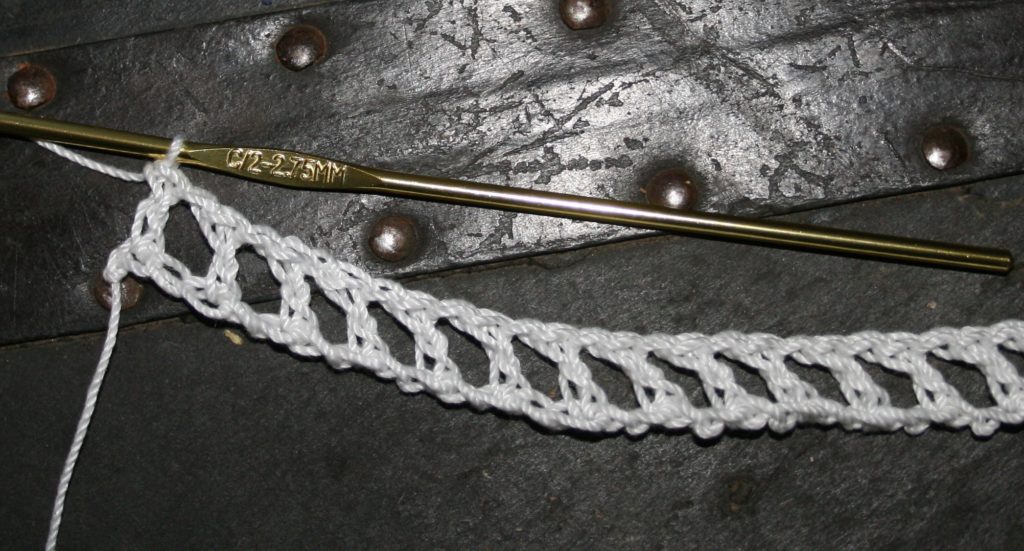
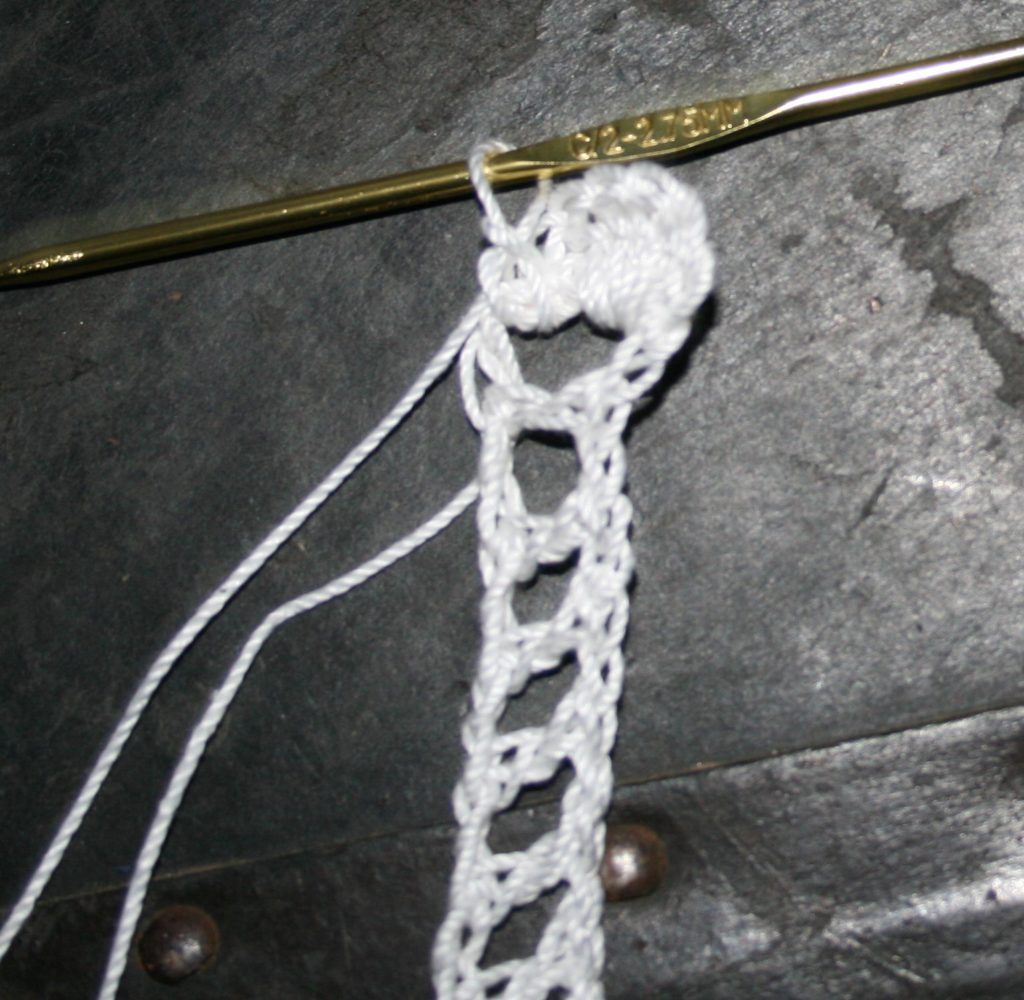
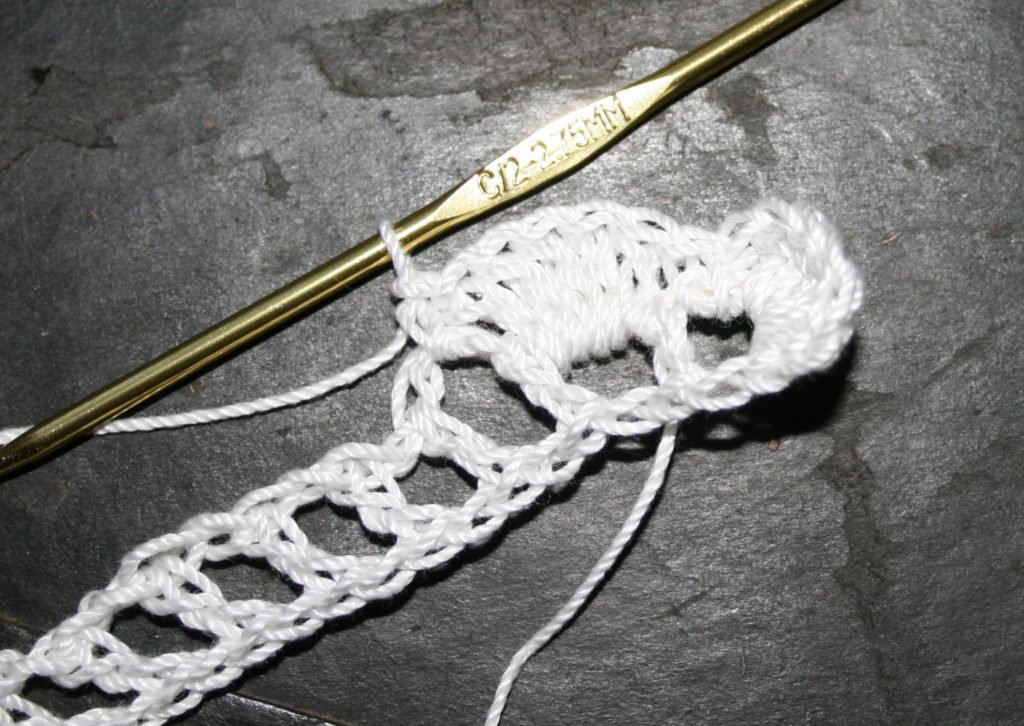
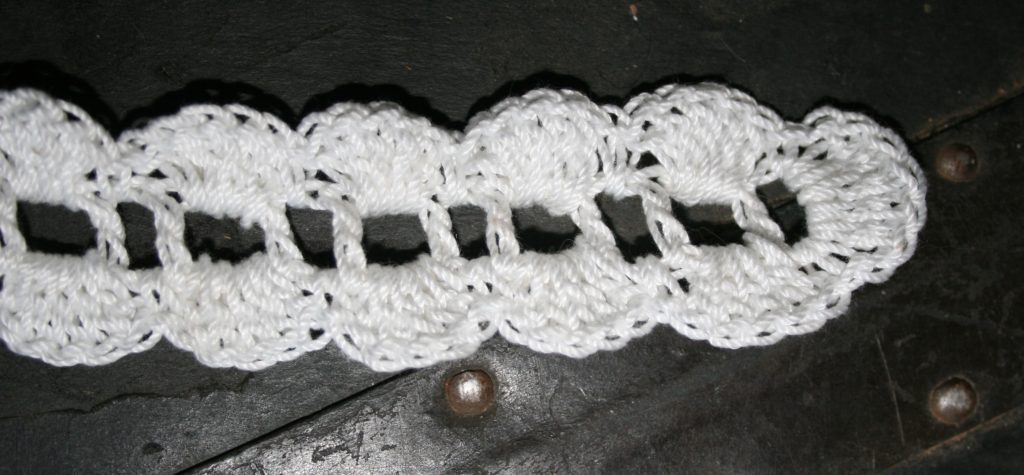
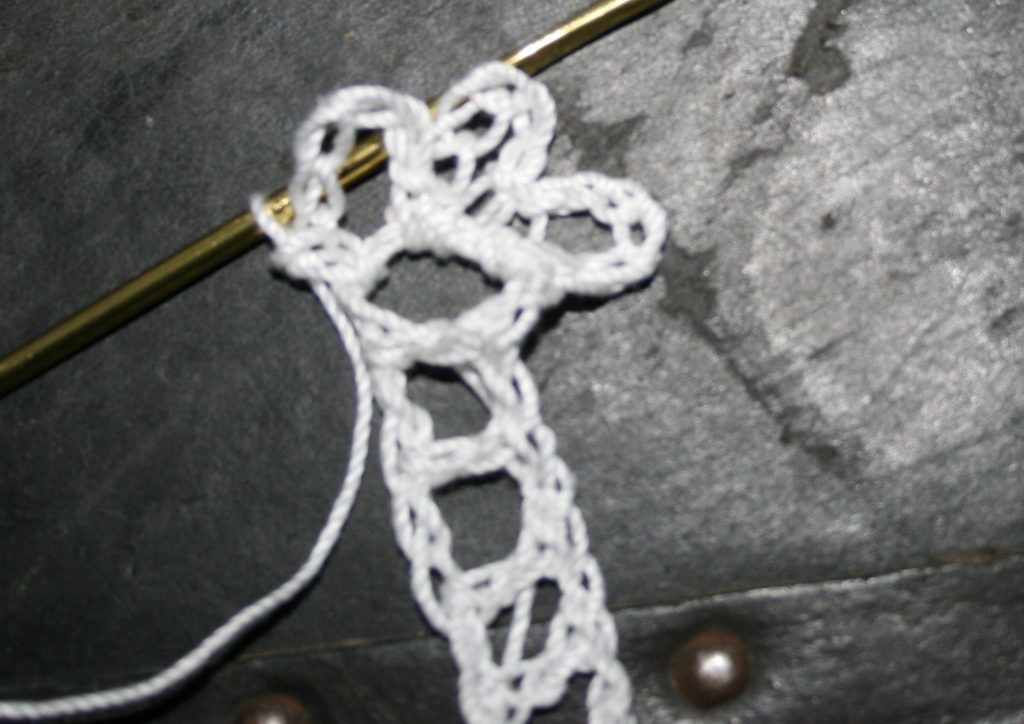
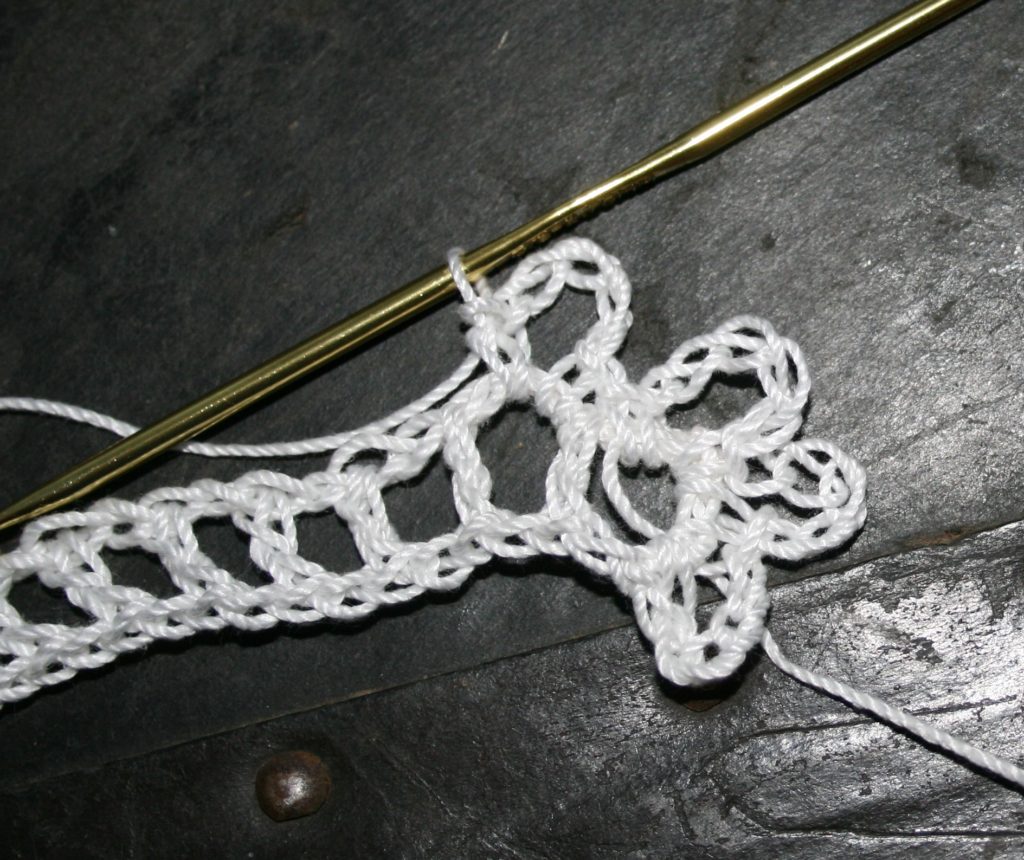
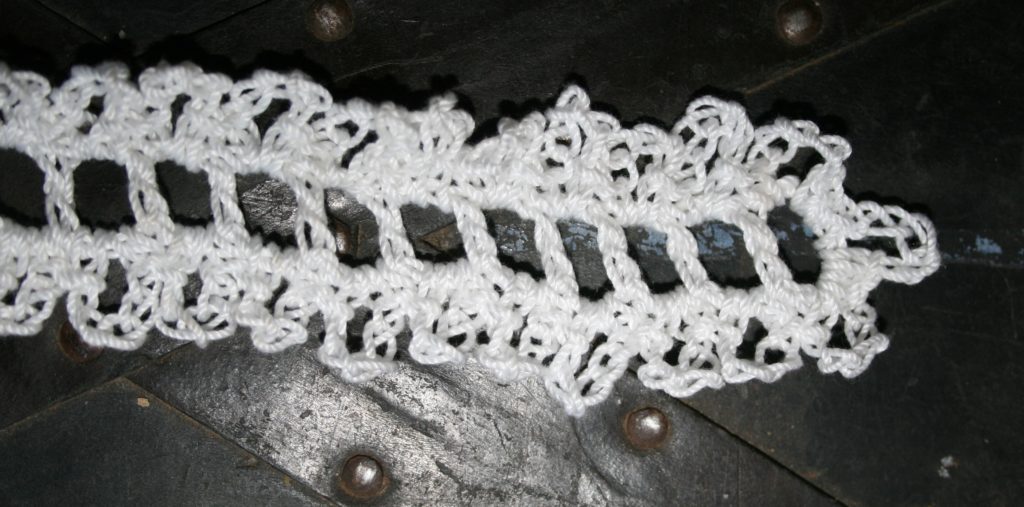
The Watershed Bruges Top helps take your crochet to another level. Created entirely in a single strip of Bruges lace, worked in a spiral all the way around the bodice.

Watershed Bruges Top

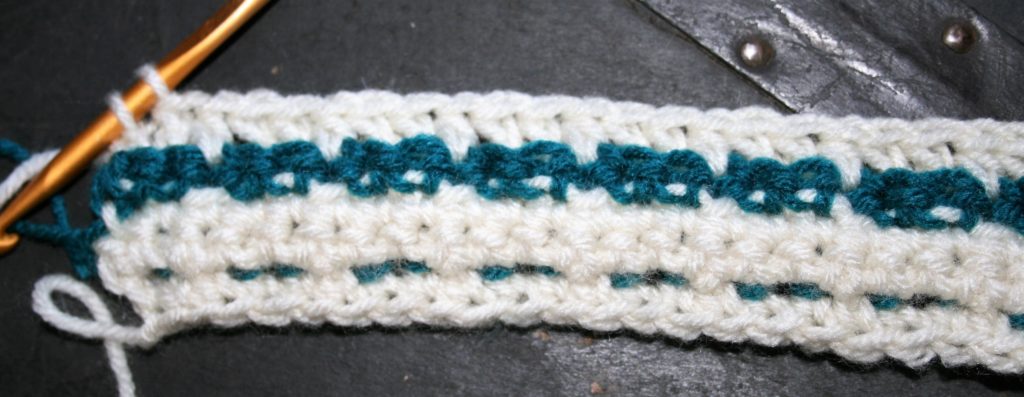
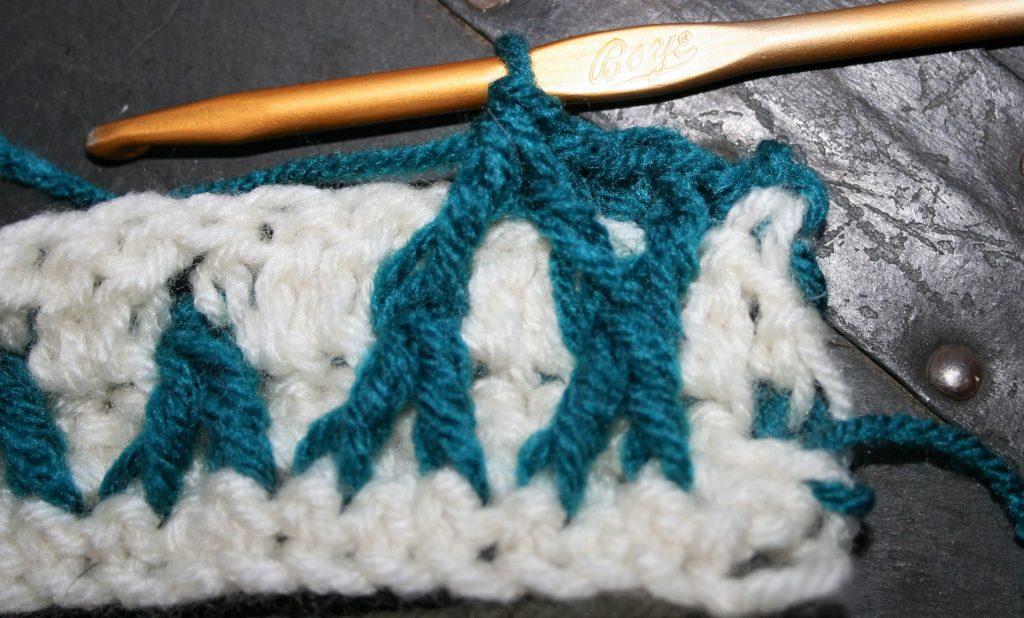
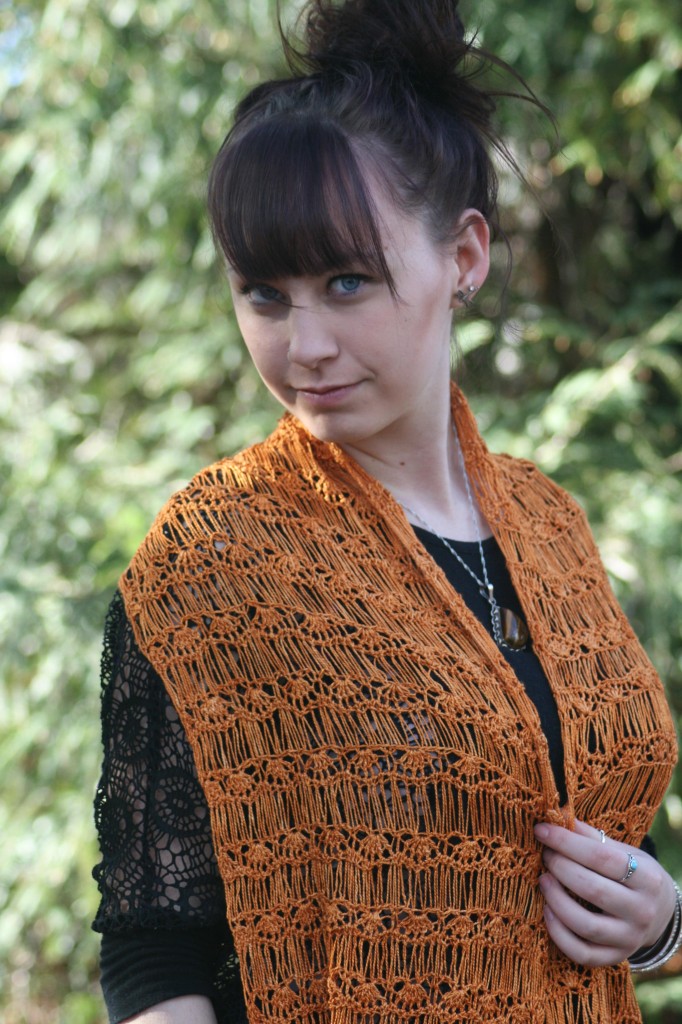
The Summer Rays Drop Stitch Wrap is takes your yarn to a new level. Created with a unique stitch, the Drop Stitch or Mock Hairpin Lace. There is no loom, no special tools, just your hook.

Summer Rays Drop Stitch Wrap

Get all 56 patterns featured in this bundle for only $27. That’s less than 50 cents per pattern! But the offer is only available through December 31, 2020, 11:59 PM Eastern, and it absolutely will not be extended nor repeated.

Get the CROCHET FOR ME BUNDLE!!! -JUST FOR ME!

The Just for me- Knit for Me Bundle

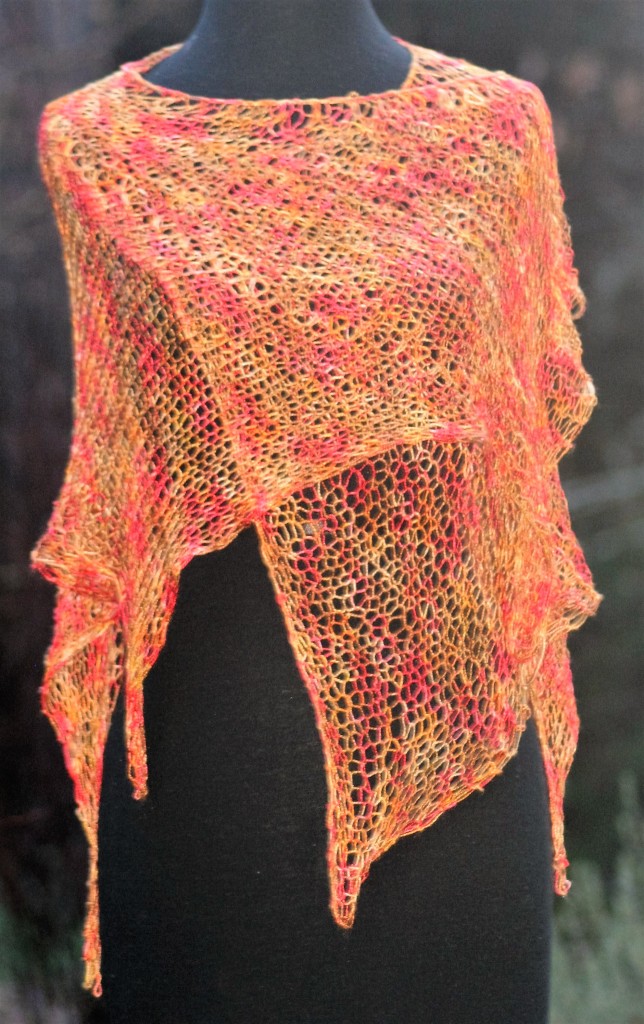
I have 1 design in the Knit for Me Bundle, but it is a favorite. Interlude Shawl is a fabulous piece of lace. It works up with one skein on large needles to create a completely scrumptious design.

Interlude Knit Shawl

You get all 28 patterns featured in this bundle for only $17. That’s less than 61 cents per pattern! But the offer is only available through December 31, 2020, midnight Eastern, and it absolutely will not be extended nor repeated.

Get the KNIT FOR ME BUNDLE!!!– JUST FOR ME!

Want to see what else is included?

If you purchased these patterns individually they would cost you well over $200. Buying from a coalition of designers instead of a huge publisher, you know that your money is going where it’s needed; – into the pockets of your favorite designers so they can keep on creating the patterns you love to make.

Get Both the CROCHET & KNIT FOR ME BUNDLE and SAVE!

If all of that is not enough to convince you you need this bundle here’s one more great thing. Gain access to the patterns you ALSO get a file with extra discount codes. Codes for additional products offered by some of our amazing designer friends. And there’s a 15 day money back guarantee so you have absolutely nothing to lose.

So spend some of that holiday cash, support the community that you love, then put your feet up and crochet something fabulous for yourself as you watch 2020 go out the door! You deserve it!

Don’t miss out! Time is Limited….these bundles are only available until the end of 2020….get Crochet for Me, Knit for Me or Both….

Just to be completely transparent….This post contains affiliate links, meaning that I receive compensation if you purchase using the above links.

1 For Me, 1 For You- Solid Crochet Lattice Block

Help me help local communities by creating blocks for Warm Up America, by making 1 block for yourself and 1 for a community project with this free pattern, so 1 your Me and 1 for You. This block, Solid Crochet Lattice, will help build your skills and looks great. I just ask that make one for donation.

Donations can be made to Warm Up America as a nation wide organization. They encourage local donations, but will also except donations to be sent to their office so that blocks can be assembled and then blankets can be donated through the United States.

Even if you do not want to participate with Warm Up America, please consider creating blocks, or blankets for your local community. There are various places in every community that accept donations.

The Solid Lattice Block

This block uses 2 double crochet stitches worked together, as they are in a decrease, but over a space of stitches and rows below the working row (utilizing a front post stitch). This creates a raised texture to the fabric that has a trellis like effect.

This stitch pattern reminds me of fancy pastry techniques, but maybe that is because I have caught many baking shows as of late.

Gauge

Gauge: Square measures 7”x 9”

Materials

  • Medium weigh yarn, two colors (A), (B)
  • I/9/5.50 mm crochet hook

Special Stitches

Front Post Double Crochet 2 Together (fpdc2tog): Yo, insert hook around indicated stitch inserting from the front to back of post, returning hook from back to front of fabric , yo, pull up a loop, yo, pull through 2, yo, insert hook into next indicated stitch, yo, pull up a loop, yo, pull through 2 loops, yo, pull through 3 loops on hook.

Solid Lattice Block

With Color A, ch 24

Row 1: Sc in 2nd ch from hook, sc in each ch across, turn. -23 sc

We repeat a simple stitch a bit…

Row 2: Ch 1, sc in same st, sc in each st across, turn.

Row 3: Ch 1, sc in same st, sc in each st across, change to color B, turn.

Focus on something different…

Row 4: Ch 1, back loop single crochet (blsc) in next 2 sts, [working around posts of stitches in Row 1 fpdc2tog over post 1 stitch behind working loop, skip 1 post and complete stitch around next post, blsc in next 2 sts,] repeat 7 times, change to color A, turn.

Location of the first fpdc2tog stitch in Row 4
Completion of Row 4

Row 5: Ch 1, working in the unused loops 2 rows below dc in next 2 sts, [hdc in next st, working in unused loops 2 rows below dc in next 2 sts] repeat 7 times, change to color B, turn.

Working in the unused loops 2 rows below…the stitch location
The wrong side of the fabric….the end of Row 5

Row 6: Ch 1, blsc in same st, fpdc around fpdc2tog 2 rows below, blsc in next 2 sts, [fpdc2tog around fpdc2tog 2 rows below, blsc in next 2 sts] 6 times, fpdc around fpdc2tog 2 rows below, sl st to last st, change to color A, turn.

The stitch locations of the fpdc2tog in Row 6

Row 7: Ch 2, hdc in same fpdc, working in unused loops 2 rows below dc in next 2 sts, [hdc in next st, working in unused loops 2 rows below dc in next 2 sts] 6 times, hdc in next st, dc in unworked loop 2 rows below, change to color B, turn.

Row 8: Ch 1, blsc in next 2 sts, [fpdc2tog around fpdc2tog 2 rows below, blsc in next 2 sts] repeat 7 times, change to color A, turn.

Have you noticed the bit of pattern…all odd rows worked in color A and making a back ground…

Row 9:  Ch 1, working in the unused loops 2 rows below dc in next 2 sts, [hdc in next st, working in unused loops 2 rows below dc in next 2 sts] repeat 7 times, change to color B, turn.

Rows 10-24: Rep Rows 6-9.

Edging

Rnd 1: Join with B to any corner, working around edges of block, sc evenly working 3 sc in each corner.  Fasten off. Weave in ends

Chinese Lantern Bag- A free crochet pattern

Tis the season for quick holiday gifts, and I am honored to be part of the Marly Bird 24 Days of Quickies, sharing a free crochet bag pattern with you. Look for free patterns every day to help you meet your gift giving needs.

Today I am sharing a quick bag, the Chinese Lantern Bag works up in 1 skein, and since the yarn is super bulky it does not take much time to complete. Yet in the end you get a cute bag that any girl, or woman would enjoy. It is that “goldilocks” size, not too big and not too small, it is “just right”.

If your still need more quick gifts, don’t miss all the ideas from many designers, at Marly Birds, here.

Chinese Lantern Bag

Chinese Lantern Bag

Skill Level: Advanced Beginner Finished Size: 9” deep, 40” in circumference

Materials

  • Manos del Uruguay Franca super bulky weight, 100% superwash merino (114 yrds/105m/5.3 oz/150 g), 1 skein; colorway F9019 Duende
  • N/9.00mm crochet hook

Notes:

This bag is made by bringing the corners to the center and touching each other. The sides between the adjacent corners are then seamed part way.

Handles as attached at the corners.

Lets crochet the Square for the bag

Rnd 1: Ch 4, 2 dc in 4th ch from hook, ch 1, [3 dc in same ch as previous, ch 1] 3 times, sl st to top of beg ch.

Rnd 2: Ch 3, bldc in next st, fldc in next, (dc, ch 1, dc) in ch-1 sp (corner made), [fldc in next st, bldc in next st, fldc in next st, (dc, ch 1, dc) in ch-1 sp] 3 times, sl st to top of beg ch.

And Rnd 3: Ch 3, bldc in next st, fldc in next st, bldc in next st, (dc, ch 1, dc) in ch-1 sp, {[bldc in next st, fldc in next st] across until 1 st before corner remains, bldc in next st, (dc, ch 1, dc) in ch-1 sp} 3 times, bldc in next st, sl st to join.

Still working on crocheting the square bag….

Rnd 4: Ch 3, [bldc in next st, fldc in next st] across to corner, (dc, ch 1, dc) in ch-1 sp, {[fldc in next st, bldc in next st] across until 1 st before corner remains, fldc in next st, (dc, ch 1, dc) in ch-1 sp} 3 times, fldc in next st, bldc in next st, sl st to join.

Rnd 5: Ch 3, bldc in next st, [fldc in next st, bldc in next st] across to corner, (dc, ch 1, dc) in ch-1 sp, {[bldc in next st, fldc in next st] across until 1 st before corner remains, bldc in next st, (dc, ch 1, dc) in ch-1 sp]} 3 times, bldc in next st, fldc in next st, bldc in next st, sl st to join.

Almost there…

Rnd 6: Ch 3, [bldc in next st, fldc in next st] across to corner, (dc, ch 1, dc) in ch-1 sp, {[fldc in next st, bldc in next st] across until 1 st before corner remains, fldc in next st, (dc, ch 1, dc) in ch-1 sp} 3 times, [fldc in next st, bldc in next st] twice, sl st to join.

Rnd 7: Ch 3, bldc in next st, [fldc in next st, bldc in next st] across to corner, (dc, ch 1, dc) in ch-1 sp, {[bldc in next st, fldc in next st] across until 1 st before corner remains, bldc in next st, (dc, ch 1, dc) in ch-1 sp]} 3 times, bldc in next st, [fldc in next st, bldc in next st] twice, sl st to join.

Almost done crocheting…

Rnd 8: Ch 3, [bldc in next st, fldc in next st] across to corner, (dc, ch 1, dc) in ch-1 sp, {[fldc in next st, bldc in next st] across until 1 st before corner remains, fldc in next st, (dc, ch 1, dc) in ch-1 sp} 3 times, [fldc in next st, bldc in next st] 3 times, sl st to join.

Rnd 9: Ch 3, bldc in next st, [fldc in next st, bldc in next st] across to corner, (dc, ch 1, dc) in ch-1 sp, {[bldc in next st, fldc in next st] across until 1 st before corner remains, bldc in next st, (dc, ch 1, dc) in ch-1 sp]} 3 times, bldc in next st, [fldc in next st, bldc in next st] 3 times, sl st to join.

Joining the sides…

Joining corners Rnd 10: Ch 1, fold corners together that hook is between, insert hook into same stitch as join and the stitch folded next to it, sc in this stitch, inserting hook through both sides of the fabric, sc in next 5 sts, only working through 1 fabric, sc in next 4 sts to corner, (sc, ch 3, sc) in corner, sc in next 4 sts, [fold corner just worked to next corner, working through both sides of the fabric sc in next 5 sts, only working through 1 fabric, sc in next 4 sts to corner, (sc, ch 3, sc) in corner, sc in next 4 sts] rep 3 times, sl st to join, fasten off.

Making the handles

Handles: Join to any corner, ch 5, sl st to the corner directly opposite, fasten off. Repeat for the other two corners. 

Abbreviations

Ch(s): chain(s)

Bldc: back loop double crochet

Dc: double crochet

Fldc: front loop double crochet

Sc: single crochet

Sl st: slip stitch

Sp: space

I hope you enjoy your free crochet bag pattern.

Reversible Shells- A unique fabric

Creating unique reversible crochet fabric is a really fun thing to do. The Reversible Shell stitch is a great technique that can create a memorable blanket, scarf, hat, or really just about anything.

It looks more intimidating than it really is. This technique is worked as a 4 row repeat, working 2 rows in each color.

One of the things that can be a bit trying about this stitch is that after working 2 rows of one color, you remove the hook from the working loop and pick up the loop of the other color and work 2 more rows.

Lets Get Started

Start with a beginning chain of a multiple of 4. The first row has a little different stitch pattern in order to keep the project looking symmetrical.

To work the first row, put a stitch marker in the 4th chain from the hook (this is to help find the location to join the second color), dc in 5th ch from hook, 3 dc in next ch, dc in next ch, [ch 1, sk 1, dc in next ch, 3 dc in next ch, dc in next ch] repeat across, leave last ch unworked. Do not turn.

The beginning foundation of Reversible Shells in crochet
Reversible Shells, Row 1

A Little Unnerving Way to Start A New Row

Now for the unnerving part, pull your working loop up kind of long and remove your hook. With the second color join with a sc in the marked chain (to work a standing sc, check it out here), now ch 6, sc in the skipped chain of the beginning, (ch 6, sc in next ch) across, working last sc in the unworked last chain. Chain 1, and slip stitch to the last stitch worked in the other color making sure to keep the long loop and the working yarn of the other skein out of the way. Now you turn the fabric.

Using a standing single crochet to join for Reversible Shells
Reversible Shells- drop the working loop and join the new color with a standing single crochet
Adding the first row of a new color in Reversible Shell crochet stitch is a chain loop
Reversible Shells- Work chain 6 and single crochet across, working a single crochet in the unused beginning chain.
Slip Stitch to attach this unique reversible fabric
Reversible Shell- Slip Stitch in last stitch of the other color, make sure to keep the long loop and working yarn out of the way.

Join the Fabrics

This row essentially joins the two colors. When working the shell the hook is inserted through the indicated double crochet and chain 6 loop of the same color that is being worked. Ch2, sk 1 dc, Shell (5 dc in next dc and ch-6 loop), [ch 1, sk 4 dc, Shell in next dc and ch-6 loop (this is the center dc and the chain loop)] repeat across, sc in turning chain. Pull up the working loop to a long loop and remove hook. Do not turn.

Work through the two rows in Reversible Shell crochet stitch
Reversible Shell- Insert hook through both the indicated stitch and the chain 6 loop that is the same color as the working yarn.
Single crochet in last stitch or turning chain.
Reversible Shell- Single crochet in the last stitch or turning chain

Back to Working Only the Same Color

This row works through the same color. Start by inserting the hook in the other color loop, and resize the loop to fit the hook. [Ch 6 and sc in the ch-1 sp (between the 5 dc stitches)] repeat across. Turn and work the Row of joining the two colors.

Single crochet in the chain 1 space between the double crochets of the same color
Reversible Shells- Chain 6, single crochet in the chain 1 space between double crochets of the same color

And Repeat

Repeat the stitch pattern rows or working ch-6 loops, turning and working a joining shell. Then you drop the working yarn, pick up the other color and work the same stitch repeat.

Reversible Shells crochet
Reversible Shells- Work the pattern until the desired length.

Work this until you have the desired length.

I like to finish my work so that it has a little visual balance, so I work a row of the ch-6 loops, and fasten off that color. I then turn and pick up the other color loop. Chain 4 and [sc in the same location I would work a shell, picking up the ch-6 loop, ch 3] repeat across, sc in 2nd ch of ch-6 loop. Then fasten off.

I have found that it works nicely with a wide range of colors and yarn types. Lending itself to endless possibilities.

Candy Cane Lace

I have begun decorating candy canes with lace to help get into the mood for a great holiday season.

Honestly, I am not a fan of the candy cane. It is a candy that I usually pass on, but I have a couple of candy canes that have decorated my tree for decades. A friend created these decorated candy canes and I treasure them.

Candy Cane Lace Solid Shells and Lacy Loops

I want to share my own approach to these decorations to help adorn your tree or even a package or gift. Since it is a simple two row pattern that you can be altered and personalized many ways it is great way to spread cheer.

Materials

  • #10 Crochet Cotton Thread (or a lace weight yarn)
  • C/2/2.75mm crochet hook

The First Row- Creates the Woven Strip

Row 1: Ch 55, dc in 6th ch from hook, [ch 1, sk 1, dc in next st] across.

Make a chain as log as the candy cane working an odd number (basic candy cane works at 55 chains)
DC in the 6th chain from the hook
Chain 1, skip 1, dc in next chain, across. This is the ladder bade that the candy cane will weave through

Option 1- Solid Shells

Round 1 Option Solid Shells: Ch 1, working around the last dc st or Row 1, sc around post, ch 1, 5 dc around same post, ch 1, sc around same post, turn to work over beginning ch, [5 dc in next ch-1 sp, sc in next ch-1 sp] across to end, ch 1, working around the end ch-5 loop, 5 dc in same space, ch 1, sc in same sp, turn to work over the top of Row 1, 5 dc in next ch-1 sp, [sc in next ch-1 sp, 5 dc in next ch-1 sp] across, sl st to first sc. Fasten off.

To start the shell lace, sc 5 dc sc in the end of the ladder
sc in the next ladder rung, 5 dc in the next ladder rung, sc in the next ladder rung, across to the other end and repeat all the way around the other side
Solid Shell Lace

Option 2 Lacy Loops

Round 1 Option Lacy Loops: [(sc, ch 5, sc)] 3 times around last dc, (sc, ch 5, sc) in each ch-1 sp across to other end, [(sc, ch 5, sc)] 3 times around beg ch-5 loop, (sc, ch 5, sc) in each ch-1 sp across, sl st to join. Fasten off.

To start Loops end work sc ch 5 sc, 3 times in end of the ladder
sc ch 5 sc in each rung around
Lacy Loops

Finishing Up

Weave in ends and weave candy cane through the spaces or Row 1.